assembly instructions - Media.hobbypeople.net - Global Hobby ...
assembly instructions - Media.hobbypeople.net - Global Hobby ...
assembly instructions - Media.hobbypeople.net - Global Hobby ...

You also want an ePaper? Increase the reach of your titles
YUMPU automatically turns print PDFs into web optimized ePapers that Google loves.
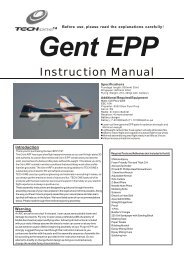
The Model Tech Apex 3D EP ARF is designed for one thing: Electric Flying Fun! A cross between a stick and a 3D airplane, the Apex3D EP ARF is light, nimble, responsive, and solid. No matter how wild the maneuver, just release input and watch it straighten up,making recovery easy. The light wing loading provides that quick response and allows for great low-speed handling. Soloed pilotsto wold champions can set this airplane up for anything from Mild-to-Wild.The APEX is a great time. It's the Peak of Fun, the APEX by Model Tech.Check out our website for more information on this and other exciting Model Tech products!HTTP://MODELTECH.GLOBALHOBBY.COMASSEMBLY INSTRUCTIONSThe Model Tech Apex 3D EP ARF is distributedexclusively in North America by <strong>Global</strong> <strong>Hobby</strong> Distributorsand in the U.K. by YT InternationalAll Contents Copyright © 2006, <strong>Global</strong> <strong>Hobby</strong> DistributorsVersion 1 December 2006●●●●featuresPrecision-Built, All-Wood StructureUltra-Lightweight Wing Loading and Over-Sized Control SurfacesMotor Installation Allows for Easy Mounting of Different Motor TypesPremium, Factory-Applied Covering with Four-Color Decal Sheet● Dual Aileron Servos for Precise Control and Mixing Capabilities● Includes High-Quality Hardware● Fast and Easy Assembly - Over 60 High-Resolution Digital Photos and DrawingsspecificationsWing Span: 43.375 Inches (1102mm) ● Wing Area: 600 Square Inches (38.7dm 2 ) ● Length: 43.5 Inches (1105mm)Weight RTF: 2.1-2.4 Pounds (34-38oz) ● Wing Loading: 8.17-9.14 Ounces/Square Foot (28-32gr/dm 2 )Functions: Ailerons, Elevator, Rudder and ThrottleMotor Required: 200-400 Watt Power System l ESC Required: 40 Amp Brushless l Battery Required: 3 Cell 2100mAH LiPOMade in ChinaPage Kit Product Number 128508
TABLE OF CONTENTSINTRODUCTION......................................................................................2SAFETY WARNING.................................................................................2OUR GUARANTEE..................................................................................2CUSTOMER SERVICE INFORMATION..................................................3OUR RECOMMENDATIONS...................................................................3LITHIUM POLYMER BATTERY WARNINGS - PLEASE READ..............4TOOLS AND SUPPLIES REQUIRED......................................................5KIT CONTENTS.......................................................................................5A NOTE ABOUT COVERING MATERIAL................................................6TIPS FROM THE PROS..........................................................................6STABILIZER INSTALLATION...................................................................9ELEVATOR AND RUDDER CONTROL SYSTEMS INSTALLATION........12AILERON CONTROL SYSTEMS INSTALLATION.................................15LANDING GEAR INSTALLATION..........................................................16FINAL ASSEMBLY.................................................................................18BALANCE POINT AND CONTROL THROWS.......................................19PREFLIGHT CHECK AND SAFETY......................................................20REPLACEMENT PARTS LIST...............................................................20PRODUCT EVALUATION SHEET.........................................................23MOTOR INSTALLATION..........................................................................7WING INSTALLATION.............................................................................8INTRODUCTIONThank you for purchasing the Model Tech Apex 3D EP ARF. We're confident that the quality of your new airplane meets andeven exceeds your expectations. Before completing the final <strong>assembly</strong> of your new airplane, please carefully read throughthese <strong>assembly</strong> <strong>instructions</strong> in their entirety. Doing so will ensure your success the first time around!These <strong>assembly</strong> <strong>instructions</strong> are designed to guide you through the entire <strong>assembly</strong> process of your new airplane in the least amountof time possible. Along the way you'll learn how to properly assemble your new airplane and also learn tips that will help you in thefuture. We have listed some of our recommendations below. Please read through them before beginning <strong>assembly</strong>.● Please read through each step before beginning <strong>assembly</strong>. Youshould find the layout very complete and straightforward. Our goalis to guide you through <strong>assembly</strong> without any of the headachesand hassles that you might expect.● There are check boxes next to each procedure. After youcomplete a procedure, check off the box. This will help preventyou from losing your place.● Cover your work table with brown paper or a soft cloth, both toprotect the table and to protect the parts.● Keep a couple of small bowls or jars handy to put the small partsin after you open the accessory bags.● We're all excited to get a new airplane in the air, but take yourtime. This will ensure you build a straight, strong and great flyingairplane.● If you come across this symbol ☞, it means that this is animportant point or an <strong>assembly</strong> hint.SAFETY WARNINGThis R/C airplane is not a toy! If misused or abused, it can cause serious bodily injury and/or damage to property. Fly only in openareas and preferably at a dedicated R/C flying site. We suggest having a qualified instructor carefully inspect your airplane beforeits first flight. Please carefully read and follow all <strong>instructions</strong> included with this airplane, your radio control system and any othercomponents purchased separately.OUR GUARANTEEModel Tech guarantees this kit to be free from defects in both material and workmanship at the date of purchase. This does not cover any componentparts damaged by use, misuse or modification. In no case shall Model Tech's liability exceed the original cost of the purchased kit.In that Model Tech has no control over the final <strong>assembly</strong> or material used for final <strong>assembly</strong>, no liability shall be assumed for any damage resultingfrom the use by the user of the final user-assembled product. By the act of using the final user-assembled product, the user accepts allresulting liability.Page
CUSTOMER SERVICE INFORMATIONIn the USA<strong>Global</strong> Services18480 Bandilier CircleFountain Valley, CA 92708Phone: (714) 963-0329 Fax: (714) 964-6236Email: service@globalhobby.<strong>net</strong>In the UKYT International15 Parkstone CloseShelfield, Walsall, West Midlands WS4 1QWPhone/Fax: 01922-684425Email: enquiries@ytinternational.co.ukCheck out our support website at http://globalservices.globalhobby.com. There you will find public message boards frequented by other Model Techproduct owners and the Model Tech technical support staff. This is a great place to get quick answers and advice on your new product.To enable us to better serve your needs, please include your email address with any correspondence you send to us. Your email address will be addedto our Customer Service Database so you will automatically receive free updates and tech notices for your particular product. You will also receiverepair status updates (if applicable) and other important information about your product as it becomes available.IMPORTANT INFORMATION ABOUT YOUR EMAIL ADDRESS<strong>Global</strong> <strong>Hobby</strong> Distributors will not disclose the information it collects to outside parties. We do not sell, trade, or rent your personal information to others . Your privacy is important to us.OUR RECOMMENDATIONSThis section describes our recommendations to help you in deciding which types of accessories to purchase for your new airplane.Please read through this entire section very carefully. We have provided you with recommendations that,if followed, will result in a great flying airplane. Failure to follow our recommendations may result in a poorflying airplane.Recommended brushless power systemAll prototype testing on the Apex 3D EP ARF was done using the Multiplex BL480/4G 480 Brushless Motor with Gearbox. We usedthe 4.4:1 gearbox, APC 10 x 7E propeller, KMS Sentry 40 amp brushless ESC, and Impulse Power 3C 2100mAH LiPO battery. TheApex 3D EP ARF, however, is set up so that both in-line gearbox and Outrunner direct drive motors can easily be used. These motorsinclude the Hacker A30 series, AXI 2814 and 2217, and KMS 2814 Outrunner motor● Multiplex BL480/4G Brushless Motor● KMS Sentry 40 Amp Brushless ESC● APC 10 x 7E Composite Propeller● Impulse Power 3C 2100mAH LiPO Battery● Pro-Peak Quattro LiPO DC Chargerl Maxx Products 1/8" Propeller AdapterRecommended Radio, Receiver and ServosYou will need to use a 4 or more channel transmitter with a 4 or more channelstandard range mini receiver. Ideally, the transmitter should feature dual rates andservo reversing. More experienced pilots might also want exponential and mixingcapabilities. Do not use short-range micro receivers.The servos you use should be the lightest available, yet still have an adequateamount of torque. We suggest using mini servos that weigh no more than 18 gramsand have a torque rating of no less than 25 ounces per square inch. The Cirrus CS402BB 18gr mini servos will work well. Theseservos are lightweight, small and strong, and produce more than enough torque and speed.Here's a List of What We used to finish the Apex 3D EP arf shown in these <strong>instructions</strong>QTY. 1QTY. 1QTY. 1QTY. 1QTY. 1QTY. 1QTY. 4Hitec Optic 6 FM Radio SystemMultiplex BL480/4G Brushless MotorKMS Sentry 40 Amp Brushless ESCAPC 10 x 7E Composite PropellerHitec Electron 6 FM ReceiverHitec Crystal for FM Dual Conversion ReceiversCirrus CS402BB 18gr Mini ServosQTY. 1QTY. 1QTY. 2QTY. 1QTY. 1QTY. 1QTY. 1Impulse Power 3C 2100mAH LiPO BatteryMaxx Products 1/8" Propeller AdapterCirrus 12" Servo Extension LeadsPro-Peak Quattro LiPO ChargerX'TRA 4mm Gold Connector SetDouble-Sided Foam Tape#64 Rubber BandsPage
WARNINGS AND SAFETY PRECAUTIONS FOR ALL BRANDS OF LITHIUM POLYMER BATTERIESPlease read and understand the warnings listed in this section. Make sure to read any and all warningsincluded in the packaging with your battery, too. If used improperly, lithium polymer batteries can be verydangerous, so please follow these warnings and suggestions at all times.● This product may explode or catch fire. Serious injury can result from misuse. Serious injury, loss of property, fire and deathcan result from misuse of this product.● All <strong>instructions</strong>, warnings and cautions must be followed at all times. Failure to do so can lead to serious injury or fire.● Do NOT use this product before reading and understanding all directions and warnings.● Do NOT overcharge. Maximum voltage for each pack must be followed.● Do NOT over-discharge. NEVER discharge below minimum volts.● Do NOT discharge at a rate greater than the maximum continuous discharge.● Do NOT use or charge if the battery is hot.● ONLY use a charger made for Lithium Polymer batteries.● Do NOT charge at a rate higher than 1C. Example: if the battery’s rating is 340mAH, then the charger’s charge rate must be setat 340mAH or less.● Do NOT leave in direct sunlight or in a hot car or storage area.● Do NOT get wet or expose to moisture.● Do NOT short-circuit the battery.● ONLY discharge and charge the battery outdoors or in a firesafe container.● Do NOT charge with reverse polarity.● Do NOT leave the battery connected when not in use.● Do NOT operate or charge unattended.LITHIUM POLYMER BATTERY WARNINGS - PLEASE READ● Do NOT solder to the battery directly and do not get the battery hot in any way.CHARGING PRECAUTIONS FOR ALL BRANDS OF LITHIUM POLYMER BATTERIES● Do NOT use the product if you do not understand the warnings and proper use of the product.● Always let the battery cool and "rest" between uses and charging.● To avoid over-discharging, only use a speed control that is made for LiPO batteries.● We recommend the use of a firesafe container when charging or storing.● Do NOT charge inside your car or inside your house.● Inspect the battery before each use for swelling or other malformation. If the cell has ballooned, it MUST be discarded.● Set the charger to 1C (charge at 1/2C or less for the first 5 cycles).● Check polarity and then connect battery to charger.● In use, do not over-discharge or exceed maximum discharge.● When handling the battery, remember not to poke, bend or damage the cell. The cell outer casing is soft and can be damaged.● Remember, the cells must never exceed 160 degrees Fahrenheit for any reason.Page
TOOLS AND SUPPLIES REQUIRED❑ 5 Minute Epoxy❑ Thin and Thick C/A❑ # 1 and # 2 Phillips Head Screwdrivers❑ 1.5mm Hex Wrench (Optional)❑ Adjustable Wrench❑ Wire Cutters❑ Needle Nose Pliers❑ Modeling Knife❑ Scissors❑ Electric or Hand Drill❑ Assorted Drill Bits❑ Straight Edge Ruler❑ T-Pins❑ Builder's Triangle❑ 220 Grit Sandpaper with Sanding Block❑ Masking Tape❑ Paper Towels❑ Rubbing Alcohol❑ Epoxy Mixing Sticks❑ Epoxy Mixing Cups❑ Soldering Iron❑ Solder❑ Heat-Shrink Tubing (Assorted Sizes)❑ Heat Gun (for Heat-Shrink Tubing)❑ PencilKIT CONTENTSBefore you begin <strong>assembly</strong>, group the parts as we list them below. This will ensure that you have all of the parts before you begin<strong>assembly</strong> and it will also help you become familiar with each part.If you find any parts missing or damaged, please contact your local distributor,using the Customer Service Information on page 2.AIRFRAME ASSEMBLIES❑ (1) Fuselage❑ (1) Wing with Ailerons❑ (1) Horizontal Stabilizer with Elevator❑ (1) Vertical Stabilizer with RudderLANDING GEAR ASSEMBLY❑ (2) Landing Gear Wiresq (1) Tail Skid❑ (2) Wheels❑ (2) Nylon Landing Gear Strapsq (2) Nylon Axle Spacersq (2) Wheel Collarsq (2) M3 x 5mm Machine Screwsq (4) M2 x 10mm Wood ScrewsCONTROL SYSTEM ASSEMBLIES❑ (1) 5-1/2" (140mm) Threaded Wire with Z-Bend❑ (1) 4-1/8" (105mm) Threaded Wire with Z-Bend❑ (2) 2-3/4" (70mm) Threaded Wires with Z-Bends❑ (4) Nylon Control Horns with Backplatesq (4) Nylon Clevisesq (8) M2 x 10mm Machine ScrewsPage
MOTOR MOUNT ASSEMBLY❑ (2) Motor Mount Straps - Tall❑ (2) Motor Mounts Straps - Short❑ (4) M3 x 12mm Wood ScrewsMISCELLANEOUS PARTS❑ (2) Wing Hold-Down Dowels❑ (1) Wing Hold-Down Doubler❑ (1) Hook and Loop Materialq (1) Decal Set (Not Pictured)A NOTE ABOUT COVERING MATERIALThe covering material used on your airplane is real iron-on, heat-shrink covering material. It is possible with heat and humidity changesthat the covering material on your airplane may wrinkle or sag. This trait is inherent in all types of heat-shrink material. To removeany wrinkles that might be visible you will need to use a heat-sealing covering iron.Follow this simple procedure to remove the wrinkles:❑ Plug in and turn on the sealing iron to the medium-high temperature setting. Allow the sealing iron to heat up for approximately5 - 7 minutes.❑ After the sealing iron has reached temperature, lightly apply the sealing iron to the wrinkled section of the covering material. Movethe sealing iron slowly over the wrinkled section until the covering material tightens and the wrinkles disappear.IMPORTANT You will notice that the color of the covering material will darken when it is heated. When the covering materialcools back down, it will return to its normal color.☞ If the color layer smears from any of the seams the temperature of the sealing iron is too hot. Turn the temperature dial downand wait about 5 minutes for the sealing iron to adjust to the lower temperature. You can remove any excess color streaks using apaper towel soaked with a small quantity of acetone.TIPS FROM THE PROS● During the covering process, sometimes color may smear slightly from the seams. If you see any smeared colors on the coveringmaterial, they can be quickly removed by simply wiping them off with a paper towel and a small amount of acetone.● Make sure to test-fit the parts together before applying glue. This will ensure that the parts fit properly before gluing them together.● When gluing anything that has a smooth surface, it's important to lightly roughen the gluing surfaces with 220 grit sandpaper. Thiswill allow the glue to stick better. Also, never glue directly to the covering material. Always remove the covering material from thegluing surfaces prior to gluing the parts together.● When cutting away the covering material from the gluing surfaces, be careful to cut only through the covering material. Try not tocut down into the balsa structure because that can compromise the integrity of the airframe.● We do not suggest storing your airplane in an extremely hot environment (like the back of your car in direct sunlight) for any lengthof time. The extreme heat could cause the covering material to wrinkle or sag and possibly damage the fragile components of theradio control system and/or battery.● Epoxy can be cleaned up before it dries using rubbing alcohol, and C/A can be cleaned up before it dries using C/A Debonder.l To prevent current loss, make sure to use high-quality connectors between the battery and the ESC and solder your ESC motorwires directly to the motor.l Insulate solder joints with heat-shrink tubing to prevent short circuits and corrosion.l Read and fully understand the LiPO battery warnings on page 4.Page
MOTOR INSTALLATIONYou'll Need the following parts FROM THE KIT:❑ (1) Fuselageq (2) Motor Mount Straps - Tall❑ (2) Motor Mount Straps - Shortq (4) M3 x 12mm Wood ScrewsYou'll Need the following TOOLS AND SUPPLIES:❑ # 2 Phillips Head Screwdriverq 1.5mm Hex Wrench (Optional)❑ Modeling Knifeq Electric or Hand Drillq 5/64” (2mm) Drill Bit❑ Straight Edge Ruler❑ PencilIMPORTANT This section shows the installation of two different types of motors. The first type shown (in Step 1A) is a brushlessmotor with an in-line gearbox. The second type shown (in Step 1B) is a brushless Outrunner direct drive motor. If you're mountingan Outrunner motor you will need to use mounting screws and washers that match your motor (mounting screws and washers arenot included). Please skip to the step that matches the type of motor that you're going to use.Step 1A: INSTALLING the motor - Brushless with in-line gearbox❑ Cut away enough of the plywood motor plate to ensure that your propelleradapter will not hit it when it's installed later.❑ Set the two taller motor mounting straps onto the plywood rails. Positionthe motor mounting straps in the approximate positions shown.❑ Set your motor onto the motor mounting straps and push it forward so thatthe front of the gearbox is just about touching the plywood motor plate. In thisposition, when you install your propeller adapter, the front edge of the propelleradapter will be about 1/4" (6mm) in front of the front of the fuselage.q While gently holding the motor in position, adjust the placement of the twomotor mounting straps so they are centered, but not covering any of the motor’scooling slots.❑ When satisfied with the alignment, mark the locations of the four motormounting screws, then drill four 5/64" (2mm) diameter pilot holes through themounting rails.IMPORTANT Be careful not to drill through the top of the fuselage.Page
❑ Set the motor mounting straps and your motor back into place and realignthem.❑ Place the remaining two motor mounting straps over the motor and securethe <strong>assembly</strong> into place, using four M3 x 12mm wood screws.☞ Tighten the wood screws firmly, yet evenly, to clamp the motor securelyin place.Step 1B: INSTALLING the motor - Brushless outrunner direct driveIMPORTANT The precut slots in the plywood motor plate are 4mm wide. If your motor uses 3mm diameter mounting screws,you will need to use "oversized" washers to ensure that you can tighten the mounting screws securely. For some motors, it may benecessary to enlarge the center cutout in the plywood motor plate. Some motors may also include a separate plywood plate thatcan be used as a drilling guide. If drilling new holes through the plywood motor plate, make sure to drill the new holes off-centerfrom the precut slots to ensure adequate strength.❑ Line up the mounting holes in your motor with the precut slots in theplywood motor plate.q Secure your motor into place, using the machine screws and washersincluded with your motor.WING INSTALLATIONYou'll Need the following parts FROM THE KIT:❑ (1) Wing with Aileronsq (2) Wing Hold-Down Dowels❑ (1) Wing Hold-Down DoublerYou'll Need the following TOOLS AND SUPPLIES:❑ 5 Minute Epoxyq Thick C/A❑ Modeling Knife❑ Straight Edge Ruler❑ Pencilq Paper Towelsq Rubbing Alcoholq Epoxy Mixing Sticksq Epoxy Mixing CupsStep 1: INSTALLING the WING HOLD-DOWN DOUBLER❑ Place the wing hold-down doubler on top of the wing. Align the backedge of the doubler with the trailing edge of the wing, and align the edges ofthe purple covering material on the wing hold-down doubler with the edgesof the purple covering material on the wing.q When satisfied with the alignment, draw an outline around the winghold‐down doubler on the wing.Page
❑ Cut away the covering material from within the outline you drew, then gluethe wing hold-down doubler into place.IMPORTANT Glue does not stick well to covering material. To ensure the strongest bond, always make sure to remove the coveringmaterial from the gluing surfaces before gluing the parts together.Step 2: installing the WING HOLD-DOWN dowels❑ Cut away the covering material from over the two wing hold-down dowelmounting holes in each side of the fuselage. Two holes are located 2-1/4" (57mm)up from the bottom of the fuselage and 1/2" (13mm) in front of the wing saddle,and two holes are located 2-1/8" (54mm) up from the bottom of the fuselageand 3/4" (19mm) behind the wing saddle.❑ Glue one wing hold-down dowel into the two holes at the front of the wingsaddle, making sure that the dowel is centered from side to side.❑ Glue the second wing hold-down dowel into the two holes at the back ofthe wing saddle, again making sure that the dowel is centered from sideto side.Step 3: installing the WING❑ Set the wing into the wing saddle and push it firmly into place.q Carefully center the wing from side-to-side, then use two #64 rubber bandsto temporarily hold the wing in place.IMPORTANT Use a minimum of six #64 rubber bands to hold the wing in place for flight.Page
STABILIZER INSTALLATIONYou'll Need the following parts FROM THE KIT:❑ (1) Horizontal Stabilizer with Elevator❑ (1) Vertical Stabilizer with RudderYou'll Need the following TOOLS AND SUPPLIES:❑ 5 Minute Epoxy❑ Modeling Knife❑ Straight Edge Ruler❑ Pencilq T-Pinsq Builder's Triangleq 220 Grit Sandpaper with Sanding Blockq Masking Tapeq Paper Towelsq Rubbing Alcoholq Epoxy Mixing Sticksq Epoxy Mixing CupsStep 1: aligning the horizontal stabilizer❑ Cut away the covering material from over the horizontal and verticalstabilizer mounting slots in the fuselage.❑ Measure and draw a centerline mark on the top of the trailing edge of thestabilizer.❑ Extend the centerline mark across the top of the stabilizer, using a builder’striangle to ensure that the line is perpendicular to the trailing edge.❑ Slide the stabilizer into the mounting slot and temporarily align it. Thetrailing edge should be even with the back edge of the fuselage, and thecenterline you drew should be centered within the vertical stabilizer mountingslot, when viewed from above.❑ When satisfied that the stabilizer is centered, hold only the trailing edgeof the stabilizer in place, using a T-Pin.IMPORTANT The front of the stabilizer should be able to pivot slightlyfrom side to side and the back should stay firmly in place and aligned. Thetrailing edge should not be allowed to move from side to side.Page 10
❑ With the wing mounted to the fuselage and centered, measure the distancebetween the tips of the stabilizer and the tips of the wing. Pivot the front ofthe stabilizer until both of these measurements are equal.☞ When both of these measurements are equal, you're assured that thestabilizer is square to the wing.❑ When you're satisfied that the stabilizer is square to the wing, hold thefront of the stabilizer in place, using a T-Pin, then draw a mark on each sideof both the front and the back of the stabilizer where it and the fuselagesides meet.+ These marks will help you realign the stabilizer after you remove it andglue it back into place.❑ With the stabilizer held firmly in place, look from the front of the airplaneat both the wing and the stabilizer. When aligned properly, the stabilizershould be parallel to the wing.IMPORTANT If the stabilizer is not parallel to the wing, remove it and use 220 grit sandpaper with a sanding block to sand downthe higher side of the stabilizer mounting slot, until you are satisfied with the alignment.Step 2: installing the horizontal stabilizer❑ Once you're satisfied with the alignment, draw a line on each side of thestabilizer where it meets the fuselage. Do this on both the top and the bottom.❑ Remove the stabilizer from the fuselage, then carefully cut away thecovering material from inside the lines you drew. Remove the coveringmaterial from both the top and the bottom of the stabilizer.WARNING When cutting through the covering to remove it in the nextprocedure, cut with only enough pressure to cut through only the coveringitself. Cutting down into the balsa structure could weaken the stabilizerand cause it to fail during flight.❑ To make it less messy during installation, apply masking tape to bothsides of the fuselage around the mounting slot, and to the top and bottom ofthe stabilizer, too.Page 11
❑ Apply a generous amount of 5 minute epoxy to the gluing surfaces of both the stabilizer and the fuselage, then push the stabilizerinto place and realign it, double-checking all of your measurements once more before the epoxy sets up. Remove any excessepoxy and use T-Pins to hold the stabilizer in place and aligned until the epoxy has fully cured.Step 3: Aligning the vertical stabilizer❑ Cut away the covering material from over the elevator joiner relief notchin the leading edge of the rudder.❑ Push the stabilizer into the mounting slot. To align it properly, the trailingedge of the stabilizer should be even with the back edge of the fuselage andthe stabilizer should be pushed down firmly.IMPORTANT Double-check that the elevator and rudder don’t interfere with each other when moved. If they do, enlarge theelevator joiner relief notch in the rudder.Step 4: installing the vertical stabilizer❑ While holding the stabilizer in place, draw a line on each side of thestabilizer where it meets the top of the fuselage.❑ Remove the stabilizer and carefully cut away the covering material frombelow the lines you drew. Cut away the covering material from the base ofthe stabilizer, too.❑ Glue the stabilizer into place, using 5 minute epoxy. Double-check all ofyour measurements once more before the epoxy sets up, then wipe away anyexcess epoxy, and hold the stabilizer in place until the epoxy has fully cured.IMPORTANT Use a builder's triangle to make sure that the verticalstabilizer is perpendicular to the horizontal stabilizer.Page 12
ELEVATOR AND RUDDER CONTROL SYSTEMS INSTALLATIONYou'll Need the following parts FROM THE KIT:❑ (1) 5-1/2" (140mm) Threaded Wire with Z-Bendq (1) 4-1/8" (105mm) Threaded Wire with Z-Bend❑ (2) Nylon Control Horns with Backplates❑ (2) Nylon Clevisesq (4) M2 x 10mm Machine ScrewsYou'll Need the following TOOLS AND SUPPLIES:❑ Thin C/Aq # 1 Phillips Head Screwdriverq Needle Nose Pliers❑ Modeling Knifeq Electric or Hand Drillq 1/16" (1.6mm) & 5/64" (2mm) Drill Bits❑ Straight Edge Ruler❑ Pencilq Masking TapeStep 1: installing the Servos❑ Cut away the covering material from over the elevator servo mountinghole in the left side of the fuselage and from over the rudder servo mountinghole in the top of the fuselage.❑ Plug one 12" long servo extension onto both your elevator and rudder servos.IMPORTANT If you mount your receiver near the back of the wing saddle, 12” long servo extensions will be long enough. If youmount your receiver farther forward, you may need to use longer servo extensions.❑ Install the elevator and rudder servos into the mounting holes, makingsure to drill 1/16" (1.6mm) diameter pilot holes for the mounting screws. Bothservo output shafts should be toward the front of the fuselage.IMPORTANT Depending on the height of your elevator servo, you mayneed to cut away the covering material from the right side of the fuselageto allow the bottom of the servo to stick out beyond the fuselage side.Step 2: installing the elevator control linkage <strong>assembly</strong>❑ Position and mark the mounting hole locations for the control horn on thebottom of the elevator. When aligned properly, the centerline of the controlhorn should be 3/4" (19mm) out from the side of the fuselage and the clevisattachment holes should be lined up over the hinge line. The base of thecontrol horn should be parallel to the hinge line, too, so that the control hornwill line up with the pushrod wire.❑ Drill 5/64" (2mm) diameter pilot holes through the elevator for the controlhorn mounting screws, then apply a couple of drops of thin C/A to the pilotholes and allow the C/A to fully cure.☞ The C/A will harden the surrounding balsa, making the mounting areastronger.Page 13
❑ Install the control horn and backplate, using two M2 x 10mm machinescrews.❑ Cut away all but one arm from a "4-point" servo horn, then install theZ-Bend in the 4-1/8" (105mm) long pushrod wire into the outermost hole inthe servo arm.☞ You may need to enlarge the hole to fit the diameter of the wire.❑ Center the servo, then install the servo horn onto the servo, making surethat the servo horn is centered and pointing down toward the bottom of thefuselage.❑ Install the servo horn retaining screw to secure the servo horn to theservo.❑ With both the elevator servo horn and the elevator centered, thread onenylon clevis onto the pushrod wire and snap the clevis into the outermosthole in the control horn.❑ Double-check that both the servo horn and the elevator are still centered. If necessary, thread the clevis in or out to center theelevator, then move the elevator up and down several times to ensure proper movement.Step 3: installing the rudder control linkage <strong>assembly</strong>❑ Position and install one control horn onto the left side of the rudder, usingthe same techniques that you used to install the elevator control horn. Whenpositioned properly, the centerline of the control horn should be 2‐1/8" (54mm)up from the bottom of the rudder and the clevis attachment holes should belined up over the hinge line. The base of the control horn should be parallel tothe hinge line, too, so that the control horn will line up with the pushrod wire.IMPORTANT Don't forget to apply a couple of drops of thin C/A to thepilot holes.❑ Install the Z-Bend in the 5-1/2" (140mm) long pushrod wire into theoutermost hole in a "4-point" servo horn.❑ Center the rudder servo, then install the servo horn onto the servo, makingsure that the servo horn is centered and pointing out toward the side of thefuselage.Page 14
❑ Install the servo horn retaining screw to secure the servo horn to the servo.❑ With both the rudder servo horn and the rudder centered, thread onenylon clevis onto the pushrod wire and snap the clevis into the outermosthole in the control horn.❑ Double-check that both servo horn and the rudder are still centered. Ifnecessary, thread the clevis in or out to center the rudder, then move therudder right and left several times to ensure proper movement.AILERON CONTROL SYSTEMS INSTALLATIONYou'll Need the following parts FROM THE KIT:❑ (2) 2-3/4" (70mm) Threaded Wires with Z-Bends❑ (2) Nylon Control Horns with Backplates❑ (2) Nylon Clevisesq (4) M2 x 10mm Machine ScrewsYou'll Need the following TOOLS AND SUPPLIES:❑ Thin C/Aq # 1 Phillips Head Screwdriverq Needle Nose Pliers❑ Modeling Knifeq Electric or Hand Drillq 1/16" (1.6mm) & 5/64" (2mm) Drill Bits❑ Straight Edge Ruler❑ Pencilq Masking TapeStep 1: installing the servos❑ Cut away the covering material from over the two aileron servo mountingholes and the aileron servo lead exit hole in the bottom of the wing.❑ Tie the end of the piece of string that's preinstalled in the wing to theaileron servo lead and use that to pull the servo lead through the paper tubeand out the servo lead exit hole.❑ Install the aileron servo into the mounting hole, making sure to drill 1/16"(1.6mm) diameter pilot holes for the mounting screws. The servo outputshaft should be toward the back of the wing.IMPORTANT Depending on the length of your servo lead, you mayneed to add a servo extension lead to reach out through the bottom ofthe wing.q Repeat the previous procedures to install the second aileron servo in the other half of the wing.Page 15
Step 2: installing the aileron control linkage assemblies❑ Position and install one control horn onto the bottom of one aileron, usingthe same techniques that you used to install both the elevator and the ruddercontrol horns. When aligned properly, the centerline of the control hornshould be 4-1/2" (114mm) out from the inside edge of the aileron and theclevis attachment holes should be lined up over the hinge line. The base ofthe control horn should be parallel to the hinge line, too, so that the controlhorn will line up with the pushrod wire.IMPORTANT Don't forget to apply a couple of drops of thin C/A to the pilot holes.❑ Install the servo arm, pushrod wire and clevis, using the same techniquesthat you used to install the elevator and rudder servo arms, pushrod wiresand clevises.IMPORTANT The servo arm should point toward the middle of thewing. Don't forget to install the servo horn retaining screw to secure theservo horn to the servo.❑ Double-check that both the servo horn and the aileron are still centered. If necessary, thread the clevis in or out to center theaileron, then move the aileron up and down several times to ensure proper movement.q Repeat the previous procedures to install the second aileron control linkage <strong>assembly</strong>. When adjusting the second aileron controllinkage, make sure that both ailerons are even with each other. You don’t want one aileron to be higher or lower than the other one.LANDING GEAR INSTALLATIONYou'll Need the following parts FROM THE KIT:❑ (2) Landing Gear Wiresq (1) Tail Skid❑ (2) Wheels❑ (2) Nylon Landing Gear Strapsq (2) Nylon Axle Spacersq (2) Wheel Collarsq (2) M3 x 5mm Machine Screwsq (4) M2 x 10mm Wood ScrewsYou'll Need the following TOOLS AND SUPPLIES:❑ 5 Minute Epoxyq # 1 Phillips Head Screwdriver❑ Modeling Knifeq Electric or Hand Drillq 1/16" (1.6mm) Drill Bit❑ Straight Edge Ruler❑ Pencilq Paper Towelsq Rubbing Alcoholq Epoxy Mixing Sticksq Epoxy Mixing CupsStep 1: installing the tail skid❑ Cut away the covering material from over the tail skid mounting hole inthe bottom of the fuselage.Page 16
❑ Test-fit and glue the tail skid into place, using a generous amount of glue.+ Make sure that the tail skid faces toward the back of the fuselage andthat it's lined up straight with the bottom of the rudder.Step 2: installing the landing gear wires❑ Cut away the covering material from over the landing gear mounting slotin the bottom of the fuselage.❑ Insert the 90º bend in each of the landing gear wires into the predrilledholes in the mounting slot.❑ Push the landing gear wires firmly down into the slot.❑ Position the two nylon straps over the landing gear wires, 5/8" (16mm)in from the fuselage sides.❑ Mark the locations of the mounting screws onto the fuselage.IMPORTANT Make sure that the nylon straps are centered over thelanding gear wires when you mark the positions of the mounting screwholes.❑ Drill four 1/16" (1.6mm) diameter pilot holes through the fuselage at themarks you drew.❑ Install the two nylon landing gear straps, using four M2 x 10mm woodscrews, to hold the landing gear wires in place.Step 3: installing the wheels❑ Push one nylon spacer completely onto each axle.Page 17
❑ Slide one wheel onto each axle and secure the wheels into place, usingone wheel collar and one M3 x 5mm machine screw.☞ Tighten the machine screws firmly, then double-check that both wheelsspin freely.FINAL ASSEMBLYYou'll Need the following parts FROM THE KIT:❑ (1) Hook and Loop Materialq (1) Decal SetYou'll Need the following TOOLS AND SUPPLIES:q # 1 Phillips Head Screwdriverq Adjustable Wrenchq Wire Cutters❑ Modeling Knifeq Scissorsq Electric or Hand Drillq 5/64” (2mm) Drill Bitq Soldering Ironq Solderq Heat-Shrink Tubingq Heat Gun (for Heat-Shrink Tubing)IMPORTANT The mounting locations of the ESC, receiver and battery may differ from that shown. You may need to mount yourESC, receiver and battery in slightly different locations, depending on how your model balances.Step 1: installing the electronic speed control❑ Mount your ESC to the side of the fuselage, using a piece of double-sidedfoam tape (not included).q If your ESC features an on/off switch, mount it to the fuselage side.IMPORTANT If you don't want to solder the motor wires directly to the ESC motor wires, make sure to use high-qualityconnectors between the motor and the ESC to prevent current loss.Step 2: installing the receiver❑ Plug the servo and ESC leads into their proper slots in your receiver, thenmount your receiver to the fuselage floor, using a piece of double-sided foamtape (not included).+ Plug a Y-Harness into the aileron slot in your receiver, so that you canconnect the aileron servo leads when you install the wing. If you areplanning on plugging the ailerons separately into your receiver, plug aileronservo extension leads into the receiver.Page 18
❑ Drill a 5/64" (2mm) diameter hole through the bottom of the fuselage for the antenna to exit, then run the antenna out and alongthe bottom of the fuselage. Use pieces of clear tape to secure it into place along the length of the fuselage. Do not cut the antennashorter. Allow the excess to hang beyond the back of the fuselage.Step 3: installing the battery❑ Mount the battery to the fuselage floor, directly behind the motor, usingthe strip of hook and loop material included.Step 4: installing the propeller❑ Install your propeller onto the motor.IMPORTANT Make sure to tighten the propeller nut firmly.Step 5: applying the decals❑ Using a clean cloth, wipe the airframe down completely to remove any dust, debris and oil.❑ Cut out each of the decals and apply them using the box cover photos for reference. If any air bubbles form under the decalswhen you apply them, use a T-Pin to puncture the bubble and release the trapped air, then press the decal down.Balance Point:BALANCE POINT AND CONTROL THROWSThe Center of Gravity (C/G or Balance Point) is 3" to 4-1/2" (76mm to 114mm) back from the leading edge of the wing,measured at the fuselage sides. For test flying, start with the balance point at the middle of the C/G range 3-3/4" (95mm).WARNING For test flying and general sport flying, we suggest you balance the airplane at the C/G recommended above.Experienced pilots can experiment with the C/G range as far back as 5" (127mm).CONTROL THROWS:Test Flying and Sport Flying3D FlyingAilerons:Elevator:Rudder:5/8" (16mm) Up and Down1/2" (13mm) Up and Down1/2" (13mm) Right and LeftAilerons:Elevator:Rudder:1-1/2" (38mm) Up and Down1" (25mm) Up and DownMaximum Deflection Right and LeftThe control throws are measured from the widest point of the control surfacesEXPONENTIAL:For all control surfaces, we recommend 15% to 25% exponential on high rates (3D Flying). For more information about exponentialand how to program it, please refer to your radio system's user's guide.Page 19
PREFLIGHT CHECK AND SAFETY● Check the operation of the throttle. Double-check that you're getting full power when the throttle control stick is at full.☞ If you're using a computer radio, you may need to increase your throttle channel's EPA setting to result in full power. (Refer toyour radio system's operating guide for further information.)● Check the condition of the transmitter batteries. They should be fully charged.● Check every glue joint in the airplane to ensure that everything is tight and well-bonded.● Double-check that you've installed and tightened all of the servo horn retaining screws.● Double-check that the battery is properly secured into place. There's nothing worse than the battery coming loose during flight.● Double-check the balance of the airplane. Do this with the battery installed and the airplane ready to fly.● Check the control surfaces. They should all move in the correct direction and not bind.● If your radio transmitter is equipped with dual rate switches, double-check that they are on the low-rate setting for your first fewflights.● Check to ensure that all of the control surfaces are moving the proper amount in both low and high rate settings.● Check the receiver antenna. It should be fully extended and not coiled up inside the fuselage. Do not cut the receiver antennashorter or the range of your radio control system will be greatly reduced.● You should complete a successful range check of your radio equipment prior to each new day of flying, or prior to the first flight ofa new or repaired model.● You should not knowingly operate your R/C radio system within 3 miles of a preexisting model club flying field without a frequencysharing agreement with that club.REPLACEMENT PARTS LISTWhen it comes time to order replacement parts, we recommend ordering directly from your local hobby retailer.If your hobby retailer does not stock Model Tech products, you can order replacement parts directlyfrom your local distributor, using the Customer Service Information on page 2.Instruction Manual............................................................119980Wing Set..........................................................................119981Fuselage Set....................................................................119982Stabilizer Set....................................................................119983Hardware Set (Includes Landing Gear)...........................119984Page 20
If you liked the Model Tech Apex 3D EP ARF, here's a few of the manyother Model Tech ARF airplanes that are currently available:Mini Magic Extra ARF(P/N 123661) (MT3192D-5)Inspired by it's larger brother, the Magic Extra, this smaller version has theconstruction you expect: Laser cut parts, Quality Contruction, Iron-On covering,Fiberglass Cowl and all the design features that make the Magic Extra so great:Thick Airfoil, Light Wing Loading, Generous Wing Area and Large Control Surfaces.Model Tech has combined it all to make this a fun and great performing airplane.Model Tech recognizes that modelers around the world want selection. So, thisMini has the ability to take glow or electric power. Install a .15 two-stroke or a30 four-stroke engine, or for you electric enthusiasts, drop in a Multiplex 480 BL 4TGeared motor and watch it dance! Hardware for both are already included and aneasy access panel is standard for the fuel tank area, which is also where yourflight battery is installed if you are flying electric.Sukhoi SU-31 3D Profile ARF(P/N 123741) (MT3192K)The Model Tech Profile Sukhoi ARF (almost ready to fly) is ahigh performance pilots dream, whether you are an expert orworking your skills to achieve such skill. Built with the finestwood materials, the Sukhoi is a plane that will advance yourflying prowess beyond mere loops and rolls. The Profile Sukhoiwill hover, knife edge, perform blenders, and all the advanced3D aerobatics. The ModelTech engineers have designed theSukhoi 31 to handle superbly due to its lightweight wingloading, tapered wings, and HUGE control surfaces. Factorybuilt and covered with Monokote.Fledgling EP ARF(P/N 123505) (MT3209E)The Fledgling is the perfect electric trainer. With its large size andaffordable electronics you will not have any of the high start-up costsassociated with smaller electric models. The simple layout and troublefree installation make <strong>assembly</strong> a pleasure. A light wing loading andample power together with rock steady flight characteristics makelearning easy. This, combined with a model that has full four channelfunctions will help you to grow your piloting skills as you progress tomore advance aerobatics.Mach Racer Delta ARF(P/N 123780) (MT3211B)Fast and Agile... Ready for an adrenaline high? Well, hold on tight when youfly the Mach Racer from Model Tech. This is one fast delta. At 3.5 lbs flyingweight, power-to-weight is certainly no issue when you install your favorite46 two-stroke engine. The simple and clean airframe makes this delta fastand fun to fly. Because it's a delta, you do not have to worry aboutslow-speed handling! It is amazingly gentle at slow speeds for such a fastplane. The Mach Racer is easy to take off and land, and taxi's nicely if youuse the included landing gear. Go on, grin ear-to-ear, it's ok. Speed is fun andthe Mach Racer delivers.Page 21
THIS PAGE INTENTIONALLY LEFT BLANKPage 22
PRODUCT EVALUATION SHEETTelling us what you like and don't like determines what model kits we make and how we make them. We would appreciate it if you would take afew minutes of your time to answer the following questions about this kit and your modeling interests. Simply fold this form on the dotted lines, sealwith tape and mail it to us. Do not use staples and make sure our address faces out.<strong>Global</strong> <strong>Hobby</strong> Distributors will not disclose the information it collects to outside parties. <strong>Global</strong> <strong>Hobby</strong> Distributors does not sell,trade, or rent your personal information to others. Your privacy is important to us.1) Kit: Model Tech Apex 3D EP ARF # 1285082) Where did you learn about this kit?❑ Magazine Ads❑ Friend❑ <strong>Hobby</strong> Shop❑ Other❑ Inter<strong>net</strong>3) What influenced you the most to buy this kit?❑ Magazine Ads❑ Price❑ Type of Model❑ Box Art❑ Recommendation❑ Other❑ Inter<strong>net</strong>4) Did you have any trouble understanding the written <strong>instructions</strong>? Ifyes, please explain.❑ Yes❑ No________________________________________________________________________________________________________________________________________________________________________________________________5) Did you have any trouble understanding any of the photographs?If yes, please explain.❑ Yes❑ No________________________________________________________________________________________________________________________________________________________________________________________________6) Were any of the kit parts:❑ Damaged❑ Missing❑ Wrong Size❑ Wrong ShapeIf you checked any of the boxes above, did you contact ourCustomer Service Department to resolve the problem?❑ Yes❑ No7) Was any of the <strong>assembly</strong> difficult for you? If yes, please explain.❑ Yes❑ No________________________________________________________________________________________________________________________________________________________________________________________________8) What did you like most about this kit?❑ Assembly Manual❑ Parts Fit❑ Hardware Supplied❑ Price❑ Other9) What did you like least about this kit?❑ Assembly Manual❑ Parts Fit❑ Hardware Supplied❑ Price❑ Other10) Are you satisfied with the finished model? If no, please explain.❑ Yes❑ No____________________________________________________________________________________________________________________________________________________________________________________________11) How does this kit compare to similar kits by other manufacturers?❑ Better❑ As GoodQC #What is Your Age Group:❑ 10 & Under ❑ 11 - 20 ❑ 21 - 30 ❑ 31 - 40 ❑ 41 - 50 ❑ 51 - 60 ❑ 61 - 70 ❑ 71 +How Many Years Have You Been in the <strong>Hobby</strong>?❑ Less than 1 ❑ 2 - 4 ❑ 5 - 7 ❑ 8 - 10 ❑ 11 - 15 ❑ 16 - 20 ❑ 20 or MoreHow Many Models Have You Purchased In the Last Year?❑ 0 - 1 ❑ 2 - 4 ❑ 5 - 7 ❑ 8 - 10 ❑ 10 or MorePlease List any Other Modeling Interests or any Additional Information about This Product:_____________________________________________________________________________________________________________________________________________________________________________________________________________________________________________________________________________________________________________________________________________________________________________________________________________________________________________________________________________________________________________________________________________________________________________________________________________________________________________________________________________________________________________________________________________________________________________________________________________________________________________________________________________________________________________________________________________________________________________________________________________________________________________________________________________________________________________________________________________________________________________________________________________________________________________________________________________________________________________________________________________________________________________Page 23
Fold along dotted line__________________________________________________________________________________________(Return Address Here)Post Officewill not deliverwithout properpostage<strong>Global</strong> <strong>Hobby</strong> DistributorsAttn: <strong>Global</strong> Services18480 Bandilier CircleFountain Valley CA 92728-8610Fold along dotted linePage 24