Altus 40 Asie modulis .indd - Somfy Architecture
Altus 40 Asie modulis .indd - Somfy Architecture
Altus 40 Asie modulis .indd - Somfy Architecture
- No tags were found...
You also want an ePaper? Increase the reach of your titles
YUMPU automatically turns print PDFs into web optimized ePapers that Google loves.
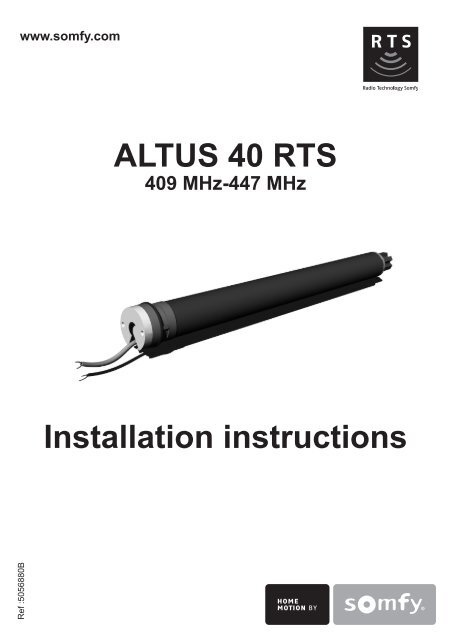
ENInstallation instructions page 1SOMFY hereby declares that this product complies with the essential requirements and other relevant provisions of Directive1999/5/EC. A Declaration of Conformity is available at the web address www.somfy.com/CE. Suitable for use in EU, CH andNO
Safety• This <strong>Somfy</strong> product must be installed by a professional motorisation and home automation installer, forwhom these instructions are intended.• Before installation, check that this product is compatible with the associated equipments and accessories.• These instructions describe how to install, commission and use this product.• Moreover, the installer must comply with current standards and legislation in the country in which theproduct is being installed, and inform his customers of the operating and maintenance conditions for theproduct.• Any use outside the sphere of application specified by <strong>Somfy</strong> is not approved. Such use, or any failure tocomply with the instructions given herein will invalidate the warranty, and <strong>Somfy</strong> refuses to accept liability.Compatible blindsFor internal use onlyVenetian blinds Roman shades Roller blinds / Projection screenGeneral safety instructionsThe safety instructions that must be observed, besides the usual rules, areexplained in these instructions and in the attached «Safety Instructions» document.Never immerse the motorin liquid!Avoid impacts!Never drill holes in themotor!Do not drop it!Copyright © 2009 <strong>Somfy</strong> SAS. All rights reserved - V0 - 08/20091
InstallationMotor preparation1b1) Fit the crown (a) and drive wheel (b) tothe motor.2) Measure the length (L) between the drivewheel and the head end.2aTube preparation1) Cut the tube to the required length.Deburr the tube and remove the swarf.2) For smooth tubes, cut a notch with theexact measurements given in figure.1 2D ≥ <strong>40</strong> x 1,5 mm D ≥ <strong>40</strong> x 0,8 mme 6 mm (0.24 in)L 8 mm (0.31 in)Motor/Tube assembly1) Slide the motor into the tube.For smooth tubes, position the notch on thecrown.2) Fix the tube to the motor with 4 self-tappingscrews or 4 steel pop rivets dependingon the dimension (L).12Mounting the motorized tube1 21) Screw the bracket interface on the motorhead.2) Mount the motorized tube on the endbracket.3) Mount the motorized tube on the motorbracket.4) Fit the pin.3 4Wiring1) Switch off the power supply.2) Connect the motor according to theinformation in the table below.RANGE220-2<strong>40</strong>V 50HZ220V 60HZ1 Neutral 2 LiveBlueBlueBrownBrown1 2OFF122 x 1,5 mm22 x 0,75 mm22 Copyright © 2009 <strong>Somfy</strong> SAS. All rights reserved - V0 - 08/2009
CommissioningTo commission the motor, an RTS control pointmust be programmed.N.B.: Only one motor can be powered at a time!Programming the RTS control pointSwitch on the power supply.Simultaneously press the UP and DOWN buttonson the RTS control point: the shade moves for afew seconds and the control point is preprogrammedin the motorChecking the direction of rotationPress the RTS control point UP button:a) If the shade is raised, the direction of rotationis correct: move onto the section entitled«Adjusting the end limits».b) If the shade is lowered, the direction of rotationis incorrect: move onto the next step.Press the RTS control point MY button until theshade jogs: the direction of rotation has beenmodified.Press the RTS control point UP button to checkthe direction of rotation.abAdjusting the end limitsNo compulsary order to set the limit.1) Press the UP button to move the shade to thedesired up position.2) Press the MY and DOWN buttons and releasethem once the shade begins to move. The uplimit is memorized.3) Press MY button when it reaches the desireddown position.If necessary adjust the down position, use theUP or DOWN buttons.4) Press the MY and UP buttons and releasethem once the shade begins to move.5) The shade moves up and will stop at its uplimit.6) To confirm the end limits press the MY buttonuntil the shade jogs.The end limits are recorded.1 234 5 56Copyright © 2009 <strong>Somfy</strong> SAS. All rights reserved - V0 - 08/20093
Adding/Deleting RTS control pointsADDDELETEFind an RTS control point programmed in themotor.Press and hold the RTS programmed controlpoint (A) PROG button until the shade jogs: themotor is in programming mode.Quickly press the RTS control point (B) PROGbutton to add or delete: the shade jogs and theRTS control point is programmed or deleted fromthe motor.AAPROG.ABAPROG.BBABAdding/Deleting RTS sensorsADDDELETEFind an RTS control point programmed in themotor.Press and hold the RTS programmed controlpoint (A) PROG button until the shade jogs: themotor is in programming mode.Quickly press the RTS sensor (C) PROG buttonto add or delete: the shade jogs and the RTSsensor is programmed or deleted from the motor.AAPROG.ACPROG.CACACErasing the sensor of the motor.To delete all the sensors programmed,press and hold the RTS programmed transmitter(A) PROG button until the shade jogs.Quickly press and hold the RTS sensor (C)PROG button until the shade jogs twice.All the sensors are deleted.PROG.APROG.Cx2Copyright © 2009 <strong>Somfy</strong> SAS. All rights reserved - V0 - 08/20095
Sun functionFor this function, you need a Telis Soliris transmitter.By default, the Sun function is disactivate.1) To activate the Sun function, press the SE-LECT button on the Telis Soliris transmitter untilthe shade jogs.2) To disactivate the Sun function, press theSELECT button on the Telis Soliris transmitteruntil the shade jogs.12OKWhen the intensity of the daylight exceeds thethreshold set by the soliris sensor RTS, a DOWNorder is sent to the shade after 2 min.The shade goes to the MY position or to its downlimit if no MY position has been memorised.When the intensity of the daylight fallsbelow the threshold set by the SOLIRIS sensorRTS, the shade stay at its position (MY or downlimit).The Wind fonction is not compatible with thismotor.2 minChange the direction of rotationMove the shade to a position different than endlimits.- Press the UP and DOWN buttons simultaneouslyuntil the shade jogs.- Press the MY button until the shade jogs.The direction of rotation is change.- Press the UP button to check the new directionof rotation.Change the wheel rotation directionMove the shade away from the end limits.- Press the UP and DOWN buttonssimultaneously until the shade jogs.- Press the UP and DOWN buttons until the shadejogs to reverse the wheel rotation direction.6 Copyright © 2009 <strong>Somfy</strong> SAS. All rights reserved - V0 - 08/2009
Replacement of a lost remote controlN.B.: This reset deletes all control points programmed,but the intermediate positions and thesensors are retained.N.B.: Only switch off the current for the motorwhere a remote control is lost.1 22 sec 5 to 15 sec3 41) Cut the power supply for 2 seconds.2) Switch the power supply back on for 5 to 15seconds.3) Cut the power supply for 2 seconds.4) Switch the power supply back on: the shademoves during 5 seconds (If the shade positionis an end limit, the behavior of the shade will bea jog).5) Press the RTS control point (B) PROG buttonuntil the shade jogs: all the RTS control pointsare cleared and the new RTS control point isprogrammed in the motor.5PROG.B2 secAErase the memory of the motor.N.B.: This reset deletes all control points, sensorsand intermediate positions programmed.N.B.: Only switch off the current for the motor tobe reset!N.B.: Before cutting the power, move the shadeto the middle position.1 22 sec 5 to 15 sec3 41) Cut the power supply for 2 seconds.2) Switch the power supply back on for 5 to 15seconds.3) Cut the power supply for 2 seconds.4) Switch the power supply back on: the shademoves during 5 seconds (If the shade positionis an end limit, the behavior of the shade will bea jog).5) Press the RTS control point (A) PROG buttonuntil the the shade jogs twice: all the RTS controlpoints, RTS sensors and intermediate positionare cleared.5PROG.A2 secX 2ABMYC8 Copyright © 2009 <strong>Somfy</strong> SAS. All rights reserved - V0 - 08/2009
Technical dataHONG KONGKOREAPower supplyFrequency220-2<strong>40</strong> V / 50 Hz 220 V / 60 Hz<strong>40</strong>9,9875 MHz 447,7 MHzOperating temperature0°C / 60 °C0°C / 60 °CProtection ratingMaximum number oftransmittersMaximum number ofsensorsIP 31123IP 31123Trouble shootingThe motor doesn’t work:Verify:• The wiring of the motor.• The heat generated (wait for the cooling of the motor).• The suitability of the cable used.The equipment stops too soon:Verifiy:• The operation of end-limits during the rotation of the motor.• The crown is properly fitted to the tube.• The end-limits of the motor are properly adjusted.Copyright © 2009 <strong>Somfy</strong> SAS. All rights reserved - V0 - 08/20099
<strong>Somfy</strong>Hong Kong: <strong>Somfy</strong> Co. LtdTel: +852 2523 6339Fax: +852 2815 0716South Korea: <strong>Somfy</strong> JOOTel: +82 2594 4331Fax: +82 2594 4332<strong>Somfy</strong> SAS, capital 20.000.000 Euros,RCS Annecy303.970.230 08/2009


