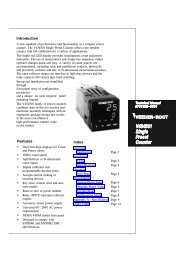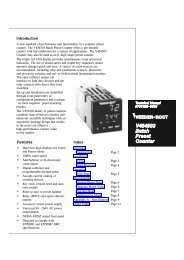
S428A Manual - Danaher Specialty Products
S428A Manual - Danaher Specialty Products
S428A Manual - Danaher Specialty Products

Create successful ePaper yourself
Turn your PDF publications into a flip-book with our unique Google optimized e-Paper software.
DYNAPAR brand PRODUCT MANUAL: Series <strong>S428A</strong> 1/8 DIN Process IndicatorSection 2INSTALLATION2.00<strong>Manual</strong> Number: 702683-0001 Rev.: A August, 2006 Installation
DYNAPAR brand PRODUCT MANUAL: Series <strong>S428A</strong> 1/8 DIN Process IndicatorInstallationUnpacking1. Remove the product from its packing. Retain the packing for future use, in case it isnecessary to transport the instrument to a different site or to return it to the supplier forrepair/testing.2. The instrument is supplied with a panel gasket and push fit mounting clamp. A singlesheet concise manual is also supplied in one or more languages. Examine the delivereditems for damage or defects. If any are found, contact your supplier immediately.CAUTION:Installation and configuration should be performed only by personnel who aretechnically competent and authorised to do so. Local regulations regarding electricalinstallation and safety must be observed.1.89"48mm3.78"96mmPanel Cutout45mm X 92mm (1.77” X 3.62”)The mounting panel must be rigid andmay be up to 6.0mm (0.25 inches) thick.3.93"100mmaprox.0.39"10mm<strong>S428A</strong> Dimensions<strong>Manual</strong> Number: 702683-0001 Rev.: A August, 2006 Installation 2.01
DYNAPAR brand PRODUCT MANUAL: Series <strong>S428A</strong> 1/8 DIN Process IndicatorNoise Suppression at SourceUsually when good wiring practices arefollowed, no further noise protection isnecessary. Sometimes in severe electricalenvironments, the amount of noise is sogreat that it has to be suppressed atsource. Many manufacturers of relays,contactors etc supply ‘surge suppressors’which mount on the noise source. Forthose devices that do not have surge suppressorssupplied, Resistance-Capacitance(RC) networks and/or Metal Oxide Varistors(MOV) may be added.Contacts:- Arcing may occur across contactswhen they open and close. This resultsin electrical noise as well as damageto the contacts. Connecting a properlysized RC network can eliminate this arc.For circuits up to 3 amps, a combination ofa 47 ohm resistor and 0.1 microfarad capacitor(1000 volts) is recommended. Forcircuits from 3 to 5 amps, connect two ofthese in parallel.Inductive coils:- MOVs are recommendedfor transient suppression in inductive coils,connected in parallel and as close as possibleto the coil. Additional protection may beprovided by adding an RC network acrossthe MOV.Contact noise suppressionTransient Suppression with Inductive Coils2.04<strong>Manual</strong> Number: 702683-0001 Rev.: A August, 2006 Installation
DYNAPAR brand PRODUCT MANUAL: Series <strong>S428A</strong> 1/8 DIN Process IndicatorSensor Placement (Thermocoupleor RTD)If the temperature probe is to be subjectedto corrosive or abrasive conditions, it mustbe protected by an appropriate thermowell.The probe must be positioned to reflect trueprocess temperature:1. In a liquid media - the most agitated area2. In air - the best circulated areaCAUTION:The placement of probes into pipework some distance from the heatingvessel leads to transport delay, whichresults in poor control.Thermocouple Wire IdentificationChartThe different thermocouple types are identifiedby their wire colors, and where possible,the outer insulation (sheath) as well.There are several standards in use throughoutthe world.+ Wire SheathThe table below shows the wire and sheathcolors used for most common thermocoupletypes. The format used in the table is:+ Wire Color- Wire ColorSheathColorFor a two wire RTD a wire link should beused in place of the third wire. Two wireRTDs must only be used with lead lengthsless than 3 meters. Use of three wire RTDsis strongly recommended.TypeJThermocouple Wire ColorsInternationalIEC584-3USA ANSIMC 96.1BritishBS1843FrenchNFC 42-324+* Black White Yellow Yellow RedBlackBlack- WhiteBlackBlackRed Blue Black BlueGermanDIN 43710BlueTK+ Brown Blue White Yellow RedBrownBlueBlueBlue- White Red Blue Blue Brown+ Green Yellow Brown Yellow RedGreenYellowRedYellow-* White Red Blue Purple GreenBrownGreenN+ Pink Orange OrangePinkOrange- White Red BlueOrangeBR & S+ Grey Grey RedGreyGrey- White Red Grey+ Orange Black White Yellow RedOrangeGreenGreenGreen- White Red BlueGreenWhiteGreyWhiteC (W5)+ White- RedWhite*= Wire is magnetic<strong>Manual</strong> Number: 702683-0001 Rev.: A August, 2006 Installation 2.05
DYNAPAR brand PRODUCT MANUAL: Series <strong>S428A</strong> 1/8 DIN Process IndicatorPower ConnectionsThe rear terminal connections are illustratedin the following diagrams.In general, all wiring connections are madeto the instrument after it is mounted/installed.Copper wires must be used for allconnections (except thermocouple signalwires).WARNING:TO AVOID ELECTRICAL SHOCK, ACPOWER WIRING MUST NOT BE CON-NECTED TO THE SOURCE DISTRIBUTIONPANEL UNTIL ALL WIRING PROCEDURESARE COMPLETED.WARNING:CHECK THE INFORMATION LABEL ONTHE CASE TO DETERMINE THE COR-RECT VOLTAGE BEFORE CONNECTINGTO A POWER SUPPLY.Note:The wiring diagram below shows allpossible combinations. The actual connectionsrequired depend upon thefeatures available on the model and themodules and options fittedRear Terminals2.06<strong>Manual</strong> Number: 702683-0001 Rev.: A August, 2006 Installation
DYNAPAR brand PRODUCT MANUAL: Series <strong>S428A</strong> 1/8 DIN Process IndicatorPower Connections to 100-240VACThe <strong>S428A</strong> will operate from a 100 to 240V(±10%) 50/60Hz mains supply (powerconsumption is 7.5VA).Connect the line voltage (hot and neutral)as illustrated via a two-pole isolating switch(preferably located near the equipment) anda 1amp anti-surge fuse. If the instrumenthas relay outputs with contacts carryingmains voltage, it is recommended that therelay contacts supply should be switchedand fused in a similar manner, but shouldbe separate from the instrument’s mainssupply.Power Connections - 24/48V AC/DC24/48V AD/DC powered instruments willoperate from a 20 to 48V AC or DC supply.AC power consumption is 7.5VA max, DCpower consumption is 5 watts max. Connectionshould be via a two-pole isolatingswitch (preferably located near the equipment)and a 315mA slow-blow (anti-surgetype T) fuse.24/48 AC/DC ConnectionsWARNING:WARNING:AC (Mains) ConnectionsCHECK THE INFORMATION LABEL ONTHE CASE TO DETERMINE THE COR-RECT VOLTAGE BEFORE CONNECTINGTO A LIVE SUPPLY.CHECK THE INFORMATION LABEL ONTHE CASE TO DETERMINE THE COR-RECT VOLTAGE BEFORE CONNECTINGTO A LIVE SUPPLY.CAUTION:This equipment is designed for installationin an enclosure that providesadequate protection against electricshock<strong>Manual</strong> Number: 702683-0001 Rev.: A August, 2006 Installation 2.07
DYNAPAR brand PRODUCT MANUAL: Series <strong>S428A</strong> 1/8 DIN Process IndicatorUniversal Input, ConnectionsThermocouple (T/C)Use only the correct thermocouple wire orcompensating cable from the probe to theinstrument terminals avoiding joints in thecable if possible. Failure to use the correctwire type will lead to inaccurate readings.Ensure correct polarity of the wires bycross-referencing the colors with a thermocouplereference table.Linear Volt, mV or mA inputLinear DC voltage, millivolt or milliamp inputconnections are made as illustrated. Carefullyobserve the polarity of the connections.RTD inputFor three wire RTDs, connect the resistiveleg and the common legs of the RTD asillustrated. For a two wire RTD a wire linkshould be used in place of the third wire(shown by dotted line). Two wire RTDsshould only be used when the leads areless than 3 meters long. Avoid cable joints.Four wire RTD’s can be used, provided thatthe fourth wire is left unconnected. This wireshould be cut short or tied back so that itcannot contact any of the terminals on therear of the instrument.2.08<strong>Manual</strong> Number: 702683-0001 Rev.: A August, 2006 Installation
DYNAPAR brand PRODUCT MANUAL: Series <strong>S428A</strong> 1/8 DIN Process IndicatorOutput ConnectionsOption Slot 1 - Relay ModuleIf option slot is fitted with a relay outputmodule, make connections as illustrated.Option Slot 1 - Triac ModuleIf option slot is fitted with a Triac outputmodule, make connections as illustrated.19N/C2020COM21∼ AC to Load21N/OContact Rating: 2 amps resistive,120/240 VAC.Triac Rating: 0.01 to 1 amp @ 240V AC50/60Hz. Use only to switch external load.Do not apply AC mains directly acrossterminalsOption Slot 1 - SSR Driver ModuleIf option slot is fitted with an SSR driveroutput module, make connections as illustrated.The solid-state relay driver is a 0-10V DC signal, load impedance must be noless than 500 ohms. SSR driver outputs arenot isolated from the signal input or otherSSR driver outputs.Option Slot 1 - Linear Voltage or mADCmoduleIf option slot is fitted with a DC linear outputmodule, make connections as illustrated.19- (minus)19- (minus)202021+ (plus)21+ (plus)<strong>Manual</strong> Number: 702683-0001 Rev.: A August, 2006 Installation 2.09
DYNAPAR brand PRODUCT MANUAL: Series <strong>S428A</strong> 1/8 DIN Process IndicatorOutput ConnectionsOption Slot 2 - Relay ModuleIf option slot is fitted with a relay outputmodule, make connections as illustrated.22N/COption Slot 2 - Triac ModuleIf option slot is fitted with a Triac outputmodule, make connections as illustrated.2324∼ AC to Load2324COMN/OTriac Rating: 0.01 to 1 amp @ 240V AC50/60Hz. Use only to switch external load.Do not apply AC mains directly acrossterminalsContact Rating: 2 amps resistive,120/240 VAC.Option Slot 2 - SSR Driver ModuleIf option slot is fitted with an SSR driveroutput module, make connections as illustrated.The solid-state relay driver is a 0-10V DC signal, load impedance must be noless than 500 ohms. SSR driver outputs arenot isolated from the signal input or otherSSR driver outputs.Option Slot 2 - Linear Voltage or mADCmoduleIf option slot is fitted with a DC linear outputmodule, make connections as illustrated.222324- (minus)+ (plus)222324- (minus)+ (plus)Option Slot 2 - Dual Relay ModuleIf option slot is fitted with a dual relay outputmodule, make connections as illustrated.This module has two independent relays,which share a common connection terminal.22N/O Output 423COM24N/O Output 2Contact Rating: 2 amps resistive,120/240 VAC.2.10<strong>Manual</strong> Number: 702683-0001 Rev.: A August, 2006 Installation
DYNAPAR brand PRODUCT MANUAL: Series <strong>S428A</strong> 1/8 DIN Process IndicatorOutput ConnectionsOption Slot 3 - Relay ModuleIf option slot is fitted with a relay outputmodule, make connections as illustrated.Option Slot 3 - Linear Voltage or mADCmoduleIf option slot is fitted with a DC linear outputmodule, make connections as illustrated.10N/C10- (minus)11COM1112N/O12+ (plus)Contact Rating: 2 amps resistive,120/240 VAC.Option Slot 3 - SSR Driver ModuleIf option slot is fitted with an SSR driveroutput module, make connections as illustrated.The solid-state relay driver is a 0-10V DC signal, load impedance must be noless than 500 ohms. SSR driver outputs arenot isolated from the signal input or otherSSR driver outputs.Option Slot 3 - Dual Relay ModuleIf option slot is fitted with a dual relay outputmodule, make connections as illustrated.This module has two independent relays,which share a common connection terminal.101112N/O Output 3COMN/O Outpu5101112- (minus)+ (plus)Contact Rating: 2 amps resistive,120/240 VAC.Option Slot 3 - Transmitter PowerSupply ModuleIf option slot is fitted with a transmitterpower supply module, make connections asillustrated.10- (minus)1112+ (plus)The output is an unregulated 24VDC, 22mA supply.<strong>Manual</strong> Number: 702683-0001 Rev.: A August, 2006 Installation 2.11
DYNAPAR brand PRODUCT MANUAL: Series <strong>S428A</strong> 1/8 DIN Process IndicatorCommunications & DigitalInput ConnectionsOption Slot A Connections - RS485Serial Communications ModuleIf option slot A is fitted with the RS485serial communication module, connectionsare as illustrated. Carefully observe thepolarity of the A (Rx/Tx +ve) and B (Rx/Tx -ve) connections.Option Slot A Connections - DigitalInput ModuleIf a digital input module is fitted in optionslot A, this may be connected to eithervoltage free contacts (e.g. switch or relay),or a TTL compatible voltage. Connectionsare shown below.16A16+17BRS48517_18COMFirst-Time Power UpWARNING:ENSURE SAFE WIRING PRACTICES AREFOLLOWEDThe instrument must be powered from asupply according to the wiring label on theside of the unit. The supply will be either100 to 240V AC, or 24/48V AC/DC powered.Check carefully the supply voltageand connections before applying power.CAUTION:Powering Up ProcedureAt power up, a self-test procedure is automaticallystarted, during which all LEDsegments and indicators are lit. At the firstever power up, or if option modules arechanged, Goto [onF will then be displayed,indicating configuration is required (refer tosection 6). At all other times, the instrumentreturns to operator mode once the self-testprocedure is complete.When powering up for the first time,disconnect the output connections.2.12<strong>Manual</strong> Number: 702683-0001 Rev.: A August, 2006 Installation
DYNAPAR brand PRODUCT MANUAL: Series <strong>S428A</strong> 1/8 DIN Process IndicatorNOTES<strong>Manual</strong> Number: 702683-0001 Rev.: A August, 2006 Operation
DYNAPAR brand PRODUCT MANUAL: Series <strong>S428A</strong> 1/8 DIN Process IndicatorSection 3OPERATION3.00<strong>Manual</strong> Number: 702683-0001 Rev.: A August, 2006 Operation
DYNAPAR brand PRODUCT MANUAL: Series <strong>S428A</strong> 1/8 DIN Process IndicatorDisplays and IndicatorsDisplaysThe <strong>S428A</strong> features a single line display,which normally shows the process variablevalue, and status indicators LED’s for modeand alarm indication.LED Indicator FunctionsLEDFUNCTIONSET indicates the Setup Modehas been enteredSET - FLASHING indicatesthe configuration mode hasbeen enteredALM - FLASHING indicatesthat an alarm condition ispresentMessages and Error IndicationsThe following displays are shown when an error occurs or a hardware change is detected.1 This feature does not guarantee correct configuration but only helps to ensure that the unit will beconfigured before use. Use of set-up mode is not enforced but may be essential for the users process.2 If the PV display exceeds 9999 before 5% over-range is reached, an over-range indication is given.3 Indicators will allow up to 10% under-range on non-zero based Linear ranges. If the PV display is lessthan -1999 before the % under-range is reached, an under-range indication is given.<strong>Manual</strong> Number: 702683-0001 Rev.: A August, 2006 Operation 3.01
DYNAPAR brand PRODUCT MANUAL: Series <strong>S428A</strong> 1/8 DIN Process IndicatorOperation ModesThe <strong>S428A</strong> 4-digit display will show theMode Description for approx 1 secondbefore the Mode Setting value is shown.For more details, refer to the following table.Select ModeThis mode is used to gain entry to each of the modes available in the instrument.Entry into the Select ModeHold down and press in any mode to force the unit to enter Select Mode.Navigating in Select ModeOnce in Select Mode, press or to select the required mode,then press to enter the chosen mode.To prevent unauthorized entry to Configuration, and Setup modes, an unlock code is required.These are shown in the - Lock code values table3.02<strong>Manual</strong> Number: 702683-0001 Rev.: A August, 2006 Operation
DYNAPAR brand PRODUCT MANUAL: Series <strong>S428A</strong> 1/8 DIN Process IndicatorOperation ModesUnlock CodesThe ULoc screen is seen before entry isallowed to Configuration & Setup modes.An unlock code must be correctly selectedusing the or keys to enter therequired mode.An incorrect entry results in a return toSelect Mode. The value of the lock codesonly can be changed from within the modesthat they apply to.Unlock Codes Display & EntryLock Code ViewIn the event that a lock code is forgotten,the instrument lock code current valuescan be seen in the lock code view. In thisview the codes are read only, the codescan be changed from the mode to whichthey apply.Entry and Navigating in Lock Code View ModePress and together while theinstrument is powering up until the [locdisplay is shown.Once this mode has been entered:Press to step between lock codes.Note:If there is no key activity for 2 minutes the instrumentreturns to Operator Mode, or to forcefully exit thisview, switch off the instrument.Lock CodeNameConfigurationLock CodeSetupLock CodeDescriptionRead only view ofConfiguration Lock Code.Read only view of SetupMode Lock Code.SettingValueCurrent ValueCurrent ValueLegend Display(for 1sec.)[locSlocUnitsDisplay[S<strong>Manual</strong> Number: 702683-0001 Rev.: A August, 2006 Operation 3.03
DYNAPAR brand PRODUCT MANUAL: Series <strong>S428A</strong> 1/8 DIN Process IndicatorProduct Information ModeThis is a read only mode describing the instrument and the options fitted to it.Navigating the Product Information ModePress to view each parameter in turn.Hold Down and press to return to Select Mode.Note:If there is no key activity for 2 minutes the controller automatically returns to operatormode3.04<strong>Manual</strong> Number: 702683-0001 Rev.: A August, 2006 Operation
DYNAPAR brand PRODUCT MANUAL: Series <strong>S428A</strong> 1/8 DIN Process IndicatorConfiguration ModeThis mode is normally used only when theindicator is configured for the first time orwhen a major change is made to the instrumentscharacteristics. The ConfigurationMode parameters must be set as requiredbefore adjusting parameters in Setup Mode,or attempting to use in an application.Entry into the Configuration ModeCAUTION:Adjustments to these parameters shouldonly be performed by personnelcompetent and authorised to do so.Configuration is entered from Select ModeHold down and press to force thecontroller into the Select Mode.The SLCT legend is shown for 1 second,followed by the legend for the current mode.Press or to navigate to the ConfigurationMode option, then press .Note:Entry into this mode is security-protected bythe Configuration Mode Lock Code. Refer tothe Unlock Code section for more details.Note:The Set LED indicator flashes inConfiguration Mode.Scrolling through Parameters and ValuesPress to scroll through the parameters.While this key is pressed, and up to 1second after, the parameter legend isshown, followed by the current parametervalue.Note:Only parameters that are applicable to thehardware options chosen will be displayed.Changing Parameter ValuesPress to navigate to the required parameter,then press or to set the value asrequired.Once the desired value is set, press todisplay yes?, press within 10 seconds,accept the change, otherwise parameter willrevert to previous value.OrPress to reject the change and to moveonto the next parameter.Hold down and press to return toSelect Mode.Note:If there is no key activity for 2 minutes theinstrument returns to the operator mode.Configuration Mode Parameters<strong>Manual</strong> Number: 702683-0001 Rev.: A August, 2006 Operation 3.05
DYNAPAR brand PRODUCT MANUAL: Series <strong>S428A</strong> 1/8 DIN Process IndicatorConfiguration Mode Parameters3.06<strong>Manual</strong> Number: 702683-0001 Rev.: A August, 2006 Operation
DYNAPAR brand PRODUCT MANUAL: Series <strong>S428A</strong> 1/8 DIN Process IndicatorConfiguration Mode Parameters<strong>Manual</strong> Number: 702683-0001 Rev.: A August, 2006 Operation 3.07
DYNAPAR brand PRODUCT MANUAL: Series <strong>S428A</strong> 1/8 DIN Process IndicatorConfiguration Mode Parameters3.08<strong>Manual</strong> Number: 702683-0001 Rev.: A August, 2006 Operation
DYNAPAR brand PRODUCT MANUAL: Series <strong>S428A</strong> 1/8 DIN Process IndicatorConfiguration Mode Parameters<strong>Manual</strong> Number: 702683-0001 Rev.: A August, 2006 Operation 3.09
DYNAPAR brand PRODUCT MANUAL: Series <strong>S428A</strong> 1/8 DIN Process IndicatorConfiguration Mode Parameters3.10<strong>Manual</strong> Number: 702683-0001 Rev.: A August, 2006 Operation
DYNAPAR brand PRODUCT MANUAL: Series <strong>S428A</strong> 1/8 DIN Process IndicatorConfiguration Mode Parameters<strong>Manual</strong> Number: 702683-0001 Rev.: A August, 2006 Operation 3.11
DYNAPAR brand PRODUCT MANUAL: Series <strong>S428A</strong> 1/8 DIN Process IndicatorSetup ModeThis mode is normally selected only afterConfiguration Mode has been completed,or is used when a change to the processset up is required. These parameters mustbe set as required before attempting to usethe indicator in an application.Entry into the Setup ModeSetup Mode is entered from Select ModeHold down and press to force thecontroller into the Select Mode.The sl[t legend is shown for 1 second,followed by the legend for the currentmode.Press or to navigate to the SetupMode option, then press .Note:Entry into Setup Mode is security-protectedby the Setup Mode lock code. Refer to theUnlock Code section for more details.Note:The Set LED indicator is on in Setup Mode.Scrolling through Parameters andValuesPress to scroll through the parameters.While this key is pressed, and up to 1second after, the parameter legend isshown, followed by the current parametervalue.Changing Parameter ValuesPress to select the required parameter,then press or to set the value asrequired.Once the displayed value is changed, it iseffective is immediately. No confirmation ofthe change is required.Pressto move onto the next parameter.Hold down and press to return toSelect Mode.Note:If there is no key activity for two minutes theinstrument returns to the operator mode.3.12<strong>Manual</strong> Number: 702683-0001 Rev.: A August, 2006 Operation
DYNAPAR brand PRODUCT MANUAL: Series <strong>S428A</strong> 1/8 DIN Process IndicatorSetup Mode ParametersNote:Alarm parameters marked * are repeated in Configuration Mode.Note:**Once the complete list of Set Up Mode parameters has been displayed, the OperatorMode displays are shown without exiting from Set Up Mode.<strong>Manual</strong> Number: 702683-0001 Rev.: A August, 2006 Operation 3.13
DYNAPAR brand PRODUCT MANUAL: Series <strong>S428A</strong> 1/8 DIN Process IndicatorSetup Mode ParametersNote:Alarm parameters marked * are repeated in Configuration Mode.Note:**Once the complete list of Set Up Mode parameters has been displayed, the OperatorMode displays are shown without exiting from Set Up Mode.3.14<strong>Manual</strong> Number: 702683-0001 Rev.: A August, 2006 Operation
DYNAPAR brand PRODUCT MANUAL: Series <strong>S428A</strong> 1/8 DIN Process IndicatorSetup Mode ParametersNote:Alarm parameters marked * are repeated in Configuration Mode.Note:**Once the complete list of Set Up Mode parameters has been displayed, the OperatorMode displays are shown without exiting from Set Up Mode.<strong>Manual</strong> Number: 702683-0001 Rev.: A August, 2006 Operation 3.15
DYNAPAR brand PRODUCT MANUAL: Series <strong>S428A</strong> 1/8 DIN Process IndicatorOperator ModeThis is the mode used during normaloperation of the instrument. It can beaccessed from Select Mode, and is theusual mode entered at power-up. Theavailable displays are dependent upon thesetting of the Display Strategy parameterin Configuration Mode.WARNING:IN NORMAL OPERATION, THEOPERATOR MUST NOT REMOVE THEINSTRUMENT FROM ITS HOUSING ORHAVE UNRESTRICTED ACCESS TO THEREAR TERMINALS, AS THIS WOULDPROVIDE POTENTIAL CONTACT WITHHAZARDOUS LIVE PARTS.CAUTION:Set all Configuration Modeparameters and Set Up Modeparameters as required beforestarting normal operations.Entry into Operator ModeThis is the normal operating mode of theinstrument from power-up. It can also beaccessed from any other mode via SelectMode as follows:Hold down and press to force thecontroller into the Select Mode.The sl[t legend is shown for 1 second,followed by the legend for the currentmode.Press or to navigate to the OperatorMode option, then press .Scrolling through Parameters andValuesPress to scroll through the parameters.While this key is pressed, and up to 1second after, the parameter legend isshown, followed by the current parametervalue.Changing Parameter ValuesPress to select the required parameter,then press or to set the value asrequired.Once the displayed value is changed, it iseffective is immediately. No confirmation ofthe change is required.Pressto move onto the next parameter.Note:The operator can freely view theparameters in this mode, but alterationdepends on the Display strategy settingin Configuration Mode. All parameters inDisplay strategy 6 are read only, and canonly be adjusted via Setup mode.3.16<strong>Manual</strong> Number: 702683-0001 Rev.: A August, 2006 Operation
DYNAPAR brand PRODUCT MANUAL: Series <strong>S428A</strong> 1/8 DIN Process IndicatorOperator Mode Parameters<strong>Manual</strong> Number: 702683-0001 Rev.: A August, 2006 Operation 3.17
DYNAPAR brand PRODUCT MANUAL: Series <strong>S428A</strong> 1/8 DIN Process IndicatorThe <strong>S428A</strong> Units DisplayThe single-digit Units Display is locateddirectly to the right of the main display. InOperator Mode, this display shows C or fwhen a temperature input range is displayed,and is blank for linear inputs.The units display is also used in othermodes as a confirmation of the parametertype currently shown in the main display.Alarm IndicationsThe alarm status screen indicatesany active alarms, in addition,when alarms 1, 2, 3, 4 or 5 areactive, their associated Alarm LEDflashes. For latching alarm outputs, theLED FLASHES when the alarm conditionexists, and goes to ON when the alarmcondition is no longer present if the outputhas not yet been reset., to indicate that therelay is in the Latched on condition.*Resetting Latched Alarm OutputsLatched outputs can be reset while theProcess variable or Alarm Status screensare displayed, via the Digital Input (if fitted),with a communications command via theRS485 module (if fitted) or from the frontkeypad as follows:Press either or to reset the latchedrelay(s).Note:Outputs will only reset if their alarmcondition is no longer present.CAUTION:A reset will affect ALL latched outputs.Resetting Alarm 1 Active Time,Minimum PV or Maximum PVThe stored Maximum PV value, MinimumPV value or Alarm 1 active Elapsed Timevalue can be reset via the Digital Input (iffitted), with a communications command viathe RS485 module (if fitted) or from thefront keypad as follows:Pressreset.to select the parameter to bePress either or for three seconds.The display briefly shows ---- when thevalue is reset before the unit reverts to therequested display.3.18<strong>Manual</strong> Number: 702683-0001 Rev.: A August, 2006 Operation
DYNAPAR brand PRODUCT MANUAL: Series <strong>S428A</strong> 1/8 DIN Process IndicatorMulti-Point ScalingWhen Multi-Point Scaling is enabled (M7ps= enab in Configuration Mode), up to 9breakpoints can be set to linearize the inputsignal. This only applies to mA, mV orVoltage input types.For each breakpoint the input scale value(scan) is entered in % of input span, followedbythe value to be shown (disn) in displayunits. Each breakpoint’s input scale valuemust be higher than the previous value, butthe display values can be either higher orlower. Any scale value set to 100% becomesthe last in the series.Tare FeatureWhen Tare is enabled (tare = enab inConfiguration Mode), it can be used to setthe displayed value to zero automatically,by making the PV Offset parameter equal,but opposite to, the current process variablevalue.Tare can be initiated via the Digital Input (iffitted), with a communications command viathe RS485 module (if fitted) or by using thefollowing key press sequence:until the process variable is dis-Pressplayed.Hold down or together for threeseconds until the display shows yes?.Release both keys and press within 3seconds to confirm the request.Note:The Tare request is aborted if this sequence is notfollowed exactly.<strong>Manual</strong> Number: 702683-0001 Rev.: A August, 2006 Operation 3.19
DYNAPAR brand PRODUCT MANUAL: Series <strong>S428A</strong> 1/8 DIN Process IndicatorSection 4COMMUNICATIONS4.00<strong>Manual</strong> Number: 702683-0001 Rev.: A August, 2006 Communications
DYNAPAR brand PRODUCT MANUAL: Series <strong>S428A</strong> 1/8 DIN Process IndicatorSerial CommunicationsParametersThe Modbus parameter addresses, and thepossible ASCII message types and parametersare detailed below. RO indicates aparameter is read only,WO indicates a parameter is write only andR/W indicates it can read from or written to.Communications writes will not implementedif the Communications Write Parameteris disabled. Refer to the Modbusand ASCII Communications sections of thismanual for details of the protocols used.Bit ParametersBit parameters are not applicable to theASCII protocol.Parameter Modbus NotesParameter No.Alarm 1 Status 1 RO 1 = Active, 0 = InactiveAlarm 2 Status 2 RO 1 = Active, 0 = InactiveAlarm 3 Status 3 RO 1 = Active, 0 = InactiveAlarm 1 Latched 4 RO 1 = Alarm 1 Latched, 0 = Not Latched*PV Under Range 5 RO 1 = PV Under-range, 0 = PV within rangePV Over Range 6 RO 1 = PV Over-range, 0 = PV within rangeSensor Break 7 RO 1 = Sensor Break Active, 0 = Sensor Break InactiveLatched Alarm 8 WO Writing any value resets all latched alarm relays.ResetNote: Outputs will only reset if their alarmcondition is no longer present.Reset Maximum PV 9 WO Writing any value resets the stored maximumdisplayed PV valueReset Minimum PV 10 WO Writing any value resets the stored minimumdisplayed PV valueReset Elapsed 11 WO Writing any value resets the stored alarm 1 activeTimetime valueAlarm 5 Status 12 RO 1 = Active, 0 = InactiveAlarm 5 Status 13 RO 1 = Active, 0 = InactiveAlarm 2 Latched 14 RO 1 = Alarm 2 Latched, 0 = Not Latched*Alarm 3 Latched 15 RO 1 = Alarm 3 Latched, 0 = Not Latched*Alarm 4 Latched 16 RO 1 = Alarm 4 Latched, 0 = Not Latched*Alarm 5 Latched 17 RO 1 = Alarm 5 Latched, 0 = Not Latched*To set the bit value to 1 write FF, to set the bit value to 0 write 00. Refer to Function Code 05 in the Modbus Communications section*Note:Alarm Latched status requests always returns 0 if that alarm is not configured to be latching.<strong>Manual</strong> Number: 702683-0001 Rev.: A August, 2006 Serial Communications 4.01
DYNAPAR brand PRODUCT MANUAL: Series <strong>S428A</strong> 1/8 DIN Process IndicatorSetup Mode Parameters4.02<strong>Manual</strong> Number: 702683-0001 Rev.: A August, 2006 Serial Communications
DYNAPAR brand PRODUCT MANUAL: Series <strong>S428A</strong> 1/8 DIN Process IndicatorSetup Mode Parameters<strong>Manual</strong> Number: 702683-0001 Rev.: A August, 2006 Serial Communications 4.03
DYNAPAR brand PRODUCT MANUAL: Series <strong>S428A</strong> 1/8 DIN Process IndicatorNote:Some of the parameters that do not apply to a particular configuration will accept readsand writes (e.g. attempting to scale a Linear output which has not been fitted). Read onlyparameters will return an exception if an attempt is made to write values to them.4.04<strong>Manual</strong> Number: 702683-0001 Rev.: A August, 2006 Serial Communications
DYNAPAR brand PRODUCT MANUAL: Series <strong>S428A</strong> 1/8 DIN Process IndicatorModbus Serial CommunicationsAll models support the Modbus RTU communicationprotocol. Some models alsosupport an ASCII communication protocol.Where both Modbus and ASCII are supported,the protocol to be used is selectedfrom Configuration Mode. The RS485Communications Module must be fitted intoOption Slot A in order to use serial communications.Refer to the relevant Model Group Sectionfor the ASCII and Modbus Application Layer(parameter address/ident information).For a complete description of the Modbusprotocol refer to the description provided athttp://www.modicon.com/ orhttp: www.modbus.org/Physical LayerThe Base address, bit rate and characterformat are configured via the front panel inConfiguration Mode or by using the PCConfigurator software.Physical layer configuration settings possibleare:Data rate: 1200, 2400, 4800 (default),9600 and 19,200 bpsParity: None (default), Even, OddCharacter format: Always 8 bits percharacter.The transmitter must not start transmissionuntil 3 character times have elapsed sincereception of the last character in a message,and must release the transmissionline within 3 character times of the lastcharacter in a message.Note:Three character times = 1.5ms at 19200, 3ms at9600, 6ms at 4800, 12ms at 2400 and24ms at 1200 bps.Link LayerA Query (or command) is transmitted fromthe Modbus Master to the Modbus Slave.The slave instrument assembles the replyto the master. All of the instruments coveredby this manual are slave devices, andcannot act as a Modbus Master.Modbus Link LayerA message for either a QUERY or RE-SPONSE is made up of an inter-messagegap followed by a sequence of data characters.The inter-message gap is at least 3.5data character times.Data is encoded for each character asbinary data, transmitted LSB first.For a QUERY the address field containsthe address of the slave destination. Theslave address is given together with theFunction and Data fields by the Applicationlayer. The CRC is generated from the givenaddress, function and data characters.For a RESPONSE the address field containsthe address of the responding slave.The Function and Data fields are generatedby the slave application. The CRC is generatedfrom the address, function and datacharacters.The standard MODBUS RTU CRC-16calculation employing the polynomial216+215+22+1 is used.Inter-message Address Function Data CRC Checkgap 1 character 1 character ncharacters 2 characters<strong>Manual</strong> Number: 702683-0001 Rev.: A August, 2006 Serial Communications 4.05
DYNAPAR brand PRODUCT MANUAL: Series <strong>S428A</strong> 1/8 DIN Process IndicatorDevice AddressingThe instrument is assigned a unique deviceaddress by the user in the range 1 (default)to 255 using the 5DD9 parameter in ConfigurationMode. This address is used torecognize Modbus Queries intended forthis instrument. The instrument does notrespond to Modbus Queries that do notmatch the address that has been assignedto it.The instrument will also accept globalQueries using device address 0 no matterwhat device address is assigned. No responsesare returned for globally addressedQueries.Supported Modbus FunctionsModbus defines several function types;these instruments support the types that arelisted in the following table:Function Code(decimal)01 / 0203 / 0405060816Modbus MeaningRead Coil/Input StatusRead Holding/Input registersForce single CoilPre-set Single RegisterDiagnosticsPre-set Multiple RegistersDescriptionRead output/input status bits at given address.Read current binary value of specified numberof parameters at given address. Up to 64parameters can be accessed with one Query.Writes a single binary bit to the Specified SlaveBit address.Writes two bytes to a specified word address.Used for loopback test.Writes up to 1 word parameter values to thespecified address range.Supported Modbus FunctionsFunction DescriptionsThe following is interpreted from theModbus Protocol Description obtainablefrom http://www.modicon.com/ orhttp://www.modbus.org/. Refer to thatdocument if clarification is required.In the function descriptions that follow, thepreceding device address value isassumed, as is the correctly formed twobyteCRC value at the end of the QUERYand RESPONSE frames.4.06<strong>Manual</strong> Number: 702683-0001 Rev.: A August, 2006 Serial Communications
DYNAPAR brand PRODUCT MANUAL: Series <strong>S428A</strong> 1/8 DIN Process IndicatorRead Coil/Input Status (Function 01 / 02)Reads the content of instruments output/input status bits at the specified bit address.QUERY - Read Coil/Input Status (Modbus Function 01/02)Function Address of 1st Bit Number of Bits01 / 02 HI LO HI LORESPONSEFunction Number of Bytes 1st 8 Bytes 2nd 8 Bytes01 / 02In the response the .Number of Bytes. indicates the number of data bytes read from theinstrument. E.g. if 16 bits of data are returned then the count will be 2. The maximumnumber of bits that can be read is 16 in one transaction. The first bit read is returned in theleast significant bit of the first 8 bits returned.Read Holding/Input Registers (Function 03 / 04)Reads current binary value of data at the specified word addresses.QUERY - Read Holding/Input Registers (Modbus Function 03/04)Function Address of 1st Word Number of Words03 / 04 HI LO HI LORESPONSEFunction Number of Bytes First Word Last Word03 / 04 HI LO HI LOIn the response the .Number of Bytes. indicates the number of data bytes read from theinstrument. E.g. if 5 words are read, the count will be 10 (A hex). The maximum number ofwords that can be read is 64. If a parameter does not exist at one of the addresses read,then a value of 0000h is returned for that word.<strong>Manual</strong> Number: 702683-0001 Rev.: A August, 2006 Serial Communications 4.07
DYNAPAR brand PRODUCT MANUAL: Series <strong>S428A</strong> 1/8 DIN Process IndicatorForce Single Coil (Function 05)Writes a single binary value to the Specified Instrument Bit address.QUERY - Force Single Coil (Modbus Function 05)Function Address of Bit State to write05 HI LO FF/00 00RESPONSEFunction Address of Bit State written05 HI LO FF/00 00The address specifies the address of the bit to be written to. The State to write is FF whenthe bit is to be SET and 00 if the bit is to be RESET.Note: The Response normally returns the same data as the Query.Pre-Set Single Register (Function 06)Writes two bytes to a specified word address.QUERY - Pre-Set Single Register (Modbus Function 06)Function Address of Word Value to write06 HI LO HI LORESPONSEFunction Address of Word Value written06 HI LO HI LONote: The Response normally returns the same data as the Query.Loopback Diagnostic Test (Function 08)QUERY - Loopback Diagnostic Test (Modbus Function 08)Function Diagnostic Code Value08 HI= 00 LO= 00 HI LORESPONSEFunction Sub-function Value08 HI= 00 LO= 00 HI LONote: The Response normally returns the same data as the Query.4.08<strong>Manual</strong> Number: 702683-0001 Rev.: A August, 2006 Serial Communications
DYNAPAR brand PRODUCT MANUAL: Series <strong>S428A</strong> 1/8 DIN Process IndicatorPre-Set Multiple Registers (Function 10 Hex)Writes a consecutive word (two-byte) value to the specified address range.QUERY - Pre-Set Multiple Registers (Modbus Function 10 Hex)Function 1st Word Number of Number of First valueAddress Words Query Bytes to write10 HI LO HI LO HI LORESPONSEFunction 1st Word Address Number of Words10 HI LO HI LONote: The number of consecutive words that can be written is limited to 1.Exception ResponsesWhen a QUERY is sent that the instrument cannot interpret then an ExceptionRESPONSE is returned. Possible exception responses are:MODBUS EXCEPTION RESPONSESExceptionCode Error Condition Interpretation00 Unused None.01 Illegal function Function number out of range.02 Illegal Data Address Write functions: Parameter number out ofrange or not supported. (for write functionsonly).Read Functions: Start parameter does notexist or end parameter greater than 6553603 Illegal Data Value Attempt to write invalid data / required action notexecuted.The format of an exception response is:RESPONSEFunctionOriginal Function code with ms bit set.Exception Codeas detailed aboveNote: In the case of multiple exception codes for a single QUERY the Exception codereturned is the one corresponding to the first parameter in error.<strong>Manual</strong> Number: 702683-0001 Rev.: A August, 2006 Serial Communications 4.09
DYNAPAR brand PRODUCT MANUAL: Series <strong>S428A</strong> 1/8 DIN Process IndicatorASCII CommunicationsThis is a simple ASCII protocol that providesbackwards compatibility with previousgenerations of products. ASCII is not availablein all models in the range. The Modbusprotocol is recommended for future use.Refer to the relevant Model Group Sectionfor the ASCII and Modbus Application Layer(parameter address/ident information).Physical LayerThe Base address, bit rate and characterformat are configured via the front panel inConfiguration Mode or by using the PCConfigurator software.Physical layer configuration settings possibleare:Data rate: 1200, 2400, 4800(default), 9600 and 19,200 bpsParity: EvenCharacter format: 7 bits percharacter. + 1 stop bit.The transmitter must not start transmissionuntil 3 character times have elapsed sincereception of the last character in a message,and must release the transmissionline within 3 character times of the lastcharacter in a message.Note: Three character times = 1.5ms at19200, 3ms at 9600, 6ms at 4800, 12msat 2400 and 24ms at 1200 bps.Device AddressingThe instrument is assigned a device addressby the user using the 5DD9 parameterin Configuration Mode. The addressmay be set to any unique value from 1(default) to 99. This address is used torecognize ASCII messages intended for thisinstrument. The instrument does not respondto messages that do not match theaddress that has been assigned to it.Session LayerThe ASCII protocol assumes half duplexcommunications. The master device initiatesall communication. The master sendsa command or query to the addressed slaveinstrument and the slave replies with anacknowledgement of the command or thereply to the query.Messages from the master device may beone of five types:Type 1: {S}{N}??*Type 2: {S}{N}{P}{C}* or R{N}{P}{C}*Type 3: {S}{N}{P}#{DATA}* orR{N}{P}#{DATA}*Type 4: {S}{N}{P}I* or R{N}{P}I*Type 5: {S} {N} \ P S S ? *All characters are in ASCII code. See thefollowing Parameter Key table for details ofthe parameters in brackets { }.{S}is the Start of Message character L (Hex 4C) or R (Hex 52). L is used for Controllers; R is used for Profilers.{N} is the slave device address (in the range 1 - 99); addresses 1 - 9 may be represented by a singledigit (e.g. 7) or in two-digit form, the first digit being zero (e.g. 07).{P } is a character which identifies the parameter to be interrogated/modified.{C} is the command (Refer to the Serial Communications Application Layer information for each Model Group)# indicates that {DATA} is to follow (Hex 23){DATA} is a string of numerical data in ASCII code (refer to the Data Element table below)P is the Program NumberS S is the Segment Number (01 to 16)* is the End of Message Character (Hex 2A)No space characters are permitted in messages. Any syntax errors in a received messagewill cause the slave instrument to issue no reply and await the Start of Message character.4.10<strong>Manual</strong> Number: 702683-0001 Rev.: A May, 2006 Serial Communications
DYNAPAR brand PRODUCT MANUAL: Series <strong>S428A</strong> 1/8 DIN Process IndicatorASCII CommunicationsASCII Data Element . Sign/Decimal Point Position{DATA} Content Data Format Descriptionabcd0 +abcd Positive value, no decimal placeabcd1 +abc.d Positive value, one decimal placeabcd2 +ab.cd Positive value, two decimal placesabcd3 +a.bcd Positive value, three decimal placesAbcd5 -abcd Negative value, no decimal placeAbcd6 -abc.d Negative value, one decimal placeAbcd7 -ab.cd Negative value, two decimal placesAbcd8 -a.bcd Negative value, three decimal places(in the Data Content, abcd represents the data value, the last digit indicates data format)Type 1 MessageL {N} ? ? *This message is used by the master deviceto determine whether the addressed slavedevice is active.The reply from an active slave isL {N} ? A *An inactive device will give no reply.Type 2 MessageL {N} {P} {C} * or R {N} {P} {C} *This type of message is used by the masterdevice, to interrogate or modify a parameterin the addressed slave device. {P} identifiesthe parameter and {C} represents thecommand to be executed, which may beone of the following:+ (Hex 2B) = Increment the value of theparameter defined by {P}. (Hex 2D) = Decrement the value of theparameter defined by {P}? (Hex 3F) = Determine the current valueof the parameter defined by {P}The reply from the addressed slave deviceis of the form:L {N} {P} {DATA} A * or R {N} {P} {DATA} A *where {DATA} comprises five ASCII-codeddigits whose format is shown in the DataElement table above. The data is the valuerequested in a query message or the newvalue of the parameter after modification. Ifthe action requested by the message fromthe master device would result in an invalidvalue for that parameter (either because therequested new value would be outside thepermitted range for that parameter or becausethe parameter is not modifiable), theslave device replies with a negative acknowledgement:L {N} {P} {DATA} N * or R {N} {P} {DATA} N *The {DATA} string in the negative acknowledgementreply will be indeterminate. If theprocess variable or the deviation is interrogatedwhilst the process variable is outsidethe range of the slave device, the reply is:L {N} {P} < ? ? > 0 A *if the process variable is over-range, orL {N} {P} < ? ? > 5 A *if the process variable is under-range.<strong>Manual</strong> Number: 702683-0001 Rev.: A May, 2006 Serial Communications 4.11
DYNAPAR brand PRODUCT MANUAL: Series <strong>S428A</strong> 1/8 DIN Process IndicatorASCII CommunicationsType 3 MessageL {N} {P} # {DATA} * or R {N} {P} # {DATA} *This message type is used by the masterdevice to set a parameter to the valuespecified in {DATA}. The command is notimplemented immediately by the slavedevice; the slave will receive this commandand will then wait for a Type 4 message(see below). Upon receipt of a Type 3message, if the {DATA} content and thespecified parameter are valid, the slavedevice reply is of the form:L {N} {P} {DATA} I * or R {N} {P} {DATA} I *(where I = Hex 49) indicating that the slavedevice is ready to implement the command.If the parameter specified is invalid or is notmodifiable or if the desired value is outsidethe permitted range for that parameter, theslave device replies with a negative acknowledgementin the form:L {N} {P} {DATA} N * or R {N} {P} {DATA} N *Error ResponseThe circumstances under which a messagereceived from the master device is ignoredare:Parity error detectedSyntax error detectedTimeout elapsedReceipt of a Type 4 message withouta preceding Type 3 commandmessage.Negative acknowledgements will be returnedif, in spite of the received messagebeing notionally correct, the slave devicecannot supply the requested information orperform the requested operation. The{DATA} element of a negative acknowledgementwill be indeterminate.Type 4 MessageL {N} {P} I * or R {N} {P} I *This type of message is sent by the masterdevice to the addressed slave device,following a successful Type 3 transactionwith the same slave device. Provided thatthe {DATA} content and the parameterspecified in the preceding Type 3 messageare still valid, the slave device will then setthe parameter to the desired value and willreply in the form:L {N} {P} {DATA} A *where {DATA} is the new value of theparameter. If the new value or parameterspecified is invalid, the slave device willreply with a negative acknowledgement inthe form:L {N} {P} {DATA} N *where {DATA} is indeterminate. If the immediatelypreceding message received bythe slave device was not a Type 3 message,the Type 4 message is ignored.4.12<strong>Manual</strong> Number: 702683-0001 Rev.: A May, 2006 Serial Communications
DYNAPAR brand PRODUCT MANUAL: Series <strong>S428A</strong> 1/8 DIN Process IndicatorNOTES<strong>Manual</strong> Number: 702683-0001 Rev.: A August, 2006 Calibration
DYNAPAR brand PRODUCT MANUAL: Series <strong>S428A</strong> 1/8 DIN Process IndicatorSection 5CALIBRATION5.00<strong>Manual</strong> Number: 702683-0001 Rev.: A August, 2006 Calibration
DYNAPAR brand PRODUCT MANUAL: Series <strong>S428A</strong> 1/8 DIN Process IndicatorCalibrationWARNING:CALIBRATION IS ONLY REQUIRED FORINSTRUMENTS IN WHICH CALIBRATIONERRORS HAVE BEEN ENCOUNTERED.REFER TO CALIBRATION CHECK BELOW.CAUTION:Calibration must be performed bypersonnel who are technically competentand authorized to do so.Calibration is carried out during manufactureand is not normally required againduring the lifetime of the instrument.Equipment Required For Checking orCalibrating the Universal InputA suitable calibration signal source is requiredfor each input type. To verify theaccuracy of the instrument or carry outrecalibration, the listed input sources arerequired, with better than ±0.05% of thereading accuracy:Calibration Check1. Set the instrument to the required inputtype.2. Power up the instrument and connect thecorrect input leads.Leave powered up for at least five minutesfor RTD and DC linear inputs, or at least 30minutes for thermocouple inputs.3. After the appropriate delay forstabilization has elapsed, check the calibrationby connecting the appropriate inputsource and checking a number of cardinalpoints.4. Repeat the test for all required inputtypes.1. DC linear inputs: 0 to 50mV, 0 to 10VDCand 0 to 20mADC.2. Thermocouple inputs - complete with 0ºCreference facility, appropriate thermocouplefunctions and compensating leads (orequivalent).3. RTD inputs: decade resistance box withconnections for three-wire input (or equivalent).<strong>Manual</strong> Number: 702683-0001 Rev.: A August, 2006 Calibration 5.01
DYNAPAR brand PRODUCT MANUAL: Series <strong>S428A</strong> 1/8 DIN Process IndicatorRecalibration ProcedureRecalibration is carried out in five phasesas shown in the table below, each phasecorresponds to an input range of the instrument.CAUTION:The 50mV phase MUST be calibratedbefore the thermocouple range.INPUT CALIBRATION PHASES`p- 1`p- 2`p- 3`p- 4`p- 550 mV10 V20 mARTD input (200 ohm)Thermocouple (K typesource at 0ºC required)3. During calibration the display changes to- - - - for a few seconds.4. If the input is misconnected or an incorrectsignal is applied the calibration will beaborted and the display will show fail. Theprevious calibration value will be retained.5. If the calibration has succeeded, thepass display is shown as `p - 1 (non-flashing).6. Press to step to the next phase.7. Repeat this process for each input typeuntil all the phases are calibrated.Note:Switch off the instrument to exit theCalibration Mode or Calibration Mode willbe automatically exited if there is nobutton activity for five minutes.To start calibration, apply the requiredcalibration input from the source type listabove, using the correct connections,1. While the instrument is powering up,press and together until `p - 1 isdisplayed.Note:If a phase has not been previously calibratedthe display will flash.2. Press and together to initiatecalibration on Indicators.5.02<strong>Manual</strong> Number: 702683-0001 Rev.: A August, 2006 Calibration
DYNAPAR brand PRODUCT MANUAL: Series <strong>S428A</strong> 1/8 DIN Process IndicatorNOTES<strong>Manual</strong> Number: 702683-0001 Rev.: A August, 2006 Appendix 1
DYNAPAR brand PRODUCT MANUAL: Series <strong>S428A</strong> 1/8 DIN Process IndicatorAppendix 1PLUG-IN OPTIONS&PART NUMBERSAppendix 2GLOSSARYAppendix 3COMPLETE SPECIFICATION<strong>Manual</strong> Number: 702683-0001 Rev.: A August, 2006 Appendix 1
DYNAPAR brand PRODUCT MANUAL: Series <strong>S428A</strong> 1/8 DIN Process IndicatorAppendix 1Plug-In Options & Part NumbersOptions Modules and FunctionsA range of plug-in option modules is availableto add additional input, output andcommunication functions to the instrumentsin the range. These modules can be eitherpreinstalled at the time of manufacture, orretrofitted to a Base Model in the field, seetable below.Note:Slot 1 modules cannot be fitted into Slot2 or 3. Slot 2 & 3 modules cannot befitted into Slot 1. Some Slot 2 &3 modulesshould only be fitted into one of thetwo slots. This is detailed in the - AllowedFunctions in Options Slots table, nextpage.The modules are installed between theinstruments main circuit boards into the fouroption slots. These are designated as Slots1, 2, 3, & A. Installation is detailed below.Auto Detection of Option ModulesThe instrument automatically detects whichoption modules have been fitted into eachslot. In Configuration Mode, the menus willchange to reflect the options compatiblewith the hardware fitted. The modules fittedcan be viewed in the Product InformationMode.The following table shows available standard model configurations that may be provided in theSeries <strong>S428A</strong> when ordered from the factory. Alternatively, Base Models may be ordered andfitted with option models in the field. Part Numbers for and placement of Option Modules isdetailed in the - Allowed Functions in Options Slots table, next page.Input Type must bespecified in Base Model.The functions in Option Slots below may be outfittedat any time by ordering Option Modules, theninstalling per the procedure in this section.Power Supply and Display color/must be specified in Base Model.<strong>Manual</strong> Number: 702683-0001 Rev.: A August, 2006 Appendix 1 A1.01
DYNAPAR brand PRODUCT MANUAL: Series <strong>S428A</strong> 1/8 DIN Process IndicatorAppendix 1 Plug-In Options & Part NumbersAllowed Functions in Option SlotsOPTION SLOT 1P/N FunctionPO1-C10F RelayPO1-C50FPO1-C80FPO1-C21FSSR DriverTriacLinear mA/V DCOPTION SLOT 3P/N FunctionPO2-C10F RelayPO2-C50F SSR DriverPO2-C21F Linear mA/V DCPO2-W08FPO2-W09FTransmitterPSUDual RelayOPTION SLOT 2P/N FunctionPO2-C10F RelayPO2-C50F SSR DriverPO2-C80F TriacPO2-C21F Linear mA/V DCPO2-W09F Dual RelayOPTION SLOT AP/N FunctionPA1-W06F RS485 CommsPA1-W03F Digital InputTable shows part number and function of boards that my be used inoption slots 1, 2, 3 and APreparing to Install or Remove OptionsModulesCAUTION:Before removing the instrument fromit’s housing, ensure that all power hasbeen removed from the rear terminals.1. Remove the instrument from its housingby gripping the side edges of the frontpanel (there is a finger grip on each edge)then pulling the instrument forward whilepressing down on the two latching tabslocated on the top and bottom of the casedirectly behind the front panel. This willrelease the instrument from the rear connectorsin the housing and will give accessto the PCBs.2. Take note of the orientation of the instrumentfor subsequent replacement into thehousing. The positions of the main andoption PCBs in the instrument are shown inthe figure that follows.Removing/Installing Option ModulesWith the instrument removed from its housing:1. To remove, install or replace modulesinto Option Slots 1, 2, 3 or A, it is necessaryto gently separate the CPU and PSU PCBs.This is achieved by detaching the mainboards (PSU and CPU) from the frontmoulding by lifting first the upper and thenlower mounting struts as shown. This freesthe boards from the front.A1.02CAUTION:Take care not to put undue stress onthe ribbon cable attaching the displayand CPU boards.<strong>Manual</strong> Number: 702683-0001 Rev.: A August, 2006 Appendix 1
DYNAPAR brand PRODUCT MANUAL: Series <strong>S428A</strong> 1/8 DIN Process IndicatorAppendix 1Plug-In Options & Part NumbersLocation of Option Modules2. Remove or fit the modules into theOption slots as required. The location of theconnectors is shown below.Tabs on each option module engage slotsin the main boards, opposite each of theconnectors, in order to stabilize the assembly.CAUTION:Check for correct orientationof the modules andthat all pins locate correctlyinto the socketOption Module Connections<strong>Manual</strong> Number: 702683-0001 Rev.: A August, 2006 Appendix 1 A1.03
DYNAPAR brand PRODUCT MANUAL: Series <strong>S428A</strong> 1/8 DIN Process IndicatorAppendix 1 Plug-In Options & Part NumbersReplacing the Instrument in its HousingWith the required option modules correctlylocated into their respective positions theinstrument can be replaced into its housingas follows:1. Move the CPU and PSU boards backtogether, taking care to locate the optionmodule tabs into the slots in the boardopposite. Hold the main boards togetherwhile relocating them back into the mountingstruts on the front panel.2. Align the CPU and PSU PCBs with theirguides and connectors in the housing.3. Slowly and firmly, push the instrument inposition.CAUTION:Be sure that the instrument is correctlyorientated. A mechanical stopwill attempt to prevent insertion of thePCBs in the wrong orientation, thisstop MUST NOT be over-ridden.A1.04<strong>Manual</strong> Number: 702683-0001 Rev.: A August, 2006 Appendix 1
DYNAPAR brand PRODUCT MANUAL: Series <strong>S428A</strong> 1/8 DIN Process IndicatorAppendix 2 . GlossaryThis Glossary explains the technical terms and parameters used in this manual. The entrytype is also shown:General Definition: Terms applicable to the entire model range.Indicator Definition: Terms applicable to <strong>S428A</strong> indicator models.General Parameter: Parameters applicable to the entire model range.Indicator Parameter: Parameters applicable to indicator <strong>S428A</strong> models.Alarm HysteresisType: General ParameterAn adjustable band on the .safe. side of an alarm point, through which the process variablemust pass before the alarm will change state, as shown in the diagram below. E.g. a highalarm’s hysteresis band is below the high alarm value, and a low alarm’s hysteresis isabove the low alarm value. Also refer to Alarm Operation.<strong>Manual</strong> Number: 702683-0001 Rev.: A August, 2006 Appendix 2 A2.01
DYNAPAR brand PRODUCT MANUAL: Series <strong>S428A</strong> 1/8 DIN Process IndicatorAppendix 2 . GlossaryAlarm OperationType: General DefinitionThe different alarm types are shown below, together with the action of any outputs. Alsorefer to Alarm Hysteresis, Latching Relay, Logical Alarm Combinations, Process High Alarmand Process Low Alarm.A2.02<strong>Manual</strong> Number: 702683-0001 Rev.: A August, 2006 Appendix 2
DYNAPAR brand PRODUCT MANUAL: Series <strong>S428A</strong> 1/8 DIN Process IndicatorAppendix 2 . GlossaryCommunications Write EnableType: General DefinitionEnables/disables the changing of parameter values via the RS485 communications link, ifthe communications option is installed. Possible settings are read only or read/write. Displaycode = [oen, default setting = r_WJ (read/write).Display StrategyType: General ParameterAlters the parameters displayed in normal operator mode. For example an indicator coulddisplay PV + AL 1, 2, 3, 4, 5, PV or SP only. Display strategy 6 will allow read only accessto the setpoint values in Operator Mode, Setup Mode must then be entered to change thesetpoint. Display code = Disp} Also refer to Process Variable.Elapsed TimeType: Indicator DefinitionThe total accumulated time that Alarm 1 has been active on an Indicator since this parameterwas last reset. This does not include the time when the alarm condition has cleared.The Elapsed Time is not affected by the Alarm 2 and Alarm 3 status. Also refer to AlarmOperation, and Indicator.IndicatorType: Indicator DefinitionAn instrument that can display a Process Variable. Alarm outputs are available that willactivate at preset PV values. Relay outputs can be selected to have a Latching functionsimilar to a Limit Controller output, but indicators do not have the necessary approvals forsafety critical applications. Other options are PV retransmission and Serial Communications.Process control functions are not available. Also refer to Alarm Operation, ElapsedTime, Latching Relay, Process Variable, Retransmit Output, Serial Communications, Tare.Input Filter Time ConstantType: General ParameterThis parameter is used to filter out extraneous impulses on the process variable. Thefiltered PV is used for all PV-dependent functions (display control, alarm etc). The timeconstant is adjustable from 0.0 seconds (off) to 100.0 seconds in 0.5 second increments.Display code = filt, Default value = 2.0 seconds. Also refer to Process Variable.Input RangeType: General DefinitionThis is the overall process variable input range and type as selected by the Set Valueparameter in Configuration Mode. Also refer to Input Span.Input SpanType: General DefinitionThe measuring limits, as defined by the Scale Range Lower and Scale Range UpperLimits.Also refer to Input Range, Scale Range Lower Limit and Scale Range Upper Limit.<strong>Manual</strong> Number: 702683-0001 Rev.: A August, 2006 Appendix 2 A2.03
DYNAPAR brand PRODUCT MANUAL: Series <strong>S428A</strong> 1/8 DIN Process IndicatorAppendix 2 . GlossaryLatching RelayType: General DefinitionA type of relay that, once it becomes active, requires a reset signal before it will deactivate.This output is available on indicator alarms. To successfully deactivate a latched relay, thealarm or alarm condition that caused the relay to become active must first be removed,then a reset signal can be applied. This signal may be applied from the instrument keypad,Digital Input or command via Serial Communication. Also refer to Alarm Operation, Indicator,Alarm Hysteresis, Serial Communications.LEDType: General DefinitionLight Emitting Diode. LED’s are used as indicator lights (e.g. for the alarm indication). The7-segment display is also LED.s.Lock CodesType: General ParameterDefines the codes required to enter Configuration (20) & Set-Up (10).Display codes = cloc & sloc, default values shown above in brackets.Logical Combination of AlarmsType: General DefinitionTwo alarms may be combined logically to create an OR situation. Any suitable output maybe assigned as a Logical Alarm Output, configured for Reverse-acting or Direct action. Alsorefer to Alarm Operation.mADCType: General DefinitionThis stands for milliamp DC. It is used in reference to the DC milliamp input ranges and thelinear DC milliamp outputs. Typically, these will be 0 to 20mA or 4 to 20mA.Multi-Point Scaling EnableType: Indicator ParameterWhen an Indicators Multi-Point Scaling function is enabled by setting m7p5 to enab inConfiguration Mode, up to 9 breakpoints can be defined to linearize the input signal. Thisonly applies to mA, mV or Voltage input types. For each breakpoint, an input scale value isentered, followed by the value to be shown at the breakpoint.Display code = m7p5 default setting = disaAlso refer to Indicator, Multipoint Scaling Set Up and Process Variable.A2.04<strong>Manual</strong> Number: 702683-0001 Rev.: A August, 2006 Appendix 2
DYNAPAR brand PRODUCT MANUAL: Series <strong>S428A</strong> 1/8 DIN Process IndicatorAppendix 2 . GlossaryMulti-Point Scaling Set UpType: Indicator ParameterFor each breakpoint, the input scale value (scan) is entered as a percentage of the inputspan, followed by the value to be shown (disn) in display units, for this input value. Eachbreakpoint’s input scale value must be higher than the previous value, but the displayvalues can be either higher or lower. This procedure is repeated for up to nine breakpoints,but if any scale value is set to 100% if automatically becomes the last in the series.Also refer to Indicator, Multipoint Scaling Enable and Process Variable.PLCType: General DefinitionThis stands for Programmable Logic Controller. A microprocessor based device used inmachine control. It is particularly suited to sequential control applications, and uses LadderLogic programming techniques. Some PLC’s are capable of basic PID control, but tend tobe expensive and often give inferior levels of control.Process High Alarm 1 ValueType: General ParameterThis parameter, applicable only when Alarm 1 is selected to be a Process High alarm,defines the process variable value above which Alarm 1 will be active. Its value may beadjusted between Scale Range Upper Limit and Scale Range Lower Limit.Display code = pKa1, Default value = Scale Range Upper Limit.Also refer to Alarm Operation, Process High Alarm 2 Value, Process Variable, Scale RangeLower Limit and Scale Range Upper Limit.Process High Alarm 2 ValueType: General ParameterThis parameter, applicable only when Alarm 2 is selected to be a Process High alarm. It issimilar to the Process High Alarm 1 Value. Display code = pKa2, Default value = ScaleRange Upper Limit. Also refer to Alarm Operation, Process High Alarm 1 Value, ProcessVariable, Scale Range Lower Limit and Scale Range Upper Limit.<strong>Manual</strong> Number: 702683-0001 Rev.: A August, 2006 Appendix 2 A2.05
DYNAPAR brand PRODUCT MANUAL: Series <strong>S428A</strong> 1/8 DIN Process IndicatorAppendix 2 . GlossaryProcess Low Alarm 1 ValueType: General ParameterThis parameter, applicable only when Alarm 1 is selected to be a Process low alarm, definesthe process variable value below which Alarm 1 will be active. Its value may be adjustedbetween Scale Range Upper Limit and Scale Range Lower Limit.Display code = pla1, Default value = Scale Range Lower Limit. Also refer to Alarm Operation,Process Low Alarm 2 Value, Process Variable, Scale Range Lower Limit and ScaleRange Upper Limit.Process Low Alarm 2 ValueType: General ParameterThis parameter, applicable only when Alarm 2 is selected to be a Process low alarm. It issimilar to the Process Low Alarm 1 Value. Display code = pla2, default value = ScaleRange Lower Limit.Also refer to Alarm Operation, Process Low Alarm 1 Value, Process Variable, Scale RangeLower Limit and Scale Range Upper Limit.Process Variable (PV)Type: General DefinitionProcess Variable is the variable to be measured by the primary input of the instrument. ThePV can be any parameter that can be converted into a electronic signal suitable for theinput. Common types are Thermocouple or PT100 temperature probes, or pressure, level,flow etc from transducers which convert these parameters into linear DC signals (e.g. 4 to20mA). Linear signals can be scaled into engineering units using the Scale Range LowerLimit and Scale Range Upper Limit parameters.Also refer to Input Span, Scale Range Lower Limit and Scale Range Upper Limit.Retransmit OutputType: General DefinitionA linear DC voltage or mA output signal, proportional to the Process Variable for use byslave controllers or external devices, such as a Data Recorder or PLC. The output can bescaled to transmit any portion of the input span.Also refer to Input Span and Process Variable.Retransmit Output 1 Scale MaximumType: General ParameterScales a linear output module in slot 1 that has been set up to retransmit PV. RetransmitScale Maximum defines the value of the process variable at which the output will be at itsmaximum value. E.g. for a 0 to 5V output, the value corresponds to 5V. It may be adjustedwithin the range -1999 to 9999; the decimal position is always the same as that for theprocess variable input. If this parameter is set to a value less than that for RetransmitOutput 1 Scale Minimum, the relationship between the process variable and theretransmission output is reversed. Display code = roiK, default value = Scale RangeUpper Limit.Also refer to Process Variable, Retransmit Output, Retransmit Output 1 Scale Minimumand Scale Range Upper Limit.A2.06<strong>Manual</strong> Number: 702683-0001 Rev.: A August, 2006 Appendix 2
DYNAPAR brand PRODUCT MANUAL: Series <strong>S428A</strong> 1/8 DIN Process IndicatorAppendix 2 . GlossaryRetransmit Output 1 Scale MinimumType: General ParameterScales a linear output module in slot 1 that has been set up to retransmit PV. RetransmitScale Minimum defines the value of the process variable at which the output will be at itsminimum value. E.g. for a 0 to 5V output, the value corresponds to 0V. It may be adjustedwithin the range -1999 to 9999; the decimal position is always the same as that for theprocess variable input. If this parameter is set to a value greater than that for RetransmitOutput Scale Maximum, the relationship between the process variables and theretransmission output is reversed. Display code = roil, default value = Scale RangeLower Limit.Also refer to Process Variable, Retransmit Output, Retransmit Output 1 Scale Maximumand Scale Range Lower Limit.Retransmit Output 2 Scale MaximumType: General ParameterDefines the value of the process variable at which Retransmit Output 2 will be at its maximumvalue. It is similar to Retransmit Output 1 Scale Maximum.Display code = ro2K, default value = Scale Range Upper Limit.Also refer to Process Variable, Retransmit Output, Retransmit Output 2 Scale Minimumand Scale Range Upper Limit.Retransmit Output 2 Scale MinimumType: General ParameterDefines the value of the process variable at which Retransmit Output 2 will be at its minimumvalue. It is similar to Retransmit Output 1 Scale Minimum.Display code = roil, default value = Scale Range Lower Limit.Also refer to Process Variable, Retransmit Output, Retransmit Output 2 Scale Maximum,and Scale Range Lower Limit.Retransmit Output 3 Scale MaximumType: General ParameterDefines the value of the process variable at which Retransmit Output 3 will be at its maximumvalue. It is similar to Retransmit Output 1 Scale Maximum.Display code = ro3K, default value = Scale Range Upper Limit.Also refer to Process Variable, Retransmit Output, Retransmit Output 3 Scale Minimumand Scale Range Upper Limit.Retransmit Output 3 Scale MinimumType: General ParameterDefines the value of the process variable at which Retransmit Output 3 will be at its minimumvalue. It is similar to Retransmit Output 1 Scale Minimum.Display code = ro3l, default value = Scale Range Lower Limit.Also refer to Process Variable, Retransmit Output, Retransmit Output 3 Scale Maximum<strong>Manual</strong> Number: 702683-0001 Rev.: A August, 2006 Appendix 2 A2.07
DYNAPAR brandroiKPRODUCT MANUAL: Series <strong>S428A</strong> 1/8 DIN Process IndicatorAppendix 2 . Glossaryand Scale Range Lower Limit.Scale Range Upper LimitType: General ParameterFor linear inputs, this parameter is used to scale the process variable into engineeringunits. It defines the displayed value when the process variable input is at its maximumvalue. It is adjustable from -1999 to 9999 and can be set to a value less than (but not within100 units of) the Scale Range Lower Limit, in which case the sense of the input is reversed.For thermocouple and RTD inputs, this parameter is used to reduce the effectiverange of the input. All span related functions work from the trimmed input span. The parametercan be adjusted within the limits of the range selected by Configuration Mode parameterinpt. It is adjustable to within 100 degrees of the Scale Range Lower Limit.Display code rul, default value = 1000 for linear inputs or range maximum for temperatureinputs.Also refer to Input Span, Process Variable and Scale Range Lower Limit.Scale Range Lower LimitType: General ParameterFor linear inputs, this parameter can be used to display the process variable in engineeringunits. It defines the displayed value when the process variable input is at its minimumvalue. It is adjustable from -1999 to 9999 and can be set to a value more than (but notwithin 100 units of) the Scale Range Upper Limit, in which case the sense of the input isreversed. For thermocouple and RTD inputs, this parameter is used to reduce the effectiverange of the input. All span related functions, work from the trimmed span. The parametercan be adjusted within the limits of the range selected by Configuration Mode parameterinpt. It is adjustable to within 100 degrees of the Scale Range Upper Limit.Display code = rul, default value = 0 for linear inputs, or range minimum for temperatureinputs.Also refer to Input Span, Process Variable and Scale Range Upper Limit.Serial Communications OptionType: General DefinitionA feature that allows other devices such as PC’s, PLC’s or a master controller to read orchange an instruments parameters via an RS485 Serial link. Full details can be found inthe Serial Communications sections of this manual.Also refer to Indicator and PLCSolid State Relay (SSR)Type: General DefinitionAn external device manufactured using two silicone controlled rectifiers, which can be usedto replace mechanical relays in most AC power applications. As a solid state device, anSSR does not suffer from contact degradation when switching electrical current. Muchfaster switching cycle times are also possible, leading to superior control. The instrument.sSSR Driver output is a 10VDC pulse which causes conduction of current to the load whenthe pulse is on.Also refer to Triac.A2.08<strong>Manual</strong> Number: 702683-0001 Rev.: A August, 2006 Appendix 2
DYNAPAR brand PRODUCT MANUAL: Series <strong>S428A</strong> 1/8 DIN Process IndicatorAppendix 2 . GlossaryTareType: Indicator ParameterWhen an Indicator’s Tare function has been enabled, the operator can set the currentProcess Variable input value to be displayed as zero. This function may be used to easilyeliminate any offset on the input signal, e.g. when a transducer output is not giving a truezero value. It may also be used in applications displaying the weight of a product, to removethe weight of a container before starting. When Tare is activated, the instrumentautomatically sets the PV Offset to an equal, but opposite value to the current measuredvalue.Display code = tare, default setting = disa (disabled).Also refer to Indicator and Process Variable.TriacType: General DefinitionA small internal solid state device, which can be used in place of a mechanical relay inapplications switching low power AC, up to 1 amp. As a solid-state device, a Triac does notsuffer from contact degradation when switching electrical currents. A triac cannot be usedto switch DC power.Also refer to SSR.<strong>Manual</strong> Number: 702683-0001 Rev.: A August, 2006 Appendix 2 A2.09
DYNAPAR brand PRODUCT MANUAL: Series <strong>S428A</strong> 1/8 DIN Process IndicatorAppendix 3. Complete SpecificationNOTESA3.00<strong>Manual</strong> Number: 123456-987 Rev.: 0 August, 2006 Appendix 3
DYNAPAR brand PRODUCT MANUAL: Series <strong>S428A</strong> 1/8 DIN Process IndicatorAppendix 3. Complete SpecificationUniversal InputGeneral Input SpecificationInput Sample Rate:Four samples/second.Digital Input Filter time constantInput Resolution:0.0 (OFF), 0.5 to 100.0 seconds in 0.5 second increments.14 bits approximately.Always four times better than display resolution.Input Impedance: 10V DC 47K-Ohm20mA DC:5 OhmOther ranges:Greater than 10M-Ohm resistiveIsolation:Isolated from all outputs (except SSR driver). If single relay outputs areconnected to a hazardous voltage source, and the universal input isconnected to operator accessible circuits, supplementary insulation or inputgrounding is required.PV Offset:Adjustable ±input span.PV Display:Displays process variable up to 5% over and 5% under span.ThermocoupleThermocouple Ranges AvailableSensor Range Min. Range Max. Range Min. Range Max. ResolutionType in °C in °C in °F in °FJ (default) -200 1200 -328 2192 1°J -128.8 537.7 -199.9 999.9 0.1°T -240 400 -400 752 1°T -128.8 400.0 -199.9 752.0 0.1°K -240 1373 -400 2503 1°K -128.8 537.7 -199.9 999.9 0.1°L 0 762 32 1403 1°L 0.0 537.7 32.0 999.9 0.1°N 0 1399 32 2551 0.1°B 100 1824 211 3315 1°R 0 1759 32 3198 1°S 0 1762 32 3204 1°C 0 2320 32 4208 1°PtRh20%: 0 1850 32 3362 1°PtRh40%Note:Defaults to °F for USA units. The Configuration Mode parameters, Scale Range Upper Limit and Scale Range LowerLimit, can be used to restrict range.<strong>Manual</strong> Number: 123456-987 Rev.: 0 August, 2006 Appendix 3 A3.01
DYNAPAR brand PRODUCT MANUAL: Series <strong>S428A</strong> 1/8 DIN Process IndicatorAppendix 3. Complete SpecificationThermocouple PerformanceCalibration:Measurement Accuracy:Linearisation Accuracy:Cold Junction Compensation:Temperature Stability:Supply Voltage Influence:Relative Humidity Influence:Sensor Resistance Influence:Sensor Break Protection:Complies with BS4937, NBS125 and IEC584.±0.1% of full range span ±1LSD.NOTE: Reduced performance for B Thermocouple from 100 to 600°C.NOTE: PtRh 20% vs PtRh 40% Thermocouple accuracy is 0.25% and hasreduced performance below 800°C.Better than ±0.2°C any point, for 0.1° resolution ranges (±0.05°C typical).Better than ±0.5°C any point, for 1° resolution ranges.Better than ±0.7°C under reference conditions.Better than ±1°C under operating conditions.0.01% of span/°C change in ambient temperature.Negligible.Negligible.Thermocouple 100 Ohms:
DYNAPAR brand PRODUCT MANUAL: Series <strong>S428A</strong> 1/8 DIN Process IndicatorAppendix 3. Complete SpecificationRTD PerformanceType:Calibration:Measurement Accuracy:Linearization Accuracy:Temperature Stability:Supply Voltage Influence:Relative Humidity Influence:Sensor Resistance Influence:Lead Compensation:RTD Sensor Current:Sensor Break Protection:Three-wire Pt100.Complies with BS1904 and DIN43760 (0.00385././°C).±0.1% of span ±1LSD.Better than ±0.2°C any point, any 0.1°C range (±0.05°C typical).Better than ±0.5°C any point, any 1°C range.Negligible.Negligible.Pt100 50 Ohm/lead:
DYNAPAR brand PRODUCT MANUAL: Series <strong>S428A</strong> 1/8 DIN Process IndicatorAppendix 3. Complete SpecificationDigital InputsType:Voltage-Free Operation:functions depend on modeland how configuredTTL levels:functions depend on modeland how configuredMaximum Input Delay (OFF-ON):Maximum Input Delay (ON-OFF):Isolation:Voltage-free or TTL-compatibleConnection to contacts of external switch or relay:Open= No ActionClosed= Latching Relay, Stored Min/Max/Time reset (edge triggered) or Tare activate (edge triggered). Maximum contact resistance = 50 Ohm.2.0 to 24VDC = No Action0.6 to 0.8VDC= Latching Relay, Stored Min/Max/Time reset (edgetriggered) or Tare activate (edge triggered).0.25 second.0.25 second.Reinforced safety isolation from any source of hazardous voltages.A3.04<strong>Manual</strong> Number: 123456-987 Rev.: 0 August, 2006 Appendix 3
DYNAPAR brand PRODUCT MANUAL: Series <strong>S428A</strong> 1/8 DIN Process IndicatorAppendix 3. Complete SpecificationOutput SpecificationsOutput Module TypesOption Slot 1 Module Options:Option Slot 2 Module Options:Option Slot 3 Module Options:Relay, SSR drive, Triac or DC linear.Relay, Dual Relay, SSR drive, Triac or DC linear.Relay, Dual Relay, SSR drive, DC Linear or Transmitter PSU.Specifications of Output TypesSingle Relay:Dual Relay:SSR Driver:Contact Type:Alarm Rating:Control/Alarm Lifetime:Isolation:Contact Type:Alarm Rating:Control/Alarm Lifetime:Isolation:Drive Capability:Isolation:Single pole double throw (SPDT).2A resistive at 240V AC>500,000 operations at ratedvoltage/current.Basic Isolation from universal inputand SSR outputs.2 x Single pole single throw(SPST) with shared common.2A resistive at 240VA.>200,000 operations at ratedvoltage/current.Reinforced safety isolation frominputs and other outputs.10V minimum at up to 20mA load.Not isolated from universal input orother SSR driver outputs.<strong>Manual</strong> Number: 123456-987 Rev.: 0 August, 2006 Appendix 3 A3.05
DYNAPAR brand PRODUCT MANUAL: Series <strong>S428A</strong> 1/8 DIN Process IndicatorAppendix 3. Complete SpecificationTriac:Linear DC:Operating Voltage Range:Current Rating:Max. Non-repetitive SurgeCurrent (16.6ms):Min. OFF-State dv/dt @ RatedVoltage:Max. OFF-State leakage @ RatedVoltage:Max. ON-State Voltage Drop @Rated Current:Repetitive Peak OFF-stateVoltage, Vdrm:Isolation:Resolution:Update Rate:Ranges:Load Impedance:Accuracy:Isolation:Use as 0 to 10VDC transmitterpower supply*20 to 280Vrms @47 to 63Hz.0.01 to 1A (full cycle rms on-state @25°C); derates linearly above 40°C to0.5A @ 80°C.25A peak.500V/µs.1mA rms.1.5V peak.600V minimum.Reinforced safety isolation from inputsand other outputs.Eight bits in 250mS(10 bits in 1 second typical, >10 bits in>1 second typical).Every control algorithm execution0 to 10V 0 to 20mA0 to 5V 4 to 20mA2 to 10V (default)0 to 20mA & 4 to 20mA:500 Ohm maximum.0 to 5V, 0 to 10V & 2 to 10V:500 Ohm minimum.Short circuit protected±0.25% (mA @ 250 Ohms, V @ 2k Ohm).Degrades linearly to ±0.5% forincreasing burden (to specification limits).Reinforced safety isolation from inputsand other outputs.Adjustable, 0.0 to 10.0V (regulated)output into 500 Ohm minimum.Transmitter PowerSupply: *see Linearoutput spec for0-10V PSUPower RatingIsolation:19 to 28VDC (24V nominal) into 910 Ohmminimum resistance.Reinforced safety isolation from inputsand other outputs.A3.06<strong>Manual</strong> Number: 123456-987 Rev.: 0 August, 2006 Appendix 3
DYNAPAR brand PRODUCT MANUAL: Series <strong>S428A</strong> 1/8 DIN Process IndicatorAppendix 3. Complete SpecificationProcess AlarmsMaximum Number of Alarms:Combinatorial Alarms:Five “soft” alarms (process high or low)Logical OR of alarms to any suitable output.Digital CommunicationsType:Protocols Supported:Physical Layer:Zone address range:Bit Rate:Bits per character:Stop Bits:Parity:Isolation:Asynchronous Serial.Modbus RTU (all models) and ASCII (somemodels).RS485.1 to 99 (ASCII), 1 to 255 (Modbus).1200, 2400, 4800, 9600 and 19200 bps.ASCII: 10Modbus: 10 or 11 (depending on parity setting)1ASCII: Even (fixed).Modbus: None, even or odd (selectable).Reinforced safety isolation from inputs andoutputs.Reference ConditionsAmbient Temperature:20°C ±2°C.Relative Humidity: 60 to 70%.Supply Voltage: 100 to 240V AC 50Hz ±1%.Source Resistance:
DYNAPAR brand PRODUCT MANUAL: Series <strong>S428A</strong> 1/8 DIN Process IndicatorAppendix 3. Complete SpecificationOperating ConditionsAmbient Temperature (operating):Ambient Temperature (storage):Relative Humidity:Altitude:Supply Voltage:Power Consumption:Source Resistance:PT100 Input Lead Resistance:0°C to 55°C.-20°C to 80°C.20% to 95% non-condensing.Up to 2000m above sea level.Either 100 to 240V ±10% AC 50/60Hzor 20 to 48V AC 50/60Hz & 22 to 55V DC5W / 7.5 VA maximum.1000 Ohm maximum (thermocouple).50 Ohm per lead maximum, balancedStandardsConformance Norms:EMC standards:Safety Standards:Front Panel Sealing:CE, UL, ULC.EN61326*EN61010 and UL3121.Pollution Degree 2, Installation Category II.IP66Note:*For disturbances induced by RF fields of 10V/m 80% AM at 1kHz the input accuracyspecification is changed to 0.25% in the frequency bands 465 to 575 MHz and 630 to660 MHz.Physical SpecificationsDepth behind panel:Front bezel size (w x h):Mounting:Panel cut-out size (w x h):Terminals:Weight:100mm96 x 48mmPlug-in with panel mounting fixing strap.92 x 45mmScrew type (combination head).0.21kg maximum.A3.08<strong>Manual</strong> Number: 123456-987 Rev.: 0 August, 2006 Appendix 3
DYNAPAR brand PRODUCT MANUAL: Series <strong>S428A</strong> 1/8 DIN Process IndicatorAppendix 3. Complete SpecificationNOTES<strong>Manual</strong> Number: 123456-987 Rev.: 0 August, 2006 Appendix 3 A3.09
DYNAPAR brand PRODUCT MANUAL: Series <strong>S428A</strong> 1/8 DIN Process IndicatorNOTESAppendix 3. Complete SpecificationA3.010<strong>Manual</strong> Number: 123456-987 Rev.: 0 August, 2006 Appendix 3
DYNAPAR brand PRODUCT MANUAL: Series <strong>S428A</strong> 1/8 DIN Process Indicator3 Year Warranty and Return StatementThese products are sold by <strong>Danaher</strong> Idustrial Controls under the warranties set forth inthe following paragraphs. Such warranties are extended only with respect to a purchaseof these products, as new merchandise, directly from <strong>Danaher</strong> Industrial Controls or froman authorized product distributor, representative or reseller, and are extended only to thefirst buyer thereof who purchases them other than for the purpose of resale.3 Year WarrantyThese products are warranted to be free from functional defects in materials and workmanshipat the time the products leave the factory and to conform at that time to thespecifications set forth in the relevant instruction manual or manuals, sheet or sheets, forsuch products for a period of three years.THERE ARE NO EXPRESSED OR IMPLIED WARRANTIES WHICH EXTEND BEYONDTHE WARRANTIES HEREIN AND ABOVE SET FORTH. DANAHER INDUSTRIAL CON-TROLS MAKES NO WARRANTY OF MERCHANTABILITY OR FITNESS FOR A PAR-TICULAR PURPOSE WITH RESPECT TO THE PRODUCTS.Limitations<strong>Danaher</strong> Industrial Controls shall not be liable for any incidental damages, consequentialdamages, special damages, or any other damages, costs or expenses excepting only thecost or expense of repair or replacement as described above.<strong>Products</strong> must be installed and maintained in accordance with the instructions. Users areresponsible for the suitability of the products to their application. There is no warrantyagainst damage resulting from corrosion, misapplication, improper specifications or otheroperating condition beyond our control. Claims against carriers for damage in transit mustbe filed by the buyer.This warranty is void if the purchaser uses non-factory approved replacement parts andsupplies or if the purchaser attempts to repair the product themselves or through a thirdparty without <strong>Danaher</strong> Industrial Controls authorization.Returns<strong>Danaher</strong> Industrial Controls’ sole and exclusive obligation and buyer’s sole and exclusiveremedy under the above warranty is limited to repairing or replacing (at <strong>Danaher</strong> IndustrialControls’ option), free of charge, the products which are reported in writing to<strong>Danaher</strong> Industrial Controls at its main office indicated below.<strong>Danaher</strong> Industrial Controls is to be advised of return requests during normal businesshours and the technical support department will issue a return authorization number andshipping location at that time. Such returns are to include a statement of the observeddeficiency. The buyer shall prepay shipping charges for products returned and <strong>Danaher</strong>Industrial Controls or its representative shall pay for the return of the products to thebuyer.<strong>Manual</strong> Number: 702683-0001 Rev.: A August, 2006 General Information
<strong>Manual</strong> Number: 702683-0001 Rev.: A August, 2006