PVE and PVHC for PVG 32, PVG 100 and PVG 120 ... - Sauer-Danfoss
PVE and PVHC for PVG 32, PVG 100 and PVG 120 ... - Sauer-Danfoss
PVE and PVHC for PVG 32, PVG 100 and PVG 120 ... - Sauer-Danfoss

You also want an ePaper? Increase the reach of your titles
YUMPU automatically turns print PDFs into web optimized ePapers that Google loves.
Be<strong>for</strong>e replacing or<br />
dismounting a <strong>PVE</strong> or<br />
<strong>PVHC</strong><br />
Be<strong>for</strong>e replacing or<br />
dismounting a <strong>PVE</strong> or<br />
<strong>PVHC</strong> (continued)<br />
12 L1223449 • Rev AA • May 2012<br />
<strong>PVE</strong> <strong>and</strong> <strong>PVHC</strong> <strong>for</strong> <strong>PVG</strong> <strong>32</strong>, <strong>PVG</strong> <strong>100</strong> <strong>and</strong> <strong>PVG</strong> <strong>120</strong><br />
Service Manual<br />
Exchanging <strong>PVE</strong> or <strong>PVHC</strong><br />
These guidelines are only meant to point out issues that could be related to the<br />
application, the <strong>PVG</strong> <strong>and</strong> its actuator. <strong>Sauer</strong>-<strong>Danfoss</strong> can <strong>and</strong> will not give directives how<br />
work has to be planed <strong>and</strong> supervised.<br />
1. Ensure that the actuator has to be dismounted. Follow the trouble shooting<br />
procedure to make sure that the failure is not elsewhere in the application. See Service<br />
Manual <strong>for</strong> <strong>PVG</strong><strong>32</strong> <strong>and</strong> <strong>PVG</strong><strong>100</strong>.<br />
Digital actuators contain parameters. These parameters must also be in the replacing<br />
<strong>PVE</strong>D <strong>and</strong> must be backed up be<strong>for</strong>e removing the old <strong>PVE</strong>D.<br />
See description <strong>for</strong> parameter transfer <strong>for</strong> <strong>PVE</strong>D later.<br />
2. Clean surroundings on <strong>PVG</strong> <strong>for</strong> dirt <strong>and</strong> rust/oxidations; <strong>and</strong> do not use cleaning<br />
agents or methods that require higher IP than the actuator supports.<br />
3. Have a clean area to put new <strong>PVE</strong>/<br />
<strong>PVHC</strong> be<strong>for</strong>e mounting.<br />
4. Have a clean area to put old <strong>PVE</strong>/<br />
<strong>PVHC</strong> be<strong>for</strong>e eventually returning <strong>for</strong><br />
investigation.<br />
5. Have the right tools at h<strong>and</strong>.<br />
6. Ensure that spare part is the correct<br />
actuator .<br />
V310375.A<br />
7. Unpack replacing actuator:<br />
– If actuator has LVDT avoid mish<strong>and</strong>ling <strong>and</strong> bending of it<br />
– Ensure all O-rings are in place<br />
– Ensure new bolts are present<br />
– Ensure presence of eventually electrical connector sealing<br />
– Eventually clean off excessive oil with a soft tissue. <strong>PVE</strong> must still be coated with a<br />
thin oil film<br />
– Keep actuator protected from a pollution during the whole process. Keep in a bag.<br />
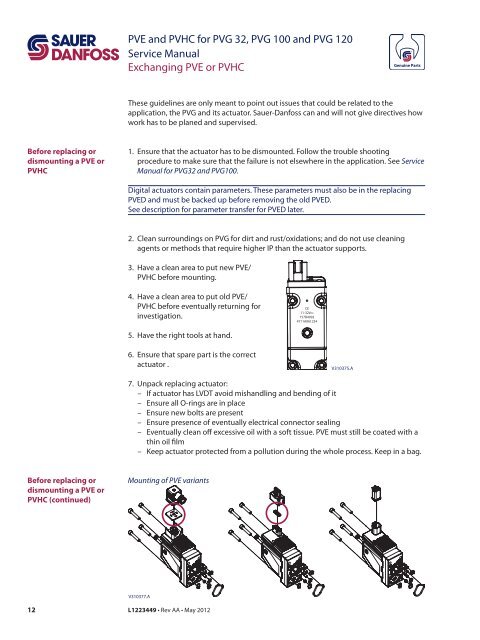
Mounting of <strong>PVE</strong> variants<br />
V310377.A<br />
CE<br />
11-<strong>32</strong>VDC<br />
157B4092<br />
4711A061234