Series 51 Hydraulic Proportional Controls HZ, HA ... - Sauer-Danfoss
Series 51 Hydraulic Proportional Controls HZ, HA ... - Sauer-Danfoss
Series 51 Hydraulic Proportional Controls HZ, HA ... - Sauer-Danfoss

Create successful ePaper yourself
Turn your PDF publications into a flip-book with our unique Google optimized e-Paper software.
Overview<br />
General Instructions<br />
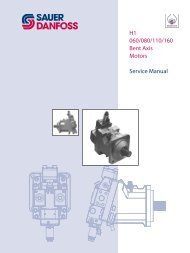
<strong>Series</strong> <strong>51</strong> <strong>Hydraulic</strong> <strong>Proportional</strong> <strong>Controls</strong><br />
Service Manual<br />
Introduction<br />
This manual includes information for the installation, maintenance, and minor repair<br />
of <strong>Series</strong> <strong>51</strong> hydraulic proportional controls. It includes a description of the unit and its<br />
individual components, and minor repair procedures.<br />
Performing minor repairs may require removal of the unit from the vehicle/machine.<br />
Thoroughly clean the unit before beginning maintenance, or repair activities. Since dirt<br />
and contamination are the greatest enemies of any type of hydraulic equipment, follow<br />
cleanliness requirements strictly. This is especially important when changing the system<br />
filter and when removing hoses or plumbing.<br />
A worldwide network of <strong>Sauer</strong>-<strong>Danfoss</strong> Global Service Partners is available for major<br />
repairs. <strong>Sauer</strong>-<strong>Danfoss</strong> Global Service Partners are trained by the factory and certified on<br />
a regular basis. You can locate your nearest Global Service Partner using the distributor<br />
locator at www.sauer-danfoss.com. Click on the Sales and Service link.<br />
Keep it Clean<br />
You can complete many repairs or adjustments without removing the unit from the<br />
machine, if the unit is accessible and you can thoroughly clean it before beginning any<br />
procedures.<br />
Cleanliness is a primary means of assuring satisfactory motor life on either new or<br />
repaired units. Clean the outside of the motor thoroughly before disassembly. Take care to<br />
avoid contamination of the system ports. Cleaning parts with a clean solvent wash and<br />
air drying is usually adequate.<br />
As with any precision equipment, keep all parts free of foreign materials and chemicals.<br />
Protect all exposed sealing surfaces and open cavities from damage and foreign material.<br />
Cap all hoses after removal, and plug all open ports. Cover any unattended parts with a<br />
protective layer of plastic.<br />
Inspect for System Contamination<br />
Inspect the motor for signs of system contamination. If you find contamination, fully<br />
disassemble, clean and inspect all components of the motor.<br />
Replace the O-rings and Gaskets<br />
Replace all O-rings and gaskets. Discard them only after you make certain that you have<br />
the correct replacement parts. Lightly lubricate all O-rings with clean petroleum jelly<br />
before assembly.<br />
Lubricate all Moving Parts<br />
During reassembly, coat all moving parts with a film of clean hydraulic oil. This helps<br />
lubricate the surfaces during start-up.<br />
For fluid quality requirements, refer to 520L0463 <strong>Hydraulic</strong> Fluids and Lubricants,<br />
Technical Information.<br />
Torque Procedure<br />
During reassembly, cross torque all retaining screws to the given value. Do not<br />
overtorque.<br />
11009446 • Rev AC • November 2010<br />
7