System 184 XT - Fagerberg
System 184 XT - Fagerberg
System 184 XT - Fagerberg
- No tags were found...

Create successful ePaper yourself
Turn your PDF publications into a flip-book with our unique Google optimized e-Paper software.
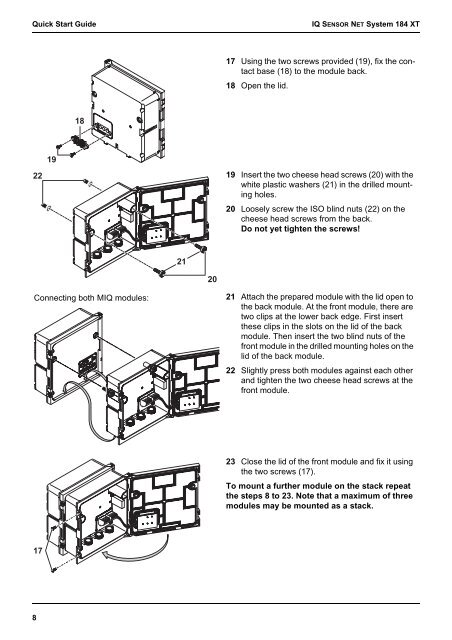
Quick Start GuideIQ SENSOR NET <strong>System</strong> <strong>184</strong> <strong>XT</strong>17 Using the two screws provided (19), fix the contactbase (18) to the module back.18 Open the lid.18192219 Insert the two cheese head screws (20) with thewhite plastic washers (21) in the drilled mountingholes.20 Loosely screw the ISO blind nuts (22) on thecheese head screws from the back.Do not yet tighten the screws!2120Connecting both MIQ modules:21 Attach the prepared module with the lid open tothe back module. At the front module, there aretwo clips at the lower back edge. First insertthese clips in the slots on the lid of the backmodule. Then insert the two blind nuts of thefront module in the drilled mounting holes on thelid of the back module.22 Slightly press both modules against each otherand tighten the two cheese head screws at thefront module.23 Close the lid of the front module and fix it usingthe two screws (17).To mount a further module on the stack repeatthe steps 8 to 23. Note that a maximum of threemodules may be mounted as a stack.178