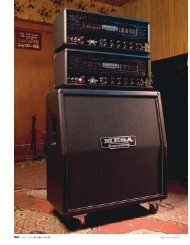
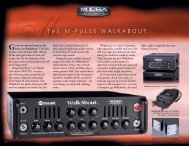
OVERVIEW: (Continued)4 provide different levels of the same lower gain solo sound. Conversely, a Rock player might configure 1 & 2 for semi-clean andpushed rhythm sounds respectively and dedicate 3 & 4 to high gain crunch rhythm and lead sounds using different settings of thesame modes.This type of preamp versatility means you will never have to compromise, even when you change bands or venture into a new anddifferent style with your playing…and you’ve chosen an amp that will grow with you.This awesome preamp power is then sent to the <strong>Road</strong> <strong>King</strong>s’ Effects Loop section and we have provided both Series and ParallelLoops to assure a match to whatever type of processing you choose. These may be used individually or combined, and may beprogrammed active in any of the channels or, footswitched in and out on the fly.From there we reach the coolest feature of all and the reason why the <strong>Road</strong> <strong>King</strong> is just that…our patented Progressive Linkageswitchable, and in this case assignable, power section. That’s right, any of the 4 preamps can be combined with any one of the 5power section configurations! You choices are the bubbly, elastic 2 x 6L6; the urgent, brash 2 x EL34; the tight, bold 4 x 6L6; theelusive, stinging 2 x 6L6 + 2 x EL34; and the huge, dominating power of 4 x 6L6 + 2 x EL34.Each of these power configurations lends its own personality and when matched with the right preamp can sonically define a musicalstyle. But it doesn’t end there…the <strong>Road</strong> <strong>King</strong> also features Rectifier Tracking, a feature which automatically matches the type ofrectification for each of the preamp / power sections you have configured. This means you can tune the power feel even further to thesound you are creating. You might want a lower wattage clean sound with the loose, airy feel of Tube Rectification and a high gain leadsound with higher power and the tight tracking bass response of the Solid State rectifier or vice versa. Many combinations arepossible and the best part is that Rectifier Tracking follows your choices in power sections to always mate the proper amount ofrectification for a given string of tubes. For example, if you are using either 2 x 6L6 or 2 x EL 34 and you choose Tube rectification, 1x 5U4G will be applied. If you use either 4 x 6L6 or 2 x 6L6 + 2 x EL34 2 x 5U4G will be used. And finally, if you choose to run all sixpower tubes (4 x 6L6 + 2 x EL34) then the Silicon Diodes will be called up, ensuring that you have maximum headroom at all times.This Rectifier Tracking feature provides one more layer of focus to an already mindbending array of sounds to create the mostexpressive amplifier available anywhere.And if this versatility isn’t enough, add to the palate Programmable Channel-specific Speaker Switching! That’s right, you can utilizetwo different types of speaker enclosures to enhance different sonic characteristics and combine these choices with each Channel/Mode scheme. Use an open back 2 x 12 cabinet for more shimmering clean performance and switch to a closed back 2 x 12 for abigger, more compressed lead sound. There are even provisions for using two cabinets of different impedance loads…the choice isyours.The <strong>Road</strong> <strong>King</strong> incorporates a rich analog Reverb, which is controlled per channel with the Rear Panel Reverb controls and may beswitched in and out via the <strong>King</strong> Kontroller.Our SOLO feature is an additional Output Level control that is wired in parallel to the Output and provides a pre-assignable, footswitchableboost for stepping out when it’s time to solo.A built-in Variac, our patented SPONGY/BOLD switch, is also included which enables you to reduce the A.C. line voltage for a looserfeel and increased upper harmonic spread resulting in that brown sound that has the elusive sag.And finally, to keep you in constant control of all the features aboard this vehicle of expression, we have supplied one of the mightiestfootswitches around…the <strong>King</strong> Kontroller. All possible Channels, Functions and Features are there for your instant access andtheir status is monitored by LED illumination.So with an overview of the basic layout of the <strong>Road</strong> <strong>King</strong> behind us, let’s get ready to play.1.) After unpacking the amplifier remove the plastic webbing from all of the tubes (including the preamp tubes behind the row ofpower and rectifier tubes) and make sure all tubes are seated firmly in their sockets.PAGE 2
Getting Started:2.) Install the 5U4 Rectifier tubes (if they are not already in place) by bending back the spring steel tube clamps just enough so thatthe base of the tube will have to barely push the clamps out of the way as they go in. Be sure to line up the guide with the slot inthe socket, don’t force it…when it is lined up it will fit in the socket easily. When the tube is lined up gently press the tube into thesocket while rocking it back and forth until it is seated.3.) Connect the 8 Pin DIN Footcontroller Cable to the female DIN connector located on the Rear Panel just under the Rotary ModeSelect Switch.4.) Connect your speaker enclosure(s) to the proper impedance SPEAKER OUTPUT jacks “A & B”. If only one speaker cabinet is tobe used make sure that the dummy plug connected to the chassis is connected to the “B” jack to prevent accidental outputtransformer damage due to a “no load” scenario.5.) Connect the A.C. Power Cable to a grounded A.C. outlet.6.) Flip the A.C. Mains switch to the ON position and wait at least 30 seconds for the power tube filaments to warm up with the HIVOLTS switch in the down position. This cold start procedure prolongs tube life so try to follow it each time you power up theamplifier.7.) Turn the Front Panel OUTPUT control to zero before flipping the HI VOLTS switch to the ON position. This will prevent accidentalsettings that are too loud for the room and your ears. These amplifiers are LOUD and are capable of extreme volumes and shouldbe used with care to avoid damage to your hearing. Starting each power up with the OUTPUT control zero-ed help to eliminatepainful and/or embarrassing situations.8.) Flip the HI VOLTS to the ON position and enjoy your new realm.Helpful Hints:1.) The Rear Panel CHANNEL SELECT Rotary switch must be set to FOOTSWITCH to access either Channels or features via thefootcontroller.2.) The OUTPUT and SOLO controls work only if the Effects Loop is active. Switch out of the LOOP BYPASS position in theEFFECTS LOOP section of the Rear Panel.3.) Should you select a Channel when the Cabinet Switching Feature is not being used and experience either low output or abroken-up or distorted signal, or no signal at all… Check that the SPKR ASSIGN mini toggle in that Channels’ Strip is notassigned to SPKR “A + B” or “B”.4.) The SOLO Control is activated when the Footcontroller is connected to the FOOTSWITCH jack on the Rear Panel and theEffects Loop is taken out of LOOP BYPASS and activated. When the Footcontroller is not connected the SOLO control will haveno effect on the signal.5.) When the Parallel Loop is activated it is normal to hear the volume drop a bit. Use the SEND LEVEL Control to bring the levelback up even if no processor is in the Loop.6.) The SOLO feature can be used to set a volume level above that of the OUTPUT control setting. It will not allow a setting belowthat of the OUTPUT control.7.) The GAIN and TREBLE controls are the most powerful controls in all four channels. They should be used with taste and you willfind that many of the best sounds are found with the controls set somewhere in their middle regions. Avoid setting the TREBLEabove 2:00 when the GAIN is maxed as the possibility of unwanted noise and squealing from microphonic tubes increasesdramatically above this setting.PAGE 3