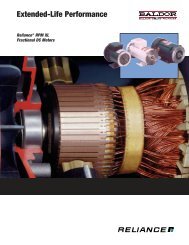
FlexPak 3000 Digital DC Drive Hardware ... - Reliance Electric
FlexPak 3000 Digital DC Drive Hardware ... - Reliance Electric
FlexPak 3000 Digital DC Drive Hardware ... - Reliance Electric
- No tags were found...

Create successful ePaper yourself
Turn your PDF publications into a flip-book with our unique Google optimized e-Paper software.
2.4 Install the MotorStep 1. Verify that the motor is the appropriate rating to use with the drive.Step 2. Install the <strong>DC</strong> motor in accordance with its installation instructions.Step 3. Make sure that coupled applications have proper shaft alignment with thedriven machine or that belted applications have proper sheave/belt alignmentto minimize unnecessary motor loading.Step 4. If the motor is accessible while it is running, install a protective guard aroundall exposed rotating parts.Step 5. Wire the motor to the drive. Refer to section 2.6.4, “Wire the <strong>DC</strong> Motor to the<strong>Drive</strong>.”2.5 General Wiring Practices!ATTENTION:The user is responsible for conforming to the National<strong>Electric</strong> Code (NEC/CEC) and all other applicable local codes. Wiringpractices, grounding, disconnects, and overcurrent protection are ofparticular importance. Size and install all wiring in conformance with theNEC/CEC and all other applicable codes. Failure to observe thisprecaution could result in severe bodily injury or loss of life.The drive is designed for AC power entry and <strong>DC</strong> power exiting at the top and controland signal wiring entering from the bottom.Reference signal wiring should be run in a separate conduit isolated from all AC and<strong>DC</strong> power and control. Signal wires should not be run in parallel with high voltage orelectrically noisy conductors. Always cross such conductors at 90°. All referencesignals should be wired with either twisted double or twisted triple conductor wire, 2twists per inch, stranded copper, AWG No. 16, 600 VAC rated, poly-vinyl chlorideinsulation, with a temperature range of 40°C to 105°C (104°F to 221°F).Tachometer feedback and other signal wiring should be run in a separate conduitisolated from all AC and <strong>DC</strong> power and logic control. Wiring should be the same as forthe reference signals. For mounting with external contacts and solenoids, coils shouldbe suppressed to reduce noise.Important: The maximum recommended wire length from the drive to the motor is1000 feet.2.5.1 Ground the <strong>Drive</strong> and Enclosure, the Motor and the Operator'sControl StationYou must ground both the control and power wiring.Step 1. Locate the drive ground points as shown in figures 2.8 through 2.13.Step 2. Run a suitable equipment grounding conductor unbroken from any driveground point (see step 1) to the plant ground (grounding electrode). A ringlug is recommended at the ground point.Step 3. Connect a suitable grounding conductor from each conduit to this driveground point.Install and Wire the <strong>Drive</strong> 2-9