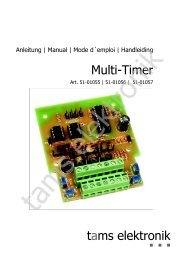
FD-5 - Tams
FD-5 - Tams
FD-5 - Tams

You also want an ePaper? Increase the reach of your titles
YUMPU automatically turns print PDFs into web optimized ePapers that Google loves.
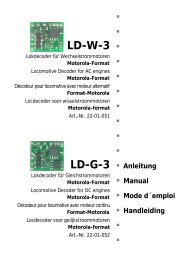
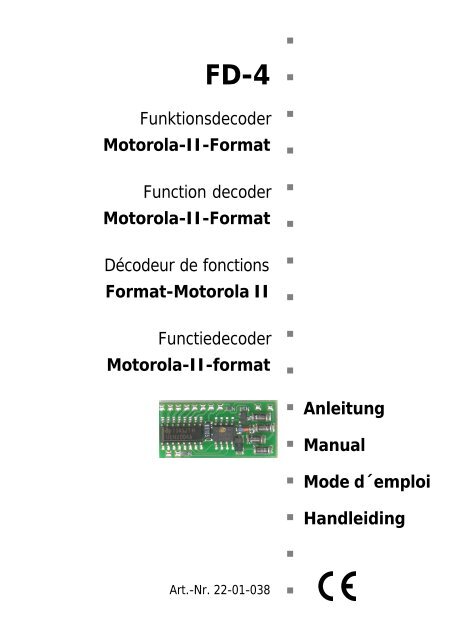
•<strong>FD</strong>-4 • •FunktionsdecoderMotorola-II-Format•Function decoderMotorola-II-Format••Décodeur de fonctionsFormat-Motorola II•••FunctiedecoderMotorola-II-format•• Anleitung• Manual• Mode d´emploi• Handleiding•Art.-Nr. 22-01-038•
© 01/2002 <strong>Tams</strong> Elektronik GmbHAlle Rechte, insbesondere das Recht derVervielfältigung und Verbreitung sowie derÜbersetzung vorbehalten. Vervielfältigungenund Reproduktionen in jeglicher Formbedürfen der schriftlichen Genehmigungdurch die <strong>Tams</strong> Elektronik GmbH.Technische Änderungen vorbehalten.© 01/2002 <strong>Tams</strong> Elektronik GmbHAll rights reserved. No part of thispublication may be reproduced ortransmitted in any form or by any means,electronic or mechanical, includingphotocopying, without prior permission inwriting from <strong>Tams</strong> Elektronik GmbH.Subject to technical modification.© 01/2002 <strong>Tams</strong> Elektronik GmbHTout droits réservés, en particulier les droitsde reproduction et de diffusion ainsi que letraduction. Toute duplication oureproduction sous quelque forme que ce soitnécessite l´accord écrit de la societé <strong>Tams</strong>Elektronik GmbH.Sous réserve de modifications techniques.© 01/2002 <strong>Tams</strong> Elektronik GmbHAlle rechten voorbehouden. Niets uit dezepublicatie mag worden vermenigvuldigdopgeslagen of openbaar gemaakt, zondervoorafgaande schriftelijke toestemming van<strong>Tams</strong> Elektronik GmbH.Technische wijzigingen voorbehouden.•••• Deutsch 3• English 18• Français 31• Nederlands 45•••••••••••••
<strong>FD</strong>-5EnglishTable of contentsHow to use this manual 18Intended use 18Safety instructions 19EMC declaration 21INFORMATION: Speed mode 21INFORMATION: Configuration variables 21Operation overview 22Technical specifications 24Checking the package contents 24Required tools and consumables 24Safe and correct soldering 25Performing a visual check 25Mounting the function decoder 26Programming the function decoder 28FAQ 29Manufacturer's note 29Certification 30Conditional warranty 30Connections Diagram (Fig. 1)Circuit Diagram (Fig. 2)III(Pages I and II in the centre of this handbook are removeable.)Page 17
English<strong>FD</strong>-5How to use this manualIf you have no specialist technical training, this manual gives step-bystepinstructions for safe and correct fitting of the module, andoperation. Before you start, we advise you to read the whole manual,particularly the chapter on safety instructions and the FAQ chapter. Youwill then know where to take care and how to prevent mistakes whichtake a lot of effort to correct.Keep this manual safely so that you can solve problems in the future. If youpass the module on to another person, please pass on the manual with it.Intended use! Caution:Integrated circuits are very sensitive to static electricity. Do not touchcomponents without first discharging yourself. Touching a radiator orother grounded metal part will discharge you.The module can be used according to the specifications of this manual.It is designed for a mounting in a model railway locomotive or in amodel railway carriage. It evaluates the DCC format data sent by thedigital control unit to its address. The decoder has 7 outputs for theconnection of optional accessories.The module is not suitable for children under the age of 14.Reading, understanding and following the instructions in this manualare mandatory for the user. Any other use of the module isinappropriate and invalidates any guarantees.Page 18
<strong>FD</strong>-5EnglishSafety instructionsMechanical hazardsCut wires can have sharp ends and can cause serious injuries. Watchout for sharp edges when you pick up the PCB.Visibly damaged parts can cause unpredictable danger. Do not usedamaged parts: recycle and replace them with new ones.Electrical hazards• Touching powered, live components,• touching conducting components which are live due to malfunction,• short circuits,• connecting the circuit to a higher voltage than designed,• impermissibly high humidity,• condensation of watercan cause serious injury due to electrical shock. Take the followingprecautions to prevent this danger:• Never perform wiring on a powered module.• Only use low power for this module as described in this manual andonly use certified transformers.• Connect transformers and soldering stations only in approved mainssockets installed by an authorised electrician.• Observe cable diameter requirements.• After the condensation of water do not start working until after aminimum of 2 hours of acclimatisation.• Mounting the module should only be done in closed, clean, dryrooms. Beware of humidity.• Use only original spare parts if you have to repair the module.Page 19
English<strong>FD</strong>-5Fire riskTouching flammable material with a hot soldering iron can cause lifethreateningfire, burns and toxic smoke. Connect your soldering iron orsoldering station only when actually needed. Use the correct solderingiron or station and never leave a hot soldering iron or stationunattended.Thermal dangerA hot soldering iron or liquid solder accidentally touching your skin cancause skin burns. As a precaution:• use a heat-resistant mat during soldering,• always put the hot soldering iron in the soldering iron stand,• point the soldering iron tip carefully when soldering, and• remove liquid solder with a thick wet rag or wet sponge.Dangerous environmentsA working area that is too small or cramped is unsuitable and can causeaccidents, fires and injury. Prevent this by working in a clean, dry roomwith enough freedom of movement.Other dangersChildren can cause any of the accidents mentioned above because theyare inattentive and not responsible enough. Children under the age of14 should not be allowed to work with this kit or the ready-builtmodule.Little children can swallow small components with sharp edges. Lifethreatening! Do not allow components to reach small children.In schools, training centres, clubs and workshops, assembly must besupervised by qualified personnel.In industrial institutions, health and safety regulations applying toelectronic work must be adhered to.Page 20
<strong>FD</strong>-5EnglishEMC declarationThis product is developed in accordance with the European standardsEN 55014 and EN 50082-1, tested corresponding to the EC - directive89/336/EWG (EMVG of 09/11/1992, electromagnetic tolerance) andmeets legal requirements.To guarantee the electromagnetic tolerance you must take thefollowing precautions:• Connect the transformer only to an approved mains socket installedby an authorised electrician.• Make no changes to the original parts and accurately follow theinstructions, circuit diagram and PCB layout included with this manual.• Use only original spare parts if you have to repair module.Information: Speed modeDigital control units for DCC format can send 14, 28 or 128 speed levelsdepending on the model and the settings. The number of speed levels sentby the control unit (=speed mode) must be set at the decoder as well.The speed mode set at the digital control unit for a particular decoderaddress must correspond to the speed mode saved in the functiondecoder. Otherwise the performance of the decoder may be incorrect.Information: Configuration variables (CVs)You can set the so-called configuration variables of the decoder fromthe control unit. The programming of the variables allows theadjustment of the decoder to the individual needs of the user.The configuration variables are saved in the decoder and are alsopreserved if the decoder is switched off. Changing the configurationvariables is possible at any time from the digital control unit.The configuration variables for the DCC format are standarised. Thevariables that can be set depend on the decoder type.Page 21
English<strong>FD</strong>-5Operation overviewThe decoder is designed for operation in DCC format and can beadjusted to one of 127 basic-adresses. It evaluates the digital data sentby the control unit to its address and switches the accessoriesconnected to the seven outputs via the functions F0 to F4. Thefunctions F5 to F8 are not available with the <strong>FD</strong>-5.The configuration variables of the <strong>FD</strong>-5The following configuration variables (CVs) can be set from the digitalcontrol unit:• Basic address (CV 1)• Consist-Address (CV 19)• Configuration data (CV 29)• Utilisation and setting of output X9 and X10 (CV 56):1. Lighting according to the direction of travel for forwarddirection or constant light2. F4 to switch or lighting according to the direction of travel forbackward direction.Function F0 (Light)The lights can be switched from the digital control unit. You can either setthe lighting according to the direction of travel or a fixed light for bothdirections of travel by programming the configuration variable CV 56.Functions F1 and F3Each of the functions F1 and F3 allow two accessories connected to theoutputs X4 and X5 resp. X7 and X8, with a max. current consumption of500 mA, to be switched on or off. Parallel switching of the outputs is alsopossible. In this way accessories with a maximum current consumption ofup to 900 mA can be switched. They are available for optional accessories(e.g. smoke generator, cab lighting, sound module).Page 22
<strong>FD</strong>-5EnglishFunction F2The function F2 allows an accessory connected to the output X6, with amaximum current consumption of 500 mA, to be switched on or off.Function F4If the configuration variable CV 56 is programmed accordingly, thefunction F4 allows an optional accessory, connected to the output X9,to be switched on or off. If lighting for reverse direction is programmedfor the output X9, the function F4 has no effect on this output.Point connectionsX1Return conductor for all functions.X2 und X3 Connections to the rails .X4 und X5Two optional accessories with a maximum currentconsumption of 500 mA* each or one optional accessorywith a maximum current consumption of 900 mA*.Switched via F1.X6 Optional accessory with a maximum currentconsumption of 500 mA*. Switched via F2.X7 und X8Two optional accessories with a maximum currentconsumption of 500 mA* each or one optional accessorywith a maximum current consumption of 900 mA*.Switched via F3.X9 Optional accessory with a maximum currentconsumption of 500 mA*. Switched via F4 or:X10Lighting for reverse direction (switched dependent of thedirection of travel via F0).Optional accessory or lighting for forward direction witha maximum current consumption of 500 mA*.Switched dependent or independent of the direction oftravel via F0).* Maximum current consumption of all accessories = 1.500 mAPage 23
English<strong>FD</strong>-5Technical specificationsData formatSupply voltageCurrent consumption(without connected loads)Max. current per function outputMax. total currentDCC12-24 Volt digital voltageca. 10 mA500 mA1.500 mAProtected to IP 00Ambient temperature in useAmbient temperature in storage0 - + 60° C-10 - + 80° CComparative humidity allowed max. 85 %DimensionsWeightca. 12,5 x 27,5 x 3,5 mmca. 2 gChecking the package contentsCheck the contents of the package for completeness:• 1 module• 1 manualRequired tools and consumablesMake sure you have the following tools, equipment and materials readyfor use:• a heat-resistant mat• a soldering iron stand with tip-cleaning sponge• a small side cutter and wire stripper• an electronic soldering iron (max. 30 Watt) with a fine tip• tin solder (0,5 mm. diameter)• wire (diameter: > 0,08 mm² for all connections)Page 24
<strong>FD</strong>-5EnglishSafe and correct soldering!Caution:Incorrect soldering can cause fires (through excessive heat). Avoid thisdager by reading the chapter Safety instructions again and followingthe directions given.If you have had training in soldering you can skip this chapter.• When soldering electronic circuits never use soldering-water orsoldering grease. They contain acids that can corrode componentsand copper tracks.• Only use tin solder SN 60 Pb (i.e. 60 % tin, 40 % lead) with rosinbasedflux.• Use a small soldering iron with max. 30 Watt. Keep the soldering tipclean so the heat of the soldering iron is applied to the solder pointeffectively.• Solder fast: long soldering can destroy components and coppertracks, and damages through plated holes.• Apply the soldering tip to the soldering spot in such a way that the partand the soldering spot are heated at the same time. Simultaneouslyadd solder (not too much). As soon as the solder becomes liquid take itaway. Hold the soldering tip at the spot for a few seconds so that thetin solder finds its way, then remove the soldering iron.• Do not move the component for about 5 seconds after soldering. Aglossy and perfect soldering spot should remain.• To make a good soldering joint you must use a clean andunoxidised soldering tip. Clean the soldering tip with a damp pieceof cloth, a damp sponge or a piece of silicon cloth.Performing a visual checkDamaged materials can cause injury. Parts damaged during transit canalso be dangerous. Check the module for damage, missing parts orpoor soldering. If you find damage, return the module for exchange.Page 25
English<strong>FD</strong>-5Mounting the function decoderOpen the locomotive or the carriage housing. Locate the position forthe decoder.Follow the connections diagrams (fig. 1a and 1b)! Solder theconnections to the rails at points X2 and X3.Connecting the lighting and other accessoriesFollow the connections diagrams (fig. 1a and 1b)!Disconnect any existing diodes in the leads to the lamps. Connect thelamps for forward motion to X10 and - if desired - the lamps for reversemotion to point X9. If the lamps are already connected with one side toground, you must solder in a diode between the decoder and the lamp(see fig. 1a) Otherwise you must connect the second side of the lampsaccording to fig. 1b to the return conductor (point X1).Connect other accessories (e.g. smoke generator, noise module), whichare switched by the functions F1 to F4, to the points X4 to X8. Connectthe accessory which is switched via the function F2 to the point X6. Theaccessories connected to the points X4 and X5 resp. the points X7 andX8 are switched jointly on and off via the functions F1 resp. F3. If youwant to connect an accessoriy with a current consumption of more than500 mA you must connect the two outputs in parallel (fig. 1a and 1 b,connection to X4 and X5). You can connect a further accessory to pointX9 which can be switched via the function F4 instead of the lighting forreverse direction.! Caution:The current consumption of all connected accessories may not exceed1.500 mA!You can connect the second side of the accessories either to the returnconductor (point X1) or to ground. If connecting the accessory toground you must solder in a diode.Page 26
<strong>FD</strong>-5English! Caution:The return conductor for all functions (point X1) must under nocircumstances be connected to locomotive resp. carriage ground.Possible short circuit! The decoder will be damaged in operation.! Caution:If you connect the loads to the return conductor for all functions (pointX1), the loads must be insulated. The loads must not make contact withmetal parts of the locomotive or the carriage. Possible short circuit! Thedecoder will be damaged in operation.Connecting the LEDsThe function outputs of the decoder switch against decoder ground. Forthat reason you must connect the cathode (-) of the LED to the outputof the relevant function.! Caution:If you use light-emitting diodes (LEDs) you must always operate themvia a series resistor.LEDs are available in many different models. There are LEDs with 2-5mA, but also LEDs with 15-30 mA power consumption. The seriesresistor limits the current flow of the LED and will need to be calculatedfor each model. Ask for the max current rating when buying your LEDs.You can connect several LEDs in parallel to each output. In this case everyLED must have a series resistor of its own. If you connect several LEDs toone output in series, only one series resistor is needed. The number ofLEDs connected in series to one output depends on the digital voltage.You can determine the number of the LEDs that can be connected inseries to one output from the following formula:(number of LEDs + 2) x 1,5 < digital voltageFixing the decoderAfter completing all connections fix the decoder with double-sidedadhesive tape, for example.Page 27
English<strong>FD</strong>-5Programming the function decoderThe function decoder is programmed from the digtial control unit. Seechapter in the manual of your digital control unit where theprogramming of configuration variables (CVs) is explained.You can programm the following function decoder variables:CV-NameEingabewert(Auslieferungszustand)BasicaddressConsistaddressConfigurationdataUtilizationand settingof outputX9 and X10Page 28CV-Nr.1 1 ... 127(3)19 1 ... 127(0)29 0,1,2 or 3(2)56 0,1,2 or 3(3)Erläuterungen= 2nd addressThis data is set by entering thesum of the numerical values.Numerical valuedirection "standard" 0invert direction 114 speed levels 028 speed levels 2This data is set by entering thesum of the numerical values.Numerical valueConstant lighting 0Lighting accordingto direction of travel 1Optional accessoryswitched via F4 0Lighting forreverse direction 2
<strong>FD</strong>-5EnglishFAQ• Parts are getting too hot and/or start to smoke.! Disconnect the module from the mains immediately!Possible cause: Short circuit. The decoder is connected tolocomotive or carriage ground.à Check the connections. A short circuit can result in irreparabledamage.• The lighting does not correspond to the direction of travel.Possible cause: The configuration data (CV29) of the locomotivedecoder in the train vary from the configuration data programmedin the function decoder.à Change the programming or the function or the locomotivedeocder.• The lighting for forward dirction cannot be switched via F0.Possible cause: The speed mode of the decoder and the digitalcontrol unit do not correspond. Example: The control unit is set tothe mode 28 speed levels, but the decoder to the mode 14 speedlevels.à Change the speed mode at the control unti and / or at thedecoder.If you cannot find the problem, please return the decoder for repair(address on the cover page).Manufacturer's noteAccording to DIN VDE 0869, the person who builds this kit or brings thecircuit into operation is the manufacturer of the product. If he sells theproduct to another person he is responsible for passing on all therelevant papers. Domestic appliances assembled from a kit are deemedindustrial products and must comply with health and safety regulations.Page 29
English<strong>FD</strong>-5CertificationThis product conforms with the EC- directive 89/336/EWG onelectromagnetic radiation and is therefore CE certified.Conditional warrantyThis product is guaranteed for two years. The warranty includes freerepair if the problem is due to material failure or incorrect assembly ofthe module by us. We guarantee the quality of the components.Other claims are excluded. By law, we are not responsible for damagesor secondary damages in connection with this product. We retain theright to repair, make improvements, supply spare parts or return thepurchase price.The following invalidate the warranty:• using an unsuitable soldering iron, solder containing liquid acids orsimilar,• if damage is caused by not following the instructions in this manualor the circuit diagram,• if the circuit has been altered and repair attempts have failed,• if arbitrary changes in the circuit are made,• if parts are stored incorrectly and if the wires to the switches, thepower resistors, etc. are made incorrectly,• if the copper tracks or soldering points are damaged,• if damage occurs due to an overload of the circuit,• if the wrong power or current is connected,• if damaged by other persons,• if damaged by the wrong use or abuse of the circuit,• if parts are damaged due to static because they were touchedbefore a discharge is performed.Page 30
<strong>FD</strong>-5<strong>FD</strong>-5Anschlußplan - Connections diagram - Schema de connexion - Aansluit plan• • • Fig. 1Seite - Page - Page - Pagina ISeite - Page - Page - Pagina I
<strong>FD</strong>-5<strong>FD</strong>-5Schaltplan - Circuit diagram - Schéma de commutation - Schakelplan• • • Fig. 2AusgängeOutputsSortiesUitgangenSeite - Page - Page - Pagina IISeite - Page - Page - Pagina II
•••Aktuelle Informationen und Tipps:Information and tips:Informations et conseils:Actuele informatie en tips:http://www.tams-online.de••••••Garantie und Service:Warranty and service:Garantie et service:Garantie en service:•••<strong>Tams</strong> Elektronik GmbHRupsteinstraße 10D-30625 Hannoverfon: 0049 (0)511 / 55 60 60fax: 0049 (0)511 / 55 61 61e-mail: modellbahn@tams-online.de••••