Create successful ePaper yourself
Turn your PDF publications into a flip-book with our unique Google optimized e-Paper software.
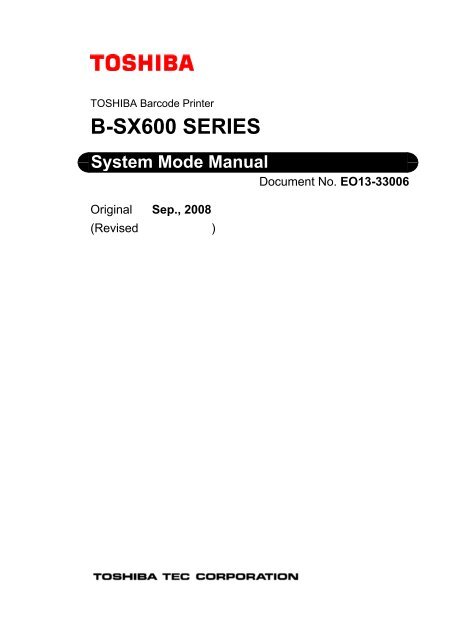
TOSHIBA Barcode PrinterB-<strong>SX600</strong> <strong>SERIES</strong>System Mode ManualOriginal Sep., 2008(Revised )Document No. EO13-33006
EO13-33006TABLE OF CONTENTSPage1. KEY OPERATION PROCEDURE ------------------------------------------------------------------1- 11.1 OPERATION PANEL-------------------------------------------------------------------------------------- 1- 12. LCD MESSAGE-----------------------------------------------------------------------------------------2- 12.1 DISPLAY WHEN “Ready” IS SHOWN---------------------------------------------------------------- 2- 22.2 DISPLAY WHEN “Pause” IS SHOWN ---------------------------------------------------------------- 2- 32.3 DISPLAY WHEN “Printing” IS SHOWN -------------------------------------------------------------- 2- 42.4 DISPLAY WHEN “Take off the label” IS SHOWN (ONLY FOR THE MODEL WITH THESTRIP UNIT) ------------------------------------------------------------------------------------------------ 2- 42.5 ERROR MESSAGES (IN THE EVENT OF “End of paper”)-------------------------------------2- 42.6 DISPLAY IN LOW POWER MODE-------------------------------------------------------------------- 2- 53. PRINTER OPERATION USING THE OPERATION PANEL --------------------------------3- 13.1 MENU OPERATIONS------------------------------------------------------------------------------------- 3- 23.2 INFORMATION MENU ----------------------------------------------------------------------------------- 3- 43.3 CLEAR TRIP METER MENU --------------------------------------------------------------------------- 3- 53.4 TEST PRINT MENU---------------------------------------------------------------------------------------3- 63.5 REPRINT ERROR PAGE MENU ----------------------------------------------------------------------3- 73.6 TOF AFTER BOOTING MENU ------------------------------------------------------------------------- 3- 83.7 LOW POWER MODE MENU -------------------------------------------------------------------------- 3-113.8 LOW POWER (MIN) MENU ---------------------------------------------------------------------------- 3-123.9 BEEP VOLUME MENU---------------------------------------------------------------------------------- 3-133.10 BEEP PATTERN MENU -------------------------------------------------------------------------------- 3-143.11 LCD CONTRAST MENU -------------------------------------------------------------------------------- 3-153.12 LANGUAGE MENU--------------------------------------------------------------------------------------- 3-163.13 COUNTER RESET MENU------------------------------------------------------------------------------ 3-173.14 EXTERNAL I/F MENU ------------------------------------------------------------------------------------ 3-183.14.1 Selecting an Expansion I/O Interface Mode on the Operation Panel -------------- 3-183.14.2 How to Display the “External I/F Menu”---------------------------------------------------- 3-183.14.3 Selecting an Expansion I/O Interface Mode ---------------------------------------------- 3-183.14.4 Operation after Selecting an Expansion I/O Interface Mode ------------------------- 3-183.14.5 How to Check the Currently Selected Mode---------------------------------------------- 3-19CAUTION!1. This manual may not be copied in whole or in part without prior written permission of TOSHIBATEC.2. The contents of this manual may be changed without notification.Copyright © 2008by TOSHIBA TEC CORPORATIONAll Rights Reserved570 Ohito, Izunokuni-shi, Shizuoka-ken, JAPAN
1. KEY OPERATION PROCEDURE EO13-330061.1 OPERATION PANEL1. KEY OPERATION PROCEDUREThis section describes the functions of the LCD Message Display, LED’s and keys on the Operation Panel.1.1 OPERATION PANELThe Operation Panel is equipped with the LCD Message Display, which is used to indicate the state of theprinter, 4 LED’s, and 9 keys. Please see the table below for details.ReadyNo. 00000LCD Message DisplayPower LEDReady LED[PAUSE] KeyCursor Keys(◄ ► ▲ ▼)Power Ready Error DataPause FeedMenuData LEDError LED[Feed] Key[Menu] Key[Enter] KeyEnterCancel[Cancel] KeyNameLCD Message DisplayPower LEDReady LEDError LEDData LED[Pause] key[Feed] key[Menu] key◄key►key▲key▼key[Enter] key[Cancel] keyFunctions (Purposes)Shows the menu or error information.Illuminates in green when the printer is turned on.Illuminates in green when the printer is ready, and goes out when the printer is ina pause state or while the menu is being displayed.Illuminates in red when an error occurs, and flashes in red in the event of awarning.Flashes in green when data is received, and illuminates in green when data is inthe receive buffer.Used to place the printer in a pause or ready state.Used to feed the media for a single page or label length.Used to display the menu when the printer is in a ready or pause state. Whenheld down, the [Menu] key will be locked, and when held down again, it will beunlocked.Used to choose an item on the left while the menu is being displayed.Used to choose an item on the right while the menu is being displayed.Used to choose an item above while the menu is being displayed.Used to choose an item below while the menu is being displayed.When the model with the Cutter Unit is used, holding down this key in a ready orpause state causes the media to be cut.Used to determine the settings while the menu is being displayed.Used to clear an error when it occurs.When held down, print data is cleared.1-1
2. LCD MESSAGE EO13-330062. LCD MESSAGE2. LCD MESSAGEMessages below which indicate the printer status and errors are displayed on the LCD.MessagesPrinter StatusReadyThe printer is ready to print.Pause ##### (Number of labels issued.) The printer is in a pause state.Pause Head unit lifted.The printer is in a pause state, and the Upper Unit is lifted.Pause Front cover open.The printer is in a pause state, and the Front Cover isopened.Pause Side cover open.The printer is in a pause state, and the Side Cover isopened.PrintingPrinting is being performed.Take off the label.When the model with the Peel-off Unit is used, a peeledlabel is still not removed from the media outlet.Low Power ModeThe printer is in Low Power Mode.Paper feed errorA media jam has occurred.The loaded media has not been fed properly.End of PaperThe printer has run out of the media.Paper info conflictThe media calibration has failed.No ribbon requiredThermal paper is selected, but a ribbon is loaded.Ribbon error Set a new ribbon.The printer has run out of the ribbon.Ribbon error Reset ribbon.The ribbon has torn apart.Ribbon error Reset head unit.The rotation of the ribbon shaft has not been detected.Peeling failedPeeling has failed.Cut failedThe media has not been cut correctly.Page Info. ErrorPage information command errorAction Info.ErrorOperation information command errorImage Info.ErrorImage information command errorUnable to respondNo response can be returned to your host computer.Overheated thermal headThe thermal head is overheated.Note: Regarding the error messages and their descriptions, please refer to section 12.5 of Owner 'sManual.2-1
2. LCD MESSAGE EO13-330062.1 DISPLAY WHEN “Ready” IS SHOWN2.1 DISPLAY WHEN “Ready” IS SHOWN• When the printer is in a normal stateReadyNo. 00000Power Ready Error DataThe printer status is shown.The number of labels printed is shown.The cumulative number of printed labels is shown after theprinter is turned on.It is cleared when the printer is turned off.(It can also be cleared from the Menu.)• Display in the event of a warningReadyBad thermal head.No. 00000Power Ready Error DataA warning message appears.(e.g. “Bad thermal head”, “Paper near end”)A buzzer sounds in the event of a warning, and the Error LEDflashes.(The buzzer stops sounding either after a lapse of a buzzersounding time specified on the Menu or by pressing any of thebuttons on the Operation Panel.)2-2
2. LCD MESSAGE EO13-330062.2 DISPLAY WHEN “Pause” IS SHOWN2.2 DISPLAY WHEN “Pause” IS SHOWNIf the [Pause] key is pressed while “Pause” is being shown, the message will change to “Ready”.• Pause (The number of printed labels)PauseThe printer status is shown.No. 00000Power Ready Error DataAs in the “Ready” state, a warning message appears.(The Error LED flashes, and the buzzer sounds in the samemanner.)• Pause (Head unit lifted)PauseHead unit lifted.With the Head Unit lifted, the number of printed labels is notshown until the Upper Unit is lowered completely.Power Ready Error Data• Pause (Front cover open)PauseFront cover open.With the Front Cover opened, the number of printed labels is notshown until the Front Cover is closed completely.Power Ready Error Data• Pause (Side cover open)PauseSide cover open.With the Side Cover opened, the total print count is not shownuntil the Side Cover is closed completely.Power Ready Error Data2-3
2. LCD MESSAGE EO13-330062.3 DISPLAY WHEN “Printing” IS SHOWN2.3 DISPLAY WHEN “Printing” IS SHOWNPrintingThe printer status is shown.No. 00000Power Ready Error DataAs in the “Ready” state, a warning message appears.(The Error LED flashes, and the buzzer sounds in the samemanner.)2.4 DISPLAY WHEN “Take off the label” IS SHOWN (ONLY FOR THEMODEL WITH THE STRIP UNIT)Take off the label.No. 00000The printer status is shown.(The message changes after the peeled label is removed.)Power Ready Error DataAs in the “Read” state, a warning message appears.(The Error LED flashes, and the buzzer sounds in the samemanner.)2.5 ERROR MESSAGES (IN THE EVENT OF “End of paper”)End of paperSet new paper.Power Ready Error DataAn error message appears.(Please refer to a section related to error messages for furtherinformation.)Remedial action is shown.As in the “Ready” state, a warning message appears.In the event of an error, the buzzer sounds, and the Error LEDilluminates.(The buzzer stops sounding either after a lapse of a buzzersounding time specified in the Menu or by pressing any of thebuttons on the Operation Panel.)2-4
2. LCD MESSAGE EO13-330062.6. DISPLAY IN LOW POWER MODE2.6 DISPLAY IN LOW POWER MODEReadyNo. 00000Power Ready Error DataWhile the printer is in Lower Power mode, the backlight of theLCD goes out.(The buzzer stops sounding.)3-1
3. PRINTER OPERATION USING THE OPERATION PANEL EO13-330063. PRINTER OPERATION USING THE OPERATION PANEL3. PRINTER OPERATION USING THE OPERATIONPANELThe printer can be operated from the Operation Panel.OperationSwitching the printer betweenpause mode and ready modeFeeding a single page or labelStopping the buzzer soundClearing print data stored in theprinterSwitching the message from “Error”to “Pause” on the LCDEnabling or disabling the [Menu]keyDisplaying the Menu optionsCutting the media(Only for the model with the CutterUnit)Operation proceduresPress the [Pause] key.Press the [Feed] key.(The media is fed continuously while the [Feed] key is being helddown.)Press any of the keys on the Operation Panel.Hold down the [Cancel] key until the Data LED goes out.(After clearing print data, make sure that the Data LED is off beforeinitiating a print job.)Press the [Cancel] key.Hold down the [Menu] key.Press the [Menu] key.(Enable the [Menu] button if disabled. Then press it again.)Hold down the [▼] key.3-1
3. PRINTER OPERATION USING THE OPERATION PANEL EO13-330063.1 MENU OPERATIONS3.1 MENU OPERATIONSIf the [Menu] key is pressed while “Ready” or “Pause” is being shown, the Menu will appear on the LCD.ReadyNo. 00000Power Ready Error DataInformationClear Trip MeterTest PrintPower Ready Error DataPauseFeedPauseFeed[Menu] KeyMenuMenuEnterCancelEnterCancel“Menu” FunctionMenu optionsInformationClear Trip MeterTest PrintReprint Error PageTOF After BootingLow Power ModeLower Power (min)Beep VolumeBeep PatternLCD ContrastLanguageCounter ResetOverviewProduct information (e.g. firmware version) is displayed.A TRIP value (running distance) in the product information can becleared.A print test can be performed with the Operation Panel.If an error occurs while printing, whether to print the erroneous pageagain or not can be specified.Whether to perform the page alignment after power-on or not can bespecified.Whether to enable or disable Low Power Mode can be specified.A time period until the printer goes into Low Power Mode can bespecified.A Beep Volume can be adjusted.A time period during which the buzzer sounds can be specified.The contrast of the LCD can be adjusted.A language in which messages are displayed on the LCD can beselected.The print count displayed on the LCD can be cleared.3-2
3. Printer Operation using the Operation Panel EO13-330063.1 Menu OperationsOperation SampleTurn the power ON.ReadyNo. 00000Turn on the printer.”Ready” is displayed on the LCD.[Menu]Press the [Menu] key.InformationClear Trip MeterTest PrintThe “” screen is displayed.Select a desired menu with the ▲ or ▼ key. (Selected menu is highlighted.)Then, press the [Enter] key to perform each function. For details ofoperations, please refer to each section.▼ key or ▲ keyEach menu is displayed bypressing the [Enter] key.[Menu] or [Cancel] keyPauseNo. 00000▲key▲key▲key▲key▲key▲key▲key▲key▲key▲key▲key▲keyInformationClear Trip MeterTest PrintReprint Error PageTOF After BootingLow Power ModeLow Power (min)Beep volumeBeep PatternLCD ContrastLanguageCounter ResetExternal I/F▼ key▼ key▼ key▼ key▼ key▼ key▼ key▼ key▼ key▼ key▼ key▼ key[Enter] key[Enter] keyRefer to section 3.2Refer to section 3.3[Enter] key Refer to section 3.4[Enter] key Refer to section 3.5[Enter] key Refer to section 3.6[Enter] key Refer to section 3.7[Enter] key Refer to section 3.8[Enter] key Refer to section 3.9[Enter] key Refer to section 3.10[Enter] key Refer to section 3.11[Enter] key Refer to section 3.12[Enter] key Refer to section 3.13[Enter] key Refer to section 3.14[Pause]ReadyNo. 00000Note: “Pause” is displayed with the [Menu] or [Cancel] key.”Ready” is displayed with the [Pause] key.3-3
3. PRINTER OPERATION USING THE OPERATION PANEL EO13-330063.2 INFORMATION MENU3.2 INFORMATION MENUProduct information (e.g. firmware version) is displayed.InformationClear Trip MeterTest Print[Enter]Select “Information” on the screen.(Selected menu is highlighted.)Press the [Enter] key.InformationS/N xxxxxxxxxxx DPIFW x.xxProduct information is displayed.Move the highlight upward or downward by pressing the ▲ or ▼ key.Product information below is displayed on the LCD.▼ key or ▲ keyFLxxxLoxxUP FW x.xx xx[Enter], [Menu] or [Cancel]InformationClear Trip MeterTest PrintTitleDescriptionLine 1 S/N Serial number of the productLine 2 - Resolution / unit installedLine 3 FW Firmware versionLine 4 FPGA1 FPGA1 versionLine 5 FPGA2 FPGA2 versionLine 6 CPLD CPLD versionLine 7 ODO Total running distance (This value cannot be cleared.)Line 8 TRIP Running distance (This value can be cleared.)Line 9 Cut Cut countLine 10 Lc Media length excluding a gap, notch, or black mark Note 1Line 11 FL Media length including a gap, notch, or black mark Note 1Line 12 Lo Sensor threshold value used to detect a gap, notch, or blackmark from a label Note 1Line 13 UP Sensor threshold value used to detect a label in accordance witha gap, notch, or black mark Note 1Notes: 1. Description about Lc, FL, Lo, and UP of a die-cut label2. Data of label format of the last printed label is recorded.Strict feedEasy feedFeeddirection3. If the [Enter], [Menu] or [Cancel] key is pressed while“” is being shown, the display restores tothe ”” screen.3-4
3. PRINTER OPERATION USING THE OPERATION PANEL EO13-330063.3 CLEAR TRIP METER MENU3.3 CLEAR TRIP METER MENUTRIP (or the running distance) can be cleared. Reset the trip meter when replacing the print head and useas a target for the next replacement.InformationClear Trip MeterTest PrintSelect “Clear Trip Meter” on the screen.(Selected menu is highlighted.)[Enter]Reset Trip Meter?YesNoPress the [Enter] key.Reset selection screen is displayed.Select “Yes” or “No” with the ▲ or ▼ key. (Selected item is highlighted.)Note: The display restores to the ”” screen with the [Menu] or[Cancel] key.▲ key or ▼ keyReset Trip Meter?YesNoYes[Enter]Trip Meter resetPress the [Enter] key.When “Yes” is executed, TRIP (or the running distance) is reset to 0.0.When “No” is executed, it is not reset.NoPress EnterTrip Meter resetcanceledPress Enter[Enter]The display restores to the ”” screen with the [Enter] key.InformationClear Trip MeterTest Print3-5
3. PRINTER OPERATION USING THE OPERATION PANEL EO13-330063.4 TEST PRINT MENU3.4 TEST PRINT MENUA print test pattern is printed out.“TTP” must be selected when using thermal transfer paper to perform a print test.On the other hand, “DTP” must be selected when using thermal paper to perform a print test.(“TTP” is selected as default.)Set the media and ribbon to the printer.Clear Trip meterClear Test Print Trip MeterReprint Error PageSelect “Test Print” on the screen.(Selected menu is highlighted.)[Enter]Test PrintClear Trip TTP MeterDTP▲ key or ▼ keyPress the [Enter] key.Printing method selection screen is displayed.Select “TTP” (Thermal Transfer Print) or “DTP” (Direct Thermal Print) with the▲ or ▼ key. (Selected item is highlighted.)Note: The display restores to the ”” screen with the [Menu] or[Cancel] key.Test PrintTTPDTP[Enter]When the [Enter] key is pressed, a test print is performed.Print test pattern is printed on 10 pieces of media in a row. Press the[Cancel] key to stop it.Clear Trip meterClear Test Print Trip MeterReprint Error PageTest Print Pattern3-6
3. PRINTER OPERATION USING THE OPERATION PANEL EO13-330063.5 REPRINT ERROR PAGE MENU3.5 REPRINT ERROR PAGE MENUIn the case that an error occurs while printing, whether to reprint an erroneous or not is specified.Test PrintReprint Clear Trip Error Meter PageTOF After BootingSelect “Reprint Error Page” on the screen.(Selected menu is highlighted.)YesNo[Enter]Reprint ErrorPage?Clear YesNo▲ key or ▼ keyReprint ErrorPage?YesNo[Enter]Reprint Error Pageenabled.Press EnterReprint Error Pagedisabled.Press the [Enter] key.Reprint selection screen is displayed.Select “Yes” or “No” with the ▲ or ▼ key. (Selected item is highlighted.)• If [Yes] is selected for [Reprint Error Page] in the Menu of the printer,printing will be restarted from the erroneous page.• If [No] is selected, printing will be restarted from the page subsequent tothe erroneous page.“Yes” is selected in the as default.Notes:1. Depending on print data or format, an erroneous page may look like it hasbeen printed completely. Select “No” if any duplications are not allowed.For example, when individual information such as serial No. is printed,select “No”.2. The display restores to the ”” screen with the [Menu] or [Cancel]key.When the [Enter] key is pressed, the programmed data is saved and themessage is displayed.Press Enter[Enter]The display restores to the ”” screen with the [Enter] key.Test PrintReprint Clear Trip Error Meter PageTOF After BootingNote:The display restores to the reprint selection screen with the [Cancel] keyand to the ”” screen with the [Menu] key.3-7
3. PRINTER OPERATION USING THE OPERATION PANEL EO13-330063.6 TOF AFTER BOOTING MENU3.6 TOF AFTER BOOTING MENUWhether a higher priority should be given to print position accuracy or media saving in the page alignment isspecified.ReprintError PageTOF Clear After Trip Meter BootingLow Power Mode[Enter]Initial Align TOFPrecise Clear print modePaper saving mode▲ key or ▼ keyInitial Align TOFPrecise print modeNoPaper saving mode[Enter]Select “TOF After Booting” on the screen.(Selected menu is highlighted.)Press the [Enter] key.Mode selection screen is displayed.Select “Precise print mode” or “Paper saving mode” with the ▲ or ▼ key.(Selected item is highlighted.)For details of the Paper saving mode and the Precise print mode, refer to thenext page.“Precise print mode” is selected as default.Note: The display restores to the ”” screen with the [Menu] or[Cancel] key.When the [Enter] key is pressed, the programmed data is saved and themessage is displayed.Precise print modeInitial Align TOFPrecise print modeselected.Press EnterPaper saving modeInitial Align TOFPaper saving modeselected.Press Enter[Enter]ReprintError PageTOF Clear After Trip Meter BootingLow Power ModeThe display restores to the ”” screen with the [Enter] key.Note:The display restores to the mode selection screen with the [Cancel] key andto the ”” screen with the [Menu] key.3-8
3. Printer Operation using the Operation Panel EO13-330063.5 TOF After Booting Menu• Page alignment when “Precise print mode” is selectedIn the page alignment when “Precise print mode” is selected, first, the loaded media is fed to find thefirst print start position that passes the sensor. Next, the media is fed until the print start position isaligned with the Print Head position. Therefore, compared to the “Paper saving mode”, which will bedescribed later, the amount of media ejected is large. However, with “Precise print mode” selected,feed accuracy will increase because the media is fed while the sensor threshold value is beingmonitored all the time.Before page alignmentPrint HeadSensorAfter a page alignment is initiated, the first print startposition is detected. The media is fed until this positionis aligned with the Print Head position.After page alignmentFeed directionPage alignment in Strict feed modeIf the tear-off is to be performed, the media will be further fed up to a tear-off position from the pagealignment position.Tear-off positionAfter page alignmentPrint HeadSensorAfter tear-offFeed directionTear-off after page alignmentIn addition, whenever “Precise print mode” is selected, a page alignment is performed in order toincrease the print accuracy after the printer is started up.3-9
3. Printer Operation using the Operation Panel EO13-330063.5 TOF After Booting Menu• Page alignment when “Paper saving mode” is selectedIn the page alignment when “Paper saving mode” is selected, first, the loaded media is fed to find thefirst print start position that passes the sensor. Next, it is fed until the next print start position lyingbehind the print head is aligned to the Print Head position. Compared to the “Precise print mode”, theamount of media ejected is smaller, eventually waste of paper is saved. With “Paper saving mode”selected, the media is fed based on the media settings sent from the printer driver. Therefore, thefeed accuracy decreases compared to the “Precise print mode”.Page alignmentPrint HeadSensorThe media is fed until the print startposition right behind the Print Head isaligned to the Print Head Position.After a page alignment is initiated, the first print startposition is detected. The media is fed until thisposition is aligned with the Print Head position.After page alignmentFeed directionPage alignment in Strict feed modeIf the tear-off is to be performed, the media will be further fed up to a tear-off position from the pagealignment position.Tear-off position Print Head SensorAfter page alignmentAfter tear-offFeed directionTear-off after page alignmentUnlike “Precise print mode”, a page alignment is not performed after the printer is started up.3-10
3. PRINTER OPERATION USING THE OPERATION PANEL EO13-330063.7 LOW POWER MODE MENU3.7 LOW POWER MODE MENUWhether to enable or disable Low Power Mode is specified.EnableTOF After BootingLow Clear Power Trip Meter ModeLow Power (min)[Enter]Low Power ModeClear EnableDisable▲ key or ▼ keyLow Power ModeEnableDisable[Enter]Low Power Modeenabled.Press EnterSelect “Low Power Mode” on the screen.(Selected menu is highlighted.)Press the [Enter] key.Low Power Mode selection screen is displayed.Select “Enable” or “Disable” with the ▲ or ▼ key. (Selected item ishighlighted.)If “Enable” is selected, the printer will go into Low Power Mode once all of thefollowing conditions are satisfied. On the other hand, if “Disable” is selected,the printer will not go into Low Power Mode, because the following conditionsare not satisfied. (“Enable” is selected as default.)Note: The display restores to the ”” screen with the [Menu] or[Cancel] key.• To place the printer in Low Power ModeThe printer goes into Low Power Mode once all of the following conditions from 1 to 5 are satisfied.NoConditions1 Low Power Mode is enabled in the Menu.2 The LCD shows either “Ready”, “Pause (Number of printed labels),” or “Take off thelabel.” Also, the display does not change during the transition to the Low Power Mode.3 Warning types shown on the LCD remain unchanged.4 No keys on the Operation Panel are pressed during the Low Power Mode transition time.5 No operations causing the printer to operate is exercised during the Low Power Modetransition time.• To return the printer to normal modeThe printer returns from Low Power Mode to normal mode once any of the following conditions from 1to 4 are satisfied.NoConditions1 The display has changed from “Ready,” “Pause (Number of printed labels,” or “Take offthe label.”2 Warning types shown on the LCD has increased or decreased during the Low PowerMode transition time.3 Any of the keys on the Operation Panel has been pressed.4 Any operations causing the printer to operate has been performed.Note: In the Low Power Mode, the fan motor pauses as a proper operation.DisableLow Power Modedisabled.Press EnterWhen the [Enter] key is pressed, the programmed data is saved and themessage is displayed.[Enter]TOF After BootingLow Clear Power Trip Meter ModeLow Power (min)The display restores to the ”” screen with the [Enter] key.Note:The display restores to the Low Power Mode selection screen with the[Cancel] key and to the ”” screen with the [Menu] key.3-11
3. PRINTER OPERATION USING THE OPERATION PANEL EO13-330063.8 LOW POWER (MIN) MENU3.8 LOW POWER (MIN) MENUA time period until the printer goes into Low Power Mode is specified when the Low Power Mode is enabled.Low Power modeLow Clear Power Trip Meter (min)Beep Volume[Enter]Waiting time ofLow Power Mode(min) 1 5 10 30◄ key or ► keyWaiting time ofLow Power Mode(min) 1 5 10 30Select “Low Power (min)” on the screen.(Selected menu is highlighted.)Press the [Enter] key.“Waiting time of Low Power Mode” selection screen is displayed.Select a desired time with the ◄ or ► key.There is a choice of 4 options: “1 (minute),” “5 (minutes),” “10 (minutes),” and“30 (minutes).”“5” (minutes) is selected as default.Note: The display restores to the ”” screen with the [Menu] or[Cancel] key.Waiting time ofLow Power Mode(min) 1 5 10 30Waiting time ofLow Power Mode(min) 1 5 10 30Waiting time ofLow Power Mode(min) 1 5 10 30[Enter]Low Power ModeRegistered.When the [Enter] key is pressed, the programmed data is saved and themessage is displayed.Press Enter[Enter]Low Power modeLow Clear Power Trip Meter (min)Beep VolumeThe display restores to the ”” screen with the [Enter] key.Note:The display restores to the “Waiting time of Low Power Mode” selectionscreen with the [Cancel] key and to the ”” screen with the [Menu]key.3-12
3. PRINTER OPERATION USING THE OPERATION PANEL EO13-330063.9 BEEP VOLUME MENU3.9 BEEP VOLUME MENUA volume of the buzzer that sounds in the event of an error or a warning is specified.Low Power (min)Beep Clear Volume Trip MeterBeep PatternSelect “Beep Volume” on the screen.(Selected menu is highlighted.)[Enter]Beep VolumeOff Min Mid Max◄ key or ► keyPress the [Enter] key.Beep Volume selection screen is displayed.Select a desired volume with the ◄ or ► key.There is a choice of 4 options: “Off”, “Min”, “Mid”, and “Max”.“Intermediate” (Mid) is selected as default.Note: The display restores to the ”” screen with the [Menu] or[Cancel] key.Beep VolumeOff Min Mid MaxBeep VolumeOff Min Mid MaxBeep VolumeOff Min Mid MaxBeep VolumeOff Min Mid Max[Enter]Beep VolumeSaved.When the [Enter] key is pressed, the programmed data is saved and themessage is displayed.Press Enter[Enter]Low Power (min)Beep Clear Volume Trip MeterBeep PatternThe display restores to the ”” screen with the [Enter] key.Note:The display restores to the Beep Volume selection screen with the [Cancel]key and to the ”” screen with the [Menu] key.3-13
3. PRINTER OPERRATION USING THE OPERATION PANEL EO13-330063.10 BEEP PATTERN MENU3.10 BEEP PATTERN MENUA time period during which the buzzer sounds in the event of an error or a warning is specified.Beep VolumeBeep Clear Patterfn Trip MeterLCD Contrast[Enter]Beep Pattern(sec)10 60 Cont.◄ key or ► keySelect “Beep Pattern” on the screen.(Selected menu is highlighted.)Press the [Enter] key.Beep Pattern selection screen is displayed.Select a desired beep pattern with the ◄ or ► key.There is a choice of 3 options: “10” (seconds), “60” (seconds), and “Cont.”(Continuation).“10” (seconds) is selected as default.Beep Pattern(sec)10 60 Cont.Note: The display restores to the ”” screen with the [Menu] or[Cancel] key.Beep Pattern(sec)10 60 Cont.Beep Pattern(sec)10 60 Cont.[Enter]When the [Enter] key is pressed, the programmed data is saved and themessage is displayed.Beep PatternSaved.Press Enter[Enter]Beep VolumeBeep Clear Patterfn Trip MeterLCD ContrastThe display restores to the ”” screen with the [Enter] key.Note:The display restores to the Beep Pattern selection screen with the [Cancel]key and to the ”” screen with the [Menu] key.3-14
3. PRINTER OPERATION USING THE OPERATION PANEL EO13-330063.12 LANGUAGE MENU3.12 LANGUAGE MENUA language in which messages are shown on the LCD is selected.LCD ContrastLanguage Clear Trip MeterCounter Reset[Enter]Language日 本 語English▲ key or ▼ keySelect “Language” on the screen.(Selected menu is highlighted.)Press the [Enter] key.Language selection screen is displayed.Select a desired language to be used on the LCD with the ▲ or ▼ key.There is a choice of 2 options: “Japanese” and “English”.“English” is selected as default.Note: The display restores to the ”” screen with the [Menu] or[Cancel] key.LanguageEnglish日 本 語English[Enter]When the [Enter] key is pressed, the programmed data is saved and thelanguage on the LCD is changed to the selected one.LanguageEnglish ModeSelected.Press EnterJapanese表 示 言 語“ 日 本 語 ”に 設 定しました。Press EnterEnglish[Enter]LCD ContrastLanguage Clear Trip MeterCounter ResetThe display restores to the ”” screen with the [Enter] key.Note:The display restores to the Language selection screen with the [Cancel] keyand to the ”” screen with the [Menu] key.JapaneseLCDコントラスト表 Clear 示 言 Trip 語 Meter枚 数 表 示 のクリア3-16
3. PRINTER OPERATION USING THE OPERATION PANEL EO13-330063.13 COUNTER RESET MENU3.13 COUNTER RESET MENUThe print count displayed on the Operation Panel can be cleared by selecting “Counter Reset” and pressingthe [Enter] key.LCD ContrastLanguageCounter resetCounter Reset[Enter]Reset Counter?YesNoetNo▲ key or ▼ keySelect “Counter Reset” on the screen.(Selected menu is highlighted.)Press the [Enter] key.Counter reset selection screen is displayed.Select ”Yes” or ”No” with the ▲ or ▼ key.Note: The display restores to the ”” screen with the [Menu] or[Cancel] key.Reset Counter?YesNo[Enter]When the [Enter] key is pressed, the number of labels printed is reset.YesCounter resetReadyNo. 00000The number of labels printed is reset.NoPress EnterCounter resetCanceled.Press Enter[Enter]LCD ContrastLanguageCounter resetCounter ResetThe display restores to the ”” screen with the [Enter] key.Note:The display restores to the Counter Reset selection screen with the [Cancel]key and to the ”” screen with the [Menu] key.3-17
3. PRINTER OPERATION USING THE OPERATION PANEL EO13-330063.14 EXTERNAL I/F MENU3.14 EXTERNAL I/F MENU3.14.1 Selecting an Expansion I/O Interface Mode on the Operation PanelSince the expansion I/O interface is disabled as the factory default, it is necessary to display the “ExternalI/F” menu on the printer LCD and select an expansion I/O interface mode on the operation panel.Selectable expansion I/O interface mode: Disable, Mode 1, Mode 23.14.2 How to Display the “External I/F Menu”After the printer is turned on, hold down the [▲] key while the Starting up is displayed. Then the “External I/F”is added to the Menu and kept displayed until the power is turned off.When Mode 1 or Mode 2 has been selected, the “External I/F” is displayed without performing the aboveoperation.LanguageCounter ResetCounter resetExtenal I/FPower Ready Error Data3.14.3 Selecting an Expansion I/O Interface ModeSelect the “External I/F” from the Menu and press the [Enter] key. Select “Disable”, “Mode 1”, or “Mode 2”,then press the [Enter] key. The selected mode is saved in the printer memory.Note that “Mode 2” is not displayed on the standard model or cutter model.HH11/HH12 model (Strip type)HS11/HS12 model (Standard type) , HC11/HC12 model (Cutter type)External I/FDisableMode 1Counter reset Mode 2External I/FDisableCounter reset Mode 1Power Ready ErrorDataPower Ready Error Data3.14.4 Operation after Selecting an Expansion I/O Interface ModeAfter changing the expansion I/O interface mode, turn off the printer and back to on in order to enable thenew setting.3-18
3. PRINTER OPERATION USING THE OPERATION PANEL EO13-330063.14 EXTERNAL I/F MENU3.14.5 How to Check the Currently Selected ModeSelect the “External I/F” from the Menu and press the [Enter] key. The option where the cursor is initiallyplaced is the currently selected mode.HH11/HH12 model (Strip type)HS11/HS12 model (Standard type) , HC11/HC12 model (Cutter type)External I/FDisableMode 1Counter reset Mode 2External I/FDisableCounter reset Mode 1Power Ready ErrorDataPower Ready Error Data3-19


