


You also want an ePaper? Increase the reach of your titles
YUMPU automatically turns print PDFs into web optimized ePapers that Google loves.
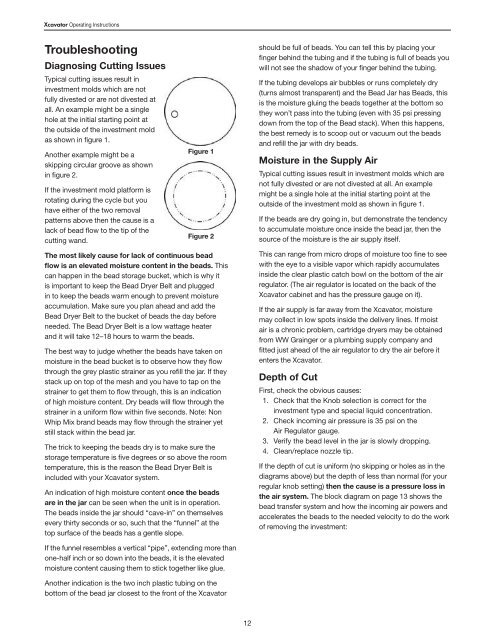
<strong>Xcavator</strong> Operating <strong>Instruction</strong>sTroubleshootingDiagnosing Cutting IssuesTypical cutting issues result ininvestment molds which are notfully divested or are not divested atall. An example might be a singlehole at the initial starting point atthe outside of the investment moldas shown in figure 1.Another example might be askipping circular groove as shownin figure 2.If the investment mold platform isrotating during the cycle but youhave either of the two removalpatterns above then the cause is alack of bead flow to the tip of thecutting wand.Figure 1Figure 2The most likely cause for lack of continuous beadflow is an elevated moisture content in the beads. Thiscan happen in the bead storage bucket, which is why itis important to keep the Bead Dryer Belt and pluggedin to keep the beads warm enough to prevent moistureaccumulation. Make sure you plan ahead and add theBead Dryer Belt to the bucket of beads the day beforeneeded. The Bead Dryer Belt is a low wattage heaterand it will take 12–18 hours to warm the beads.The best way to judge whether the beads have taken onmoisture in the bead bucket is to observe how they flowthrough the grey plastic strainer as you refill the jar. If theystack up on top of the mesh and you have to tap on thestrainer to get them to flow through, this is an indicationof high moisture content. Dry beads will flow through thestrainer in a uniform flow within five seconds. Note: Non<strong>Whip</strong> <strong>Mix</strong> brand beads may flow through the strainer yetstill stack within the bead jar.The trick to keeping the beads dry is to make sure thestorage temperature is five degrees or so above the roomtemperature, this is the reason the Bead Dryer Belt isincluded with your <strong>Xcavator</strong> system.An indication of high moisture content once the beadsare in the jar can be seen when the unit is in operation.The beads inside the jar should “cave-in” on themselvesevery thirty seconds or so, such that the “funnel” at thetop surface of the beads has a gentle slope.should be full of beads. You can tell this by placing yourfinger behind the tubing and if the tubing is full of beads youwill not see the shadow of your finger behind the tubing.If the tubing develops air bubbles or runs completely dry(turns almost transparent) and the Bead Jar has Beads, thisis the moisture gluing the beads together at the bottom sothey won’t pass into the tubing (even with 35 psi pressingdown from the top of the Bead stack). When this happens,the best remedy is to scoop out or vacuum out the beadsand refill the jar with dry beads.Moisture in the Supply AirTypical cutting issues result in investment molds which arenot fully divested or are not divested at all. An examplemight be a single hole at the initial starting point at theoutside of the investment mold as shown in figure 1.If the beads are dry going in, but demonstrate the tendencyto accumulate moisture once inside the bead jar, then thesource of the moisture is the air supply itself.This can range from micro drops of moisture too fine to seewith the eye to a visible vapor which rapidly accumulatesinside the clear plastic catch bowl on the bottom of the airregulator. (The air regulator is located on the back of the<strong>Xcavator</strong> cabinet and has the pressure gauge on it).If the air supply is far away from the <strong>Xcavator</strong>, moisturemay collect in low spots inside the delivery lines. If moistair is a chronic problem, cartridge dryers may be obtainedfrom WW Grainger or a plumbing supply company andfitted just ahead of the air regulator to dry the air before itenters the <strong>Xcavator</strong>.Depth of CutFirst, check the obvious causes:1. Check that the Knob selection is correct for theinvestment type and special liquid concentration.2. Check incoming air pressure is 35 psi on theAir Regulator gauge.3. Verify the bead level in the jar is slowly dropping.4. Clean/replace nozzle tip.If the depth of cut is uniform (no skipping or holes as in thediagrams above) but the depth of less than normal (for yourregular knob setting) then the cause is a pressure loss inthe air system. The block diagram on page 13 shows thebead transfer system and how the incoming air powers andaccelerates the beads to the needed velocity to do the workof removing the investment:If the funnel resembles a vertical “pipe”, extending more thanone-half inch or so down into the beads, it is the elevatedmoisture content causing them to stick together like glue.Another indication is the two inch plastic tubing on thebottom of the bead jar closest to the front of the <strong>Xcavator</strong>12


