GV-Video Server
GV-Video Server
GV-Video Server
- No tags were found...

You also want an ePaper? Increase the reach of your titles
YUMPU automatically turns print PDFs into web optimized ePapers that Google loves.
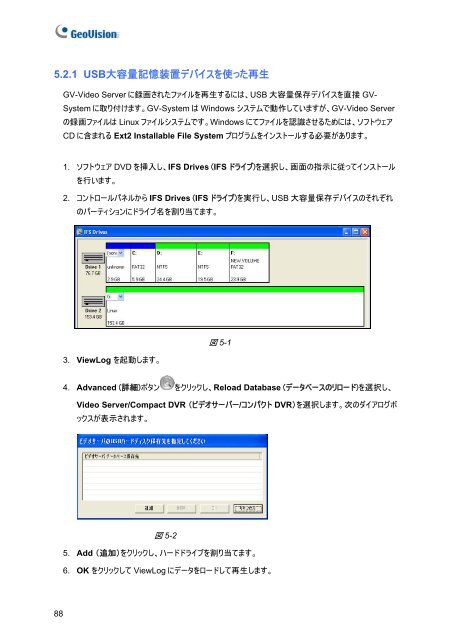
5.2.1 USB 大 容 量 記 憶 装 置 デバイスを 使 った 再 生<strong>GV</strong>-<strong>Video</strong> <strong>Server</strong> に 録 画 されたファイルを 再 生 するには、USB 大 容 量 保 存 デバイスを 直 接 <strong>GV</strong>-System に 取 り 付 けます。<strong>GV</strong>-System は Windows システムで 動 作 していますが、<strong>GV</strong>-<strong>Video</strong> <strong>Server</strong>の 録 画 ファイルは Linux ファイルシステムです。Windows にてファイルを 認 識 させるためには、ソフトウェアCD に 含 まれる Ext2 Installable File System プログラムをインストールする 必 要 があります。1. ソフトウェア DVD を 挿 入 し、IFS Drives (IFS ドライブ)を 選 択 し、 画 面 の 指 示 に 従 ってインストールを 行 います。2. コントロールパネルから IFS Drives (IFS ドライブ)を 実 行 し、USB 大 容 量 保 存 デバイスのそれぞれのパーティションにドライブ 名 を 割 り 当 てます。3. ViewLog を 起 動 します。図 5-14. Advanced ( 詳 細 )ボタン をクリックし、Reload Database (データベースのリロード)を 選 択 し、<strong>Video</strong> <strong>Server</strong>/Compact DVR (ビデオサーバー/コンパクト DVR)を 選 択 します。 次 のダイアログボックスが 表 示 されます。図 5-25. Add ( 追 加 )をクリックし、ハードドライブを 割 り 当 てます。6. OK をクリックして ViewLog にデータをロードして 再 生 します。88