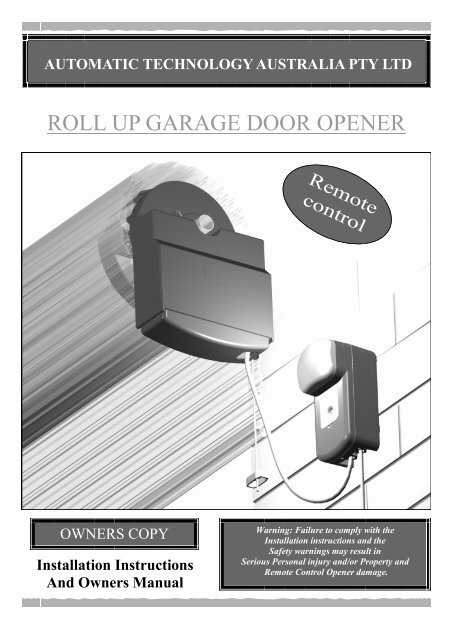
ROLL UP GARAGE DOOR OPENER - Capital Doorworks
ROLL UP GARAGE DOOR OPENER - Capital Doorworks
ROLL UP GARAGE DOOR OPENER - Capital Doorworks
- No tags were found...

Create successful ePaper yourself
Turn your PDF publications into a flip-book with our unique Google optimized e-Paper software.
PLEASE READ THESE IMPORTANT SAFETY RULES<br />
Failure to comply with the following Safety Rules may result in<br />
Serious Personal injury and/or Property Damage.<br />
For ADDITIONAL SAFETY protection we<br />
STRONGLY recommend the fitting of a Photo Electric<br />
beam. In most countries Photo Electric Beams are mandatory<br />
on all garage doors fitted with Automatic Openers.<br />
For a small additional outlay ATA recommends that<br />
Photo Electric Beams be installed with the Automatic<br />
Opener insuring additional safety and peace of mind.<br />
DO NOT operate the Garage Door Opener unless the<br />
Garage Door is in full view and free from objects such<br />
as cars and children/people. SERIOUS PERSONAL<br />
INJURY and/or property damage can result from failure<br />
to follow this warning.<br />
DO NOT operate the Garage Door Opener when children/persons<br />
are near the door. Children must be supervised<br />
near garage door at all time and when Door<br />
Opener is in use. SERIOUS PERSONAL INJURY<br />
and/or property damage can result from failure to follow<br />
the warning.<br />
DO NOT allow children to operate the Garage Door<br />
Opener. SERIOUS PERSONAL INJURY and/or<br />
property damage can result from failure to follow this<br />
warning.<br />
Make sure that the SAFETY OBSTRUCTION<br />
FORCE is working correctly, and is TESTED and set<br />
as per the Installation Instructions Manual. Failure to<br />
follow the Manual could result in SERIOUS PER-<br />
SONAL INJURY and/or property damage. This test<br />
must be repeated at regular intervals and the necessary<br />
adjustments made if required.<br />
DO NOT disengage the Door Opener to manual operation<br />
with children/persons or any other objects including<br />
motor vehicle within the doorway.<br />
Install the wall switch or wall mounted transmitter in a<br />
LOCATION / POSITION where the garage door is<br />
visible and out of reach of children.<br />
The Garage door must be WELL BALANCED.<br />
Sticking or binding doors must be repaired by a qualified<br />
garage door installer prior to Opener installation.<br />
DO NOT attempt to repair door yourself as hardware<br />
is under extreme tension and can cause SERIOUS<br />
PERSONAL INJURY and/or property damage.<br />
REMOVE OR DISENGAGE all garage doors locks<br />
and mechanisms prior to installation of Opener.<br />
Connect the Garage Door Opener to a properly<br />
EARTHED general purpose 240V outlet installed by<br />
a qualified electrical contractor.<br />
DISCONNECT THE POWER CORD from main<br />
power before making any repairs or removing covers.<br />
Only EXPERIENCED service personnel can remove<br />
covers from Opener.<br />
Keep hands and loose clothing CLEAR of the door<br />
and Door Opener at all times.<br />
When using auto close mode a PHOTO ELECTRIC<br />
BEAM must be fitted correctly and tested for operation<br />
at regular intervals. EXTREME CAUTION is<br />
recommend when using auto close mode. All<br />
SAFETY RULES above must be followed.<br />
In order for the Garage Door Opener to SENSE an object<br />
obstructing the door way, some FORCE must be<br />
exerted on the object. As a result the object, door and/<br />
or person may suffer DAMAGE or INJURY .<br />
Make sure that the door is fully open before driving<br />
into or out of the garage.<br />
Make sure the door is fully closed before leaving the<br />
driveway.<br />
Automatic Technology Australia Pty Ltd to the extent that such may be lawfully excluded hereby expressly disclaims all conditions or warranties, Statutory or<br />
otherwise which may be implied by laws as conditions or warranties of purchase of an Automatic Technology Australia Pty Ltd Roll Up Garage Door Opener<br />
and<br />
Automatic Technology Australia Pty Ltd hereby further expressly excludes all or any liability for any injury, damage, cost, expense or claim whatsoever suffered<br />
by any person as a result whether directly or indirectly from failure to install the Automatic Technology Australia Roll Up Garage Door Opener in accordance<br />
2
FEATURES<br />
Your ATA Automatic Garage Door<br />
Opener has many features which<br />
you will appreciate. The components<br />
and materials used in this<br />
Automatic Opener are of the latest<br />
technology and highest quality. Below<br />
are listed some of the many features.<br />
OPERATION<br />
To operate the door simply press the<br />
hand held transmitter or the wall<br />
mounted transmitter or optional wall<br />
switch for two seconds and the door<br />
will automatically open or close.<br />
The door can be stopped during an<br />
opening or closing cycle by pressing<br />
again. The next actuation will move<br />
the door in the opposite direction.<br />
HOPPING CODE<br />
Every time a transmission is made<br />
from the Remote Transmitter a new<br />
security code is generated. The<br />
n u mb e r o f p o s s i b l e c o d e<br />
combinations is over 4.29 billion.<br />
This greatly enhances security of the<br />
system. Code ‟Grabbing‟ is made a<br />
thing of the past.<br />
ISS (INTELLIGENT SAFETY<br />
OBSTRUCTION SYSTEM)<br />
While the door is doing a closing<br />
cycle and if it should hit an obstacle<br />
or be restricted in some manner, it<br />
will automatically reverse. The<br />
amount of force the door should<br />
encounter before reversing, is<br />
automatically adjusted by the doors<br />
control system, during the initial<br />
installation of the automatic door<br />
opener. The door also if restricted<br />
whilst opening will stop. The Safety<br />
Obstruction Force should be<br />
checked at least once a month. See<br />
installation manual for instructions.<br />
SECURITY CODE STORE<br />
The Opener uses state of the art<br />
technology in storing your selected<br />
Transmitter Security Code. Up to 27<br />
different codes can be stored in the<br />
Openers memory.<br />
To store any code simply press and<br />
hold the Door Code button on the<br />
Opener and press the Transmitter<br />
button twice. Each or all codes can be<br />
deleted and changed at any time. The<br />
codes can also be stored with the<br />
Transmitter from a remote location.<br />
OVER LOAD INDICATOR<br />
When the maximum opening and<br />
closing capacity of the Opener is<br />
exceeded the Courtesy Light will<br />
flash 10 times and an audible beeper<br />
will sound to indicate that an Overload<br />
has occurred.<br />
SERVICE INDICATOR<br />
The Opener has a Service indicator.<br />
When the Overload LED light flashes<br />
and the beeper sounds at the start of a<br />
door cycle, it means that the opener<br />
and or garage door needs a service.<br />
AUTO COURTESY LIGHT<br />
The Courtesy Light on the Opener<br />
comes on automatically whenever the<br />
door is activated to do an opening or<br />
closing cycle. The Light can also be<br />
switched on and off without operating<br />
the door. This is done by pressing<br />
the button on any Hand Held Transmitter<br />
or Wall Mounted Transmitter<br />
which has been stored with the light<br />
code, or by pressing the light button<br />
on the Wall Switch (optional). The<br />
light will stay on for approximately<br />
three minutes then switch off. This<br />
time is also adjustable.<br />
CAS (COLOUR ASSISTED<br />
SETTINGS)<br />
To make the installation of the<br />
Automatic Opener more user friendly<br />
Automatic Technology Australia<br />
developed the CAS (Colour Assisted<br />
Settings) system. This unique system<br />
makes installation easy and quick, as<br />
all the Open and Close adjustments<br />
and settings are colour coordinated.<br />
Red for Close and Green for Open. .<br />
OPEN AND CLOSE DRIVE<br />
BUTTONS<br />
Another feature developed by<br />
Automatic Technology Australia in<br />
aiding in the installation of the<br />
opener is the Open and Close Drive<br />
Buttons. These buttons are used to<br />
help set the open and close limit<br />
positions. A quicker setting time<br />
and a more precise limit position<br />
can be achieved using this feature.<br />
INITIALISATION<br />
The Reset button on the Door<br />
Opener is used to initialise or re<br />
-initialise the obstruction settings<br />
and door travel counts. See<br />
installation manual for instructions.<br />
AUTO CLOSE MODE<br />
The Opener can be programmed to<br />
automatically close after an open<br />
cycle. The Auto Close time is<br />
adjustable. It is compulsory to install<br />
a Photo Electric Beam if this<br />
mode is selected, otherwise the door<br />
will not operate.<br />
SAFETY AUTO RUN TIME<br />
If the Opener does not complete its<br />
cycle within thirty seconds the<br />
Opener will stop if opening, and reverse<br />
back open if closing automatically.<br />
PHOTO ELECTRIC BEAM<br />
(OPTIONAL)<br />
The Opener has an input for a Photo<br />
Electric Beam to be connected for<br />
extra safety protection. And use of<br />
the Auto Close Mode<br />
MANUAL OPERATION<br />
The Opener is equipped with a<br />
unique Manual Disengaging Device.<br />
If the power to the Opener is<br />
disrupted for any reason the door<br />
can be put into Manual Mode by<br />
pulling down on the string handle,<br />
then releasing. This will allow you<br />
to manually open or close the door.<br />
When power is restored, by pulling<br />
down on the string handle and<br />
releasing, the opener is put back into<br />
Automatic Mode.<br />
3
OPERATING CONTROLS<br />
1. LIGHT CODE button (White)<br />
is used for storing or erasing the<br />
transmitter button (code) you wish<br />
to use to turn the courtesy light on<br />
and off.<br />
2. <strong>DOOR</strong> CODE button (Blue) is<br />
used for storing or erasing the<br />
transmitter button (code) you wish<br />
to use to command the door to<br />
open , stop or close.<br />
3. CLOSE DRIVE button (Red) is<br />
used during installation to help set<br />
the close limit stop position. Pressing<br />
and holding this button will<br />
move the door in the close direction.<br />
Movement stops when the button is<br />
released.<br />
NOTE: The close safety obstruction<br />
detection is inoperable whenever<br />
the Close Drive button is<br />
used to move door.<br />
4. CLOSE LIMIT Led (Red) the<br />
led is very helpful during installation,<br />
it illuminates and flashes when<br />
the door is closing and remains<br />
steady on when the close limit is<br />
activated<br />
5. AUTO CLOSE TIME button<br />
(White) is used to adjust the auto<br />
close time. While holding in the<br />
Auto Close button and then pressing<br />
the Open button the time is increased,<br />
pressing the Close button<br />
will decrease the time. (each press<br />
will increase the time by 5 seconds)<br />
6. RESET button is used to<br />
initialise and set the door/opener<br />
operating parameters, including<br />
cycle times and obstruction force<br />
settings. Check the installation manual<br />
for other uses.<br />
7. O / S / C button (Yellow) is used<br />
during installation to test the Open,<br />
Stop and Close cycles for the<br />
Opener. The Opener has to be initialised<br />
by the Reset button before the<br />
O/S/C button becomes operable.<br />
8. CLOSE LIMIT ADJUST<br />
SCREW Red is used to fine adjust<br />
the close limit stop position. See installation<br />
section on how to adjust.<br />
9. OPEN LIMIT ADJUST<br />
SCREW (Green) is used to fine<br />
adjust the open limit stop position.<br />
Check installation section on how<br />
to adjust.<br />
10. CLOSE LIMIT CAM (Red) is<br />
used to set the close limit stop<br />
position. Check installation section<br />
on how to adjust.<br />
11. OPEN Drive button (Green) is<br />
used during installation to help set<br />
the open limit stop position. Pressing<br />
and holding this button will<br />
move the door in the open direction.<br />
Movement stops when the button is<br />
released.<br />
NOTE: The open obstruction<br />
detection is disabled whenever the<br />
Open Drive button is used to<br />
move door.<br />
12. OPEN LIMIT Led (Green)<br />
the led is very helpful during installation,<br />
it illuminates and flashes<br />
when the door is opening and<br />
remains steady on when the open<br />
limit is activated<br />
13. OPEN LIMIT CAM (Green)<br />
is used to set the open limit stop<br />
position. Check installation section<br />
on how to adjust.<br />
14. FORCE MARGIN SET<br />
button (White) is used to change<br />
the force pressure when the door encounters<br />
an obstruction. Pressing the<br />
Force Margin Set button and Open<br />
or Close button will increase or<br />
decrease the force. Normally the<br />
force pressure is set automatically.<br />
The Force Margin Set is only ever<br />
used if other environmental factors<br />
(wind, etc.) effect the operations of<br />
the Door/Opener.<br />
15. P.E. Input is for connection of<br />
Photo Electric Beams (optional<br />
extra) for extra safety obstruction<br />
protection, are compulsory when<br />
used with Auto Close mode.<br />
NOTE: P.E. SHUNT must not be<br />
removed otherwise the Opener will<br />
not function correctly. Remove only<br />
when a P.E. is to be connected.<br />
16. EXTERNAL RECEIVER<br />
INPUT is the input where an<br />
external receiver can be connected<br />
(optional extra). The receiver must<br />
be able to operate on 24 volts DC<br />
(50mA max.).<br />
17. SECURALIGHT Input is<br />
used for connecting a Securalight<br />
(optional extra) Monitor. A<br />
Securalight is a monitor unit which<br />
is mounted inside your home and is<br />
connected to the Opener by wire<br />
cable. The monitor indicates the<br />
status of the door, for example if the<br />
door is moving or is opened or<br />
closed, etc. The door can also be<br />
controlled from the monitor unit.<br />
18. O / S / C Input is for connecting<br />
the wired Wall Switch (optional<br />
extra) .<br />
19. P. E. SHUNT The shunt has<br />
to be removed when connecting a<br />
Photo Electric Beam.<br />
20. ENGAGE / DISENGAGE<br />
HANDLE when pulled down and<br />
released will select manual mode on<br />
Opener when there is a power failure.<br />
Pulling down and releasing<br />
again will select automatic mode on<br />
the Opener.<br />
4
OPERATING CONTROLS<br />
1<br />
2<br />
3<br />
4<br />
5<br />
6<br />
7<br />
8<br />
9<br />
10<br />
11 12 13 14 15<br />
1) FORCE MARGIN SET BUTTON<br />
2) OPEN LIMIT LED (GREEN)<br />
3) OPEN DRIVE BUTTON (GREEN)<br />
4) O/S/C BUTTON (YELLOW)<br />
5) RESET BUTTON<br />
6) AUTO CLOSE TIME BUTTON<br />
7) CLOSE LIMIT LED (RED)<br />
8) CLOSE DRIVE BUTTON (RED)<br />
9) <strong>DOOR</strong> CODE BUTTON (BLUE)<br />
10) LIGHT CODE BUTTON<br />
11) ENGAGE / DISENGAGE HANDLE<br />
12) OPEN LIMIT ADJUST SCREW (GREEN)<br />
13) CLOSE LIMIT ADJUST SCREW (RED)<br />
14) OPEN LIMIT CAM (GREEN)<br />
15) CLOSE LIMIT CAM (RED)<br />
5
PACKAGE CONTENTS<br />
ITEM<br />
QUANTITY<br />
(1) DRIVE UNIT………………………………………………………………………………………….. 1<br />
(2) CONTROL BOX……………………………………………………………………………………... 1<br />
(3) KEY RING TRANSMITTER PTX-4……………...………………………………………………... 2<br />
(3.1) ALKALINE BATTERY A23 12V……………………………………………………………………. 2<br />
(4) WEIGHT BARS (NOT INCLUDED IN SOME COUNTRIES)………………………………….. 2<br />
(5) WEIGHT BARS ACCESSORY PACK (NOT INCLUDED IN SOME COUNTRIES)………… 1<br />
(5.1) PAN HEAD SCREW M5x40………………………………………………………………………….. 4<br />
(5.2) HEX NUT M5………………………………………………………………………………………….. 4<br />
(5.3) SPRING WASHER I.D 5………………………………………………………………………………. 4<br />
(6) INSTALLATION MANUAL…………………………………………………………………………. 1<br />
6
SEQUENCE OF INSTALLATION<br />
SIDE ROOM REQUIREMENTS<br />
Figure 1 shows the minimum side room that is required.<br />
The distance between the edge of the door curtain and the inside<br />
of the bracket is 85mm, and the distance between the<br />
edge of the door curtain and the outside of bracket is 135mm.<br />
Figure 2 shows the recommended side room. The distance<br />
between the edge of the door curtain and the inside of the<br />
bracket should be 110mm minimum, and the distance between<br />
the edge of the door curtain and the outside of bracket is<br />
160mm minimum.<br />
1. CHECK OPERATION OF <strong>DOOR</strong><br />
BEFORE BEGINNING THE INSTALLATION OF THE<br />
EASY <strong>ROLL</strong>ER AUTOMATIC <strong>OPENER</strong> CHECK THE<br />
OPERATION OF THE <strong>DOOR</strong>.<br />
The door must be well balanced and be in an reasonable operating<br />
condition. You should be able to lift the door smoothly<br />
and with little resistance. It should stay open around 900mm to<br />
1200mm above the floor. The door should not stick or bind in<br />
the guide tracks. The ideal operational effort in raising or lowering<br />
the door should not exceed a force of 10 kg (22 lbs.).<br />
MINIMUM SIDE ROOM<br />
RECOMMENDED SIDE ROOM<br />
135mm<br />
85mm<br />
160mm<br />
110mm<br />
FIG. 1<br />
FIG. 2<br />
FIG. 2A<br />
2. FIXING OF <strong>DOOR</strong> WEIGHT BARS<br />
Move the door manually to the mid open position. Place the<br />
weight bars equally apart on the bottom rail of the door and<br />
secure them with the fasteners provided (Fig. 2A). Check the<br />
operation of the door again. If the door feels heavy it may require<br />
extra tension to be added to the door springs. Refer to<br />
the door Installation manual from manufacturer on how to tension<br />
the door.<br />
7
FIG. 3<br />
FIG. 3a<br />
3. MOUNTING OF CONTROL BOX<br />
1. Determine the position for the control box on the wall. Considering<br />
that it must be: a) out of reach of children, 1.5 mtr<br />
above the ground and b) close enough to the drive unit to run<br />
the 1.8 mtr connecting wires.<br />
2. If required, place the mains power and connecting wire inside<br />
the slots on the back of the control box then into appropriate<br />
conduit.<br />
3. Drill all holes as shown in (Fig 3) and locate the bottom two<br />
screws (not supplied) as shown leaving the screw head protruding<br />
3.5mm (Fig 3a)<br />
4. Mount the control box onto the bottom two screws.<br />
5. Pull off the light diffuser and fix the top screw (not supplied)<br />
through the control box, see (Fig 3). Replace the light diffuser.<br />
FIG. 4<br />
4. LEFT OR RIGHT HAND INSTALLATION<br />
The Automatic Opener can be installed on the left or right hand<br />
side of the door (when looking out from the inside of the garage).<br />
If your opener is to be installed on the RIGHT HAND<br />
side of the door then go on to step 4. If the LEFT HAND side is<br />
your selected side for installation the next step is to move the<br />
motor wire connector on the control board. The connector plug<br />
has to be removed and reconnected to the LEFT side of the<br />
connector (Fig. 4). If you have made an error in selection and<br />
wish to install to the RIGHT HAND side of the door, then reconnect<br />
the connector plug to the RIGHT side of the connector<br />
(Fig. 5).<br />
FIG. 5<br />
8
INSTALLATION<br />
5. FIXING DRIVE UNIT TO THE <strong>DOOR</strong><br />
(RIGHT HAND INSTALLATION)<br />
The Automatic Openers Drive Unit can be fixed to the<br />
Roll Up Garage Door in a variety of ways. Below we will<br />
describe one method of fixing. Make sure there is enough<br />
side room (135mm from end of door shaft to the wall) to<br />
slide Drive Unit onto shaft.<br />
FIG. 6<br />
PLEASE NOTE : THE INSTRUCTIONS FOR<br />
FIXING OF THE DRIVE ASSEMBLY TO THE<br />
<strong>DOOR</strong> IS FOR RIGHT HAND INSTALLATION.<br />
FITTING DRIVE UNIT TO <strong>DOOR</strong><br />
( Fig. 6, Fig. 7, and Fig. 8 ).<br />
1. Check that the door shaft U bolt is securely<br />
tightened on the left hand side of the door.<br />
2. Raise the door and tie a rope around the centre<br />
to secure the roll.<br />
3. Support the right hand end of the door with a<br />
suitable prop, e.g. step ladder and soft padding<br />
to protect door surface.<br />
FIG. 7<br />
STOP. WARNING: DO NOT ALLOW CHILDREN/<br />
PERSONS AROUND THE <strong>DOOR</strong> AND PROP.<br />
SERIOUS PERSONAL INJURY AND / OR PROP-<br />
ERTY DAMAGE CAN RESULT FROM FAILURE TO<br />
FOLLOW THIS WARNING.<br />
4. Check that Step 3. was completed. Carefully<br />
loosen and remove the right hand door shaft U bolt.<br />
5. Make sure that the door supporting prop is<br />
secure. While the door is supported remove the<br />
right hand door mounting bracket from wall.<br />
6. Remove the Drive Unit from packaging.<br />
Try and rotate the drive gear by pushing on the<br />
fork. If the gear does not rotate the manual<br />
mode has to be selected. To select pull on the<br />
string handle downwards, then release slowly.<br />
The drive gear should now rotate. (Fig 13).<br />
7. Slide the Drive Unit over the door axle making sure<br />
that the fork extends into and over one of the spokes<br />
of the door drum wheel.<br />
8. Refit the door mounting bracket to the wall.<br />
In some cases the bracket may have to be<br />
re-positioned. Re-tighten the door shaft U bolt.<br />
Remove door supporting prop and untie rope<br />
from curtain.<br />
9. Straighten the Drive Unit and position as per<br />
Fig. 8. Tighten the two locking bolts firmly to<br />
secure the Drive Unit.<br />
10. Check the manual operation of the door by raising<br />
and lowering the door. The door should run<br />
smoothly and not catch on any part of the Drive Unit<br />
11. Plug the connecting wire from the control box into<br />
the bottom of the drive unit (Fig 8).<br />
FIG. 8<br />
9
INSTALLATION<br />
6. FIXING OF <strong>DOOR</strong> CURTAIN TO<br />
DRUM WHEEL<br />
The door curtain has to be secured to the drum wheel with<br />
suitable fasteners.<br />
1. With the door in the fully closed position mark the<br />
curtain (Fig. 9) on both ends of the door.<br />
2. Open door slightly to have access to the marked<br />
positions. Secure the curtain to drum wheel using<br />
self drilling screws (two on each end). The screws<br />
should be at least 90 degrees apart (Fig. 9).<br />
FIG. 9<br />
7. SETTING LIMIT SWITCHES<br />
IMPORTANT NOTE: The O / S / C button<br />
and Transmitters will not function until the<br />
Limits are adjusted and Step 8.1 is completed.<br />
The Limit Cams, Limit Fine Adjustment Screws and Door<br />
Drive buttons are colour coded to make the setting of the<br />
limits as user friendly as possible.<br />
The GREEN colours for OPEN LIMIT SETTING.<br />
The RED colours for CLOSE LIMIT SETTING.<br />
7.1 SETTING LIMITS FOR RIGHT<br />
HAND INSTALLATION<br />
1. With the Drive Unit in manual mode (Fig. 13)<br />
move the door up by hand to the desired open position.<br />
2. Remove the Limits Cover (Fig. 10). Rotate<br />
by hand in a anticlockwise direction the green<br />
limit cam (Fig. 11) until the cam clicks the<br />
open limit switch.<br />
3. Move the door down by hand to the desired closed<br />
position.<br />
4. Rotate by hand in a clockwise direction the red limit<br />
cam (Fig. 12) until the cam clicks the close limit<br />
switch.<br />
5. Connect power lead from the Drive Unit into,<br />
a general purpose power outlet installed by a licensed<br />
electrical contractor. Turn the Power On.<br />
6. Re-engage the drive gear to door by pulling down on<br />
the string and then releasing slowly (Fig. 13).<br />
OPEN LIMIT ADJUSTMENT<br />
Press in and hold the Green Open button (Fig 11) The<br />
door should start opening. Release the Green Open button<br />
when the door reaches the desired open position. If<br />
the Green LED (Fig. 11) is illuminated and the desired<br />
limit position has been reached then the limit adjustment<br />
is complete. If the Green LED is illuminated but<br />
you are not happy with the door open position, the<br />
Green Fine Adjustment Screw (Fig. 11) can be adjusted<br />
to fine tune the open position. Adjust the screw anticlockwise<br />
to open the door more. To open the door less<br />
adjust the screw clockwise. Each complete revolution<br />
of the adjustment screw is equal to approximately 10<br />
mm of door travel.<br />
<br />
<br />
<br />
<br />
<br />
<br />
<br />
<br />
<br />
<br />
FIG. 10<br />
FIG. 11<br />
<br />
<br />
<br />
10
INSTALLATION<br />
NOTE: If the door has not reached the desired<br />
limit position by more then 30 mm, then it is<br />
recommended that the green limits cam be<br />
adjusted again before the green fine adjustment<br />
screw is adjusted.<br />
CLOSE LIMIT ADJUSTMENT<br />
Press in and hold the Red Close button. (Fig 12)<br />
The door should start closing. Release the<br />
Red Close button when the door reaches the desired<br />
closed position. If the Red LED Fig. 12) is<br />
illuminated and the desired limit position has<br />
been reached then the limit adjustment is<br />
complete. If the Red LED is illuminated but you<br />
are not happy with the door close position, the<br />
Red Fine Adjustment Screw (Fig. 12) can be<br />
adjusted to fine tune the close position. Adjust<br />
the screw anticlockwise to close the door<br />
less. To close the door more adjust the Red Fine<br />
Adjustment Screw clockwise. Each complete<br />
revolution of the adjustment screw is equal to<br />
approximately 10 mm of door travel.<br />
NOTE: If the door has not reached the desired<br />
limit position by more then 30 mm, then it is<br />
recommended that the red limits cam be<br />
adjusted again before the red fine adjustment<br />
screw is adjusted.<br />
<br />
<br />
<br />
<br />
<br />
<br />
<br />
<br />
<br />
<br />
<br />
<br />
<br />
FIG. 12<br />
FIG. 13<br />
7.2 SETTING LIMITS FOR<br />
LEFT HAND INSTALLATION<br />
1. With the Drive Unit in manual mode (Fig. 13) move<br />
the door up by hand to the desired open position.<br />
2. Remove the Limit Cover (Fig. 10). Rotate by hand<br />
in a clockwise direction the Green Limit Cam (Fig.<br />
14) until the cam clicks the open limit switch.<br />
3. Move the door down by hand to the desired closed<br />
position.<br />
4. Rotate by hand in a anticlockwise direction the red<br />
limit cam (Fig. 15) until the cam clicks the close<br />
limit switch.<br />
5. Connect Power Lead from the Drive Assembly into,<br />
a general purpose power outlet installed by a licensed<br />
qualified electrical contractor. Make sure<br />
that the Power Lead is safely fastened away from<br />
any moving parts. Turn the Power On.<br />
6. Re-engage the drive gear to door by pulling down<br />
on the string handle and then releasing slowly (Fig.<br />
13).<br />
11
INSTALLATION<br />
OPEN LIMIT ADJUSTMENT<br />
Press in and hold the Green Open Button (Fig 14) The<br />
door should start opening. Release the Green Open button<br />
when the door reaches the desired open limit stop<br />
position. If the Green LED (Fig. 14) is illuminated<br />
and the desired limit stop position has been<br />
reached then the limit adjustment is complete. If<br />
the Green LED is illuminated but you are not happy<br />
with the door open position, the Green Fine Adjustment<br />
Screw (Fig. 14) can be adjusted to fine tune<br />
the open position. To open the door more, turn the<br />
Green Fine Adjustment Screw clockwise. To open the<br />
door less turn the Green Fine Adjustment screw<br />
anticlockwise. Each complete revolution of the<br />
adjustment screw is equal to approximately 10 mm<br />
of door travel.<br />
NOTE: If the door has not reached the desired<br />
limit position by more then 30 mm, it is recommended<br />
that the green limits cam be adjusted again before<br />
the green fine adjustment screw is adjusted.<br />
CLOSE LIMIT ADJUSTMENT<br />
Press in and hold the Red Close button (Fig 15) The<br />
door should start closing. Release the Red Close button<br />
when the door reaches the desired closed limit stop<br />
position. If the Red LED (Fig. 15) is illuminated and<br />
the desired limit position has been reached<br />
then the limit adjustment is complete. If the Red LED<br />
is illuminated but you are not happy with the door<br />
close position, the Red Fine Adjustment Screw (Fig. 15)<br />
can be adjusted to fine tune the close position.<br />
Adjust the screw clockwise to close the door less. To<br />
close the door more adjust the screw anticlockwise.<br />
Each complete revolution of the adjustment screw is<br />
equal to approximately 10 mm of door travel.<br />
NOTE: If the door has not reached the desired<br />
limit position by more then 30 mm, then it is<br />
recommended that the red limits cam be<br />
adjusted again before the red fine adjustment<br />
screw is adjusted.<br />
<br />
<br />
<br />
<br />
<br />
<br />
<br />
<br />
<br />
<br />
<br />
<br />
<br />
FIG. 14<br />
FIG. 15<br />
<br />
<br />
<br />
<br />
<br />
<br />
<br />
<br />
<br />
<br />
<br />
<br />
<br />
12
INASTALLATION<br />
8. SETTING OF OPEN AND CLOSE<br />
SAFETY OBSTRUCTION FORCE<br />
The Safety Obstruction Force is calculated automatically and<br />
set in memory on the Automatic Opener. This applies to both<br />
the Open Force and Close Force.<br />
Warning: When step 8.1 is initiated the Garage Door will<br />
do a full open and close cycle automatically. Please keep<br />
door way clear to avoid any personal injury or damage to<br />
property.<br />
8.1 TO INITIALISE OBSTRUCTION FORCE<br />
1. Press and hold down the close button 8 (FIG. 16), to move<br />
the door to the fully closed position. Check that the RED<br />
LED is steady ON, to confirm the door is set on the closed<br />
limit position.<br />
2. Press the Reset button 5 (FIG. 16) for two seconds, the<br />
door should start opening. As soon as the door reach‟s the<br />
fully open position it will pause momentarily then start to<br />
close.<br />
The door has to do a full open and close cycle with no<br />
interruptions for the safety obstruction parameters to be<br />
calculated and set automatically.<br />
A default safety force pressure margin is preset in the factory.<br />
Under normal operating conditions this default margin should<br />
not be changed. If you are unhappy with the pressure you can<br />
change it as below.<br />
8.2 TO INCREASE FORCE PRESSURE<br />
1. Press and hold the Force Margin Set button 1 (Fig. 16).<br />
2. While holding down button 1 press the green Open<br />
button 3. The green LED will illuminate each time the<br />
green open button is pressed to indicate that the force<br />
pressure is being increased. If the green LED flashes continuously<br />
when the open button is being pressed, this<br />
indicates that the maximum force pressure setting has been<br />
reached.<br />
8.3 TO DECREASE FORCE PRESSURE<br />
1. Press and hold the Force Margin Set button 1 (Fig. 16).<br />
2. While holding down button 1 press the red Close button 8.<br />
The red LED will illuminate each time the red Close.<br />
button is pressed, to indicate that the force pressure is<br />
being reduced. When the red LED flashes continuously<br />
when the red close button is being pressed, this indicates<br />
that the minimum force pressure setting has been reached.<br />
8.4 TO RECALL FACTORY SET FORCE MARGIN<br />
1. While holding down the Force Margin Set button 1 press<br />
the RESET button 5 for two seconds.<br />
2. Release both buttons. The default setting should now be<br />
recalled.<br />
IMPORTANT NOTE:<br />
Whenever the Limit Switches or Cams are<br />
adjusted the safety obstruction force has to be<br />
re-initialised because the door travel distance<br />
may have changed. To re-initialise please follow<br />
STEP 8.1 above.<br />
1<br />
5<br />
<br />
<br />
<br />
<br />
<br />
<br />
<br />
<br />
<br />
<br />
<br />
<br />
<br />
FIG. 16<br />
8<br />
FIG. 17<br />
13
INSTALLATION<br />
8.5 SAFETY OBSTRUCTION TEST<br />
TESTING CLOSE CYCLE<br />
1. Open the door by pressing the Yellow O/S/C<br />
button 4 (Fig 18).<br />
2. Place a length of timber 100mm X 50mm on the<br />
floor directly under the door (FIG. 17).<br />
3. Press the Yellow O/S/C button to close door. The<br />
door should strike the object and start to re-open.<br />
TESTING OPEN CYCLE<br />
1. Close the door by pressing the Yellow O/S/C<br />
button 4. (Fig 18).<br />
2. Press again to open the door. When the door<br />
reaches half the opening distance grab the bottom<br />
rail of the door firmly, the door should stop.<br />
If the door does not reverse readily when closing, or stop<br />
when opening, the force may be excessive and need adjusting,<br />
refer to STEP 8.1, 8.2, 8.3 and 8.4.<br />
IMPORTANT WARNING: If the door is closing and<br />
is unable to reopen when obstructed discontinue use.<br />
Do not use a door with faulty obstruction sensing.<br />
Repair fault and re test before using.<br />
9. SETTING TRANSMITTERS CODES<br />
INTO <strong>DOOR</strong> <strong>OPENER</strong><br />
The Remote Transmitters and Wall Mount Transmitters<br />
can be programmed into the Door Opener as below.<br />
Make sure to connect the battery to the Transmitters. The<br />
memory in the Openers receiver can store up to<br />
27 different remote control transmitters.<br />
9.1 STORING THE TRANSMITTERS CODE<br />
1. Press and hold the blue Door Code button on the<br />
Control Panel button 9 (FIG. 18).<br />
2. Press the button (one of four) on the Transmitter<br />
you would like to use to control the door for<br />
approximately two seconds, (FIG. 18). Pause for<br />
two seconds. Press the same button again on the<br />
Transmitter for approximately two second.<br />
3. Release the blue Door Code button 9.<br />
4. Press the Transmitter button to see if it operates the<br />
door. If you wish you can code in all four buttons on<br />
the Transmitter so all four can operate the same door.<br />
9.2 STORING ADDITIONAL TRANSMITTER (S)<br />
FROM A REMOTE LOCATION<br />
Using this method you don‟t need to have access to the<br />
control panel on the Door Opener. However, you do need<br />
a transmitter that is pre coded to the controller‟s receiver.<br />
IMPORTANT NOTE: The Door must be activated<br />
when the step below is preformed. The moving Door is<br />
to confirm from a remote location that the correct button<br />
was pressed and the transmitter is in range of the<br />
opener of a pre coded Transmitter.<br />
1. Take any pre coded Transmitter. Press the button for<br />
the function you require until the door is activated<br />
and release.<br />
2. Then using a small needle press and hold firmly for<br />
2 seconds through the Coding Hole (Fig 18)<br />
3. Within 10 seconds take the additional transmitter you<br />
wish to code and follow STEP 9.1 para 2, as above.<br />
FIG. 18<br />
FIG. 19<br />
14
INSTALLATION<br />
10. SETTING THE TRANSMITTER TO<br />
OPERATE THE COURTESY LIGHT<br />
The Transmitter can be programmed to operate the<br />
Courtesy Light on the Door Opener.<br />
1. Press and hold Light Code button 10 on the Control<br />
Panel (Fig. 20).<br />
2. Press the button on the Transmitter you would like to<br />
use to control the light for approximately two seconds,<br />
Pause for two seconds. Press the same button again<br />
on the Transmitter for approximately two seconds.<br />
3. Release the Light Code button 10.<br />
4. Press the Transmitter button to see if it operates<br />
the light.<br />
11. DELETING PROGRAMMED CODES<br />
11.1 DELETING A STORED TRANSMITTER CODE<br />
1. Select the transmitter you want to delete.<br />
2. Press and hold the blue Door Code button 9 ( Fig. 21)<br />
on the Control Panel.<br />
3. Press the Transmitter button you would like to delete<br />
for two seconds. Pause for two seconds.<br />
Press the Transmitter button again for two seconds.<br />
4. Release the blue Door Code button 9. The code<br />
should now be deleted. Confirm this by pressing the<br />
transmitter button to see if it can operate the door. The<br />
door should not respond.<br />
11.2 DELETING ALL STORED TRANSMITTER<br />
CODES<br />
1. Turn the Power Off to the Drive Unit.<br />
2. Press and hold the blue Door Code button 9 (Fig.21)<br />
on the Control panel.<br />
3. Turn the Power On again, while holding the Blue<br />
Door Code button until the Coding LED illuminates.<br />
(approx. 10 to 12 seconds)<br />
Release the blue Door Code button 9. All the stored<br />
codes including the Courtesy Light Codes should now<br />
be deleted. Confirm this by trying to operate the door<br />
by pressing one of the deleted transmitters.<br />
12. SETTING OF COURTESY LIGHT<br />
TIME<br />
The preset courtesy light time on the Door Opener is<br />
3 minutes. This time can be changed as below.<br />
1. Press in together and hold the Auto Close Time button<br />
6 and Force Margin Set button 1 (Fig. 22).<br />
2. While holding in the two buttons, press the green<br />
Open button 8 ( Fig. 22). Each press of this<br />
button will add 10 seconds to the light time.<br />
3. To decrease the time follow step 1 and press the red<br />
Close button 8 (Fig. 22). Each press will deduct<br />
10 seconds from the light time.<br />
4. To recall the factory set default light time press in<br />
and hold together the Auto Close Time button 6, the<br />
Force Margin Set button 1 and the Reset button 5 for<br />
about 2 seconds. (Fig. 22).<br />
FIG. 20<br />
FIG. 21<br />
FIG. 22<br />
15
INSTALLATION<br />
13. FITTING OF SAFETY PHOTO<br />
ELECTRIC BEAM (OPTIONAL)<br />
Locate the Photo Electric Beam (P.E.) normally closed<br />
contact type in a strategic location within doorway. Remove<br />
shunt from P.E connector (Fig.23) and connect the<br />
plug from the P.E. wiring harness to P.E. connector<br />
(Fif.24). Follow the wiring diagram supplied with the<br />
P.E. for wiring of the P.E.<br />
WARNING; When using auto close and P.E. beams, the<br />
doorway must be clear of all obstructions and persons at<br />
all times. The location of the beam and manner in which<br />
it is installed might not give safety protection at all<br />
times. Check to make sure that the height of the beam<br />
and type used give maximum protection possible.<br />
FIG. 23<br />
FIG. 24<br />
14. SETTING OF AUTO CLOSE TIME<br />
IMPORTANT NOTE:<br />
IT IS COMPULSORY TO INSTALL A PHOTO<br />
ELECTRIC BEAM BEFORE USING THE AUTO<br />
CLOSE MODE.<br />
The Auto Close timer will only start after the Photo Electric<br />
Beams (P.E.) path is broken and the auto close time<br />
has been set. If the P.E. path is not broken the door will<br />
remain open till the path is broken. If the Door Opener incurs<br />
an obstruction (not from the P.E.) while closing the<br />
door will re-open and not auto close.<br />
After the setting of the auto close mode, whenever the<br />
door is in the open position the open limit green LED will<br />
flash to indicate that the auto close mode is in operation.<br />
FIG. 25<br />
SETTING AUTO CLOSE TIME<br />
1. Press in and hold the Auto Close Time button 6<br />
(Fig. 25).<br />
2. While holding in the Auto Close Time button, press<br />
the green Open button 3 (FIG. 25). Each press of<br />
this button will add 5 seconds to the preset auto close<br />
time of „0„ seconds.( 0 seconds = “OFF”)<br />
3. To decrease the time follow step 1 and press the red<br />
Close button 8. Each press will deduct 5 seconds<br />
from the auto close time.<br />
4. Press the O/S/C button 4 (Fig. 25) or Transmitter<br />
to open the door. While the door is opening break the<br />
path of the P.E. Beam, this will initialise the auto<br />
close mode. When the door reaches the fully opened<br />
position, the door will pause for the set auto close time<br />
and start to auto close.<br />
16
INSTALLATION<br />
FACTORY SET DEFAULTS.<br />
DEFAULT STEP MAXIMUM<br />
MAXIMUM MOTOR RUN TIME 30 Sec. _ _<br />
COURTESY LIGHT TIME 3 Min. 10 Sec. 10 Min.<br />
OBSTRUCTION FORCE MARGIN 10 1 20<br />
AUTO CLOSE TIME 0 Sec = Off 5 Sec. 4 Min.<br />
<strong>DOOR</strong> STATUS INDICATORS.<br />
<strong>DOOR</strong> <strong>OPENER</strong> STATE<br />
OPEN<br />
LED<br />
GREEN<br />
CLOSE<br />
LED<br />
RED<br />
<strong>DOOR</strong><br />
STATUS<br />
LED<br />
YELLOW<br />
COURTESY<br />
LIGHT<br />
BEEPER<br />
OPEN<br />
ON<br />
CLOSE<br />
ON<br />
OPENING<br />
FLASHING<br />
CLOSING<br />
FLASHING<br />
<strong>DOOR</strong> TRAVEL STOPPED FLASHING FLASHING<br />
<strong>DOOR</strong> OBSTRUCTED WHEN OPENING FLASHING BEEPS ON AND OFF<br />
<strong>DOOR</strong> OBSTRUCTED WHEN CLOSING FLASHING BEEPS ON AND OFF<br />
<strong>DOOR</strong> OVERLOADED<br />
FLASHES<br />
10 TIMES<br />
BEEPS ON AND OFF<br />
<strong>DOOR</strong> AND <strong>OPENER</strong> APPROACHING OVER-<br />
LOAD<br />
BEEPS FOR DURATION<br />
OF TIME APPROACHING<br />
OVERLOAD<br />
<strong>DOOR</strong> HAS APPROACHED THE OVERLOAD<br />
THREE TIMES IN EIGHT CYCLES.<br />
ON<br />
BEEPS ONCE AT START<br />
OF ANY CYCLE<br />
<strong>DOOR</strong> IN OPEN POSITION WITH AUTO CLOSE<br />
MODE SELECTED<br />
MAINS POWER INTERR<strong>UP</strong>TED TO <strong>OPENER</strong><br />
ONE SECOND<br />
FLASHES<br />
RAPID<br />
FLASHES<br />
17
SPARE PARTS<br />
WHEN ORDERING SPARE<br />
PARTS<br />
QUOTE THE ORDER CODE NUM-<br />
BER TO YOUR LOCAL IN-<br />
18
FAULTS AND REMEDIES<br />
SYMPTOMS POSSIBLE CAUSES REMEDY<br />
Door will not operate<br />
Door in locked or motor jammed<br />
Door will not reverse when obstructed<br />
Door moves downwards and<br />
reverses itself upwards<br />
Door operates from drive unit but<br />
not from hand transmitter<br />
Main Power not turned on<br />
Door is obstructed<br />
Door needs to be re-initialised<br />
There could be an obstruction in door way.<br />
Adverse weather conditions (wind or cold)<br />
causing door to stiffen and become tight in<br />
tracks.<br />
Indicator on transmitter not lighting<br />
Code not stored in openers receiver<br />
Drive unit aerial wire not extended<br />
Battery flat<br />
Turn on Mains Power<br />
Remove obstruction<br />
Unlock door and Inspect door and remove jam<br />
Fully close the door and press the Reset button<br />
(refer installation instruction step 8.1)<br />
Remove obstruction.<br />
Increase the force pressure and / or re-initialise<br />
the door (refer installation instruction step 8.1<br />
and 8.2)<br />
Battery flat or battery lead broken<br />
Refer to installation instructions step 9<br />
Extend aerial wire<br />
Replace battery (12V)<br />
Door does not close fully Limit micro switch incorrectly adjusted Re-adjust limit switch (refer<br />
installation instruction – step 7 and 8)<br />
Door does not open fully Limit micro switch incorrectly adjusted Re-adjust limit switch (refer<br />
installation instruction – step 7 and 8)<br />
Lights malfunction or keep blowing. Globe blown or incorrect globe<br />
Courtesy Light Flashing<br />
The Door Opener has detected a overload<br />
condition. The door may be jamming, lost<br />
Spring tension or needs repair.<br />
Replace with 24V DC 15 watts Festoon globe<br />
Discontinue use of the Door Opener and call a<br />
qualified service man to repair door. Continual<br />
use may cause severe damage to the door and<br />
Door Opener.<br />
Auto close not working<br />
P.E. Beam faulty or wiring broken<br />
P.E. Beam obstructed or dirty<br />
Door obstructed when closing<br />
Auto Close time or mode not set<br />
Repair P.E. or broken wire<br />
Remove obstruction/clean from the path of PE.<br />
Close door using Transmitter. Refer to installation<br />
instruction – step 14<br />
Refer to installation instruction – step 14.<br />
INPUT VOLTAGE:<br />
TRANSFORMER:<br />
<strong>OPENER</strong> LIFTING FORCE<br />
<strong>OPENER</strong> OPENING / CLOSING<br />
LIMITS TRAVEL<br />
RECEIVER TYPE<br />
TRANSMITTER<br />
TECHNICAL SPECIFICATIONS.<br />
220 - 240 VAC 50 Hz<br />
(Other voltages available on request<br />
110VAC 60Hz, 127VAC 60Hz)<br />
Primary Voltage<br />
Secondary Voltage<br />
Controller Voltage<br />
250 N<br />
3.5 Turns of Door Drum Wheel<br />
UHF 433.92 MHz. AM Receiver<br />
Receiver Code Storage Capacity<br />
Frequency<br />
Coding Type<br />
Number of Code Combinations<br />
Code Generation<br />
Battery Voltage<br />
MOTOR TYPE Permanent Magnet Direct CurrentVoltage 24V DC<br />
19<br />
220 V / 240 V AC<br />
24 V AC 100 VA<br />
24V DC<br />
27 X 4 Button Transmitter Codes<br />
433.92 MHz<br />
Hopping Code<br />
Over 4.29 Billion Hopping Codes<br />
Non-linear Encryption Algorithm<br />
12 Volts<br />
GLOBE TYPE Festoon Type 15 watts / 24V DC
Printed for Export<br />
**WARRANTY AND EXCLUSION OF LIABILITY**<br />
Subject to all of the matter set out below, Automatic Technology Australia Pty Ltd (“ATA”) WARRANTS for twenty four months<br />
from the date of purchase (specified in the receipt sales docket) that the Garage Door Opener System contained in the accompanying<br />
packaging (the “Product”) is free of any defects in material and workmanship rendering it unmerchantable.<br />
This warranty referred to above applied only where:<br />
a) the consumer seeking to rely on the said warranty;<br />
1) returns the Product which it claims to be defective; and<br />
2) presents the relevant sales docket and this warranty document,<br />
To the retailer from whom the Product was purchased to confirm that date of purchase; and<br />
b) the purchaser notified ATA or the retailer from whom the Product was purchased of the alleged defect in the Product immediately<br />
upon experience or learning of the alleged defect.<br />
Except for the warranty against defects in material and workmanship set out above, ATA gives no warranties of any kind whatsoever,<br />
whether express or implied or whether statutory or at common law, in relation to the Product, and all warranties of fitness<br />
for particular purpose and other warranties of whatsoever kind relating to the Product are hereby declaimed. Without limiting<br />
the generality of the foregoing, ATA disclaims any liability of whatsoever nature in respect of any claim or demand loss or<br />
damage which arise out of;<br />
a) accidental damage to or normal wear and tear to the Product or to the Product’s components;<br />
b) flood, fire or lighting;<br />
c) incorrect, improper or unreasonable maintenance and/or use;<br />
d) installation, adjustment or use other than ATA which is not in accordance with the instructions set out in installation instruction<br />
incorporated in the document;<br />
e) attempted or complete modification or repairs to the Product carried out by a person who is not authorised by ATA to carry<br />
out such modification or repairs;<br />
f) faulty or unsuitable wiring of structure to which the Product is fixed or connected; and<br />
g) radio (including citizen band transmission) or any electronic interference.<br />
h) blown fuses or damage caused by electrical surges.<br />
i) damage caused by insects.<br />
ATA’s liability under the warranty set out above is limited, at ATA’s absolute option, to replacing or repairing the Product<br />
which ATA, in its unfettered opinion, considers to the defective either in material and/or workmanship or to credit the consumer<br />
with the price at which the Product was purchased by the consumer.<br />
Where the Product is retailed by any person other than ATA, except for the warranty set out above, such person has no authority<br />
from ATA to give any warranty or guarantee on ATA’s behalf in addition to the warranty set out above.<br />
AUTOMATIC TECHNOLOGY AUSTRALIA PTY LTD<br />
ABN 11 007 125 368<br />
17-19 Advantage Rd, Highett, Victoria, Australia , 3190<br />
Ph: 61+ (03) 9532 2788 Fax:61+ (03) 9532 2799<br />
www.ata-aust.com.au E-mail: sales@ata-aust.com.au