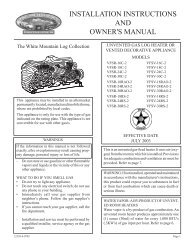
EMPIRE
Flint Hill & Burner VFD(M,R,T) - White Mountain Hearth
Flint Hill & Burner VFD(M,R,T) - White Mountain Hearth

Create successful ePaper yourself
Turn your PDF publications into a flip-book with our unique Google optimized e-Paper software.
VFDR18LB10(N,P) LIGHTING INSTRUCTIONS<br />
FOR YOUR SAFETY READ BEFORE LIGHTING<br />
Warning: If you do not follow these instructions exactly, a fire or explosion may result causing property damage,<br />
personal injury or loss of life.<br />
A. This appliance has a pilot which must be lighted by<br />
hand. When lighting the pilot, follow these instructions<br />
exactly.<br />
B. BEFORE LIGHTING, smell all around the appliance area<br />
for gas. Be sure to smell next to the floor because some<br />
gas is heavier than air and will settle on the floor.<br />
WHAT TO DO IF YOU SMELL GAS<br />
• Do not try to light any appliance<br />
• Do not touch any electrical switch; Do not use any<br />
phone in your building<br />
• Immediately call your gas supplier from a neighbor's<br />
phone. Follow the gas supplier's instructions.<br />
• If you cannot reach your gas supplier, call the fire<br />
department.<br />
C. Use only your hand to push in or turn the gas control<br />
knob. Never use tools. If the knob will not push in or<br />
turn by hand, don't try to repair it, call a qualified service<br />
technician. Force or attempted repair may result in a fire<br />
or explosion.<br />
D. Do not use this appliance if any part has been under water.<br />
Immediately call a qualified service technician to inspect<br />
the appliance and to replace any part of the control system<br />
and any gas control which has been under water.<br />
LIGHTING INSTRUCTIONS<br />
1. STOP! Read the safety information above on this page.<br />
2. Set REMOTE/OFF/ON switch to "OFF".<br />
3. Turn off all electric power to the<br />
appliance (if applicable).<br />
4. Open bottom louver assembly (if<br />
applicable).<br />
5. Push in gas control knob slightly<br />
and turn clockwise to "OFF".<br />
NOTE: Knob cannot be turned from "PILOT"<br />
to "OFF" unless knob is pushed in slightly.<br />
Do not force.<br />
6. Wait ten (10) minutes to clear out any gas.<br />
Then smell for gas, including near<br />
the floor. If you smell gas, STOP!<br />
Follow "B" in the safety information<br />
above. If you do not smell gas, go<br />
to the next step.<br />
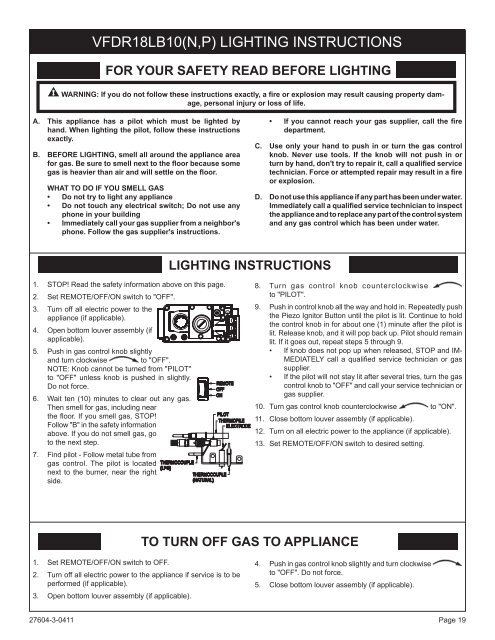
7. Find pilot - Follow metal tube from<br />
gas control. The pilot is located<br />
next to the burner, near the right<br />
side.<br />
GAS CONTROL KNOB<br />
SHOWNIN IN "OFF" POSITION.<br />
REMOTE<br />
OFF<br />
ON ON<br />
THERMOCOUPLE<br />
(LPG)<br />
THERMOCOUPLE<br />
(NATURAL)<br />
PILOT<br />
THERMOPILE<br />
ELECTRODE<br />
8. Turn gas control knob counterclockwise<br />
to "PILOT".<br />
9. Push in control knob all the way and hold in. Repeatedly push<br />
the Piezo Ignitor Button until the pilot is lit. Continue to hold<br />
the control knob in for about one (1) minute after the pilot is<br />
lit. Release knob, and it will pop back up. Pilot should remain<br />
lit. If it goes out, repeat steps 5 through 9.<br />
• If knob does not pop up when released, STOP and IM-<br />
MEDIATELY call a qualified service technician or gas<br />
supplier.<br />
• If the pilot will not stay lit after several tries, turn the gas<br />
control knob to "OFF" and call your service technician or<br />
gas supplier.<br />
10. Turn gas control knob counterclockwise to "ON".<br />
11. Close bottom louver assembly (if applicable).<br />
12. Turn on all electric power to the appliance (if applicable).<br />
13. Set REMOTE/OFF/ON switch to desired setting.<br />
TO TURN OFF GAS TO APPLIANCE<br />
1. Set REMOTE/OFF/ON switch to OFF.<br />
2. Turn off all electric power to the appliance if service is to be<br />
performed (if applicable).<br />
3. Open bottom louver assembly (if applicable).<br />
4. Push in gas control knob slightly and turn clockwise<br />
to "OFF". Do not force.<br />
5. Close bottom louver assembly (if applicable).<br />
27604-3-0411 Page 19