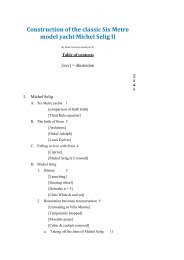
Michel Selig II
The Construction of The Classic Six Metre Model Yacht Michel Selig II
The Construction of The Classic Six Metre Model Yacht Michel Selig II

You also want an ePaper? Increase the reach of your titles
YUMPU automatically turns print PDFs into web optimized ePapers that Google loves.
I wanted a light wood which would be relatively easy to carve.<br />
Western red cedar was my preference, but its price at the saw<br />
mill near Saint-Tropez was prohibitive. I settled for a spruce<br />
(Picea abies) which has an average of one or two big knots for<br />
every 1.5 metres.<br />
The saw mill didn't want to plane the planks to the spacing of<br />
the waterlines (13.9 mm. or about half an inch). I settled for the<br />
thickness of two waterlines (27.8 mm. or about 1-1/8").<br />
Separate planks were used for the starboard and port halves of<br />
lift. This allowed cutting the inside portion of the lifts with a<br />
band saw.<br />
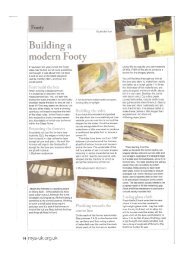
F. Fabricating the rough hull<br />
1. Transfer of the waterlines to the planks<br />
Whereas the margin of error in drawing the plans was ± 1<br />
mm., that for working on the wood was of at least ± 2 mm.<br />
a<br />
Slaloming through the knots<br />
The first task was to find a path on each plank which<br />
avoided knots. To say the least, it was tedious.<br />
For a given plank, the upper and lower waterlines lines<br />
of the lift form a pair, which can be named by the upper<br />
waterline. There are four possible positions of the<br />
upper waterline relative to the two faces of the plank:<br />
- on the topside of the plank, the centreline of the<br />
upper waterline can be on the right or left edges<br />
of the planks<br />
- ditto for the underside of the plank.<br />
For each position, one can slide the waterline from one<br />
end to the other of the plank looking for a point where<br />
the upper waterline doesn't pass through a knot.<br />
One must next verify that the lower waterline also<br />
avoids knots.<br />
To do this, I produced lengths of cardboard with the<br />
upper and lower waterlines drawn on them. I cut it<br />
along the upper waterline and then slid both cardboard<br />
halves from one end to the other of the plank to find the<br />
best position<br />
I cut then cut the cardboard along the lower waterline<br />
and verified that the position chosen for the upper<br />
waterline also proved a knot free path for the lower<br />
one.<br />
b. Drawing the waterlines on the planks.<br />
I then drew stations on both sides of the plank<br />
corresponding to the correct position of the waterlines.