

-ORIENTED
MagPi54
MagPi54

Create successful ePaper yourself
Turn your PDF publications into a flip-book with our unique Google optimized e-Paper software.
NIGHT-VISION CAMERA TRAP<br />
Tutorial<br />
mae ortes of od<br />
MOTION IN<br />
BACKGROUND<br />
nring that<br />
there are<br />
no moing<br />
oect in the<br />
ackgron of<br />
the hot eg<br />
tree aing<br />
will prevent<br />
hor of<br />
lank footage<br />
from eing<br />
recorded.<br />
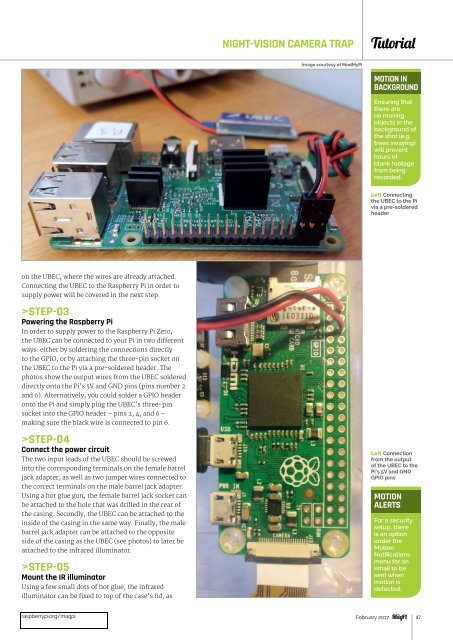
Left Connecting<br />
the UBEC to the Pi<br />
via a pre-soldered<br />
header<br />
on the UBEC, where the wires are already attached.<br />
Connecting the UBEC to the Raspberry Pi in order to<br />
supply power will be covered in the next step.<br />
>STEP-03<br />
Powering the Raspberry Pi<br />
In order to supply power to the Raspberry Pi Zero,<br />
the n e onneted to your i in two dierent<br />
ways: either by soldering the connections directly<br />
to the GPIO, or by attaching the three-pin socket on<br />
the UBEC to the Pi via a pre-soldered header. The<br />
photos show the output wires from the UBEC soldered<br />
directly onto the Pi’s 5V and GND pins (pins number 2<br />
and 6). Alternatively, you could solder a GPIO header<br />
onto the Pi and simply plug the UBEC’s three-pin<br />
socket into the GPIO header – pins 2, 4, and 6 –<br />
making sure the black wire is connected to pin 6.<br />
>STEP-04<br />
Connect the power circuit<br />
The two input leads of the UBEC should be screwed<br />
into the corresponding terminals on the female barrel<br />
jack adapter, as well as two jumper wires connected to<br />
the correct terminals on the male barrel jack adapter.<br />
Using a hot glue gun, the female barrel jack socket can<br />
be attached to the hole that was drilled in the rear of<br />
the casing. Secondly, the UBEC can be attached to the<br />
inside of the casing in the same way. Finally, the male<br />
barrel jack adapter can be attached to the opposite<br />
side of the casing as the UBEC (see photos) to later be<br />
attached to the infrared illuminator.<br />
>STEP-05<br />
Mount the IR illuminator<br />
Using a few small dots of hot glue, the infrared<br />
iumintor n e fied to top o the e id <br />
Left Connection<br />
from the output<br />
of the UBEC to the<br />
s and <br />
ns<br />
MOTION<br />
ALERTS<br />
For a security<br />
et, there<br />
is an option<br />
ner the<br />
Motion<br />
otication<br />
menu for an<br />
email to be<br />
ent hen<br />
motion is<br />
detected.<br />
raspberrypi.org/magpi February 2017<br />
47