PSIJanuary2018

Create successful ePaper yourself
Turn your PDF publications into a flip-book with our unique Google optimized e-Paper software.
TEST<br />
PRODUCT TEST<br />
AVTech AVH8516 NVR<br />
What’s in the box?<br />
NVR<br />
Power supply and UK to IEC<br />
(C5) mains lead<br />
8 x Drive carriers and<br />
mountings<br />
USB Mouse<br />
Disk Installation Sheet<br />
Software CD<br />
User manual<br />
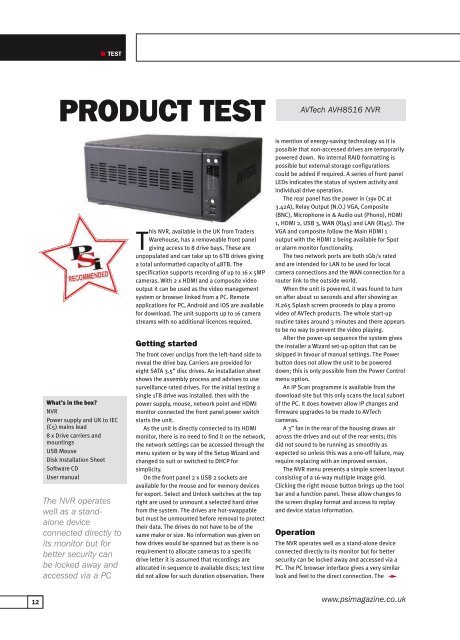
The NVR operates<br />
well as a standalone<br />
device<br />
connected directly to<br />
its monitor but for<br />
better security can<br />
be locked away and<br />
accessed via a PC<br />
This NVR, available in the UK from Traders<br />
Warehouse, has a removeable front panel<br />
giving access to 8 drive bays. These are<br />
unpopulated and can take up to 6TB drives giving<br />
a total unformatted capacity of 48TB. The<br />
specification supports recording of up to 16 x 5MP<br />
cameras. With 2 x HDMI and a composite video<br />
output it can be used as the video management<br />
system or browser linked from a PC. Remote<br />
applications for PC, Android and iOS are available<br />
for download. The unit supports up to 16 camera<br />
streams with no additional licences required.<br />
Getting started<br />
The front cover unclips from the left-hand side to<br />
reveal the drive bay. Carriers are provided for<br />
eight SATA 3.5” disc drives. An installation sheet<br />
shows the assembly process and advises to use<br />
surveillance rated drives. For the initial testing a<br />
single 1TB drive was installed. then with the<br />
power supply, mouse, network point and HDMI<br />
monitor connected the front panel power switch<br />
starts the unit.<br />
As the unit is directly connected to its HDMI<br />
monitor, there is no need to find it on the network,<br />
the network settings can be accessed through the<br />
menu system or by way of the Setup Wizard and<br />
changed to suit or switched to DHCP for<br />
simplicity.<br />
On the front panel 2 x USB 2 sockets are<br />
available for the mouse and for memory devices<br />
for export. Select and Unlock switches at the top<br />
right are used to unmount a selected hard drive<br />
from the system. The drives are hot-swappable<br />
but must be unmounted before removal to protect<br />
their data. The drives do not have to be of the<br />
same make or size. No information was given on<br />
how drives would be spanned but as there is no<br />
requirement to allocate cameras to a specific<br />
drive letter it is assumed that recordings are<br />
allocated in sequence to available discs; test time<br />
did not allow for such duration observation. There<br />
is mention of energy-saving technology so it is<br />
possible that non-accessed drives are temporarily<br />
powered down. No internal RAID formatting is<br />
possible but external storage configurations<br />
could be added if required. A series of front panel<br />
LEDs indicates the status of system activity and<br />
individual drive operation.<br />
The rear panel has the power in (19v DC at<br />
3.42A), Relay Output (N.O.) VGA, Composite<br />
(BNC), Microphone in & Audio out (Phono), HDMI<br />
1, HDMI 2, USB 3, WAN (RJ45) and LAN (RJ45). The<br />
VGA and composite follow the Main HDMI 1<br />
output with the HDMI 2 being available for Spot<br />
or alarm monitor functionality.<br />
The two network ports are both 1Gb/s rated<br />
and are intended for LAN to be used for local<br />
camera connections and the WAN connection for a<br />
router link to the outside world.<br />
When the unit is powered, it was found to turn<br />
on after about 10 seconds and after showing an<br />
H.265 Splash screen proceeds to play a promo<br />
video of AVTech products. The whole start-up<br />
routine takes around 3 minutes and there appears<br />
to be no way to prevent the video playing.<br />
After the power-up sequence the system gives<br />
the installer a Wizard set-up option that can be<br />
skipped in favour of manual settings. The Power<br />
button does not allow the unit to be powered<br />
down; this is only possible from the Power Control<br />
menu option.<br />
An IP Scan programme is available from the<br />
download site but this only scans the local subnet<br />
of the PC. It does however allow IP changes and<br />
firmware upgrades to be made to AVTech<br />
cameras.<br />
A 3” fan in the rear of the housing draws air<br />
across the drives and out of the rear vents; this<br />
did not sound to be running as smoothly as<br />
expected so unless this was a one-off failure, may<br />
require replacing with an improved version.<br />
The NVR menu presents a simple screen layout<br />
consisting of a 16-way multiple image grid.<br />
Clicking the right mouse button brings up the tool<br />
bar and a function panel. These allow changes to<br />
the screen display format and access to replay<br />
and device status information.<br />
Operation<br />
The NVR operates well as a stand-alone device<br />
connected directly to its monitor but for better<br />
security can be locked away and accessed via a<br />
PC. The PC browser interface gives a very similar<br />
look and feel to the direct connection. The<br />
12 www.psimagazine.co.uk