
You also want an ePaper? Increase the reach of your titles
YUMPU automatically turns print PDFs into web optimized ePapers that Google loves.
When you are satisfied that the new software has been accepted and installed onto the PCB, go to<br />
next step<br />
Step 12:<br />
Turn the machine and laptop OFF and disconnect the USB cable<br />
Step 13:<br />
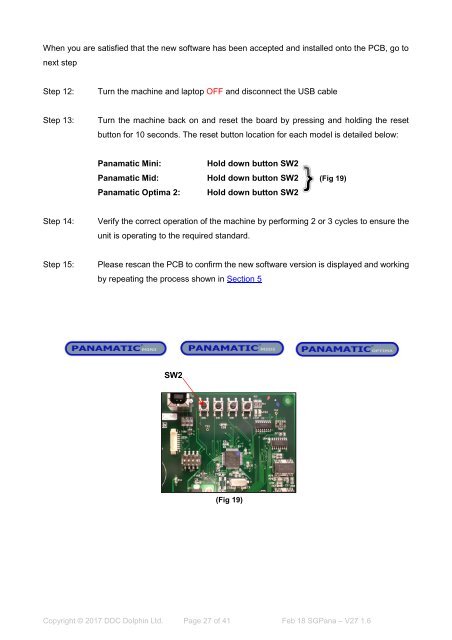
Turn the machine back on and reset the board by pressing and holding the reset<br />
button for 10 seconds. The reset button location for each model is detailed below:<br />
<strong>Panamatic</strong> <strong>Mini</strong>:<br />
<strong>Panamatic</strong> Mid:<br />
<strong>Panamatic</strong> <strong>Optima</strong> 2:<br />
Hold down button SW2<br />
Hold down button SW2<br />
Hold down button SW2<br />
(Fig 19)<br />
Step 14:<br />
Verify the correct operation of the machine by performing 2 or 3 cycles to ensure the<br />
unit is operating to the required standard.<br />
Step 15:<br />
Please rescan the PCB to confirm the new software version is displayed and working<br />
by repeating the process shown in Section 5<br />
SW2<br />
(Fig 19)<br />
Copyright © 2017 DDC Dolphin Ltd. Page 27 of 41 Feb 18 SGPana – <strong>V27</strong> 1.6