Landscape Stabilisation & Edging_MB_220318
You also want an ePaper? Increase the reach of your titles
YUMPU automatically turns print PDFs into web optimized ePapers that Google loves.
31<br />
LANDSCAPE EDGING RITE-EDGE<br />
RITE-EDGE Installation<br />
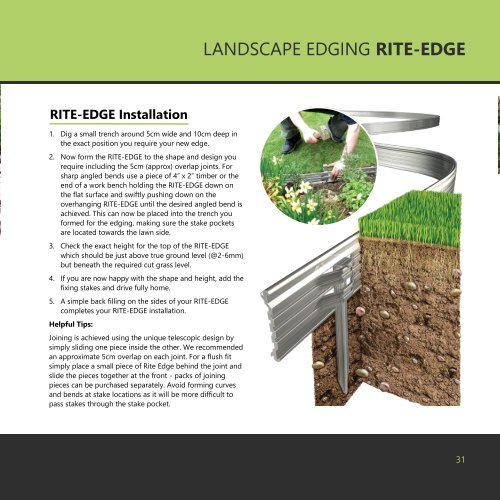
1. Dig a small trench around 5cm wide and 10cm deep in<br />
the exact position you require your new edge.<br />
2. Now form the RITE-EDGE to the shape and design you<br />
require including the 5cm (approx) overlap joints. For<br />
sharp angled bends use a piece of 4” x 2” timber or the<br />
end of a work bench holding the RITE-EDGE down on<br />
the flat surface and swiftly pushing down on the<br />
overhanging RITE-EDGE until the desired angled bend is<br />
achieved. This can now be placed into the trench you<br />
formed for the edging, making sure the stake pockets<br />
are located towards the lawn side.<br />
3. Check the exact height for the top of the RITE-EDGE<br />
which should be just above true ground level (@2-6mm)<br />
but beneath the required cut grass level.<br />
4. If you are now happy with the shape and height, add the<br />
fixing stakes and drive fully home.<br />
5. A simple back filling on the sides of your RITE-EDGE<br />
completes your RITE-EDGE installation.<br />
Helpful Tips:<br />
Joining is achieved using the unique telescopic design by<br />
simply sliding one piece inside the other. We recommended<br />
an approximate 5cm overlap on each joint. For a flush fit<br />
simply place a small piece of Rite Edge behind the joint and<br />
slide the pieces together at the front - packs of joining<br />
pieces can be purchased separately. Avoid forming curves<br />
and bends at stake locations as it will be more difficult to<br />
pass stakes through the stake pocket.<br />
31


