CM3G-CM3GP-CM3GPP Media Giant - Conceptronic
CM3G-CM3GP-CM3GPP Media Giant - Conceptronic
CM3G-CM3GP-CM3GPP Media Giant - Conceptronic

You also want an ePaper? Increase the reach of your titles
YUMPU automatically turns print PDFs into web optimized ePapers that Google loves.
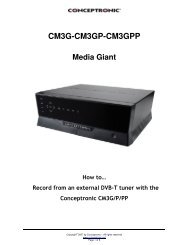
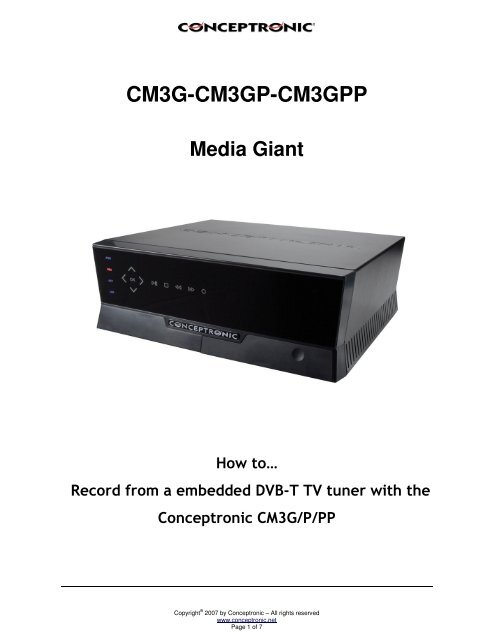
<strong>CM3G</strong>-<strong>CM3G</strong>P-<strong>CM3G</strong>PP<br />
<strong>Media</strong> <strong>Giant</strong><br />
How to…<br />
Record from a embedded DVB-T TV tuner with the<br />
<strong>Conceptronic</strong> <strong>CM3G</strong>/P/PP<br />
Copyright ® 2007 by <strong>Conceptronic</strong> – All rights reserved<br />
www.conceptronic.net<br />
Page 1 of 7
This how to document describes how you can connect and use your <strong>CM3G</strong>/P/PP to record digital channels<br />
from a TV with an embedded DVB-T tuner (within this document this will be mentioned as a TVDVB-T).<br />
ATTENTION: This feature can only be used in certain TV models, not all TV models will allow you to<br />
record from a embedded DVB-T tuner. Please check your TVs manufacturer manual if this is possible.<br />
Important<br />
As mentioned before not all TVs with embedded DVB-T tuner have the required connections to let the<br />
<strong>CM3G</strong>/P/PP record digital channels.<br />
It is mandatory that your TV has some kind of video output to let the <strong>CM3G</strong>/P/PP record digital channels.<br />
It could be that the video output from the TV only allows an analog tuner signal instead of DVB-T. Then<br />
please check with the TVs manufacturer to do a correct configuration.<br />
It should be mentioned in your TVs manufacturer manual if your TV has a video output available.<br />
Follow the steps as seen below to watch and record digital channels from a TV embedded DVB-T tuner with<br />
your <strong>CM3G</strong>/P/PP.<br />
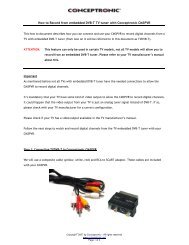
Step 1: Connecting TVDVB-T to the <strong>Conceptronic</strong> <strong>CM3G</strong>/P/PP<br />
We will use a composite cable (yellow, white, red) and the RCA to SCART adaptor. These cables are included<br />
with your <strong>CM3G</strong>/P/PP.<br />
Copyright ® 2007 by <strong>Conceptronic</strong> – All rights reserved<br />
www.conceptronic.net<br />
Page 2 of 7
In this example we use connection EXT1(RGB) as video output from the TVDVB-T.<br />
Connect the SCART adaptor to the video output of your TV. Connect one side of the composite cable to the<br />
SCART adaptor and the other side to the AV1 Input “AV1 IN” of your <strong>CM3G</strong>/P/PP.<br />
Note: Be sure that the RCA to SCART adaptor is set in OUTPUT mode.<br />
Step 2: Connecting <strong>Conceptronic</strong> <strong>CM3G</strong>/P/PP to TV<br />
Refer to chapter six (“Connecting your <strong>Media</strong> <strong>Giant</strong>”) of the <strong>CM3G</strong>/P/PP manual on how to connect the<br />
<strong>CM3G</strong>/P/PP to your TV.<br />
Copyright ® 2007 by <strong>Conceptronic</strong> – All rights reserved<br />
www.conceptronic.net<br />
Page 3 of 7
Step 3: Recording from TVDVB-T<br />
When all cable connections have been made turn on your <strong>CM3G</strong>/P/PP and your TVDVB-T. The menu of the<br />
<strong>CM3G</strong>/P/PP will be shown on your TV. If this is not the case, refer to chapter seven (“First-Time<br />
Configuration”) of the <strong>CM3G</strong>/P/PP manual.<br />
There are two methods to record from a digital TV tuner. The first one is to start recording instantly and the<br />
second one is a scheduled recording.<br />
Instant recording (One Touch Record)<br />
1. Turn on your TVDVB-T. Press the ‘SOURCE’ button twice on the <strong>CM3G</strong>/P/PP its remote control to select<br />
“Video 1” video input. If your TVDVB-T is turned on then you will be able to watch digital channels<br />
through the <strong>CM3G</strong>/P/PP.<br />
2. Use the TVDVB-T remote control to select the (digital) channel from which you want to start recording.<br />
3. Press the red ‘RECORD’ button on the remote control of the <strong>CM3G</strong>/P/PP to start recording instantly.<br />
4. To stop recording, press the ‘STOP’ button on the remote control of the <strong>CM3G</strong>/P/PP.<br />
Note: Do not turn off the CM3PVR or TVDVB-T during the recording. Also do not press<br />
any buttons on either of the remote controls or devices itself. Doing so might result in an<br />
incomplete recording.<br />
Copyright ® 2007 by <strong>Conceptronic</strong> – All rights reserved<br />
www.conceptronic.net<br />
Page 4 of 7
Scheduled recording<br />
You can set a scheduled recording to let the <strong>CM3G</strong>/P/PP start recording at a specified date/time.<br />
1. Select “Scheduled recording” at the initial menu. The following image will be shown on your screen:<br />
The Scheduled Recording menu shows 5 options, which can be selected with the left and right navigation<br />
buttons (8) of the remote control:<br />
Add: Add a new scheduled recording.<br />
Edit: Edit an existing scheduled recording.<br />
Delete: Delete a scheduled recording.<br />
Status: Change the status of the scheduled recording list.<br />
History: Display the scheduled recording history list.<br />
2. Select “Add” and press “Enter” on the remote control to create a new scheduled recording.<br />
By default, the ‘Source’ field is selected.<br />
All options can be changed with the up and down navigational buttons (8), and you can select another<br />
field with the left and right navigational buttons (8).<br />
3. Choose “VIDEO1” as source of the recording.<br />
4. Set the correct date for your recording.<br />
5. Set the correct start time for your recording.<br />
6. Set the length of your recording.<br />
7. Set the repeat option for your recording. You can select the following options:<br />
‘Once’, ‘Everyday’, ‘Mon-Fri’, ‘Mon-Sat’, ‘Sun’, ‘Mon’, ‘Tue’, ‘Wed’, ‘Thu’, ‘Fri’ or ‘Sat’.<br />
You can Skip the ‘Device’ field, since you can only record on the internal harddisk.<br />
Copyright ® 2007 by <strong>Conceptronic</strong> – All rights reserved<br />
www.conceptronic.net<br />
Page 5 of 7
8. Set the recording quality. You can choose between ‘HQ’, ‘SP’, ‘LP’, ‘EP’ and ‘SLP’.<br />
Note: Changing the ‘Quality’ field influences the quality of your recording and the amount of<br />
space needed for the recording. The available recording time for each quality setting is<br />
shown in the upper left part of the scheduling window.<br />
9. Set the ‘Nicam’ option to ‘on’ or ‘off’.<br />
The Nicam option should be set to ‘on’ if the source you want to record from broadcasts with 2 different<br />
audio sources (for example: Eurosport).<br />
10. When all the options are set for your recording, press the ‘Enter’ button (28) on the remote control to<br />
save the schedule.<br />
11. A confirmation popup will be shown on your screen. Select ‘Confirm’ and press the ‘Enter’ button (28)<br />
on the remote control to save the schedule.<br />
The recording is now programmed as a scheduled recording and the unit will start recording on the<br />
programmed time and channel, even when the device is set to ‘Standby’.<br />
Make sure the TVDVB-T is set to the right channel for the recording and leave it turned on.<br />
Copyright ® 2007 by <strong>Conceptronic</strong> – All rights reserved<br />
www.conceptronic.net<br />
Page 6 of 7
Note: The unit detects copy protection on the connected source, for example MacroVision<br />
protection on DVD discs. When a connected source is copy-protected, the unit will prevent<br />
recording and shows a warning message when the record button is pressed.<br />
Note: Do not use the switch on the back of the <strong>CM3G</strong>/P/PP to turn off the device, since it will not<br />
be able to turn on itself when a recording needs to be started. The device always needs to be<br />
in stand-by mode when a recording is scheduled.<br />
Note: The <strong>Media</strong> <strong>Giant</strong> records in HQ (High Quality) by default. You can change the recording<br />
quality in the Setup menu.<br />
Copyright ® 2007 by <strong>Conceptronic</strong> – All rights reserved<br />
www.conceptronic.net<br />
Page 7 of 7