Surrey Homes | SH57 | July 2019 | Summer supplement inside
The lifestyle magazine for Surrey - Inspirational Interiors, Fabulous Fashion, Delicious Dishes
The lifestyle magazine for Surrey - Inspirational Interiors, Fabulous Fashion, Delicious Dishes

Create successful ePaper yourself
Turn your PDF publications into a flip-book with our unique Google optimized e-Paper software.
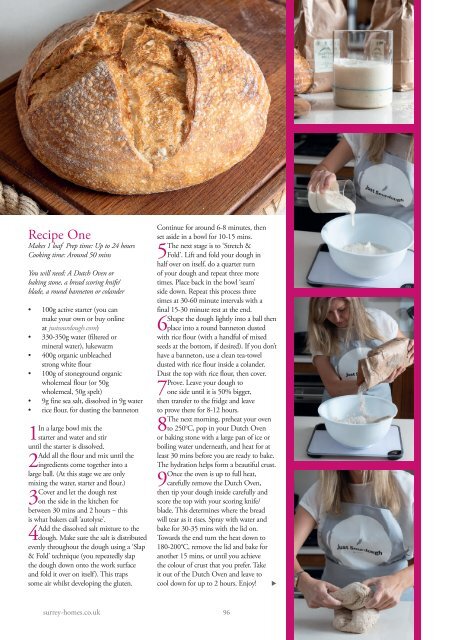
Recipe One<br />
Makes 1 loaf Prep time: Up to 24 hours<br />
Cooking time: Around 50 mins<br />
You will need: A Dutch Oven or<br />
baking stone, a bread scoring knife/<br />
blade, a round banneton or colander<br />
• 100g active starter (you can<br />
make your own or buy online<br />
at justsourdough.com)<br />
• 330-350g water (filtered or<br />
mineral water), lukewarm<br />
• 400g organic unbleached<br />
strong white flour<br />
• 100g of stoneground organic<br />
wholemeal flour (or 50g<br />
wholemeal, 50g spelt)<br />
• 9g fine sea salt, dissolved in 9g water<br />
• rice flour, for dusting the banneton<br />
1In a large bowl mix the<br />
starter and water and stir<br />
until the starter is dissolved.<br />
2Add all the flour and mix until the<br />
ingredients come together into a<br />
large ball. (At this stage we are only<br />
mixing the water, starter and flour.)<br />
3Cover and let the dough rest<br />
on the side in the kitchen for<br />
between 30 mins and 2 hours ‒ this<br />
is what bakers call ‘autolyse’.<br />
4Add the dissolved salt mixture to the<br />
dough. Make sure the salt is distributed<br />
evenly throughout the dough using a ‘Slap<br />
& Fold’ technique (you repeatedly slap<br />
the dough down onto the work surface<br />
and fold it over on itself). This traps<br />
some air whilst developing the gluten.<br />
Continue for around 6-8 minutes, then<br />
set aside in a bowl for 10-15 mins.<br />
5The next stage is to ‘Stretch &<br />
Fold’. Lift and fold your dough in<br />
half over on itself, do a quarter turn<br />
of your dough and repeat three more<br />
times. Place back in the bowl ‘seam’<br />
side down. Repeat this process three<br />
times at 30-60 minute intervals with a<br />
final 15-30 minute rest at the end.<br />
6Shape the dough lightly into a ball then<br />
place into a round banneton dusted<br />
with rice flour (with a handful of mixed<br />
seeds at the bottom, if desired). If you don’t<br />
have a banneton, use a clean tea-towel<br />
dusted with rice flour <strong>inside</strong> a colander.<br />
Dust the top with rice flour, then cover.<br />
7Prove. Leave your dough to<br />
one side until it is 50% bigger,<br />
then transfer to the fridge and leave<br />
to prove there for 8-12 hours.<br />
8The next morning, preheat your oven<br />
to 250°C, pop in your Dutch Oven<br />
or baking stone with a large pan of ice or<br />
boiling water underneath, and heat for at<br />
least 30 mins before you are ready to bake.<br />
The hydration helps form a beautiful crust.<br />
9Once the oven is up to full heat,<br />
carefully remove the Dutch Oven,<br />
then tip your dough <strong>inside</strong> carefully and<br />
score the top with your scoring knife/<br />
blade. This determines where the bread<br />
will tear as it rises. Spray with water and<br />
bake for 30-35 mins with the lid on.<br />
Towards the end turn the heat down to<br />
180-200°C, remove the lid and bake for<br />
another 15 mins, or until you achieve<br />
the colour of crust that you prefer. Take<br />
it out of the Dutch Oven and leave to<br />
cool down for up to 2 hours. Enjoy! <br />
surrey-homes.co.uk<br />
96