NMRA RH October 2018

You also want an ePaper? Increase the reach of your titles
YUMPU automatically turns print PDFs into web optimized ePapers that Google loves.
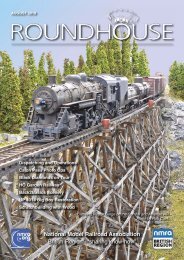
I wanted a polished marble floor and<br />
found photos of slabs on a supply<br />
company’s website. I loaded the photos<br />
into a graphics program, made<br />
them scale size, rotated copies and<br />
then laid them out to the floor plan,<br />
making sure the same images where<br />
not near each other. I printed out<br />
several copies and laminated them to<br />
give strength and the polished finish.<br />
Each of the three floors were cut to<br />
size and placed in the rooms. I then<br />
cut card to fill in the hole in the kit<br />
floor and stuck it to the laminate with<br />
double sided tape.<br />
I wanted a mezzanine floor above<br />
the main concourse to give a higher<br />
eating area. First I divided the three<br />
sections of the building with internal<br />
arched walls then cut the walls from<br />
foam core board and covered them<br />
with more dressed stone paper. The<br />
sheets include arched sections and<br />
I used those above the arched cut<br />
outs. The rear wall is wide enough for<br />
a row of tables and chairs to fit, the<br />
front is just a walkway. The mezzanine<br />
provides space underneath for<br />
the ticket office, toilets, etc. For the<br />
front walkway I made<br />
a glass balustrade<br />
from clear plastic sheet<br />
that used to surround<br />
a cake! Being clear<br />
stops it blocking views<br />
through the front windows.<br />
With the areas divided<br />
up I could start fitting<br />
them out. For the restaurant<br />
I added a kitchen<br />
and toilet block in<br />
one corner, made from<br />
foam core. I fitted it out with cooking<br />
equipment from a free Clever Models<br />
building and Scalescenes interior<br />
sheets. The floor and walls come<br />
from the Clever Models kitchen. To<br />
get lighting down to the kitchen which<br />
is visible through a window I ran the<br />
wires to a LED down an extraction<br />
pipe that runs up to the main ceiling.<br />
I made a serving bar from card that<br />
I printed my own design on. The<br />
seating booths are from Shapeways<br />
as are the bins, plates are punched<br />
from paper with food drawn on with<br />
fine markers, cups are short pieces<br />
of thin wire insulation.<br />
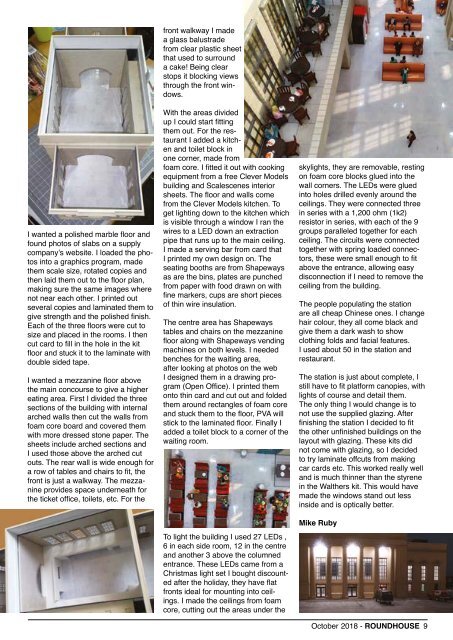
The centre area has Shapeways<br />
tables and chairs on the mezzanine<br />
floor along with Shapeways vending<br />
machines on both levels. I needed<br />
benches for the waiting area,<br />
after looking at photos on the web<br />
I designed them in a drawing program<br />
(Open Office). I printed them<br />
onto thin card and cut out and folded<br />
them around rectangles of foam core<br />
and stuck them to the floor, PVA will<br />
stick to the laminated floor. Finally I<br />
added a toilet block to a corner of the<br />
waiting room.<br />
To light the building I used 27 LEDs ,<br />
6 in each side room, 12 in the centre<br />
and another 3 above the columned<br />
entrance. These LEDs came from a<br />
Christmas light set I bought discounted<br />
after the holiday, they have flat<br />
fronts ideal for mounting into ceilings.<br />
I made the ceilings from foam<br />
core, cutting out the areas under the<br />
skylights, they are removable, resting<br />
on foam core blocks glued into the<br />
wall corners. The LEDs were glued<br />
into holes drilled evenly around the<br />
ceilings. They were connected three<br />
in series with a 1,200 ohm (1k2)<br />
resistor in series, with each of the 9<br />
groups paralleled together for each<br />
ceiling. The circuits were connected<br />
together with spring loaded connectors,<br />
these were small enough to fit<br />
above the entrance, allowing easy<br />
disconnection if I need to remove the<br />
ceiling from the building.<br />
The people populating the station<br />
are all cheap Chinese ones. I change<br />
hair colour, they all come black and<br />
give them a dark wash to show<br />
clothing folds and facial features.<br />
I used about 50 in the station and<br />
restaurant.<br />
The station is just about complete, I<br />
still have to fit platform canopies, with<br />
lights of course and detail them.<br />
The only thing I would change is to<br />
not use the supplied glazing. After<br />
finishing the station I decided to fit<br />
the other unfinished buildings on the<br />
layout with glazing. These kits did<br />
not come with glazing, so I decided<br />
to try laminate offcuts from making<br />
car cards etc. This worked really well<br />
and is much thinner than the styrene<br />
in the Walthers kit. This would have<br />
made the windows stand out less<br />
inside and is optically better.<br />
Mike Ruby<br />
<strong>October</strong> <strong>2018</strong> - ROUNDHOUSE 9