UNITROL SOFT TOUCH Manual for Welders
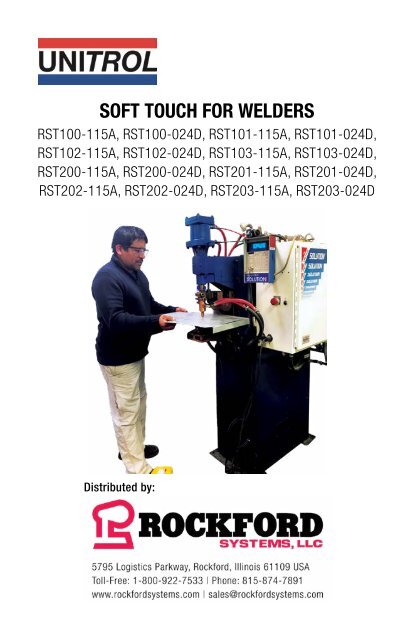
UNITROL SOFT TOUCH Manual for Welders The SOFT TOUCH Pinch-Point Safety System is the first and only fully passive safeguarding equipment designed to prevent a spot welder, a riveter or other small machine from applying full force if it detects fingers in the machine’s point-of-operation area. SOFT TOUCH prevents hand injuries and eliminates associated expenses such as hospitalization, lost days of work, higher insurance premiums and legal action. It does all this while not slowing down manufacturing operations. OSHA-compliant SOFT TOUCH technology will take you from pinch-point to pinch-proof without losing a minute of productivity. https://www.rockfordsystems.com/unitrol-soft-touch/ https://www.rockfordsystems.com/product/unitrol-soft-touch-pinch-point-safety-system-for-welders/
UNITROL SOFT TOUCH Manual for Welders
The SOFT TOUCH Pinch-Point Safety System is the first and only fully passive safeguarding equipment designed to prevent a spot welder, a riveter or other small machine from applying full force if it detects fingers in the machine’s point-of-operation area. SOFT TOUCH prevents hand injuries and eliminates associated expenses such as hospitalization, lost days of work, higher insurance premiums and legal action. It does all this while not slowing down manufacturing operations. OSHA-compliant SOFT TOUCH technology will take you from pinch-point to pinch-proof without losing a minute of productivity.
https://www.rockfordsystems.com/unitrol-soft-touch/
https://www.rockfordsystems.com/product/unitrol-soft-touch-pinch-point-safety-system-for-welders/
Create successful ePaper yourself
Turn your PDF publications into a flip-book with our unique Google optimized e-Paper software.
<strong>SOFT</strong> <strong>TOUCH</strong> FOR WELDERS<br />
RST100-115A, RST100-024D, RST101-115A, RST101-024D,<br />
RST102-115A, RST102-024D, RST103-115A, RST103-024D,<br />
RST200-115A, RST200-024D, RST201-115A, RST201-024D,<br />
RST202-115A, RST202-024D, RST203-115A, RST203-024D<br />
Distributed by:
Thank you <strong>for</strong> purchasing this Unitrol <strong>SOFT</strong> <strong>TOUCH</strong> system. It is designed to protect your<br />
resistance welder operator from serious electrode pinch-point injury. Please let us know<br />
if there are any questions or problems with the installation or use of this product. You<br />
can contact us:<br />
BY PHONE:<br />
Monday - Friday 8:00 - 5:00 CT: 1-800-922-7533<br />
BY EMAIL:<br />
sales@rock<strong>for</strong>dsystems.com<br />
BY REGULAR MAIL:<br />
Rock<strong>for</strong>d Systems, LLC<br />
5795 Logistics Parkway<br />
Rock<strong>for</strong>d, IL 61109<br />
USA<br />
2 | <strong>SOFT</strong> <strong>TOUCH</strong> FOR WELDERS
√<br />
MODEL<br />
RST100-115A<br />
RST102-115A<br />
RST101-115A<br />
RST100-024D<br />
RST101-024D<br />
RST200-115A<br />
RST201-115A<br />
RST200-024D<br />
RST201-024D<br />
RST-402<br />
RST-400<br />
RST-401<br />
RST-403<br />
RST-404<br />
RST-405<br />
RST-406<br />
RST-407<br />
RST-409<br />
RST-410<br />
RST-413<br />
WELDER TYPE &<br />
HARDWARE<br />
1Ø AC<br />
INCLUDES A SNUBBER<br />
AND 2=MUFFLERS<br />
MFDC (INVERTER)<br />
INCLUDES<br />
2=MUFFLERS<br />
RAM TYPE<br />
Heavy Weight<br />
Heavy Weight, 1” Valves<br />
Light Weight, Rocker Arm<br />
Heavy Weight<br />
Light Weight, Rocker Arm<br />
Heavy Weight<br />
Light Weight, Rocker Arm<br />
Heavy Weight<br />
Light Weight, Rocker Arm<br />
Heavy Weight<br />
Light Weight, Rocker Arm<br />
Heavy Weight<br />
VALVE<br />
VOLTAGE<br />
115AC<br />
24VDC<br />
24VAC<br />
115VAC<br />
24VDC<br />
24VAC<br />
Light Weight, Rocker Arm<br />
OPTIONS<br />
Timed bypass. Includes security lock selector switch, 2 = LED indicator<br />
lights, faceplate. Closes electrodes under low <strong>for</strong>ce, delays, and brings<br />
electrodes to welding <strong>for</strong>ce<br />
Retract Kit. Includes HEAD DOWN proximity switch and mounting bracket<br />
kit. May require additional field bracketry to match welder<br />
Retract option without proximity switch. For use with welders that have<br />
separate RETRACT and WELD INITIATION switches.<br />
Limit Switch. Allows use of ram position or continuity. Includes RAM<br />
POSITION proximity switch and mounting bracket kit. May require additional<br />
field bracketry to match welder. Includes security lock selector switch, 2 =<br />
LED indicator lights, faceplate<br />
Limit Switch. Allows use of a ram position or continuity. Includes security<br />
lock selector switch, 2 = LED indicator lights, faceplate. Does NOT include<br />
a proximity switch or mounting bracket kit. Use with customer-supplied PNP<br />
proximity switch<br />
Limit Switch used as a redundancy with continuity. Always in operation<br />
and not keylock selected. Includes RAM POSITION proximity switch and<br />
mounting bracket kit. May require additional field bracketry to match welder.<br />
Can be turned off by moving a jumper on the control board<br />
½” NPT Filter, regulator, lubricator with inter block <strong>for</strong> pilot line. With air<br />
gauge. Not needed if existing regulator is good<br />
¾” NPT Filter, regulator, lubricator with inter block <strong>for</strong> pilot line. With air<br />
gauge. Not needed if existing regulator is good<br />
Line voltage trans<strong>for</strong>mer and fuses <strong>for</strong> installation on TECNA welding controls<br />
Adds 50VA trans<strong>for</strong>mer <strong>for</strong> welders without 115VAC available<br />
System <strong>for</strong> operation on welders with FORGE DELAY<br />
<strong>SOFT</strong> <strong>TOUCH</strong> FOR WELDERS | 3
WARRANTY<br />
Unitrol Electronics provides a 5-year limited warranty to cover all of this <strong>SOFT</strong> <strong>TOUCH</strong> system. The<br />
warranty periods are determined using the date the new control was originally shipped from Unitrol<br />
Electronics. All warranty coverage is FOB Northbrook. Illinois.<br />
This warranty, except <strong>for</strong> exclusions shown herein covers the following items:<br />
DURING YEAR #1: All parts (exclusive of fuses) that fail due to manufacturing defects. Necessary<br />
labor to repair control that has failed due to manufacturing defects.<br />
DURING YEAR #2: 80% cost of all parts (exclusive of fuses).<br />
80% cost of necessary labor to repair control that has failed due to manufacturing defects.<br />
DURING YEAR #3: 60% cost of all parts (exclusive of fuses).<br />
60% cost of necessary labor to repair control that has failed due to manufacturing defects.<br />
DURING YEAR #4: 40% cost of all parts (exclusive of fuses).<br />
40% cost of necessary labor to repair control that has failed due to manufacturing defects.<br />
DURING YEAR #5:<br />
20% cost of all parts (exclusive of fuses).<br />
20% cost of necessary labor to repair control that has failed due to manufacturing defects.<br />
EXCLUSIONS TO WARRANTY<br />
Any expense involved with repair of control by other than Unitrol Electronics personnel that has not<br />
been authorized in advance and in writing by an officer of Unitrol Electronics.<br />
All costs <strong>for</strong> freight, to and from Unitrol Electronics, are excluded from this warranty<br />
All field service labor, travel expense, and field living expenses associated with field service are<br />
excluded from this warranty.<br />
No coverage, parts or labor, is offered <strong>for</strong> components that have failed on control not being used as<br />
specified in Unitrol Electronics published literature, technical sheets, and this direction book.<br />
No warranty coverage will be made on controls that are being used contrary to specifications, that<br />
were mechanically or electronically altered by customer or installer, or that were physically damaged<br />
after shipment from Unitrol Electronics.<br />
Damages to a control by lightning, flood, or mechanical damage are excluded from this warranty.<br />
Unitrol Electronics assumes no liability <strong>for</strong> damage to other equipment or injury to personnel due to<br />
a failure in the Unitrol Electronics control.<br />
Unitrol Electronics shall not be responsible <strong>for</strong> any consequential damages of whatever kind.<br />
Expenses involving alteration or installation of a Unitrol Electronics control are not covered in this warranty.<br />
NO OTHER <strong>UNITROL</strong> ELECTRONICS INC. WARRANTY, WRITTEN OR IMPLIED, COVERS THIS<br />
CONTROL UNLESS IN WRITING AND SIGNED BY AN OFFICER OF <strong>UNITROL</strong> ELECTRONICS, INC.<br />
PRIOR TO SHIPMENT OF PRODUCT.<br />
4 | <strong>SOFT</strong> <strong>TOUCH</strong> FOR WELDERS
TABLE OF CONTENTS:<br />
VERIFY YOUR <strong>SOFT</strong> <strong>TOUCH</strong> SENSOR BOARD IS CORRECT.......................................... 6<br />
HOW SYSTEM OPERATES........................................................................................... 7<br />
INSTALLATION,RST100/RST200 HEAVY WEIGHT SERIES ........................................... 8<br />
INSTALLATION, RST101/RST201 LIGHT WEIGHT SERIES ........................................... 9<br />
WIRING CONTROL: CONNECTING SIGNAL PICKUP WIRES ........................................ 10<br />
CONNECTING THE SNUBBER .................................................................................... 11<br />
CONNECTING CONTROL CABLE ................................................................................ 11<br />
CONTROL CABLE WIRING CHART ............................................................................. 12<br />
SPECIAL WIRING FOR OPTIONS RST-409 AND RST-410 .......................................... 13<br />
ELECTRICAL HOOKUP, RST100-115A, RST101-115A................................................ 14<br />
ELECTRICAL HOOKUP, RST100-024D, RST101-024D............................................... 15<br />
ELECTRICAL HOOKUP, RST100-024D, RST101-024D............................................... 16<br />
ELECTRICAL HOOKUP, RST200-115A, RST201-115A................................................ 17<br />
ELECTRICAL HOOKUP, RST200-024D, RST201-024D............................................... 18<br />
ELECTRICAL HOOKUP, RST200-024D, RST201-024D............................................... 19<br />
RETRACT OPTION RST-400..................................................................................20-21<br />
RETRACT OPTION RST-401..................................................................................22-23<br />
TIMED DELAY OPTION RST-402................................................................................ 24<br />
DEPTH SWITCH OPTION, RST-403, RST-404.......................................................25-26<br />
PNEUMATIC HOOKUP, RST101/RST201 LIGHT WEIGHT............................................ 27<br />
PNEUMATIC HOOKUP, RST100/RST200 HEAVY WEIGHT........................................... 28<br />
ADJUSTING <strong>SOFT</strong> <strong>TOUCH</strong> VALVES............................................................................ 29<br />
SETTING MAXIMUM DETECT TIME SWITCHES, BLANK TIME.................................... 30<br />
SETTING AND TESTING ELECTRODE CLOSING FORCE.............................................. 30<br />
TESTING ELECTRODE FORCE.................................................................................... 31<br />
START-UP PROCEDURE............................................................................................. 32<br />
TROUBLE SHOOTING CHART..................................................................................... 33<br />
FORCE/BUCKING PRESSURE OPTION RST-413......................................................... 34<br />
LED INDICATOR LIGHTS............................................................................................ 35<br />
<strong>SOFT</strong> <strong>TOUCH</strong> FOR WELDERS | 5
VERIFY YOUR <strong>SOFT</strong> <strong>TOUCH</strong> SENSOR BOARD IS CORRECT<br />
The <strong>SOFT</strong> <strong>TOUCH</strong> sensor board can be configured in several ways. Be<strong>for</strong>e turning power<br />
on, check to be sure that the mode and valve voltage matches your welder.<br />
1. TYPE OF WELDING CONTROL. This board can be set to operate either a 1ØAC welder<br />
or an MFDC (inverter) welder. This is done by pushing the three switches on the lower<br />
left corner to a position to match your welding control.<br />
FOR 1ØAC WELDERS<br />
FOR MFDC (INVERTER) WELDERS<br />
2. SOLENOID VALVE VOLTAGE. Be sure that the two tall relays, K2 and K3, show the<br />
same voltage on the top printing as the solenoid voltage of your welding control. If they<br />
are not correct, contact Unitrol to swap relays.<br />
FOR 115VAC SOLENOID VALVES<br />
FOR 24VDC SOLENOID VALVES<br />
3. SPECIAL INITIATION SCHEMES. Some Tecna welders<br />
do not have a pressure switch input and use a normally<br />
CLOSED switch that OPENS when the second stage<br />
of the footswitch is pushed. For these welders, move<br />
Jumper JP6 (next to the trans<strong>for</strong>mer) to the NC position<br />
and connect output terminals in parallel to the second<br />
stage Normally-Closed footswitch contact.<br />
For Tecna welders, connect output #6 on sensor board<br />
Tecna START NO terminal, and wire from #7 on sensor<br />
board to Tecna AUX terminal to put this in parallel to the<br />
footswitch second stage.<br />
6 | <strong>SOFT</strong> <strong>TOUCH</strong> FOR WELDERS<br />
NORMAL<br />
POSITION<br />
TECNA<br />
POSITION
<strong>SOFT</strong> <strong>TOUCH</strong> PINCH POINT PROTECTION SYSTEM FOR INSTALLATION<br />
ON NON-<strong>UNITROL</strong> 1Ø AC AND MFDC WELDING CONTROLS<br />
HOW THE SYSTEM OPERATES<br />
When the solenoid valve output from the welding control goes HIGH, this voltage goes to<br />
the 9280-TS6 <strong>SOFT</strong> <strong>TOUCH</strong> detection board, terminal #9.<br />
The output terminal #11 (SVL) goes HIGH to turn on solenoid valve SVL.<br />
For RST100 systems, this closes the welding electrodes under gravity <strong>for</strong>ce with low<br />
<strong>for</strong>ce bucking pressure (BALANCE) acting on the underside of the cylinder piston to<br />
counterbalance part of the ram dead weight.<br />
For RST101 systems, this closes the welding electrodes under low <strong>for</strong>ce (CLOSE) using<br />
low air pressure on the <strong>for</strong>ward port of the welder cylinder.<br />
The 9280-TS6 board checks input at terminals #4 and #5 to see if the voltage signal<br />
drops a minimum value indicating that the electrodes have made contact on a conducting<br />
material (continuity detected).<br />
If this contact is NOT sensed within the maximum time setting on the board’s DIPswitches,<br />
the output terminal #11 (SVL) will go LOW and drop out solenoid valve SVL to open the<br />
electrodes.<br />
If this contact IS sensed within the maximum time setting:<br />
• Terminal #11 (SVL) will continue to be HIGH<br />
• Terminal #13 (SVH) will go HIGH<br />
• Solenoid valve SVH will be turned ON to start high electrode pressure, and relay K4<br />
on this board will close to start the welding sequence<br />
• The contact across terminals #6 and #7 on the TS2 board close to tell the welding<br />
control to start the welding sequence.<br />
<strong>SOFT</strong> <strong>TOUCH</strong> FOR WELDERS | 7
INSTALLATION<br />
Note that this system REPLACES the existing weld solenoid valve.<br />
1. Mount the control in a convenient location using the four mounting tabs on the back<br />
of the box.<br />
2. Remove hoses from the existing welding solenoid valve. This solenoid valve will not<br />
be used with this control.<br />
3. Connect hoses from the control to the air cylinder as shown in the photos below<br />
and the next page. Choose the photo that matches your control model.<br />
HOSE CONNECTION FOR RST100/RST200 SERIES CONTROL<br />
Note that this system REPLACES the existing weld solenoid valve.<br />
TOP OF CABINET<br />
Install filters on bottom of cabinet<br />
To existing<br />
retract valve<br />
input <strong>for</strong><br />
RST400/<br />
RST401<br />
Options<br />
Connect to air cylinder port<br />
that closes the electrodes<br />
Connect to point between air<br />
filter/water trap and input to<br />
welding pressure regulator<br />
Connect to point<br />
after airline oiler<br />
(weld pressure)<br />
Connect to air cylinder port<br />
that opens the electrodes<br />
BOTTOM OF CABINET<br />
Connect to air cylinder port<br />
that opens the electrodes<br />
Connect to point between air<br />
filter/water trap and input to<br />
welding pressure regulator<br />
Connect to point<br />
after airline oiler<br />
(weld pressure)<br />
Connect to air cylinder port<br />
that closes the electrodes<br />
8 | <strong>SOFT</strong> <strong>TOUCH</strong> FOR WELDERS
HOSE CONNECTION FOR RST101/RST201 SERIES CONTROLS<br />
Note that this system REPLACES the existing weld solenoid valve.<br />
TOP OF CABINET<br />
Install filters on bottom of cabinet<br />
For RST400/<br />
RST401<br />
options<br />
to existing<br />
RETRACT<br />
valve input<br />
Connect to point<br />
after airline oiler<br />
(weld pressure)<br />
Connect to air cylinder port<br />
that closes the electrodes<br />
Connect to air cylinder port<br />
that opens the electrodes<br />
Connect to point between air<br />
filter/water trap and input to<br />
welding pressure regulator<br />
BOTTOM OF CABINET<br />
Connect to point between air<br />
filter/water trap and input to<br />
welding pressure regulator<br />
Connect to air cylinder port<br />
that closes the electrodes<br />
Connect to point<br />
after airline oiler<br />
(weld pressure)<br />
Connect to air cylinder port<br />
that opens the electrodes<br />
<strong>SOFT</strong> <strong>TOUCH</strong> FOR WELDERS | 9
WIRING CONTROL CONNECTING SIGNAL PICKUP WIRES<br />
Note that this system REPLACES the existing weld solenoid valve.<br />
1. Connect the TWO BLUE WIRES from the bottom of the box to the upper and lower<br />
secondary pad on the welding trans<strong>for</strong>mer or any point close to the pad. See photos<br />
below <strong>for</strong> suggested areas <strong>for</strong> various types of welders.<br />
CRITICAL: BE SURE THAT THE SURFACE UNDER EACH TERMINAL IS CLEAN, AND<br />
THAT THE SCREWS ARE FULLY TIGHTENED. OPERATIONAL PROBLEMS WILL OCCUR<br />
IF THIS CONNECTION IS NOT GOOD.<br />
10 | <strong>SOFT</strong> <strong>TOUCH</strong> FOR WELDERS
WIRING CONTROL CONNECTING SNUBBER<br />
2. FOR RST100 AND RST101 MODELS, Connect blue snubber cylinder in this kit across<br />
the SCR contactor per the HOOK-UP drawing and typical photos below. It does not<br />
matter which wire from the snubber connects to which side of the SCR contactor.<br />
NOTE: If the welding control already has a snubber or a resistor in series with a<br />
capacitor wired across the SCR contactor, remove it. There should only be the new<br />
blue snubber installed across the SCR contactor.<br />
CONNECTING CONTROL CABLE<br />
3. Route the black multi-wire cable from the top of the <strong>SOFT</strong> <strong>TOUCH</strong> enclosure to the<br />
welding control.<br />
4. Install the supplied strain relief fitting in a 7/8” diameter hole in the welding control<br />
and bring cable into the control.<br />
5. Trim the cable to allow it to reach the terminals shown in the table on the next<br />
page. Wire as shown.<br />
NOTE: Check the Unitrol web site www.unitrol-electronics.com SUPPORT tab <strong>for</strong><br />
hookup charts <strong>for</strong> some popular welding controls.<br />
<strong>SOFT</strong> <strong>TOUCH</strong> FOR WELDERS | 11
WIRING CONTROL, CONTROL CABLE WIRING CHART<br />
WIRE COLOR<br />
TS7<br />
TERM<br />
CONNECT IN WELDING<br />
CONTROL FOR<br />
24VDC MODELS<br />
RST100-024D,<br />
RST200-024D<br />
RST101-024D<br />
RST201-024D<br />
CONNECT IN WELDING<br />
CONTROL FOR<br />
115VAC MODELS<br />
RST100-115A,<br />
RST200-115A<br />
RST101-115A<br />
RST201-115A<br />
BLACK 1 115VAC L 115VAC L<br />
WHITE 2 115VAC N 115VAC N<br />
RED/BLACK ST. 6 INIT. PERMISSION1 INIT. PERMISSION1<br />
RED 7 INIT. PERMISSION1 INIT. PERMISSION1<br />
FOR CONTROLS<br />
SWITCHED WITH<br />
+24VDC 2<br />
FOR<br />
CONTROLS<br />
SWITCHED<br />
WITH 0VDC 3<br />
BLUE 14 24VDC + 24VDC 0V<br />
115VAC = NOT USED<br />
24VAC = 24VAC L<br />
WHITE/BLACK ST. 23 24VDC 0V 24VDC<br />
115VAC = NOT USED<br />
24VAC = 24V N<br />
ORANGE 9*<br />
WELD CONTROL SOLENOID VALVE<br />
OUTPUT 4<br />
115VAC L SOLENOID VALVE<br />
DRIVER OUTPUT 2<br />
GREEN - GROUND STUD GROUND STUD<br />
USED ONLY WITH RETRACT OPTIONS RST-400 OR RST-401<br />
GREEN/BLACK ST. 18 RETRACT IN SIGNAL 4 RETRACT IN SIGNAL4<br />
1. INIT. PERMISSION is either a PRESSURE SWITCH input terminal or in series with<br />
FOOTSWITCH second stage. These wires connect to a dry contact relay.<br />
2. Welding controls that use +24VDC to operate the welding (and RETRACT if<br />
applicable) solenoid valve.<br />
3. Welding controls that use 0VDC to operate the welding (and RETRACT if applicable)<br />
solenoid valve.<br />
4. The potential of this output should be the same as the voltage on terminal #14<br />
(BLUE wire).<br />
CAUTION: INCORRECT CONNECTION WILL CAUSE SEVERE DAMAGE.<br />
12 | <strong>SOFT</strong> <strong>TOUCH</strong> FOR WELDERS
FOR OPTIONS TECNA AND RST-410<br />
Connect jumper on primary to match line voltage. Connect the white and black<br />
wires from the cable to THAT LINE VOLTAGE IN THE WELDING CONTROL<br />
FOR 440V POWER<br />
JUMP H2 + H3<br />
FOR 220V POWER<br />
JUMP H1 + H3<br />
JUMP H2 + H4<br />
<strong>SOFT</strong> <strong>TOUCH</strong> FOR WELDERS | 13
INSTALLATION HOOK-UP DRAWING<br />
RST100-115A, RST101-115A<br />
14 | <strong>SOFT</strong> <strong>TOUCH</strong> FOR WELDERS
INSTALLATION HOOK-UP DRAWING<br />
RST100-024D, RST101-024D<br />
<strong>SOFT</strong> <strong>TOUCH</strong> FOR WELDERS | 15
INSTALLATION HOOK-UP DRAWING<br />
RST100-024D, RST101-024D<br />
16 | <strong>SOFT</strong> <strong>TOUCH</strong> FOR WELDERS
INSTALLATION HOOK-UP DRAWING<br />
RST200-115A, RST201-115A<br />
<strong>SOFT</strong> <strong>TOUCH</strong> FOR WELDERS | 17
INSTALLATION HOOK-UP DRAWING<br />
RST200-024D, RST201-024D<br />
18 | <strong>SOFT</strong> <strong>TOUCH</strong> FOR WELDERS
INSTALLATION HOOK-UP DRAWING<br />
RST200-024D, RST201-024D<br />
<strong>SOFT</strong> <strong>TOUCH</strong> FOR WELDERS | 19
OPTIONAL RETRACT WITH <strong>SOFT</strong> <strong>TOUCH</strong> RST-400<br />
FOR WELDERS WITH A RETRACT TYPE CYLINDER. OPERATED BY A 3-SECTION<br />
FOOT SWITCH<br />
This type of foot switch has the RETRACT switch controlled as the first level and mechanically<br />
latched. The other two levels of this foot switch operate the welding sequence.<br />
This option protects against pinch point injury when bringing the electrodes from fully<br />
open RETRACT position to the WORK position (small space between electrodes). The<br />
option includes a PNP proximity switch that is adjusted to go high when the retract cylinder<br />
is fully bottomed putting the electrodes in the (small opening) WORK position.<br />
1. Install the PNP proximity switch using the starter bracket kit in this option. Modify as<br />
necessary to work with your welder. The proximity switch has to be blocked when<br />
the ram is down in the WORK (small opening) position. This will put 24VDC into<br />
terminal 26.<br />
2. Wire the PNP proximity switch as shown below.<br />
3. Move the double RETRACT jumper<br />
plug to the RETRACT (upper) position<br />
as shown. This is located on the upper<br />
left corner of the board<br />
20 | <strong>SOFT</strong> <strong>TOUCH</strong> FOR WELDERS
OPTIONAL RETRACT WITH <strong>SOFT</strong> <strong>TOUCH</strong> RST-400 (CONTINUED)<br />
3. Connect the 3-stage foot switch as shown below.<br />
See bottom of page 17 <strong>for</strong> pneumatic hookup <strong>for</strong> this option<br />
<strong>SOFT</strong> <strong>TOUCH</strong> FOR WELDERS | 21
OPTIONAL RETRACT WITH <strong>SOFT</strong> <strong>TOUCH</strong> RST-401<br />
This option RST-401 is <strong>for</strong> RETRACT that operates from either RETRACT VOLTAGE<br />
from the welding control or from a separate RETRACT foot switch.<br />
DO NOT USE THIS OPTION FOR WELDERS THAT USE A COMMON WELD AND<br />
RETRACT FOOT SWITCH (use RST-400)<br />
HOOKUP FOR SYSTEMS USING RETRACT VOLTAGE SIGNAL FROM THE<br />
WELDING CONTROL:<br />
Remove the existing wire from the welding control RETRACT valve driver terminal and wire<br />
as shown below to terminal #18<br />
22 | <strong>SOFT</strong> <strong>TOUCH</strong> FOR WELDERS
OPTIONAL RETRACT WITH <strong>SOFT</strong> <strong>TOUCH</strong> RST-401<br />
Insert a jumper from terminal 26 to terminal 29. Note that the HEAD DOWN LIM. SW light<br />
on the annunciator panel will be on permanently when this jumper is in place.<br />
<strong>SOFT</strong> <strong>TOUCH</strong> FOR WELDERS | 23
OPTIONAL TIMED DELAY RST-402<br />
Some materials being welded have coatings or other<br />
conditions that prevent good continuity between electrodes.<br />
For these conditions option #RST-402 will all ow the welder<br />
to be operated using TIMING rather than CONTINUITY to<br />
switch from low <strong>for</strong>ce to high welding <strong>for</strong>ce. In this case, the<br />
low <strong>for</strong>ce will be applied <strong>for</strong> the time set on the 4-position<br />
DETECT TIME DIPswitch, and then the high welding <strong>for</strong>ce<br />
will turn on. The time from initiation to high <strong>for</strong>ce is the SUM<br />
of the switches pushed down on top.<br />
CAUTION: When the key switch is in the TIMED<br />
position, the HIGH WELDING FORCE will turn on after<br />
the selected delay (detect) time unless initiation is<br />
opened. This will happen even if a non-conductive<br />
material or body part is between the electrodes.<br />
This option will be factory wired and supplied with the faceplate.<br />
24 | <strong>SOFT</strong> <strong>TOUCH</strong> FOR WELDERS
OPTIONAL DEPTH SWITCH RST-403, RST-404<br />
This option allows use of either CONTINUITY DETECTION or closure of a DEPTH SWITCH<br />
to turn on the weld pressure and start the weld sequence. It is useful when parts being<br />
welded have a non-conductive coating.<br />
INSTALLATION:<br />
RST-403: Mount the PNP proximity switch that is supplied with this option on the body of<br />
the welder using the mounting bar. Modify and bend as needed<br />
RST-404: Mount a customer-supplied mechanical limit switch or PNP proximity switch on<br />
the body of the welder.<br />
BOTH: Make and install an adjustable cam on the moving part of the welder that will go in<br />
front of this switch when the upper electrode are less than 1/4” from the lower electrode.<br />
NOTE: If the parts being welded are very thick, setting the DEPTH SWITCH to close<br />
when there is a 1/4” gap between electrodes might not work when the part being<br />
welded is in place. In this case, set the DEPTH SWITCH to close when there is 1/4”<br />
gap from the TOP OF THE PART being welded to the underside of the upper electrode.<br />
To protect from pinch point injury when a part is NOT between the electrodes, adjust<br />
the electrode holders so that the air cylinder will bottom out when the gap between<br />
electrodes is 1/4”.<br />
<strong>SOFT</strong> <strong>TOUCH</strong> FOR WELDERS | 25
OPTIONAL DEPTH SWITCH RST-403 , RST-404 (CONTINUED)<br />
Wire the switch to match the appropriate hookup below.<br />
USE IN PRODUCTION:<br />
Turn the key COUNTER-CLOCKWISE to the CONTINUITY position. The yellow panel<br />
indicator will glow. In this position, high welding pressure will only be applied when<br />
electrical continuity is detected between the upper and lower electrodes.<br />
Turn the key CLOCKWISE to the DEPTH SWITCH position. The red panel indicator will<br />
glow. After initiation, the electrodes will close with low <strong>for</strong>ce. If the DEPTH SWITCH closes<br />
be<strong>for</strong>e the maximum DETECT TIME (as set on the DIPswitch) has been reached, the LIMIT<br />
SWITCH CLOSED light will glow on the annunciator panel, electrodes will go to welding<br />
<strong>for</strong>ce, and the output of the sensor board will close to start the welding control.<br />
CAUTION: When the key switch is in the DEPTH<br />
SWITCH position, the HIGH WELDING FORCE will<br />
turn on after the DEPTH SWITCH is closed. This will<br />
happen even if a non-conductive material or body<br />
part is between the electrodes.<br />
26 | <strong>SOFT</strong> <strong>TOUCH</strong> FOR WELDERS
PNEUMATIC HOOKUP<br />
RST101/RST201 LIGHT RAM OR ROCKER ARM WELDERS CONNECT HOSES TO<br />
PORTS SHOWN RED BELOW<br />
<strong>SOFT</strong> <strong>TOUCH</strong> FOR WELDERS | 27
PNEUMATIC HOOKUP<br />
RST100/RST200 HEAVY WEIGHT RAM WELDERS CONNECT HOSES TO PORTS<br />
SHOWN IN RED BELOW<br />
28 | <strong>SOFT</strong> <strong>TOUCH</strong> FOR WELDERS
ADJUSTING THE <strong>SOFT</strong> <strong>TOUCH</strong> VALVE SYSTEM<br />
F0R RST100 SERIES CONTROLS - HEAVY WEIGHT RAMS<br />
1. The ADVANCE PRESSURE puts air on the underside of the air cylinder piston to LIFT<br />
the welder ram. This is used to partially lower the <strong>for</strong>ce between the electrodes due to the<br />
dead (gravity) weight of the welder’s ram. Increasing this ADVANCE PRESSURE value will<br />
decrease the <strong>for</strong>ce between the electrodes when closed under low <strong>for</strong>ce.<br />
2. BE SURE THAT ALL FLOW CONTROL VALVES HAVE BEEN REMOVED FROM THE<br />
WELDER CYLINDER BEFORE DOING ANY ADJUSTMENT OF THIS SYSTEM.<br />
3. Set the BALANCE pressure regulator inside the enclosure so that the BALANCE<br />
PRESSURE gauge on the door is at approximately 1psi.<br />
4. Set the OPEN pressure regulator inside the enclosure so that the OPEN PRESSURE<br />
gauge on the door is at approximately 12 psi.<br />
5. Turn the TIP DRESS switch ON. The electrodes should close. Check the <strong>for</strong>ce<br />
between the electrodes and INCREASE the BALANCE pressure slightly if the <strong>for</strong>ce is great<br />
enough to crush a wood pencil more than 1/16” in depth. If the electrodes do not close,<br />
DECREASE the BALANCE pressure to as low as 0 psi. Even though the pressure gauge<br />
shows 0psi, this pressure is actually 1/2psi.<br />
6. Adjust the OPEN pressure regulator so that when the TIP DRESS switch is OFF, the<br />
electrodes open smoothly. Use the LOWEST setting on the OPEN pressure regulator that<br />
will smoothly open the electrodes. This will produce the fastest electrode closing time.<br />
F0R RST101 SERIES CONTROLS - LIGHT WEIGHT RAMS AND ROCKER ARM WELDERS<br />
1. Set the CLOSE pressure regulator inside the enclosure so that the CLOSE PRESSURE<br />
gauge on the door is at approximately 3psi.<br />
2. Set the OPEN pressure regulator inside the enclosure so that the OPEN PRESSURE<br />
gauge on the door is at approximately 12 psi.<br />
3. Turn the TIP DRESS switch ON. The electrodes should close. If they don’t,<br />
INCREASE the CLOSE pressure regulator. Check the <strong>for</strong>ce between the electrodes and<br />
DECREASE this pressure slightly if the <strong>for</strong>ce is great enough to crush a wood pencil<br />
more than 1/16” in depth.<br />
4. Adjust the OPEN pressure regulator so that when the TIP DRESS switch is OFF, the<br />
electrodes open smoothly. Use the LOWEST setting on this OPEN pressure regulator that<br />
will smoothly open the electrodes. This will produce the fastest electrode closing time.<br />
<strong>SOFT</strong> <strong>TOUCH</strong> FOR WELDERS | 29
SETTING <strong>SOFT</strong> <strong>TOUCH</strong> BOARD MAXIMUM DETECT TIME SWITCHES<br />
Locate the four-section ADD FOR DETECT TIME DIPswitch on the left side of each <strong>SOFT</strong><br />
<strong>TOUCH</strong> board. This switch is marked: 1, .75, .5, and .25 seconds. Set the switches to a<br />
value that is about 2 times how long it will take <strong>for</strong> the electrodes to close. The on-board<br />
computer adds the value of these switches. For example, pushing 1 and .5 down to the<br />
left side will produce a detection time of 1.5 seconds. This setting is not critical. A typical<br />
setting is 1 second. Longer times might be needed <strong>for</strong> very long stroke cylinders<br />
For example, in the photo below the 0.25 and 1 switch is pushed down toward the top of<br />
the board <strong>for</strong> a total maximum detect time of 1.25 seconds.<br />
DETECT BLANK TIME<br />
After the <strong>SOFT</strong> <strong>TOUCH</strong> board is initiated, the system will not<br />
look <strong>for</strong> continuity until the DETECT BLANK TIME has been<br />
reached. This time is 50% of the time you set on the ADD<br />
FOR DETECT TIME DIPswitch.<br />
TESTING THE BASIC PNEUMATIC SYSTEM<br />
1. Clean electrodes on welder<br />
2. With nothing between electrodes, close electrodes by turning ON the TIP DRESS<br />
switch at the bottom of the annunciator panel.<br />
3. The electrodes should close.<br />
4. Turn OFF the TIP DRESS switch and the electrodes will open.<br />
30 | <strong>SOFT</strong> <strong>TOUCH</strong> FOR WELDERS
SETTING AND TESTING ELECTRODE CLOSING FORCE<br />
Turn power on to <strong>SOFT</strong> <strong>TOUCH</strong> system.<br />
Adjust the pneumatic system to produce safe closing electrode closing <strong>for</strong>ce using the<br />
directions on page 22 or 23 to match the model number of this <strong>SOFT</strong> <strong>TOUCH</strong> system.<br />
Use the TIP DRESS switch to close the electrodes each time you make a change in the<br />
pressure regulator settings. A successful pneumatic setting will provide a <strong>for</strong>ce under 50<br />
pounds between the electrodes. There are two methods to check this <strong>for</strong>ce:<br />
1. The most precise method is to use a tip <strong>for</strong>ce measuring instrument between<br />
the electrodes. This produces data that can be recorded on safety records and is less<br />
subjective to visual observation. Un<strong>for</strong>tunately most of these devices do not have any<br />
accuracy in the low <strong>for</strong>ce ranges. Do not use an instrument that has poor or unknown<br />
accuracy in the low <strong>for</strong>ce range. An excellent device that can read the low <strong>for</strong>ces is<br />
Tuffaloy model 601-3000DLC. This unit can also be used to read welding <strong>for</strong>ces up to<br />
3,000 pounds.<br />
2. Place a wood pencil between the electrodes and close using the TIP DRESS switch.<br />
The electrodes should not dent more than 1/16” into either side. A typical #2 wood office<br />
pencil works well. A carpenter’s pencil works better since the flat area is much larger.<br />
<strong>SOFT</strong> <strong>TOUCH</strong> FOR WELDERS | 31
STARTUP PROCEDURE<br />
1. Turn on power to welding control.<br />
2. The <strong>SOFT</strong> <strong>TOUCH</strong> annunciator panel should go through a test procedure and then the<br />
READY LED should turn on solidly.<br />
3. If the READY LED does flashes slowly or quickly see the trouble shooting section in<br />
this direction book.<br />
4. The system should be ready <strong>for</strong> operation. There is no customer calibration needed<br />
now or ever.<br />
SUCCESSFUL SEQUENCE<br />
WITHOUT LIMIT SWITCH<br />
1. Weld control sends voltage to<br />
terminal 9 (SV).<br />
2. START lights<br />
3. Low Force solenoid valve (SVL) is<br />
energized, Low Force ON LED lights.<br />
4. Electrodes close<br />
5. Continuity is detected and CONTINUITY<br />
DETECTED LED lights.<br />
6. High Force solenoid valve (SVH) is<br />
energized, HIGH FORCE ON LED lights.<br />
7. Output relay at terminals 6 & 7 closes<br />
to start weld control sequence, and OK<br />
TO WELD LED lights.<br />
UNSUCCESSFUL SEQUENCE<br />
If continuity is not detected within the maximum time set on the DIPswitch, electrodes<br />
will not get to welding <strong>for</strong>ce, will open, and the Detect Time Exceeded, Dress Electrodes<br />
LED will light. Clean the electrodes and try the sequence again. Or check to see if the<br />
DIPswitch on the board is set to a long enough time to allow <strong>for</strong> the electrodes to close.<br />
32 | <strong>SOFT</strong> <strong>TOUCH</strong> FOR WELDERS
TROUBLE SHOOTING CHART<br />
NOTE: This <strong>SOFT</strong> <strong>TOUCH</strong> system will not operate if any fault is detected.<br />
SYSTEM READY LED will glow solidly if all faults are cleared.<br />
INDICATION CAUSE WHAT TO CHECK OR DO<br />
READY LED not on<br />
READY LED is on but is<br />
FLASHING<br />
Electrodes will not close<br />
when welding control is<br />
initiated<br />
READY LED flashing SLOWLY.<br />
Electrodes will not close<br />
when welding control is<br />
initiated.<br />
OR<br />
CONTINUITY DETECTED<br />
WITH NO START SIGNAL LED<br />
on when electrodes are not<br />
touching.<br />
READY LED flashing QUICKLY<br />
DETECT TIME EXCEEDED.<br />
DRESS ELECTRODES LED<br />
flashing<br />
OUTPUT CLOSED FAULT<br />
LED is on<br />
No power to control<br />
One fault shown below is<br />
detected<br />
The READY LED will not glow<br />
SOLIDLY until the system has<br />
cleared all faults<br />
Voltage on blue sensor wires<br />
is too low<br />
Lowering of this voltage is<br />
used by the sensor board<br />
to detect when continuity is<br />
reached<br />
Insulator missing or some<br />
conducting component<br />
is connected between<br />
insulated side of welder<br />
secondary and welder frame.<br />
Voltage on blue sensor wires<br />
is too high<br />
Not enough time allowed to<br />
close electrodes<br />
Electrodes not making good<br />
contact.<br />
Electrodes do not touch<br />
when welder air cylinder is<br />
fully extended.<br />
Output relay K4 is<br />
mechanically closed<br />
(welded contacts)<br />
Be sure that 115V is at terminals #1 and #2<br />
Voltage from welding control valve driver output connected to<br />
terminals 8 and 9 on the sensor board is on when power is<br />
turned on to the soft touch system<br />
correct weld control<br />
SEE ITEMS TO CHECK ON BOXES BELOW<br />
Be sure that the two blue pickup wires coming from the<br />
cabinet are correctly connected to welder secondary.<br />
See page 5<br />
FOR MFDC INVERTER WELDERS: Be sure that all three<br />
switches on lower left of board are set to the MFDC position.<br />
See page 1<br />
FOR 1Ø AC WELDERS:<br />
1.Be sure that all three switches on lower left of the sensor<br />
board are set to the AC position.<br />
See page 1.<br />
2.Be sure that a snubber is installed correctly.<br />
See page 6.<br />
3.Measure AC voltage at TP2 - TP3. It should be a minimum<br />
of 25mv (.025V). If it is above zero but below 25mv, a second<br />
snubber might have to be added across the SCR to bring this<br />
voltage up.<br />
4.If it is 0mv, replace the snubber. See page 1.<br />
CHECK MECHANICAL SYSTEM. Disconnect flexible shunt that<br />
connects weld trans<strong>for</strong>mer secondary to moving arm, pull<br />
out plug on <strong>SOFT</strong> <strong>TOUCH</strong> board at SOC2 (terminals 4 to 7).<br />
Measure resistance between electrodes. If it is not 0, check<br />
<strong>for</strong> bad insulator or some other path between the insulated<br />
moving welder part and the welder frame. Repair or replace<br />
as needed.<br />
Contact Unitrol service <strong>for</strong> instructions<br />
Increase DIPswitch time. Remember that this maximum time<br />
is the SUM of all switches pushed down towards the time<br />
numbers (.25sec, .5 sec, .75sec, 1 sec)<br />
Clean electrodes or check part being welded.<br />
Adjust electrode holders so that there is at least a 1/4” left in<br />
the air cylinder travel when the electrodes touch.<br />
Replace KA relay<br />
<strong>SOFT</strong> <strong>TOUCH</strong> FOR WELDERS | 33
OPTION RST-413 FORGE/BUCKING PRESSURE OPTION<br />
This option brings electrodes closed under low <strong>for</strong>ce. After continuity is detected, the<br />
return port on the air cylinder changes pressure to that set on the existing FORGE BACKUP<br />
pressure regulator.<br />
34 | <strong>SOFT</strong> <strong>TOUCH</strong> FOR WELDERS
<strong>SOFT</strong> <strong>TOUCH</strong> SENSOR BOARD TS6 AND TS7<br />
INDICATOR LIGHTS<br />
NOTE: TS-5 BOARDS,<br />
LED6,7,8,9,14, AND 15<br />
ARE ALL GREEN<br />
6<br />
7<br />
5<br />
4<br />
3<br />
2<br />
1<br />
8<br />
9<br />
10<br />
11<br />
12<br />
13<br />
14<br />
15 16 17 18<br />
1<br />
2<br />
3<br />
4<br />
5<br />
6<br />
7<br />
8<br />
9<br />
10<br />
11<br />
12<br />
LED9 (ORANGE): is on when START FROM WELD<br />
SOL input is hight<br />
LED15 (WHITE): is on when HEAD DOWN LIM.<br />
SW. contact is closed<br />
LED8 (BLUE): is on when RETRACT VALVE ON<br />
input is high or RETR. FOOT SWITCH contact is<br />
closed<br />
LED14 (GREEN): is on when RETR. FOOT<br />
SWITCH contact is closed<br />
LED6 (YELLOW): is on when ELECTR. CLOSED<br />
LIM. SW. contact is closed<br />
LED7 (RED): is on when SELECT SWITCH INPUT<br />
contact is closed<br />
100MA FUSE <strong>for</strong> 24VIS isolated voltage; used <strong>for</strong><br />
outside switches<br />
LED2 (ORANGE): 24VIS isolated voltage; used <strong>for</strong><br />
outside switches<br />
LED5 (ORANGE): 24VDC used <strong>for</strong> electronic<br />
circuitry on this board<br />
LED3 (ORANGE): +15VDC<br />
LED4 (ORANGE): -15VDC<br />
LED1 (ORANGE): +5VDC<br />
13<br />
14<br />
15<br />
16<br />
17<br />
18<br />
LED16 (WHITE): high gain amplifier is on<br />
FOR AC UNITS: indicates that sensor input voltage<br />
is under 300mV<br />
For MFDC UNITS: this is the normal condition<br />
LED17 (RED): K1 spurious operation relay is<br />
energized<br />
WINDOW TURNS RED when START FROM WELD<br />
SOL. input voltage is high<br />
LED13 (RED): OUTPUT N.O. CONTACT is closed<br />
Contact closure tells control to start weld sequence<br />
JP5 IN “STD”: LED will be off during standby and<br />
turn on at continuity<br />
JP5 IN “S2”: LED will be on during standby, off<br />
after SV input, and on when continuity is detected<br />
LED512 (BLUE): OUTPUT N.O. CONTACT is open<br />
JP5 IN “STD”: this is the normal standby condition<br />
JP5 IN “S2”: this will be off until SV input, then will<br />
be on until continuity is detected<br />
WINDOW TURNS RED when RETRACT VALVE<br />
ON input is high or RETR. FOOT SWITCH contact<br />
is closed<br />
<strong>SOFT</strong> <strong>TOUCH</strong> FOR WELDERS | 35
Manufactured By:<br />
702 Landwehr Road, Northbrook, Illinois 60062 USA<br />
techsupport@unitrol-electronics.com | 847-480-0115<br />
Distributed By:<br />
RSUSTW0119


