Finishing - July-August 2020
You also want an ePaper? Increase the reach of your titles
YUMPU automatically turns print PDFs into web optimized ePapers that Google loves.
14 MEASUREMENT<br />
other hand, laser profile sensors may be<br />
needed for surfaces with “matte” like finishes.<br />
Metrology platform that is<br />
significantly faster than<br />
conventional systems<br />
During the development of ZeroTouch,<br />
special attention was given to problems that<br />
conventional CMMs face: obtaining quick,<br />
accurate and reproducible results to keep pace<br />
with manufacturing cycle times. Most<br />
traditional inspection systems have issues<br />
specifically with speed, ease-of-use and<br />
machine availability. As a result, traditional<br />
measurement technology does not lend itself<br />
to inline inspection or even fast sampling.<br />
Providing the operator a tool that is easy to<br />
use to perform rapid quality checks of various<br />
types of parts produced by different lines is<br />
vital to ensure the qualification of<br />
manufacturing lines, in addition to speeding<br />
up the production ramp. CMMs are typically<br />
located in environmentally controlled<br />
inspection rooms, which often impact machine<br />
availability. If the parts are to be inspected in<br />
the metrology room during the production<br />
process, part "queues" are to be expected,<br />
due to limited machine availability coupled<br />
with long CMM setup times.<br />
ZeroTouch has been designed precisely to<br />
mitigate these issues, being fast, flexible, easy<br />
to use, and compatible with the manufacturing<br />
environment.<br />
ZeroTouch enables 100% part inspection. In<br />
addition, the ZeroTouch is characterized by its<br />
ease of use. By giving the operator an easy-touse<br />
tool, different types of parts produced on<br />
different lines can be quickly inspected. Such<br />
capability will enable the rapid qualification of<br />
manufacturing lines and speed up production<br />
ramp.<br />
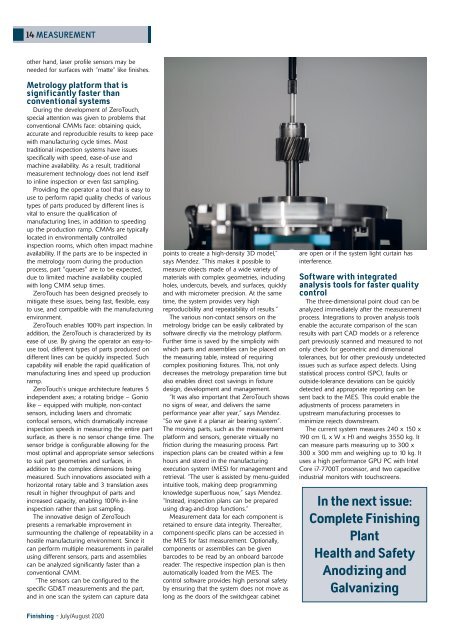
ZeroTouch’s unique architecture features 5<br />
independent axes; a rotating bridge – Gonio<br />
like – equipped with multiple, non-contact<br />
sensors, including lasers and chromatic<br />
confocal sensors, which dramatically increase<br />
inspection speeds in measuring the entire part<br />
surface, as there is no sensor change time. The<br />
sensor bridge is configurable allowing for the<br />
most optimal and appropriate sensor selections<br />
to suit part geometries and surfaces, in<br />
addition to the complex dimensions being<br />
measured. Such innovations associated with a<br />
horizontal rotary table and 3 translation axes<br />
result in higher throughput of parts and<br />
increased capacity, enabling 100% in-line<br />
inspection rather than just sampling.<br />
The innovative design of ZeroTouch<br />
presents a remarkable improvement in<br />
surmounting the challenge of repeatability in a<br />
hostile manufacturing environment. Since it<br />
can perform multiple measurements in parallel<br />
using different sensors, parts and assemblies<br />
can be analyzed significantly faster than a<br />
conventional CMM.<br />
“The sensors can be configured to the<br />
specific GD&T measurements and the part,<br />
and in one scan the system can capture data<br />
points to create a high-density 3D model,”<br />
says Mendez. “This makes it possible to<br />
measure objects made of a wide variety of<br />
materials with complex geometries, including<br />
holes, undercuts, bevels, and surfaces, quickly<br />
and with micrometer precision. At the same<br />
time, the system provides very high<br />
reproducibility and repeatability of results.”<br />
The various non-contact sensors on the<br />
metrology bridge can be easily calibrated by<br />
software directly via the metrology platform.<br />
Further time is saved by the simplicity with<br />
which parts and assemblies can be placed on<br />
the measuring table, instead of requiring<br />
complex positioning fixtures. This, not only<br />
decreases the metrology preparation time but<br />
also enables direct cost savings in fixture<br />
design, development and management.<br />
“It was also important that ZeroTouch shows<br />
no signs of wear, and delivers the same<br />
performance year after year,” says Mendez.<br />
“So we gave it a planar air bearing system”.<br />
The moving parts, such as the measurement<br />
platform and sensors, generate virtually no<br />
friction during the measuring process. Part<br />
inspection plans can be created within a few<br />
hours and stored in the manufacturing<br />
execution system (MES) for management and<br />
retrieval. “The user is assisted by menu-guided<br />
intuitive tools, making deep programming<br />
knowledge superfluous now,” says Mendez.<br />
“Instead, inspection plans can be prepared<br />
using drag-and-drop functions.”<br />
Measurement data for each component is<br />
retained to ensure data integrity. Thereafter,<br />
component-specific plans can be accessed in<br />
the MES for fast measurement. Optionally,<br />
components or assemblies can be given<br />
barcodes to be read by an onboard barcode<br />
reader. The respective inspection plan is then<br />
automatically loaded from the MES. The<br />
control software provides high personal safety<br />
by ensuring that the system does not move as<br />
long as the doors of the switchgear cabinet<br />
are open or if the system light curtain has<br />
interference.<br />
Software with integrated<br />
analysis tools for faster quality<br />
control<br />
The three-dimensional point cloud can be<br />
analyzed immediately after the measurement<br />
process. Integrations to proven analysis tools<br />
enable the accurate comparison of the scan<br />
results with part CAD models or a reference<br />
part previously scanned and measured to not<br />
only check for geometric and dimensional<br />
tolerances, but for other previously undetected<br />
issues such as surface aspect defects. Using<br />
statistical process control (SPC), faults or<br />
outside-tolerance deviations can be quickly<br />
detected and appropriate reporting can be<br />
sent back to the MES. This could enable the<br />
adjustments of process parameters in<br />
upstream manufacturing processes to<br />
minimize rejects downstream.<br />
The current system measures 240 x 150 x<br />
190 cm (L x W x H) and weighs 3550 kg. It<br />
can measure parts measuring up to 300 x<br />
300 x 300 mm and weighing up to 10 kg. It<br />
uses a high performance GPU PC with Intel<br />
Core i7-7700T processor, and two capacitive<br />
industrial monitors with touchscreens.<br />
In the next issue:<br />
Complete <strong>Finishing</strong><br />
Plant<br />
Health and Safety<br />
Anodizing and<br />
Galvanizing<br />
<strong>Finishing</strong> - <strong>July</strong>/<strong>August</strong> <strong>2020</strong>


