
Create successful ePaper yourself
Turn your PDF publications into a flip-book with our unique Google optimized e-Paper software.
© <strong>Copyright</strong> <strong>JVL</strong> © <strong>Corporation</strong> <strong>2004</strong> ©<br />
©<br />
©<br />
6.<br />
Installation<br />
Instructions<br />
Technical Support<br />
<strong>Page</strong> 43<br />
For technical support and sales please call:<br />
In the United States and Canada: Outside the United States and Canada:<br />
Tel: 1 (800) 296-6657 Tel: (905) 303-3360<br />
Fax: 1 (800) 296-6681 Fax: (905) 303-3361<br />
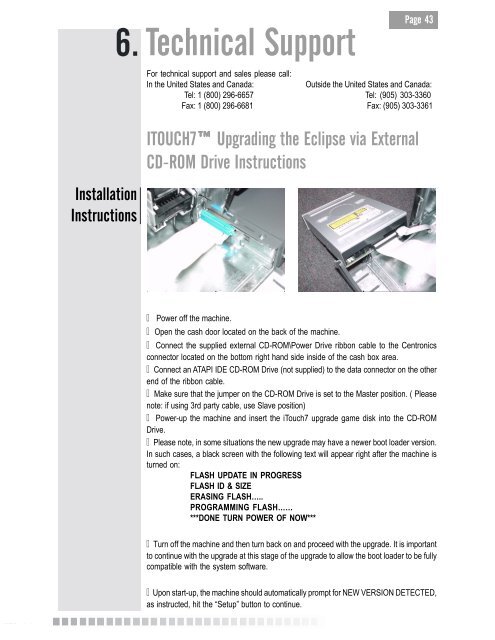
ITOUCH7 Upgrading the Eclipse via External<br />
CD-ROM Drive Instructions<br />
Power off the machine.<br />
Open the cash door located on the back of the machine.<br />
Connect the supplied external CD-ROM\Power Drive ribbon cable to the Centronics<br />
connector located on the bottom right hand side inside of the cash box area.<br />
Connect an ATAPI IDE CD-ROM Drive (not supplied) to the data connector on the other<br />
end of the ribbon cable.<br />
Make sure that the jumper on the CD-ROM Drive is set to the Master position. ( Please<br />
note: if using 3rd party cable, use Slave position)<br />
Power-up the machine and insert the iTouch7 upgrade game disk into the CD-ROM<br />
Drive.<br />
Please note, in some situations the new upgrade may have a newer boot loader version.<br />
In such cases, a black screen with the following text will appear right after the machine is<br />
turned on:<br />
FLASH UPDATE IN PROGRESS<br />
FLASH ID & SIZE<br />
ERASING FLASH…..<br />
PROGRAMMING FLASH……<br />
***DONE TURN POWER OF NOW***<br />
Turn off the machine and then turn back on and proceed with the upgrade. It is important<br />
to continue with the upgrade at this stage of the upgrade to allow the boot loader to be fully<br />
compatible with the system software.<br />
Upon start-up, the machine should automatically prompt for NEW VERSION DETECTED,<br />
as instructed, hit the “Setup” button to continue.