User Manual - Kanmed
User Manual - Kanmed
User Manual - Kanmed

You also want an ePaper? Increase the reach of your titles
YUMPU automatically turns print PDFs into web optimized ePapers that Google loves.
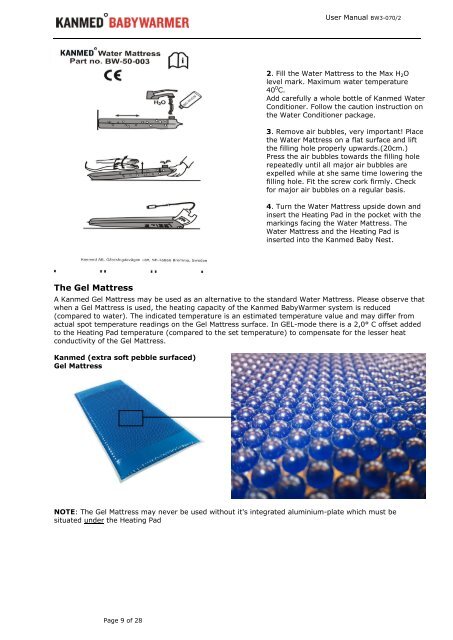
The Gel Mattress<br />
Page 9 of 28<br />
<strong>User</strong> <strong>Manual</strong> BW3-070/2<br />
2. Fill the Water Mattress to the Max H 2O<br />
level mark. Maximum water temperature<br />
40 0 C.<br />
Add carefully a whole bottle of <strong>Kanmed</strong> Water<br />
Conditioner. Follow the caution instruction on<br />
the Water Conditioner package.<br />
3. Remove air bubbles, very important! Place<br />
the Water Mattress on a flat surface and lift<br />
the filling hole properly upwards.(20cm.)<br />
Press the air bubbles towards the filling hole<br />
repeatedly until all major air bubbles are<br />
expelled while at she same time lowering the<br />
filling hole. Fit the screw cork firmly. Check<br />
for major air bubbles on a regular basis.<br />
4. Turn the Water Mattress upside down and<br />
insert the Heating Pad in the pocket with the<br />
markings facing the Water Mattress. The<br />
Water Mattress and the Heating Pad is<br />
inserted into the <strong>Kanmed</strong> Baby Nest.<br />
A <strong>Kanmed</strong> Gel Mattress may be used as an alternative to the standard Water Mattress. Please observe that<br />
when a Gel Mattress is used, the heating capacity of the <strong>Kanmed</strong> BabyWarmer system is reduced<br />
(compared to water). The indicated temperature is an estimated temperature value and may differ from<br />
actual spot temperature readings on the Gel Mattress surface. In GEL-mode there is a 2,0° C offset added<br />
to the Heating Pad temperature (compared to the set temperature) to compensate for the lesser heat<br />
conductivity of the Gel Mattress.<br />
<strong>Kanmed</strong> (extra soft pebble surfaced)<br />
Gel Mattress<br />
NOTE: The Gel Mattress may never be used without it's integrated aluminium-plate which must be<br />
situated under the Heating Pad