You also want an ePaper? Increase the reach of your titles
YUMPU automatically turns print PDFs into web optimized ePapers that Google loves.
<strong>Bryton</strong> <strong>Bridge</strong><br />
User’s Manual
Table of Contents<br />
SOFTWARE OVERVIEW............................................................ 3<br />
1.1 INITIAL SETUP....................................................................................... 3<br />
1.2 REGISTER AN ACCOUNT ............................................................................ 5<br />
EDIT PROFILE & MANAGE COLLECTION.................................. 6<br />
2.1 EDITING YOUR PROFILE ............................................................................ 6<br />
2.2 MANAGING YOUR COLLECTION .................................................................... 7<br />
MANAGE MAPS ........................................................................ 8<br />
3.1 IMPORTING MAPS ................................................................................... 8<br />
3.2 DELETING MAPS..................................................................................... 9<br />
MANAGE DEVICE ................................................................... 11<br />
4.1 UPDATING FIRMWARE ............................................................................ 11<br />
4.2 MANAGING DATA.................................................................................. 12<br />
4.3 RESET TO FACTORY DEFAULTS................................................................... 12<br />
4.4 SET HOME ALTITUDE ............................................................................. 13<br />
UPLOAD DATA ....................................................................... 14<br />
5.1 UPLOADING DATA ................................................................................. 14<br />
SOFTWARE SETTINGS ........................................................... 15<br />
6.1 CHANGING THE SETTINGS ....................................................................... 15<br />
6.2 UPDATING SOFTWARE ............................................................................ 16<br />
2 <strong>Bryton</strong> <strong>Bridge</strong>
SOFTWARE OVERVIEW<br />
SOFTWARE OVERVIEW<br />
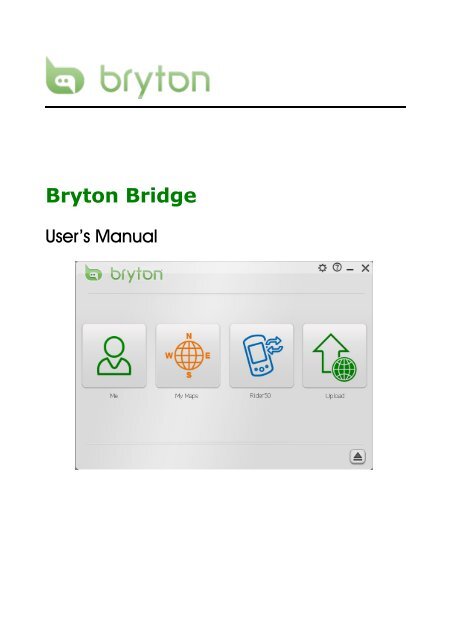
<strong>Bryton</strong> <strong>Bridge</strong> is a software that helps you to update your profile, back up and<br />
restore your Rider 50 Series data, upload your track data to our community<br />
website at www.brytonsport.com. You can also import map data from Map DVD<br />
that came with the original product packaging.<br />
1.1 Initial Setup<br />
Step 1 Connect your Rider 50 to your computer by using USB cable.<br />
Step 2 Install the <strong>Bryton</strong> <strong>Bridge</strong> application.<br />
a. A pop-up installation window appears on the screen.<br />
Click Launch <strong>Bryton</strong> <strong>Bridge</strong> and follow the on-screen instructions<br />
to install <strong>Bryton</strong> <strong>Bridge</strong>.<br />
b. Otherwise, go to My Computer > Removable Disk > double-click<br />
setup.exe and follow the on-screen instructions to install the<br />
software.<br />
<strong>Bryton</strong> <strong>Bridge</strong> 3
SOFTWARE OVERVIEW<br />
Step 3 Follow the on-screen instructions to transfer data to your computer.<br />
Note:<br />
After you have installed <strong>Bryton</strong> <strong>Bridge</strong>, it will automatically launch when the<br />
device is connected to the computer. If the software does not automatically<br />
launch, double-click <strong>Bryton</strong> <strong>Bridge</strong> shortcut icon on the computer’s desktop.<br />
(If the “Launch <strong>Bryton</strong> <strong>Bridge</strong>” window appears on the screen, just close the<br />
window. No need to reinstall the application.)<br />
4 <strong>Bryton</strong> <strong>Bridge</strong>
1.2 Register an Account<br />
SOFTWARE OVERVIEW<br />
When you first launch <strong>Bryton</strong> <strong>Bridge</strong>, you need to register an account, so that we<br />
can provide you timely support to you after your purchase.<br />
Step 1 Enter your email address and password.<br />
Step 2 Check “By sign up, I agree to Terms of Use and Privacy Policy”, and then<br />
click Save.<br />
Step 3 A “Login successful” message appears on the screen. Click OK.<br />
<strong>Bryton</strong> <strong>Bridge</strong> 5
EDIT PROFILE & MANAGE COLLECTION<br />
EDIT PROFILE & MANAGE COLLECTION<br />
With Me, you can edit your personal and bike<br />
profiles, and manage your collections.<br />
Click Me.<br />
2.1 Editing Your Profile<br />
a. Click My Profile. b. To replace the device profile, click<br />
OK to continue.<br />
c. To edit your profile and your bike<br />
profiles, click Edit.<br />
d. Select Profile tab to view your<br />
current profile. Change your<br />
personal data if necessary. To<br />
change your display picture, click<br />
Choose File.<br />
6 <strong>Bryton</strong> <strong>Bridge</strong>
e. To change your bike profiles,<br />
select Bike one/Bike two tab.<br />
Change your bike data if<br />
necessary. To change your bike<br />
picture, click Choose File.<br />
2.2 Managing Your Collection<br />
EDIT PROFILE & MANAGE COLLECTION<br />
f. After all settings are completed,<br />
click SAVE.<br />
Collection is where the track and POI data that you have collected on our<br />
community website and you plan to download to your Rider 50 later on.<br />
a. Click My Collection. b. On the POI tab, select the POI<br />
that you want to download. Click<br />
.<br />
c. On the Track tab, select the track that you want to download. Click .<br />
<strong>Bryton</strong> <strong>Bridge</strong> 7
MANAGE MAPS<br />
MANAGE MAPS<br />
With My Maps, you can import maps (that are<br />
bundled in the DVD) to your Rider 50 or the<br />
memory card. You can also delete maps from<br />
the device or memory card.<br />
Click My Maps.<br />
3.1 Importing Maps<br />
a. Insert the Map DVD into your<br />
computer’s disc drive. Click Add<br />
Maps.<br />
c. Select the desired map(s), and<br />
click Save.<br />
b. To save the maps to your device,<br />
click Save to Device.<br />
� To save the maps to the memory<br />
card, click Save to SD Card,<br />
select the SD card folder and click<br />
OK to continue.<br />
Note:<br />
Be sure that you have a microSD<br />
card into your Rider 50.<br />
d. Wait until the map importing<br />
process is completed.<br />
8 <strong>Bryton</strong> <strong>Bridge</strong>
MANAGE MAPS<br />
e. After the map is successfully imported, a message appears on the screen.<br />
Click OK.<br />
3.2 Deleting Maps<br />
a. Click Delete Maps. b. To delete the maps that you have<br />
stored on your device, click<br />
Delete Map on Device.<br />
� To delete the maps that you have<br />
stored in the memory card, click<br />
Delete Map on SD, select the SD<br />
card folder and click OK to<br />
continue.<br />
c. Select the desired map that you d. Wait until the map deleting<br />
<strong>Bryton</strong> <strong>Bridge</strong> 9
MANAGE MAPS<br />
want to delete, and click Delete<br />
to delete the selected map(s).<br />
e. After the map is successfully<br />
deleted, a message appears on<br />
the screen. Click OK.<br />
process is completed.<br />
10 <strong>Bryton</strong> <strong>Bridge</strong>
MANAGE DEVICE<br />
With Rider 50, you can view your Rider 50’s<br />
information, update your device with the latest<br />
firmware version, manage the data, and reset<br />
your device to the factory default settings.<br />
Click Rider 50.<br />
4.1 Updating Firmware<br />
MANAGE DEVICE<br />
a. Click Device Information. b. The device information is<br />
displayed on the screen. To update<br />
your device’s firmware, click<br />
Update to continue.<br />
c. Click OK to start updating the<br />
latest firmware version.<br />
d. Wait until the process is<br />
completed.<br />
Note:<br />
Do not unplug the USB cable or turn<br />
off your Rider 50 during the firmware<br />
updating process is in progress.<br />
<strong>Bryton</strong> <strong>Bridge</strong> 11
MANAGE DEVICE<br />
4.2 Managing Data<br />
Manage Data gives you the ability to delete old data on your Rider 50.<br />
a. Click Manage Data.<br />
c. Select Track tab to view your<br />
track list. Select a track and click<br />
Delete to delete it from the list.<br />
4.3 Reset to Factory Defaults<br />
b. Select Favorite POI tab to view your<br />
favorite POI list. Select a POI and click<br />
Delete to delete it from the list.<br />
d. Select Planned Trip tab to view your<br />
planned trip list. Select a trip and click<br />
Delete to delete it from the list.<br />
a. Click Reset to Factory Setting. b. Click OK to reset the device to the<br />
factory default settings.<br />
12 <strong>Bryton</strong> <strong>Bridge</strong>
4.4 Set Home Altitude<br />
a. Take your Rider 50 to outside of your<br />
house, a clear view of the sky. It will<br />
automatically search for satellite<br />
signals. When GPS is fixed, press and<br />
hold the Menu button.<br />
c. To set home altitude, click Start to<br />
set Home altitude.<br />
MANAGE DEVICE<br />
b. Connect your Rider 50 to the<br />
computer using the USB cable.<br />
The <strong>Bryton</strong> <strong>Bridge</strong> will<br />
automatically launch. Click Rider<br />
50.<br />
d. The “Home altitude data saved”<br />
message appears on the screen.<br />
Click OK to continue.<br />
Note:<br />
� To calibrate home altitude, take your Rider 50 to the same location where you<br />
set as home altitude and receive the satellite signals, and press and hold the<br />
Menu button.<br />
� To ensure the data is accurate, it is highly recommended that you adjust the<br />
barometer every time before using your Rider 50.<br />
<strong>Bryton</strong> <strong>Bridge</strong> 13
UPLOAD DATA<br />
UPLOAD DATA<br />
With Upload, you can upload your device data<br />
(such as your profile, track log and training<br />
exercise) to the community website at<br />
http://www.brytonsport.com.<br />
Click Upload.<br />
5.1 Uploading Data<br />
a. Click Start to start uploading the<br />
data to the community website.<br />
c. The system will automatically launch<br />
the community website. Enter your<br />
user name and password.<br />
b. After the data is successfully<br />
uploaded, a message appears on<br />
the screen. Click OK.<br />
14 <strong>Bryton</strong> <strong>Bridge</strong>
SOFTWARE SETTINGS<br />
You can change the <strong>Bryton</strong> <strong>Bridge</strong> settings by<br />
clicking “Setting” icon on the top right of<br />
software.<br />
6.1 Changing the Settings<br />
a. Select General tab to view the<br />
software information. To change<br />
the language, select the desired<br />
language from the pull-down<br />
menu.<br />
c. If you need further assistance on<br />
using the <strong>Bryton</strong> <strong>Bridge</strong> software,<br />
click Help icon.<br />
SOFTWARE SETTINGS<br />
b. Select Connection tab to<br />
configure the network settings.<br />
Select one of the options.<br />
Note:<br />
Before you unplug the USB cable, click to eject (“Safely Remove”) the device.<br />
<strong>Bryton</strong> <strong>Bridge</strong> 15
SOFTWARE SETTINGS<br />
6.2 Updating Software<br />
a. If there is a new software version,<br />
the above message appears on<br />
the screen. Click OK to start<br />
updating the <strong>Bryton</strong> <strong>Bridge</strong>’s<br />
software.<br />
c. To start updating the software,<br />
click OK.<br />
b. Wait until the system finishes<br />
downloading the new software.<br />
d. Select the language that you want<br />
to use during the installation, and<br />
click OK. Follow the on-screen<br />
instructions to install the software.<br />
16 <strong>Bryton</strong> <strong>Bridge</strong>


