Siemens SIPLACE X-Series Operator's Guide - Data I/O Corporation
Siemens SIPLACE X-Series Operator's Guide - Data I/O Corporation
Siemens SIPLACE X-Series Operator's Guide - Data I/O Corporation

You also want an ePaper? Increase the reach of your titles
YUMPU automatically turns print PDFs into web optimized ePapers that Google loves.
PN 096-0440-001A<br />
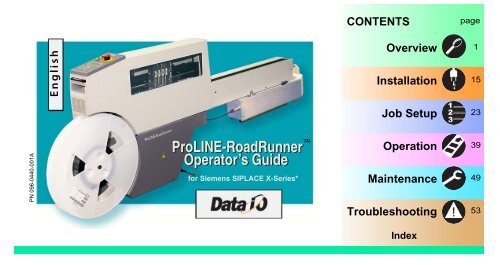
English<br />
ProLINE-RoadRunner Operator’s <strong>Guide</strong><br />
<br />
for <strong>Siemens</strong> <strong>SIPLACE</strong> X-<strong>Series</strong>*<br />
CONTENTS<br />
Overview<br />
Installation<br />
Job Setup<br />
Operation<br />
Maintenance<br />
Troubleshooting<br />
Index<br />
page<br />
1<br />
15<br />
23<br />
39<br />
49<br />
53
<strong>Data</strong> I/O has endeavored to ensure that the information in this document is accurate and<br />
complete. <strong>Data</strong> I/O assumes no liability for errors, or for any incidental, consequential, indirect,<br />
or special damages, including, without limitation, loss of use, loss or alteration of data, delays,<br />
or lost profits or savings, arising from the use of this document or the product which it<br />
accompanies.<br />
No part of this document may be reproduced or transmitted in any form or by any means,<br />
electronic or mechanical, for any purpose, without written permission from <strong>Data</strong> I/O.<br />
<strong>Data</strong> I/O is a registered trademark of <strong>Data</strong> I/O <strong>Corporation</strong>. ProLINE‐RoadRunner and<br />
TaskLink are trademarks of <strong>Data</strong> I/O <strong>Corporation</strong>.<br />
<strong>Data</strong> I/O <strong>Corporation</strong> acknowledges the trademarks of other organizations for their respective<br />
products or services mentioned in this document.<br />
<strong>SIPLACE</strong> is a registered trademark of the <strong>Siemens</strong> <strong>Corporation</strong>.<br />
© 2010 <strong>Data</strong> I/O <strong>Corporation</strong><br />
All rights reserved<br />
*from front cover: supports some feeder table positions only. See Owner’s Manual, or contact<br />
<strong>Data</strong> I/O Customer Support.
Chapter 1<br />
Overview<br />
1 ProLINE-RoadRunner Operator’s <strong>Guide</strong> A<br />
ProLINE-RoadRunner<br />
for <strong>Siemens</strong> <strong>SIPLACE</strong> X........... 2<br />
Jobs and Statistics........... 3<br />
External View........... 4<br />
Internal Components........... 5<br />
Control Panel Lamps........... 6<br />
Control Panel Buttons........... 7<br />
Operator Menus........... 8<br />
Changing the Pass Limit........... 9<br />
Supervisor Menus........... 10<br />
Warnings and Cautions......... 14<br />
Technical Support......... 63
The ProLINE-RoadRunner for <strong>Siemens</strong> X<br />
1<br />
2<br />
3 4<br />
2 ProLINE-RoadRunner Operator’s <strong>Guide</strong> A<br />
<strong>Data</strong> I/O is proud to introduce an<br />
inline solution for high-volume<br />
programming of electronic<br />
products.<br />
ProLINE-RoadRunner:<br />
1. Takes programmable devices<br />
from a reel...<br />
2. Places them in sockets and<br />
programs them with your data...<br />
3. Places them on a conveyor<br />
belt...<br />
4. Delivers them to the pick point<br />
of your assembly machine. �
Programming Jobs<br />
Statistics<br />
Jobs and Statistics<br />
3 ProLINE-RoadRunner Operator’s <strong>Guide</strong> A<br />
TaskLink for Windows � is<br />
required to process devices on<br />
ProLINE-RoadRunner.<br />
TaskLink allows you to create and<br />
manage a job database and analyze<br />
job statistics.<br />
PCMCIA cards (PC-Cards) are used<br />
to transfer jobs and statistics<br />
between TaskLink and RoadRunner.<br />
A network connection can also be<br />
used.<br />
For more information on TaskLink,<br />
see the TaskLink Help Menu. �
4<br />
3<br />
2<br />
1<br />
11<br />
Front<br />
5<br />
4 ProLINE-RoadRunner Operator’s <strong>Guide</strong> A<br />
10<br />
9<br />
External View<br />
8<br />
6<br />
Rear<br />
7<br />
1. Power and Air Connections<br />
2. Power Switch<br />
3. Handhold for lifting<br />
4. PC Card Slot and Eject button<br />
5. Control Panel<br />
6. Conveyor Belt<br />
7. Feeder Bank Adapter to SMT<br />
8. Robotics Cover<br />
9. Communications Cable<br />
10. Electronics Enclosure<br />
11. Ethernet connection �
1<br />
5 ProLINE-RoadRunner Operator’s <strong>Guide</strong> A<br />
2<br />
Internal Components<br />
3<br />
5<br />
4<br />
1. Cover Tape Take-Up Reel<br />
2. Tape-In Module<br />
3. PNP Head, Probes, and Precisor<br />
4. Reject Bin<br />
5. Socket Adapter, Actuator Plate,<br />
and Programmer �
1<br />
2<br />
3<br />
Control Panel Lamps<br />
6 ProLINE-RoadRunner Operator’s <strong>Guide</strong> A<br />
4<br />
1. Blue - Stop Indicator.<br />
User intervention is required, or<br />
the unit is paused.<br />
— CAUTION — Do not remove the<br />
PC-Card unless blue lamp is lit.<br />
2. Yellow - Caution Indicator.<br />
Correct a problem or the<br />
RoadRunner will stop. Also,<br />
reading or writing to PC-Card.<br />
3. Green - Run Indicator.<br />
Lit: A job is running.<br />
Blinking: Programmed devices<br />
are not yet at the SMT pick<br />
point.<br />
4. Emergency Stop - Press to stop<br />
the robot motors in an emergency.<br />
To resume motion, rotate<br />
the button and press Start. �
3<br />
Control Panel Buttons<br />
7 ProLINE-RoadRunner Operator’s <strong>Guide</strong> A<br />
2<br />
4<br />
1<br />
5<br />
1. Start - start or resume the<br />
chosen job.<br />
2. Menu - exit to the previous<br />
menu, —or show the next<br />
message (deleting the current<br />
one), —or deselect an item to<br />
end a process.<br />
3. Up and Down Arrows - scroll<br />
through menu items, —or toggle<br />
selections, —or advance the<br />
device tape.<br />
4. Select - select menu items.<br />
In this guide, Select Job means<br />
to scroll to Job and press<br />
Select.<br />
5. Pause - interrupt the job<br />
without cancelling it. �
Main Menu<br />
Job<br />
Advance Pocket<br />
Align Pocket<br />
Purge<br />
Socket<br />
• Light gray shaded fields<br />
cannot be changed.<br />
• For Advance Pocket, Align<br />
Pocket, and Purge, see<br />
Chapter 3 in the Owner’s<br />
Manual.<br />
Operator Menus<br />
Job<br />
View Job Name<br />
Device: E28F320<br />
Checksum: 3FC00000<br />
Mfg: INTEL<br />
Adapter: PA-G021<br />
Prec: 621-0086-005<br />
Act: 644-0016-001<br />
Encrypted: No<br />
Results Passed: 992<br />
Failed: 4<br />
System Yld: 98.7<br />
Prgrmr Yld: 99.6<br />
Handler Yld: 99.5<br />
Parts/Hour: 255<br />
MCBI: 201<br />
Skt 1 Yld: 99.9<br />
Skt 2 Yld: 100<br />
Skt 3 Yld: 100<br />
Skt 4 Yld: 100<br />
Skt Cycles: 249<br />
8 ProLINE-RoadRunner Operator’s <strong>Guide</strong> A<br />
Operator Menus are visible on the<br />
Control Panel, and can be navigated<br />
by using the Up Arrow and Down<br />
Arrow buttons.<br />
Pressing the Menu button displays<br />
the next higher menu (one level up).<br />
If you are at the main menu,<br />
pressing Menu will have no effect.<br />
Job is the first item in the main<br />
menu.<br />
Operator Menus, Version 05.35.00.C<br />
shown, and continued on the next<br />
page. �
Job continued<br />
End<br />
Remaining<br />
Devices<br />
Remaining: 144<br />
+-1<br />
+-10<br />
+-100<br />
+-1000<br />
+-10000<br />
• Light gray shaded fields cannot be<br />
changed.<br />
Changing the Pass Limit<br />
Operator Menus, continued<br />
Socket<br />
Socket 1: Enabled<br />
Socket 2: Enabled<br />
Socket 3: Enabled<br />
Socket 4: Enabled<br />
Adapter Statistics Reset Clean Count<br />
Clean Count<br />
Clean Alert: 3500<br />
No: 22113204<br />
Mfg: 10/31/05<br />
Actuations:1055<br />
Adptr. Life: 10000<br />
Insertions: 4220<br />
Pass: 4202<br />
Fail: 16<br />
Yld: 99.5<br />
Socket 1<br />
Insertions: 1055<br />
Pass: 1053<br />
Fail: 2<br />
Yield: 99.8<br />
Socket 2 [same as 1]<br />
Socket 3 [same as 1]<br />
Socket 4 [same as 1]<br />
9 ProLINE-RoadRunner Operator’s <strong>Guide</strong> A<br />
Changing the Pass Limit<br />
To change the Pass Limit:<br />
1. Select Job.<br />
2. Select Remaining Devices.<br />
3. Scroll to and Select an increment<br />
for adjustment.<br />
4. Press the Up or Down Arrow<br />
buttons as necessary.<br />
Press Menu. Repeat steps 3 & 4 if<br />
needed for another increment. �
Main Menu<br />
Job<br />
Advance Pocket<br />
Align Pocket<br />
Purge<br />
Socket*<br />
Home<br />
Operation*<br />
System†<br />
Robot Diagnostics^<br />
Programmer Diags^<br />
Event Log^<br />
* See next page<br />
† See 2 pages ahead<br />
^ See 3 pages ahead<br />
• HOME sends the<br />
PNP Head to the<br />
Home position.<br />
• Light gray shaded<br />
fields cannot be<br />
changed.<br />
Job<br />
View Job Name<br />
Device:<br />
Checksum: 3FC00000<br />
Mfg: INTEL<br />
Adapter: PA-G021<br />
Prec: 621-0086-005<br />
1 Not Required on XLF models.<br />
2 Mean Cycles Between Interrupts.<br />
Part numbers shown here are for<br />
example only.<br />
1<br />
Act: 644-0016-001<br />
Encrypted: No<br />
Results Passed: 992<br />
Failed: 4<br />
System Yld: 98.7<br />
Prgrmr Yld: 99.6<br />
Handler Yld: 99.5<br />
Parts/Hour: 255<br />
MCBI: 201 2<br />
Skt 1 Yld: 99.9<br />
Skt 2 Yld: 100<br />
etc.<br />
Skt Cycles: 249<br />
Supervisor Menus<br />
Job cont.<br />
End<br />
Select � Job 1<br />
� Job 2<br />
End of List<br />
Remaining<br />
Devices<br />
Remaining: 151<br />
+-1<br />
+-10<br />
+-100<br />
+-1000<br />
+-10000<br />
10 ProLINE-RoadRunner Operator’s <strong>Guide</strong> A<br />
View the Supervisor Menus by<br />
inserting a PC-Card with supervisor<br />
authority.<br />
(The Supervisor menus are also on<br />
the next three pages.)<br />
Supervisor (administrator)<br />
authorization is set in TaskLink. For<br />
more information, refer to TaskLink<br />
Help.<br />
Version 05.35.00.C menus shown.<br />
A (�) indicates the currently<br />
selected item.<br />
A (�) indicates the current cursor<br />
position.
Socket<br />
Socket 1: Enabled<br />
Socket 2: Enabled<br />
Socket 3: Enabled<br />
Socket 4: Enabled<br />
Adapter Statistics Reset Clean Count<br />
Clean Count<br />
Clean Alert: 3500<br />
No: 22113204<br />
Mfg: 09/23/02<br />
Actuations:1055<br />
Adptr. Life: 10000<br />
Insertions: 4220<br />
Pass: 4202<br />
Fail: 16<br />
Yld: 99.5<br />
Socket 1<br />
Insertions: 1055<br />
Pass: 1053<br />
Fail: 2<br />
Yield: 99.8<br />
Socket 2 [Same as 1]<br />
Socket 3 [Same as 1]<br />
Socket 4 [Same as 1]<br />
Supervisor Menus Continued<br />
Operation<br />
Job Pick Retries: 2<br />
Error Retries: 3<br />
Pocket Pitch: 4<br />
Pocket Advance: 3<br />
Save Air: On<br />
Belt<br />
Clear Belt: On<br />
Buffer: 1<br />
Prefill: Enabled<br />
Warning Msg: On<br />
Head Velocity: 250<br />
Accel: 700<br />
Probes Puff: 50<br />
Pick: 200<br />
Place: 100<br />
Travel: 250<br />
Teach Tape: 40.0<br />
Skt 1: -26.85<br />
Reject: -166<br />
Belt: -180<br />
Restore Defaults<br />
• Light gray shaded fields cannot be<br />
changed.<br />
11 ProLINE-RoadRunner Operator’s <strong>Guide</strong> A<br />
Refer to the previous page for the<br />
main menu.<br />
NOTE: Many of the values<br />
shown, such as the Teach and<br />
Network menus, are for<br />
illustration only.<br />
To change languages press Menu<br />
while pressing the Select button.<br />
Arrow Down to the desired<br />
language and press Menu twice.
System<br />
Time Hour: 4<br />
Minute: 55<br />
Month: 9<br />
Day: 23<br />
Year: 2002<br />
Odometer Hours: 469.92<br />
Devices: 24742<br />
Timekeeping: OFF<br />
Erase: 0.0s<br />
Blankcheck: 0.0s<br />
Program: 0.0s<br />
Verify: 0.0s<br />
Update<br />
Software<br />
Network Network Parm:Card<br />
NetworkTxt: Delete/Save<br />
Status: Enabled<br />
PGM: FredsRR2<br />
IP: 888.888.88.888<br />
Prog Port: 7596<br />
SUB: 255.255.248.0<br />
GTW: 139.138.16.1<br />
SNS: 0.0.0.0<br />
SNS Port: 7500<br />
Supervisor Menus, continued<br />
System<br />
Network HST: rr215.nt.data-io<br />
(cont.) DOM: nt.data-io.com<br />
DNS: 888.888.88.888<br />
DTS: 888.888.88.88<br />
EAddr: 0010EC002211<br />
Clear NetParms<br />
Adapter<br />
On<br />
Alarm:<br />
Configuration<br />
Firmware Version<br />
Ver 05.34.02.C<br />
Installed Boards<br />
Bkpln Brd Id: 2<br />
EP860 80Mhz<br />
WFB FCIII Id: 160<br />
Adptr Brd Id: 3<br />
Hardware Config<br />
HwCfgIds 1, 3, 4<br />
View Prog Keys<br />
Prog Key information<br />
Set Prog Key<br />
Remove Prog Key<br />
Model: [name] [-XLF]<br />
Feeder Comm:SBelt/FFI<br />
Reel Detect: Enable<br />
12 ProLINE-RoadRunner Operator’s <strong>Guide</strong> A<br />
Refer to the main Supervisor<br />
Menu for orientation (2 pages<br />
back).
Robot Diags<br />
Robot: Enabled<br />
Run<br />
Job/Dry Run<br />
Mode:<br />
Belt Move:Fwd/Bkw<br />
Pick Sensor: 0<br />
Speed: 400 ± 10<br />
Measure Device<br />
Offset: 0.00<br />
Repeatability Test<br />
Start<br />
Sensors Tape Sprocket: 0<br />
Tape Broken: 0<br />
Reject Full: 0<br />
Reject Bin: 1<br />
Air: 1<br />
Interlock: 0<br />
E-Stop: 0<br />
+Overtravel: 0<br />
Home: 1<br />
Socket State: Up<br />
Actuate: 0<br />
Act.Duration:150<br />
3<br />
Probe 1–<br />
4<br />
Head<br />
Position<br />
Supervisor Menus, continued<br />
Robot Diags<br />
Position: Up<br />
Vacuum: Enabled<br />
Puff: Enabled<br />
Vac Sense: 1<br />
Speed: 135 ± 5<br />
Head: 0<br />
• Light gray shaded fields<br />
cannot be changed.<br />
3 Socket Actuation duration<br />
is set by the Socket<br />
Adapter in some instances.<br />
Programmer Diags<br />
Programr: Enabled<br />
Exercise Display<br />
Test Cycles: 3<br />
Test All: PASS<br />
Bus Test: PASS<br />
Adtr ID Test: PASS<br />
LED Dvr Test: PASS<br />
G Node Test: PASS<br />
Vcc OC Test: PASS<br />
Vpp OC Test: PASS<br />
I2C Bus Test: PASS<br />
DAC Ref Test: PASS<br />
GSlew Test: PASS<br />
High RAM Test:<br />
Continuity Loop: 3<br />
Event Log<br />
View<br />
Clear<br />
ProgrammerDiagnostic<br />
tests<br />
require a<br />
Diagnostic<br />
Adapter<br />
Board for all<br />
items below<br />
this line.<br />
13 ProLINE-RoadRunner Operator’s <strong>Guide</strong> A<br />
NOTE: Programmer Diags tests<br />
are only available with a<br />
Diagnostic Adapter Board (not<br />
included). Contact <strong>Data</strong> I/O.<br />
For more information about menu<br />
commands, see chapter 3 of the<br />
ProLINE-RoadRunner Owner’s<br />
Manual.
Compressed<br />
Air<br />
Loud<br />
Noise<br />
High<br />
Voltage<br />
Heavy<br />
Object<br />
Moving<br />
Parts<br />
Electrostatic<br />
Discharge<br />
Warnings and Cautions<br />
Point air hoses away from body. Always wear approved eye<br />
protection.<br />
Sound pressure levels may exceed 85 db. Hearing protection is<br />
recommended for prolonged exposure at this level.<br />
Disconnect power before removing the electronics cover.<br />
This equipment weighs approximately 15 – 19 kg (33 – 41 lbs). Do<br />
not drop. Mount only with approved hardware.<br />
Pinch warning. Keep hands away from moving parts.<br />
Electrostatic Discharge (ESD) may cause damage. Discharge static<br />
against a common ground.<br />
14 ProLINE-RoadRunner Operator’s <strong>Guide</strong> A
Chapter 2<br />
Installation<br />
15 ProLINE-RoadRunner Operator’s <strong>Guide</strong> A<br />
Mounting on the<br />
Assembly Machine...... 16<br />
Connecting the Communications<br />
Cable (optional).......18<br />
Connecting Power and Air ...... 20<br />
Turning the Power On ...... 22
1<br />
Mounting on the Assembly Machine<br />
16 ProLINE-RoadRunner Operator’s <strong>Guide</strong> A<br />
1<br />
To mount RoadRunner (with Feeder<br />
Bank Adapter attached) onto a<br />
<strong>SIPLACE</strong> X Assembly Machine:<br />
NOTE: To attach the Adapter,<br />
contact <strong>Data</strong> I/O Support.<br />
1. Holding RoadRunner level, align<br />
the grooves on the Adapter with<br />
ribs on the Feeder Bank, and<br />
slide RoadRunner as far forward<br />
as it will go.<br />
Warning:<br />
FEEDER CARTS CAN TIP: Remove RoadRunner<br />
from the Feeder Cart before pulling the cart away<br />
from the SMT machine.<br />
Warning:<br />
Heavy; 19 kg (41 lbs). Do Not Drop.<br />
Mount Only With Approved Hardware.
SMT attaches here<br />
17 ProLINE-RoadRunner Operator’s <strong>Guide</strong> A<br />
NOTE: The SMT machine should<br />
automatically latch onto it.<br />
2. Make sure that RoadRunner is<br />
secure before letting go. �
Connecting the Communications Cable<br />
1<br />
Red Dot<br />
18 ProLINE-RoadRunner Operator’s <strong>Guide</strong> A<br />
To connect the Communications<br />
Cable:<br />
1. Correctly orient the connector<br />
(the red dot will be on top) and<br />
plug it into RoadRunner.<br />
The socket is located on the far<br />
side—facing the SMT feeder<br />
table.<br />
continued
2<br />
19 ProLINE-RoadRunner Operator’s <strong>Guide</strong> A<br />
2. Orient and plug the other end of<br />
the cable into the Feeder Bank<br />
Adapter.<br />
To unplug the cable, pull back on<br />
the connector collar. �
1<br />
Connecting Power and Air<br />
20 ProLINE-RoadRunner Operator’s <strong>Guide</strong> A<br />
2<br />
To connect the power and the air:<br />
1. Turn the RoadRunner power<br />
switch to the Off (0) position.<br />
2. Grasp the air hose behind the<br />
“quick connect” collar and push<br />
it firmly onto the male fitting.<br />
The collar must be allowed to<br />
move back as it goes onto the<br />
fitting.<br />
NOTE: Compressed air must be<br />
clean and dry at approximately<br />
5.25 kgf/cm 2 (75 psi).<br />
Warning:<br />
Point Air Hoses Away From Body.<br />
Wear Approved Eye Protection.
3<br />
Pull Collar<br />
21 ProLINE-RoadRunner Operator’s <strong>Guide</strong> A<br />
NOTE: The air line is equipped<br />
with a “quick connect” that will<br />
stop airflow when disconnected.<br />
To disconnect the air hose, grasp<br />
the collar on the connector and<br />
pull back.<br />
3. Connect to a grounded power<br />
source using a cable with a<br />
standard IEC 320 plug.<br />
RoadRunner accepts power<br />
between 100 and 240 VAC,<br />
50/60 Hz. �
1<br />
Turning the Power On<br />
ProLINE-RoadRunner<br />
<strong>Data</strong> I/O <strong>Corporation</strong><br />
Version: 05.35.00.C<br />
22 ProLINE-RoadRunner Operator’s <strong>Guide</strong> A<br />
To turn the power on:<br />
1. Push the power rocker switch to<br />
On (I).<br />
All the Control Panel indicator<br />
lamps light up. A Self-test runs.<br />
Then only the blue lamp will<br />
remain on and the version<br />
number will display.<br />
If all the indicator lamps start<br />
blinking, a serious error has<br />
occurred. Turn the unit off then<br />
on again. If the error remains,<br />
have the unit serviced.<br />
2. If no errors display, RoadRunner<br />
is operation ready. �
Chapter 3<br />
Job Setup<br />
23 ProLINE-RoadRunner Operator’s <strong>Guide</strong> A<br />
Inserting a Job Card ..... 24<br />
Changing the Precisor ..... 26<br />
Changing the<br />
Actuator Plate..... 28<br />
Changing the<br />
Socket Adapter..... 30<br />
Adjusting the Tape-In Module ..... 32<br />
Loading a Reel of Devices ..... 34<br />
Aligning the Tape Pockets ..... 36<br />
Adding Network<br />
Communication..... 37
1<br />
ProLINE-RoadRunner<br />
<strong>Data</strong> I/O <strong>Corporation</strong><br />
Version 02.00.00.B<br />
Inserting a Job Card<br />
24 ProLINE-RoadRunner Operator’s <strong>Guide</strong><br />
To run a job, insert a TaskLink job<br />
card into the PC-Card slot. Use only<br />
TYPE I or TYPE II PC-Cards<br />
(PCMCIA).<br />
To insert a job card:<br />
1. If the power is on, make sure the<br />
blue lamp is lit.<br />
Caution:<br />
Electrostatic Discharge May Cause Damage.<br />
Discharge Static Against Common Ground<br />
Prior to Inserting Job Card.
2<br />
25 ProLINE-RoadRunner Operator’s <strong>Guide</strong> A<br />
3<br />
2. Slide the job card into the PC-<br />
Card slot.<br />
NOTE: When fully inserted, the job<br />
card extends slightly from the PC-<br />
Card slot.<br />
NOTE: Do not eject the card<br />
unless the blue lamp is lit (or the<br />
power is off).<br />
3. The Card Eject button can be<br />
pushed to remove the card<br />
when the blue lamp is lit. �
Changing the Precisor<br />
26 ProLINE-RoadRunner Operator’s <strong>Guide</strong><br />
3<br />
To change the precisor:<br />
1. Select Job, then End, wait for<br />
the blue lamp to light and turn<br />
the power Off (0).<br />
2. Lift off the Robotics Cover.<br />
3. Starting at one end, pull the precisor<br />
down off the magnet.<br />
The PNP Head Cover (some<br />
models) can be removed for<br />
easier access (pull straight out.)<br />
Warning:<br />
Pinch Warning. Keep Hands<br />
Away From Moving Parts.
4<br />
27 ProLINE-RoadRunner Operator’s <strong>Guide</strong> A<br />
4. When inserting the new precisor,<br />
make sure that the part<br />
number faces up and that the<br />
small holes near the precisor<br />
edge fit over the dowel pins on<br />
the PNP head.<br />
There should be no visible gap<br />
between the precisor and the<br />
head. �
Changing the Actuator Plate<br />
PNP Head<br />
28 ProLINE-RoadRunner Operator’s <strong>Guide</strong><br />
To change the Actuator Plate:<br />
1. Select Job, then End, wait for<br />
the blue lamp to light and turn<br />
the power Off (0).<br />
2. Lift off the Robotics Cover.<br />
Once power is off, the PNP Head<br />
can be moved by hand to allow<br />
access to the Actuator Plate.<br />
Warning:<br />
Pinch Warning. Keep Hands<br />
Away From Moving Parts.
29 ProLINE-RoadRunner Operator’s <strong>Guide</strong> A<br />
3<br />
3. Pull the Actuator Plate to slide it<br />
out of the grooved brackets.<br />
NOTE: The Actuator Plate must be<br />
removed to access or change the<br />
Socket Adapter.<br />
To change the Socket Adapter, see<br />
the procedure on the following<br />
page. �
Changing the Socket Adapter<br />
2<br />
30 ProLINE-RoadRunner Operator’s <strong>Guide</strong><br />
2<br />
To change the Socket Adapter (with<br />
the Actuator Plate removed):<br />
1. Make sure the power is Off (0).<br />
2. Unscrew the two captive screws<br />
and lift the adapter bracket.<br />
Warning:<br />
Pinch Warning. Keep Hands<br />
Away From Moving Parts.<br />
Caution:<br />
Electrostatic Discharge May Cause Damage.<br />
Discharge Static Against Common Ground.
3<br />
31 ProLINE-RoadRunner Operator’s <strong>Guide</strong> A<br />
3. Without touching the gold contact<br />
surfaces on the bottom of<br />
the adapter, lift the adapter free.<br />
4. Insert the correct adapter, making<br />
sure that it seats on the<br />
dowel pins.<br />
NOTE: Each type of device may<br />
have its own Socket Adapter.<br />
5. Tighten the screws.<br />
6. Install and (if necessary) adjust<br />
the Actuator Plate. �
Adjusting the Tape-In Module<br />
Non-Adjustable Adjustable<br />
2<br />
Current<br />
Setting<br />
32 ProLINE-RoadRunner Operator’s <strong>Guide</strong><br />
If you have an Adjustable Tape-In<br />
Module, you may need to adjust it to<br />
match your tape width.<br />
Adjustable Tape-In Module only—<br />
If the etched number on the<br />
three-position spacer does not<br />
match your tape width dimension<br />
(mm) then adjust it:<br />
1. With the power off (0), push the<br />
PNP head out of the way.<br />
2. Loosen the Position Locking<br />
Screw most of the way out<br />
using a 4 mm Allen wrench.
6<br />
3<br />
4<br />
33 ProLINE-RoadRunner Operator’s <strong>Guide</strong> A<br />
6<br />
5<br />
3. Rotate the three-position spacer<br />
with your finger until you read<br />
16, 24 or 32, corresponding to<br />
your tape width (rotates one<br />
direction except when at 24).<br />
4. Retighten the Position Locking<br />
Screw.<br />
5. Rotate the Peel Bar counterclockwise<br />
180 degrees to the up<br />
position.<br />
6. Lift and move the magnetic<br />
Front Track to the position that<br />
fits your tape width.<br />
7. Rotate the Peel Bar back<br />
down. �
3<br />
Loading a Reel of Devices<br />
34 ProLINE-RoadRunner Operator’s <strong>Guide</strong><br />
6<br />
To load and thread device tape:<br />
1. Ensure you have the correct<br />
Tape-In Module/adjustment for<br />
your tape (tape fits in track).<br />
2. Place a reel onto the RoadRunner<br />
spindle.<br />
3. Lock the reel in place by rotating<br />
the brass button on the spindle<br />
end.<br />
4. Insert device tape into the Tape-<br />
In Module and its sprocket.<br />
5. With power on, select Advance<br />
Pocket from the menu, then<br />
press the Up Arrow button.<br />
— CAUTION — Do not advance<br />
devices past the pick point: they<br />
may fall and jam the tape.
35 ProLINE-RoadRunner Operator’s <strong>Guide</strong> A<br />
7<br />
7<br />
6. When the tape is advanced just<br />
past the Peel Bar, separate the<br />
cover tape from the device tape.<br />
7. Thread the cover tape up<br />
through the cover tape path (see<br />
label on machine) and attach it<br />
to the Cover Tape Take-Up Reel.<br />
Advance the tape as necessary.<br />
NOTE: A piece of adhesive tape<br />
will help stick the cover tape to the<br />
Take-Up Reel.<br />
8. Wind up slack cover tape.<br />
9. Press Menu to end the advancing<br />
procedure.<br />
10. Align the tape pockets as<br />
described in the following<br />
procedure. �
Job<br />
Advance Pocket<br />
> Align Pocket<br />
Purge<br />
2<br />
1<br />
Aligning the Tape Pockets<br />
36 ProLINE-RoadRunner Operator’s <strong>Guide</strong><br />
2<br />
To align the tape pockets:<br />
1. Select Align Pocket from the<br />
Menu.<br />
2. Press the Up Arrow to advance<br />
the tape until the next tape<br />
pocket center hole is approximately<br />
centered at the pick point<br />
alignment mark. Do not advance<br />
devices past the pick point. They<br />
may jam the tape path.<br />
3. Press Menu to end this process.<br />
NOTE: Perform this aligning<br />
procedure each time power is<br />
applied, including after releasing<br />
the Emergency Stop. �
Adding Network Communication<br />
3<br />
• Network: Parm<br />
Status: Enabled<br />
PGM: RRWestLine<br />
IP 123.123.12.123<br />
4<br />
37 ProLINE-RoadRunner Operator’s <strong>Guide</strong> A<br />
To connect RoadRunner to a<br />
network (optional):<br />
1. Create a Network card at a PC<br />
with TaskLink. See TaskLink’s<br />
online Help: (Help > Help Topics ><br />
Using Networked RoadRunners ><br />
How to Configure RoadRunner).<br />
2. Insert the Network card into<br />
RoadRunner.<br />
3. On the RoadRunner Control<br />
Panel, scroll to and select System<br />
> Network.<br />
4. Press Select again to edit.
5<br />
• Network: Card<br />
Status: Enabled<br />
PGM: MyRR<br />
IP 123.123.12.123<br />
5<br />
Network Connection, continued<br />
6<br />
38 ProLINE-RoadRunner Operator’s <strong>Guide</strong><br />
8<br />
5. Using the arrow buttons, toggle<br />
Network to Card.<br />
6. Press the Menu button to save<br />
your changes.<br />
7. Cycle the power Off and then<br />
On.<br />
NOTE: The network configuration<br />
file is deleted from the PC-Card at<br />
the end of the process. This<br />
prevents accidentally configuring<br />
two RoadRunners with the same<br />
network settings.<br />
8. Plug in a Network Cable,<br />
10BaseT or 100BaseT. Only<br />
FC III & later programmers<br />
make use of the latter. �
Chapter 4<br />
Operation<br />
39 ProLINE-RoadRunner Operator’s <strong>Guide</strong> A<br />
Running a Job ......... 40<br />
Pausing or Stopping a Job ......... 41<br />
Ending a Job ......... 42<br />
Emptying the Reject Bin ......... 44<br />
Emptying Cover Tape ......... 45<br />
Shutting Down ......... 46<br />
Restarting a Job ......... 48
1<br />
Running a Job<br />
> Job<br />
Advance Pocket<br />
Align Pocket<br />
Purge<br />
40 ProLINE-RoadRunner Operator’s <strong>Guide</strong> A<br />
3<br />
To run a job:<br />
1. Insert a job card into the<br />
PC-Card slot.<br />
2. Clear the conveyor belt of any<br />
unneeded devices.<br />
NOTE: If the job card has<br />
Supervisor authority, ensure the<br />
correct job is selected. See<br />
Supervisor Menu.<br />
3. Press Start. The green lamp<br />
will start blinking.<br />
When the programmed devices<br />
reach the assembly machine pick<br />
point, the belt will pause and the<br />
green lamp will stay lit without<br />
blinking. �
Job<br />
Advance Pocket<br />
Align Pocket<br />
Pausing or Stopping a Job<br />
> Job<br />
Advance Pocket<br />
Align Pocket<br />
in an emergency<br />
41 ProLINE-RoadRunner Operator’s <strong>Guide</strong> A<br />
To pause at the end of the current<br />
operation:<br />
• Press Pause on the Control<br />
Panel.<br />
To instantly stop in an emergency<br />
situation:<br />
• Press the Emergency Stop<br />
(E-Stop) button.<br />
The E-Stop does not stop the<br />
Assembly Machine. �<br />
Warning<br />
Electrical shock hazard. The E-Stop does<br />
not stop electricity to RoadRunner.
Job<br />
Advance Pocket<br />
Align Pocket<br />
1<br />
42 ProLINE-RoadRunner Operator’s <strong>Guide</strong> A<br />
2<br />
Ending a Job<br />
View<br />
Results<br />
> End<br />
Whenever you want to change job<br />
cards, you must first end the<br />
current job.<br />
To end the current job:<br />
1. Press the Pause button.<br />
2. Scroll to and select End from<br />
the Job Menu. “Job” is in the<br />
main menu.<br />
The system will finish<br />
processing devices and place<br />
the devices on the belt, but no<br />
additional devices will get<br />
picked from the tape.
5<br />
43 ProLINE-RoadRunner Operator’s <strong>Guide</strong> A<br />
4<br />
3<br />
3. Clear away excess devices from<br />
the conveyor belt.<br />
4. Empty the Reject Bin. (See next<br />
heading.)<br />
5. Empty the Cover Tape Take-Up<br />
Reel. (See “Emptying Cover<br />
Tape” ahead several pages.) �
Emptying the Reject Bin<br />
44 ProLINE-RoadRunner Operator’s <strong>Guide</strong> A<br />
3<br />
To empty the Reject Bin:<br />
1. Press the Pause button.<br />
2. Lift off the Robotics Cover.<br />
3. Lift the Reject Bin straight up by<br />
the finger tab and then out.<br />
When reinserting the Reject Bin,<br />
be sure the bin is completely<br />
lowered so that the tab is<br />
positioned out of the path of the<br />
probes. �<br />
Warning:<br />
Pinch Warning. Keep Hands<br />
Away From Moving Parts.
4<br />
3<br />
Emptying Cover Tape<br />
45 ProLINE-RoadRunner Operator’s <strong>Guide</strong> A<br />
5<br />
To empty the Cover Tape Take-Up<br />
Reel (during a job) when it looks<br />
full:<br />
1. Press Pause.<br />
2. Leaving enough slack to<br />
re-attach, cut the cover tape.<br />
3. Pull the Take-Up Reel straight<br />
out and off the hub.<br />
4. Unwind the used cover tape and<br />
discard it.<br />
5. Replace the Take-Up Reel—slide<br />
it on and rotate it to line up with<br />
the pins, and push. �<br />
Warning:<br />
Pinch Warning. Keep Hands<br />
Away From Moving Parts.
Job<br />
Advance Pocket<br />
Align Pocket<br />
1A<br />
46 ProLINE-RoadRunner Operator’s <strong>Guide</strong> A<br />
2<br />
Shutting Down<br />
To turn off RoadRunner:<br />
1. If a job is running:<br />
A. Press Pause.<br />
B. Select End Job from the Job<br />
Menu and wait for all devices to<br />
be removed from the sockets.<br />
2. Turn the power Off (0).<br />
3. Remove devices from the<br />
conveyor belt.<br />
continued
5<br />
6<br />
47 ProLINE-RoadRunner Operator’s <strong>Guide</strong> A<br />
4<br />
4. Empty the Reject Bin.<br />
5. Empty the Take-Up Reel. (For<br />
more, see the previous<br />
heading.)<br />
6. If removing the reel of devices,<br />
cut the empty tape where it exits<br />
at the far end of the conveyor,<br />
and then wind the reel<br />
backwards.<br />
7. Turn off the air flow, or remove<br />
the air hose.<br />
NOTE: When disconnecting the<br />
air hose, pull the connector collar<br />
back as you pull the connector<br />
off. �
Restarting a Job<br />
1 Job<br />
Advance Pocket<br />
3 > Align Pocket<br />
Purge<br />
48 ProLINE-RoadRunner Operator’s <strong>Guide</strong> A<br />
4<br />
5<br />
To restart a job after a Pause or an<br />
Emergency Stop:<br />
1. Rotate the Emergency Stop<br />
button clockwise to release it, if<br />
applicable.<br />
2. Press Menu until the main level<br />
menu is displayed<br />
3. Select Align Pocket.<br />
4. Press the Up Arrow to advance<br />
the device tape until the next<br />
pocket center hole lines up with<br />
the alignment mark (± 3 mm).<br />
5. Press Start.<br />
The job will resume. �
Chapter 5<br />
Maintenance<br />
49 ProLINE-RoadRunner Operator’s <strong>Guide</strong> A<br />
Cleaning with Air.......... 50<br />
Cleaning with Alcohol.......... 51<br />
Running the Self-Test.......... 52
Cleaning with Air<br />
T-I Sockets<br />
50 ProLINE-RoadRunner Operator’s <strong>Guide</strong> A<br />
To prevent dust accumulation,<br />
inject compressed air into the<br />
following component areas:<br />
NOTE: Compressed air must be<br />
clean and dry. �<br />
• Tape-In Module (weekly).<br />
• Sockets (daily). Sockets<br />
should be opened and closed<br />
by hand while air is injected.<br />
Warning:<br />
Point Air Hoses Away From Body.<br />
Wear Approved Eye Protection.
1<br />
Cleaning with Alcohol<br />
51 ProLINE-RoadRunner Operator’s <strong>Guide</strong> A<br />
2<br />
To prevent dust and oil<br />
accumulations, clean the following<br />
component areas with isopropyl<br />
alcohol on a lint-free cloth.<br />
• Chassis and Covers<br />
(every 3 months).<br />
• Conveyor belt (daily). See<br />
“Device Rotation” in the<br />
Troubleshooting chapter.<br />
NOTE: Dry the conveyor belt<br />
before rotating it.<br />
These intervals are based on<br />
running 40,000 devices weekly. �
Job<br />
Advance Pocket<br />
Align Pocket 3<br />
1<br />
Running the Self-Test<br />
52 ProLINE-RoadRunner Operator’s <strong>Guide</strong> A<br />
Run the Self-test procedure<br />
approximately once a week.<br />
To run the Self-test procedure:<br />
1. Press Pause or end a job if<br />
running.<br />
2. Clear all devices from the<br />
sockets and from the conveyor<br />
belt.<br />
3. Toggle the power switch Off and<br />
then back On.<br />
The Self-test will run, checking<br />
the condition of the<br />
components.<br />
4. Check the display for system<br />
errors. �
Chapter 6<br />
Troubleshooting<br />
53 ProLINE-RoadRunner Operator’s <strong>Guide</strong> A<br />
Viewing Errors............ 54<br />
Enabling a Socket............ 56<br />
Removing Jammed Device<br />
Tape............ 57<br />
Device Rotation............ 58<br />
Technical Support............ 63
1 Inadequate Air Pressure<br />
Viewing Errors<br />
> U8 RevA ID27<br />
Devices: 800<br />
Rejected: 0<br />
Parts/Hr: 567<br />
54 ProLINE-RoadRunner Operator’s <strong>Guide</strong> A<br />
3<br />
To view and correct errors:<br />
1. Messages will appear in the keypad<br />
display.<br />
2. Check the condition—tape path,<br />
Reject Bin, etc.—indicated by<br />
the message.<br />
If you cannot correct the error<br />
condition, contact a service<br />
technician.<br />
3. Press Menu to remove the<br />
message.<br />
If there are other error<br />
messages the next one will<br />
appear.
Stop<br />
Caution<br />
Motor Controller not<br />
responding<br />
55 ProLINE-RoadRunner Operator’s <strong>Guide</strong> A<br />
Some common error messages are<br />
listed below. For more information<br />
see “Troubleshooting” in the<br />
ProLINE-RoadRunner Owner’s<br />
Manual.<br />
Lamp Color Error Message<br />
No change in Card not present<br />
lamps<br />
Yellow Reject Bin needs to be<br />
emptied<br />
Blue Cover tape broken<br />
Blue Emergency Stop is<br />
activated 1<br />
Blue Motor controller not<br />
responding<br />
1 Twist the Emergency Stop button to release<br />
it. �
2<br />
Advance Pocket<br />
Align Pocket<br />
Purge<br />
> Socket<br />
1<br />
Enabling a Socket<br />
56 ProLINE-RoadRunner Operator’s <strong>Guide</strong> A<br />
4<br />
3<br />
• Socket 1: Disabled<br />
Socket 2: Enabled<br />
Socket 3: Enabled<br />
Socket 4: Enabled<br />
If a socket repeatedly becomes<br />
disabled, RoadRunner should be<br />
serviced.<br />
To re-enable a disabled socket:<br />
1. Press Pause if a job is running.<br />
2. Select Socket from the top<br />
level menu.<br />
3. Scroll to and select the disabled<br />
socket from the Socket menu. (A<br />
dot appears.)<br />
4. Press the Up Arrow button to<br />
re-enable the socket.<br />
5. Press Menu to end the process.<br />
NOTE: To disable a probe, disable<br />
the probe’s corresponding<br />
socket. �
3<br />
3<br />
Removing Jammed Device Tape<br />
57 ProLINE-RoadRunner Operator’s <strong>Guide</strong> A<br />
5<br />
If the tape jams, an error message<br />
displays and the blue lamp<br />
illuminates. To clear the tape path:<br />
1. Press the Emergency Stop<br />
button (to continue the job later)<br />
or select Job, then End.<br />
2. Turn the power Off.<br />
3. Unroll one turn of cover tape<br />
and cut it near the Take-Up Reel.<br />
4. Cut the device tape where it<br />
exits the conveyor end.<br />
5. At the tape reel, pull the tape out<br />
backwards until the end is free<br />
from the tape path.<br />
6. Trim away any flaws before<br />
reloading. �
3<br />
3 Clean<br />
Device Rotation<br />
58 ProLINE-RoadRunner Operator’s <strong>Guide</strong> A<br />
3<br />
Dry<br />
Rotate & Repeat<br />
If devices rotate excessively on the<br />
conveyor belt:<br />
1. Press Pause. Wait for all devices<br />
to get picked from the belt.<br />
2. Press the Emergency Stop.<br />
3. Remove the Dust Cover (some<br />
models) and clean only the<br />
exposed surface of the<br />
conveyor belt with isopropyl<br />
alcohol on a cloth, then dry it.<br />
Rotate the belt by hand and<br />
repeat until entire belt is clean.<br />
4. To continue, replace the<br />
Conveyor Dust Cover, and<br />
release the Emergency Stop<br />
button. Align the tape pockets<br />
(Chapter 3), then press Start. �
A<br />
Actuator Plate, changing 28<br />
Adapter<br />
See ’Socket’ or ’Feeder Bank’<br />
Advancing tape 34<br />
Air requirement 20<br />
Align pocket 36<br />
B<br />
Belt cleaning 58<br />
Buttons, Control Panel 7<br />
C<br />
Card eject 25<br />
Check-mark button 7<br />
Index<br />
Cleaning 50, 51<br />
Communication cable 18<br />
Contact information 63<br />
Control Panel<br />
button description 7<br />
lamps<br />
Conveyor Belt, cleaning 51<br />
Cover Tape, discarding 45<br />
D<br />
<strong>Data</strong> I/O online 63<br />
Device rotation 58<br />
Device Tape<br />
advancing 34<br />
aligning 36<br />
jammed 57<br />
59 ProLINE-RoadRunner Operator’s <strong>Guide</strong> A<br />
loading 34<br />
Disable a Probe 56<br />
E<br />
Eject card 25<br />
e-mail addresses 63<br />
Emergency Stop button, see<br />
E-Stop<br />
Enable a socket 56<br />
Ending a Job 42<br />
Error Messages<br />
common 55<br />
viewing 54<br />
ESD definition 14<br />
E-Stop<br />
location 6
eleasing 48<br />
E-stop<br />
about 41<br />
Excess device movement 58<br />
F<br />
Facilities, connecting 18–21<br />
Facilities, connecting Network 38<br />
Features<br />
external 4<br />
internal 5<br />
Feeder Bank Adapter 16<br />
Front Track 33<br />
H<br />
Handhold 4<br />
Hook, mounting 16<br />
J<br />
Jammed tape 57<br />
Job<br />
ending 42<br />
pausing 41<br />
restarting 48<br />
starting 40<br />
Job card 24<br />
removing 25<br />
60 ProLINE-RoadRunner Operator’s <strong>Guide</strong> A<br />
K<br />
Keypad description 7<br />
L<br />
Lamps<br />
all blinking 22<br />
interpretation 6<br />
Language, changing 11<br />
M<br />
MCBI 10<br />
Menu<br />
button 7<br />
diagnostics 13<br />
main 8
operator 8–9<br />
supervisor 10–13<br />
symbols 10<br />
Mounting RoadRunner 16<br />
N<br />
Network card 37<br />
Networking 37<br />
P<br />
Pass Limit 9<br />
Pause a job 41<br />
PC card 24<br />
Peel Bar 33, 34<br />
PNP Head 5<br />
Power requirement 21<br />
Power switch 22<br />
Power, switching Off 46<br />
Precisor 5<br />
Precisor, changing 26<br />
Probe, disabling 56<br />
Process, RoadRunner 2<br />
R<br />
Reject Bin, emptying 44<br />
Removing Job card 25<br />
Representative search 63<br />
Restarting a job 48<br />
Resume operation 48<br />
61 ProLINE-RoadRunner Operator’s <strong>Guide</strong> A<br />
S<br />
Self-Test 52<br />
Shutting down 46<br />
Socket Adapter, changing 30<br />
Sockets<br />
cleaning 50<br />
disabled 56<br />
enabling 56<br />
Start button 40<br />
Stopping 41, 42<br />
Support information 63<br />
Symbols, warning 14<br />
T<br />
Take-up Reel 5
Take-Up Reel, emptying 45<br />
Tape jam, removing 57<br />
Tape-In Module<br />
adjustable 32<br />
adjusting 32<br />
current setting 32<br />
non-adjustable 32<br />
TaskLink 3<br />
Threading tape 34<br />
V<br />
Version number 22<br />
W<br />
Warning Symbols 14<br />
Web site 63<br />
62 ProLINE-RoadRunner Operator’s <strong>Guide</strong> A
Contact your local <strong>Data</strong> I/O representative.<br />
To find your local representative, go to<br />
http://www.dataio.com/contact/repsearch.asp<br />
Technical Support<br />
63 ProLINE-RoadRunner Operator’s <strong>Guide</strong> A<br />
Worldwide<br />
<strong>Data</strong> I/O <strong>Corporation</strong><br />
6464 185th Ave. N.E., Suite 101<br />
Redmond, WA USA 98052<br />
Telephone: 425-881-4444 USA Only: 1-800-332-8246<br />
Fax: 425-867-6972<br />
E-mail: support@dataio.com<br />
You can also find answers by visiting the Knowledge<br />
Base on our Web site at www.dataio.com, then click<br />
Support, then Knowledge Base Search.
Junk text for correct PDF<br />
www.dataio.com