Bio-Plex Pro ™ Assays - Bio-Rad
Bio-Plex Pro ™ Assays - Bio-Rad
Bio-Plex Pro ™ Assays - Bio-Rad
- TAGS
- assays
- www.bio-rad.com
Create successful ePaper yourself
Turn your PDF publications into a flip-book with our unique Google optimized e-Paper software.
NEW MAGNETIC <strong>Assays</strong>! Now includes instructions for:<br />
Transforming Growth Factor <strong>Assays</strong> (TGF-b) – TGF-b1, TGF-b2, TGF-b3<br />
Rat Cytokine <strong>Assays</strong> – Expanded and Improved<br />
Mouse Cytokine <strong>Assays</strong> – Key Th17 pathway markers<br />
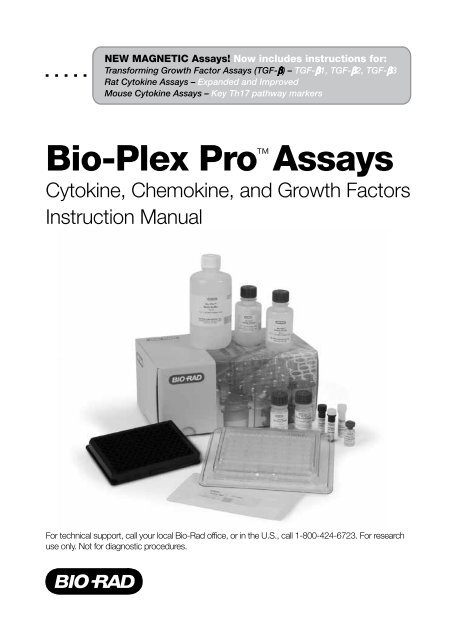
<strong>Bio</strong>-<strong>Plex</strong> <strong>Pro</strong> <strong>Assays</strong><br />
Cytokine, Chemokine, and Growth Factors<br />
Instruction Manual<br />
For technical support, call your local <strong>Bio</strong>-<strong>Rad</strong> office, or in the U.S., call 1-800-424-6723. For research<br />
use only. Not for diagnostic procedures.
Table of Contents<br />
Introduction 1<br />
Principle 2<br />
Assay Quick Guide 4<br />
Kit Contents and Storage 6<br />
Recommended Materials 8<br />
Important Considerations 9<br />
1. Prepare Instrument 10<br />
2. Prepare Wash Method 11<br />
3. Plan Plate Layout 13<br />
4. Prepare Standards 14<br />
5. Prepare Samples 18<br />
6. Prepare Coupled Beads 22<br />
7. Run Assay 24<br />
8. Read Plate 30<br />
Troubleshooting Guide 37<br />
Safety Considerations 42<br />
Legal Notices 42<br />
Plate Layout Template 37<br />
Calculation Worksheet 44<br />
Ordering Information 46
Introduction<br />
Cytokines, Chemokines, and Growth Factors<br />
These cell-signaling proteins are expressed and secreted by many cell<br />
types, including those of the immune system. Cell-signaling proteins interact<br />
with specific receptors on target cells to mediate important physiological<br />
responses such as growth, immunity, inflammation, and hematopoiesis.<br />
Dysregulation of expression is associated with pathological conditions<br />
ranging from cancer and diabetes to infection and autoimmune disease.<br />
<strong>Bio</strong>-<strong>Plex</strong> <strong>Pro</strong> cytokine, chemokine, and growth factor assays are magnetic<br />
bead-based multiplex assays designed to measure multiple members of<br />
this diverse group of proteins in a minimal volume of matrix such as serum,<br />
plasma, tissue culture supernatant, and other biological fluids.<br />
NEW! Transforming Growth Factor (TGF-b) <strong>Assays</strong><br />
The TGF-b family of proteins plays an important role in cellular functions<br />
such as proliferation, differentiation, migration, and apoptosis. There are<br />
three known isoforms of TGF-b with overlapping functions in normal<br />
physiology and in disease states such as cancer. TGF-b1 promotes TH17<br />
immune cell development and bone growth and remodeling. TGF-b2 plays<br />
a vital role in embryonic development and has been shown to suppress<br />
IL-2 dependent T-cell tumors. TGF-b3 regulates cell differentiation,<br />
adhesion, and ECM formation processes involved in embryogenesis and<br />
wound healing. <strong>Bio</strong>-<strong>Plex</strong> <strong>Pro</strong> TGF-b assays are magnetic bead–based<br />
multiplex assays designed to measure TGF-b1, TGF-b2, and TGF-b3 in<br />
human, mouse, and rat sample matrices such as serum, plasma, urine,<br />
tissue culture supernatant, and milk.<br />
Multiplexing with <strong>Bio</strong>-<strong>Plex</strong> <strong>Pro</strong> <strong>Assays</strong><br />
<strong>Bio</strong>-<strong>Plex</strong> <strong>Pro</strong> assays enable researchers to quantify multiple protein<br />
biomarkers in a single well of a 96-well plate in just 3 to 4 hr.<br />
These robust immunoassays require as little as 12.5 µl serum or plasma,<br />
or 50 µl cell culture supernatant or other biological fluid. The use of<br />
magnetic (Mag<strong>Plex</strong> ® ) beads allows researchers to automate wash steps<br />
on a <strong>Bio</strong>-<strong>Plex</strong> <strong>Pro</strong> (or similar) wash station. Magnetic separation offers<br />
greater convenience, productivity, and reproducibility compared to<br />
vacuum filtration.<br />
For more information please visit www.bio-rad.com/bio-plex<br />
1
Principle<br />
Technology<br />
The <strong>Bio</strong>-<strong>Plex</strong> ® suspension array system is built around the three core<br />
elements of xMAP technology:<br />
• Fluorescently dyed microspheres (also called beads), each with a distinct<br />
color code or spectral address to permit discrimination of individual tests<br />
within a multiplex suspension. This allows simultaneous detection of more<br />
than 100 different types of molecules in a single well of a 96-well microplate<br />
• A dedicated flow cytometer with two lasers and associated optics to<br />
measure the different molecules bound to the surface of the beads<br />
• A high-speed digital signal processor that efficiently manages the<br />
fluorescence data<br />
Assay Format<br />
<strong>Bio</strong>-<strong>Plex</strong> <strong>Pro</strong> cytokine, chemokine, and growth factor assays are<br />
essentially immunoassays formatted on magnetic beads. The assay<br />
principle is similar to that of a sandwich ELISA (Figure 1). Capture<br />
antibodies directed against the desired biomarker are covalently coupled<br />
to the beads. Coupled beads react with the sample containing the<br />
biomarker of interest. After a series of washes to remove unbound<br />
protein, a biotinylated detection antibody is added to create a sandwich<br />
complex. The final detection complex is formed with the addition of<br />
streptavidin-phycoerythrin (SA-PE) conjugate. Phycoerythrin serves as<br />
a fluorescent indicator, or reporter.<br />
2
MAGNETIC BEAD<br />
CAPTURE<br />
ANTIBODY<br />
BIOMARKER<br />
OF INTEREST<br />
Figure 1. <strong>Bio</strong>-<strong>Plex</strong> sandwich immunoassay<br />
BIOTINYLATED<br />
DETECTION<br />
ANTIBODY<br />
Data Acquisition and Analysis<br />
Data from the reactions are acquired using a <strong>Bio</strong>-<strong>Plex</strong> system or similar<br />
Luminex-based reader. When a multiplex assay suspension is drawn into<br />
the <strong>Bio</strong>-<strong>Plex</strong> 200 reader for example, a red (635 nm) laser illuminates the<br />
fluorescent dyes within each bead to provide bead classification and<br />
thus assay identification. At the same time, a green (532 nm) laser excites<br />
PE to generate a reporter signal which is detected by a photomultiplier<br />
tube (PMT). A high-speed digital processor manages data output and<br />
<strong>Bio</strong>-<strong>Plex</strong> Manager software presents data as Median Fluorescence<br />
Intensity (MFI) as well as concentration (pg/mL). The concentration of<br />
analyte bound to each bead is proportional to the median fluorescence<br />
intensity (MFI) of reporter signal.<br />
3<br />
STREPTAVIDIN<br />
PHYCOERYTHRIN<br />
FLUORESCENT<br />
REPORTER
Assay Quick Guide<br />
For experienced users, the following guide can be used to prepare and run a<br />
single 96-well assay plate. For more information on a given step, refer to the<br />
detailed instructions in the corresponding section of the manual<br />
Table 1. Assay quick guide.<br />
Refer to<br />
Section<br />
3<br />
1<br />
2<br />
1<br />
4<br />
5<br />
6<br />
Initial Preparation<br />
1. Plan the plate layout<br />
2. Start up/warm up the <strong>Bio</strong>-<strong>Plex</strong> system (up to 30 min)<br />
• Meanwhile, equilibrate assay reagents to room temperature (RT)<br />
• Begin to thaw samples<br />
3. Prime wash station or calibrate vacuum manifold<br />
4. Calibrate the system (now, or later during an incubation)<br />
5. Reconstitute a single vial of standards in 500 µl of the appropriate<br />
diluent, vortex and incubate on ice (30 min)<br />
• For serum and plasma samples, use <strong>Bio</strong>-<strong>Plex</strong> standard diluent*<br />
• For culture supernatant, use culture medium**<br />
• For lavage, sputum, or other fluid, use buffer similar to sample**<br />
6. Prepare the 8 point standard dilution series and blank.<br />
• Add 72 µl diluent to tube S1, and 150 µl diluent to<br />
tubes S2-8 and blank.<br />
• Transfer 128 µl reconstituted standard into S1<br />
• Then serially dilute 4 fold from S1 thru S8 by transferring 50 µl<br />
between tubes. Vortex between transfers<br />
7. Once thawed, prepare 1x samples<br />
• Activate TGF-b samples by adding 1 volume of 1 N HCI to<br />
5 volumes of sample (eg, 5 µl to 25 µl of sample). Vortex, incubate at<br />
RT 10 min. Neutralize by adding the same volume (5 µl)<br />
• Dilute serum, plasma and lysates in <strong>Bio</strong>-<strong>Plex</strong> sample diluent<br />
• Dilute culture supernatants in culture medium**<br />
• Dilute lavage, sputum, or other fluid in buffer similar to sample**<br />
8. Prepare 1x coupled beads in assay buffer, protect from light<br />
• From 10x stock: Add 575 µl beads to 5,175 µl buffer<br />
• From 20x stock: Add 288 µl beads to 5,472 µl buffer<br />
9. Make sure samples and standards are at RT before dispensing<br />
* Refer to section 4 for instructions on preparing an appropriate standard diluent for TGF-b<br />
assays when running serum or plasma samples.<br />
** Make sure to add protein carrier such as BSA to a final concentration of 0.5% to lavage,<br />
sputum, and serum free culture medium samples as described in section 5. Samples and<br />
standards should be reconstituted and/ or diluted in this same medium.<br />
4
Table 1. Assay quick guide, con’t.<br />
Refer to<br />
Section<br />
7<br />
8<br />
7<br />
8<br />
Running the Assay<br />
1. Prewet filter plate with 100 µl assay buffer (skip for flat bottom)<br />
2. Add 50 µl of 1x beads to the assay plate<br />
3. Wash 2 times with 100 µl wash buffer<br />
4. Add 50 µl samples, standards, blank, controls<br />
5. Cover and incubate in the dark at RT with shaking at 300 RPM<br />
• 30 min - Human Group I,II and Mouse Group I,II<br />
• 1 hour - Mouse Group III and Rat Group I<br />
• 2 hours – TGF-b<br />
With 10 min remaining, prepare 1x Detection Ab in detection antibody diluent.<br />
• From 10x stock: Add 300 µl Ab to 2,700 µl diluent<br />
• From 20x stock: Add 150 µl Ab to 2,850 µl diluent<br />
6. Wash 3 times with 100 µl wash buffer<br />
7. Add 25 µl of detection antibody<br />
8. Cover and incubate in the dark at RT with shaking at 300 RPM<br />
• 30 min - Human Group I,II; Mouse Group I,II,III; and Rat Group I<br />
• 1 hour - TGF-b<br />
Meanwhile, prepare software protocol; enter normalized standard S1 values<br />
With 10 min remaining, prepare 1x SA-PE in assay buffer, From 100x stock:<br />
Add 60 µl SA-PE to 5,940 µl assay buffer. <strong>Pro</strong>tect from light<br />
9. Wash 3 times with 100 µl wash buffer<br />
10. Add 50 µl of strepavidin-PE<br />
11. Cover and incubate in the dark at RT with shaking at 300 RPM<br />
• 10 min - Human Group I,II; Mouse Group I,II,III; and Rat Group I<br />
• 30 min - TGF-b<br />
12. Wash 3 times with 100 µl wash buffer<br />
13. Resuspend beads in 125 µl assay buffer, shake at 1100 RPM for 30 sec<br />
14. Read plate<br />
• Low PMT (Low RP1) – Human group I,II; Mouse group I,II,III and TGF-b<br />
• High PMT (High RP1) - Rat group I<br />
5
Kit Contents and Storage<br />
<strong>Bio</strong>-<strong>Plex</strong> <strong>Pro</strong> Human, Mouse, and Rat Cytokine <strong>Assays</strong><br />
Reagents Supplied<br />
Cytokine, chemokine, and growth factor assays for human, mouse, and<br />
rat species are available in a convenient kit format that includes assay,<br />
reagent, and diluent components in a single box (Table 2).<br />
Table 2. Contents of <strong>Bio</strong>-<strong>Plex</strong> <strong>Pro</strong> cytokine, chemokine and growth factor assays.<br />
Contents<br />
Universal Reagents and Diluents<br />
1 x 96 Well<br />
Format<br />
10 x 96 Well<br />
Format<br />
Standard diluent*<br />
10 ml<br />
100 ml<br />
Sample diluent*<br />
40 ml<br />
310 ml<br />
Assay buffer<br />
50 ml<br />
500 ml<br />
Wash buffer<br />
130 ml<br />
1,300 ml<br />
Detection antibody diluent<br />
5 ml<br />
50 ml<br />
Streptavidin-PE (100x)<br />
1 vial<br />
1 vial<br />
Filter plate and/or flat bottom plate (96-well) 1 plate<br />
10 plates<br />
Sealing tape<br />
1 pack of 4 5 packs of 4<br />
Instruction manual<br />
Human and Mouse Cytokine (Group I and II)<br />
1<br />
1<br />
Coupled magnetic beads (10x)<br />
600 μl<br />
3,200 μl<br />
Detection antibodies (10x)<br />
320 μl<br />
1,750 μl<br />
Standard (additional vials sold separately)<br />
1 vial<br />
10 vials<br />
Mouse Cytokine (Group III) and Rat Cytokine (Group I)<br />
Coupled magnetic beads (20x)<br />
320 μl<br />
3,200 μl<br />
Detection antibodies (20x)<br />
175 μl<br />
1,750 μl<br />
Standard (additional vials sold separately)<br />
1 vial<br />
10 vials<br />
* <strong>Bio</strong>-<strong>Plex</strong> <strong>Pro</strong> high dilution reagent kit contains 70 ml serum-based diluent in lieu of standard<br />
diluent and sample diluent.<br />
Storage and Stability<br />
Kit contents should be stored at 4°C and never frozen. Coupled magnetic<br />
beads and streptavidin-PE should be stored in the dark. All components<br />
are guaranteed for a minimum of 6 months from the date of purchase<br />
when stored as specified.<br />
6
<strong>Bio</strong>-<strong>Plex</strong> <strong>Pro</strong> TGF-b <strong>Assays</strong><br />
Reagents Supplied<br />
TGF-b1, TGF-b2, and TGF-b3 assays are available in a convenient kit format<br />
that includes assay, reagent, and diluent components in a single box (Table 3).<br />
Table 3. Contents of <strong>Bio</strong>-<strong>Plex</strong> <strong>Pro</strong> TGF-b assays.<br />
Contents<br />
Universal Reagents and Diluents<br />
Standard diluent<br />
Sample diluent<br />
Assay buffer<br />
Wash buffer<br />
Detection antibody diluent<br />
Streptavidin-PE (100x)<br />
Filter plate and/or flat bottom plate (96-well)<br />
Sealing tape<br />
Instruction manual<br />
TGF-b1, TGF-b2, and TGF-b3<br />
Coupled magnetic beads (20x)<br />
Detection antibodies (20x)<br />
Standard (additional vials sold separately)<br />
Reagents Required but Not Supplied<br />
TGF-b is secreted as part of a complex that causes it to be inactive.<br />
It is necessary to expose samples to acidic conditions in order to activate<br />
TGF-b. The following reagents are required:<br />
• 1 N Hydrochloric acid: To make 100 ml of 1 N HCl, add 8.33 ml of<br />
12 N HCl slowly to 91.67 ml of deionized water, and mix well.<br />
• 1.2 N Sodium hydroxide/0.5 M HEPES: To make 100 ml of 1.2<br />
NaOH/0.5 M HEPES, add 12 ml of 10 N NaOH to 75 ml<br />
of deionized water, and mix well. Add 11.9 g of HEPES (free acid,<br />
MW 238.3), mix well, and bring the final volume to 100 ml with<br />
deionized water.<br />
7<br />
1 x 96 Well<br />
Format<br />
10 ml<br />
40 ml<br />
50 ml<br />
130 ml<br />
5 ml<br />
1 vial<br />
1 plate<br />
1 pack of 4<br />
1<br />
320 μl<br />
175 μl<br />
1 vial
Table 4. Recommended materials.<br />
Item<br />
<strong>Bio</strong>-<strong>Plex</strong> ® 200 system with HTF or Luminex system<br />
<strong>Bio</strong>-<strong>Plex</strong> validation kit<br />
Note: The validation kit should be run monthly to ensure<br />
performance of fluidics and optics systems<br />
<strong>Bio</strong>-<strong>Plex</strong> calibration kit<br />
Note: The calibration kit should be run either daily or<br />
whenever the instrument is to be used to standardize<br />
fluorescence signal<br />
<strong>Bio</strong>-<strong>Plex</strong> <strong>Pro</strong> wash station<br />
For use with magnetic bead–based assays only<br />
<strong>Bio</strong>-<strong>Plex</strong> <strong>Pro</strong> II wash station<br />
For use with both polystyrene (non-magnetic) and magnetic<br />
bead–based assays<br />
<strong>Bio</strong>-<strong>Plex</strong> <strong>Pro</strong> flat bottom plates (40, 96-well plates)<br />
For magnetic separation on the <strong>Bio</strong>-<strong>Plex</strong> <strong>Pro</strong> wash station<br />
Microtiter plate shaker<br />
IKA MTS 2/4 shaker for 2 or 4 microplates<br />
or<br />
Barnstead/Lab-Line Model 4625 plate<br />
shaker (or equivalent capable of 300–1,100 rpm)<br />
<strong>Bio</strong>-<strong>Rad</strong> Aurum vacuum manifold<br />
For vacuum filtration<br />
BR-2000 vortexer<br />
Reagent reservoirs, 25 ml<br />
For capture beads and detection antibodies<br />
Reagent reservoir, 50 ml (for reagents and buffers)<br />
Pall Life Science Acrodisc: 25 mm PF syringe filter<br />
(0.8/0.2 µm Supor membrane)<br />
8<br />
Ordering Information<br />
<strong>Bio</strong>-<strong>Rad</strong> catalog #171-000205<br />
<strong>Bio</strong>-<strong>Rad</strong> catalog #171-203001<br />
<strong>Bio</strong>-<strong>Rad</strong> catalog #171-203060<br />
<strong>Bio</strong>-<strong>Rad</strong> catalog #300-34376<br />
<strong>Bio</strong>-<strong>Rad</strong> catalog #300-34377<br />
<strong>Bio</strong>-<strong>Rad</strong> catalog #171-025001<br />
IKA catalog #320-8000<br />
VWR catalog #57019-600<br />
<strong>Bio</strong>-<strong>Rad</strong> catalog #732-6470<br />
<strong>Bio</strong>-<strong>Rad</strong> catalog #166-0610<br />
VistaLab catalog #3054-1002<br />
or<br />
VistaLab catalog #3054-1004<br />
VistaLab catalog #3054-1006<br />
Pall Life Sciences<br />
catalog #4187<br />
Other: 15 ml polypropylene tubes for reagent dilutions. Calibrated pipets (multichannel pipets<br />
are optimal for this application) and pipet tips, sterile distilled water, aluminum foil, absorbent<br />
paper towels, 1.5 or 2 ml microcentrifuge tubes, and standard flat bottom microplate (for<br />
calibrating vacuum manifold).
lmportant Considerations<br />
Instruments and Software<br />
The cytokine and TGF-b assays described in this manual are compatible<br />
with all currently available Luminex-based systems. <strong>Assays</strong> can be read<br />
and analyzed with either <strong>Bio</strong>-<strong>Plex</strong> Manager software or Luminex xPonent<br />
software (Section 8).<br />
Preset Panels<br />
DO NOT use preset panels found in <strong>Bio</strong>-<strong>Plex</strong> Manager software version<br />
5.0 or earlier as they do not contain the correct bead map, bead regions,<br />
bead events, and DD gates for <strong>Bio</strong>-<strong>Plex</strong> <strong>Pro</strong> cytokine assays. Instead,<br />
manually enter this information, or use the pre-set panels found in<br />
<strong>Bio</strong>-<strong>Plex</strong> Manager 6.0 software.<br />
Incubation Times<br />
Please pay close attention to assay incubation times and <strong>Bio</strong>-<strong>Plex</strong> reader<br />
PMT (RP1) settings, as these have been optimized specifically for each<br />
panel. For more information, refer to the Assay Quick Guide, as well as<br />
sections 4 and 7 of this manual.<br />
Bead Regions and Multiplexing Compatibility<br />
The bead regions for cytokine and TGF-b analytes are listed in the Read<br />
Plate section (page 30). The maximum number of cytokine analytes that<br />
may be mixed across panels or groups is limited by the 10x or 20x stock<br />
concentrations of detection antibodies.<br />
9
1. Prepare Instrument<br />
Start up and calibrate the <strong>Bio</strong>-<strong>Plex</strong> ® system with <strong>Bio</strong>-<strong>Plex</strong> Manager <br />
software prior to setting up the assay. The calibration kit should be run<br />
daily or before each use of the instrument to standardize the fluorescent<br />
signal. For instructions on using other xMAP system software packages,<br />
contact <strong>Bio</strong>-<strong>Rad</strong> Technical Support or your regional <strong>Bio</strong>-<strong>Rad</strong> field<br />
applications specialist.<br />
The validation kit should be run monthly to ensure performance of fluidics<br />
and optics systems. Refer to either the software manual or online Help for<br />
directions on how to conduct validation.<br />
Start Up System<br />
1. Empty the waste bottle and fill the sheath fluid bottle before starting<br />
if high throughput fluidics (HTF) are not present. This will prevent<br />
fluidic system backup and potential data loss.<br />
2. Turn on the reader, XY platform, and HTF (if included). Allow the<br />
system to warm up for 30 min (if not already done).<br />
3. Select Start up and follow the instructions. If the system is idle<br />
for 4 hr without acquiring data, the lasers will automatically turn off.<br />
To reset the 4-hr countdown, select Warm up and wait for the<br />
lasers/ optics to reach operational temperature.<br />
Calibrate System<br />
1. Select Calibrate and confirm that the default values for CAL1<br />
and CAL2 are the same as the values printed on the bottle of<br />
<strong>Bio</strong>- <strong>Plex</strong> calibration beads. Use the <strong>Bio</strong>-<strong>Plex</strong> system low RP1<br />
target value.<br />
2. Select OK and follow the software prompts for step-by-step<br />
instructions for CAL1 and CAL2 calibration.<br />
10
2. Prepare Wash Method<br />
There are two ways to perform the wash steps in the assay procedure:<br />
vacuum filtration and magnetic separation.<br />
• When using 96-well filter plates, beads are washed via vacuum<br />
filtration using a manual vacuum manifold or the vacuum setting of<br />
the <strong>Bio</strong>-<strong>Plex</strong> <strong>Pro</strong> II wash station<br />
• When using 96-well <strong>Bio</strong>-<strong>Plex</strong> <strong>Pro</strong> flat-bottom plates, beads are<br />
washed via magnetic separation using the magnetic setting of the<br />
<strong>Bio</strong>-<strong>Plex</strong> <strong>Pro</strong> or <strong>Pro</strong> II wash station. Instructions are therefore provided<br />
for each of these wash methods<br />
Vacuum Filtration Using a Vacuum Manifold<br />
The vacuum apparatus must be calibrated prior to starting the assay.<br />
For more detailed instructions, refer to the <strong>Bio</strong>-<strong>Plex</strong> suspension array<br />
system hardware instruction manual (bulletin 10005042).<br />
1. Calibrate the vacuum manifold as follows:<br />
a. Place a standard flat-bottom microplate (not a filter plate) on the<br />
vacuum manifold.<br />
b. Turn on the vacuum source to maximum level and press down<br />
on the corners of the plate until a vacuum is established.<br />
c. Adjust the vacuum pressure using the control valves on the unit.<br />
The pressure should be set to –1 to –3 Hg.<br />
d. Once the vacuum pressure is set correctly, remove the<br />
flat-bottom plate.<br />
e. Check the vacuum periodically as house vacuum systems can<br />
fluctuate. As a general guideline, 100 µl liquid should take<br />
approximately 3–4 sec to completely clear the well.<br />
11
Vacuum Filtration Using the <strong>Bio</strong>-<strong>Plex</strong> <strong>Pro</strong> II Wash Station<br />
The <strong>Bio</strong>-<strong>Plex</strong> <strong>Pro</strong> II wash station does not require calibration, but it should<br />
be primed before use. For more detailed instructions on the wash station<br />
procedures and preloaded programs, refer to the <strong>Bio</strong>-<strong>Plex</strong> <strong>Pro</strong> II wash<br />
station quick guide (bulletin 5826).<br />
1. Install the vacuum filtration plate carrier on the <strong>Bio</strong>-<strong>Plex</strong> <strong>Pro</strong> II wash station.<br />
2. Use the Prime procedure on Channel 1 to prime the wash station.<br />
3. Place the 96-well filter plate on the vacuum filtration plate carrier.<br />
4. Use the VAC X2 preloaded program if the assay instructions indicate<br />
washing the wells twice. Use the VAC X3 preloaded program if the<br />
assay instructions indicate washing the wells three times. Repeat this<br />
step as specified in the assay instructions.<br />
5. For optimal wash station maintenance, use the Rinse Day procedure<br />
using Channel 2 after every assay wash step and the Rinse Night<br />
procedure once the assay is completed.<br />
6. Transport the filter plate on the plate holder provided.<br />
Magnetic Separation Using the <strong>Bio</strong>-<strong>Plex</strong> <strong>Pro</strong> or<br />
<strong>Bio</strong>-<strong>Plex</strong> <strong>Pro</strong> II Wash Station<br />
This wash station does not require calibration, but it should be primed. For<br />
more detailed instructions on the wash station procedures and preloaded<br />
programs, refer to the <strong>Bio</strong>-<strong>Plex</strong> <strong>Pro</strong> and <strong>Pro</strong> II wash station quick guide.<br />
1. Install the magnetic washing plate carrier on the <strong>Bio</strong>-<strong>Plex</strong> <strong>Pro</strong><br />
or <strong>Bio</strong>-<strong>Plex</strong> <strong>Pro</strong> II wash station.<br />
2. Use the Prime procedure to prime the wash station.<br />
3. Place the 96-well flat-bottom plate on the magnetic plate carrier.<br />
4. Use the MAG X2 preloaded program if the assay instructions indicate<br />
washing the wells twice. Use the MAG X3 preloaded program if the<br />
assay instructions indicate washing the wells three times. Repeat this<br />
step as specified in the assay instructions.<br />
5. For optimal wash station maintenance, use the Rinse Day procedure<br />
using Channel 2 after every assay wash step and the Rinse Night<br />
procedure once the assay is completed.<br />
6. Transport the plate to the plate holder provided.<br />
12
3. Plan Plate Layout<br />
Prior to running the assay, create the plate layout and determine the number<br />
of wells in the experiment. Use the worksheet on pages 44 and 45 to<br />
calculate the required volume of beads, detection, and streptavidin-PE.<br />
A suggested layout is shown in Figure 3. Note that all conditions are run<br />
in duplicate.<br />
1. Assign standards to columns 1 and 2, with the highest<br />
concentration in row A and the lowest concentration in row H.<br />
2. Assign the blank to wells A3 and A4. The blank should consist of your<br />
chosen standard diluent and be processed in the same manner as<br />
sample and standard wells. Instructions for selecting the appropriate<br />
standard diluent are included in the Prepare Standards section on page 14.<br />
<strong>Bio</strong>-<strong>Plex</strong> Manager software will automatically subtract the assay<br />
blank (B) FI value from the standard and sample FI values. This may<br />
result in a negative FI value if the blank’s FI value is greater than either<br />
the standard or sample value. If this is undesirable, then assign the<br />
wells as a sample (S) control (C), in the protocol or results file.<br />
3. Controls (if available) may be assigned to additional wells as shown<br />
below in colum 3 and 4.<br />
4. The remainder of the plate is available for samples.<br />
Figure 3. Sample plate layout Legend<br />
13<br />
S Standards<br />
B Blank<br />
X Samples<br />
C Controls
4. Prepare Standards<br />
Please read the following information prior to preparing the assay standards.<br />
General Instructions<br />
• The peel-off label provided with the standards lists the concentration<br />
of the most concentrated dilution point, S1. Enter this information into<br />
<strong>Bio</strong>-<strong>Plex</strong> Manager software as instructed in Section 8.<br />
• It is essential to reconstitute and dilute standards exactly as described<br />
in this section. Incorrect preparation may lead to low signal, high<br />
background, or inconsistent measurements from plate to plate<br />
• For users who wish to mix assays from different panels, such as<br />
group I cytokines with group II cytokines, guidance is provided here for<br />
mixing 2 different lyophilized standards. Bead regions were chosen to<br />
avoid overlap whenever possible. However, performance of multiplexes<br />
containing assays from different groups have not been extensively<br />
validated. Therefore, it is recommended to the user to confirm that the<br />
assay performance is still fit for purpose.<br />
Selecting the Appropriate Diluent for Standards<br />
Serum and Plasma Samples<br />
For human, mouse, and rat cytokine assays, reconstitute and dilute<br />
standards in <strong>Bio</strong>-<strong>Plex</strong> ® standard diluent. This is a serum-based matrix<br />
that mimics the matrix in 1:4 diluted samples. For TGF-b assays,<br />
mix 1 volume of <strong>Bio</strong>-<strong>Plex</strong> standard diluent with 3 volumes of <strong>Bio</strong>-<strong>Plex</strong><br />
sample diluent (each supplied in the kit). The resulting solution is used<br />
for reconstitution and subsequent dilution of standards. This results in a<br />
serum-matrix based diluent that mimics the matrix in 1:16 diluted serum<br />
and plasma samples.<br />
Cell Culture Supernatant and Other <strong>Bio</strong>logical Fluids<br />
Reconstitute and dilute the standards with the appropriate culture<br />
medium. For samples in serum-free media, lavage, sputum, and other<br />
biological fluids, use a diluent that most closely matches the sample<br />
matrix. Add carrier protein such as bovine serum albumin (BSA) at a final<br />
concentration of at least 0.5%.<br />
14
Eight-Point Standard Curve and PMT (RP1) Setting<br />
The <strong>Bio</strong>-<strong>Plex</strong> 200 and 3D systems have high and low PMT (photomultiplier<br />
tube) setting options and the MAGPIX system has one setting that is<br />
equivalent to the low PMT setting. <strong>Bio</strong>-<strong>Plex</strong> <strong>Pro</strong> cytokine assays have been<br />
validated on both PMT settings. However, one setting may be favored for<br />
the <strong>Bio</strong>-<strong>Plex</strong> 200 system when optimal sensitivity is desired:<br />
Table 5. Settings for optimal sensitivity on the <strong>Bio</strong>-<strong>Plex</strong> 200 system.<br />
Assay<br />
<strong>Bio</strong>-<strong>Plex</strong> <strong>Pro</strong> human cytokine (group I and II)<br />
<strong>Bio</strong>-<strong>Plex</strong> <strong>Pro</strong> mouse cytokine (group I, II, III)<br />
<strong>Bio</strong>-<strong>Plex</strong> <strong>Pro</strong> rat cytokine (group I)<br />
<strong>Bio</strong>-<strong>Plex</strong> <strong>Pro</strong> TGF-b<br />
Reconstitute Lyophilized Standard<br />
This procedure prepares enough standard to run each dilution in duplicate.<br />
1. Gently tap the vial containing the lyophilized standard on a solid<br />
surface to ensure the pellet is at the bottom of the vial.<br />
2. When using a single standard, reconstitute with 500 µl of the<br />
appropriate standard diluent. When mixing two different standards<br />
together, reconstitute each vial with 250 µl of the appropriate<br />
standard diluent. Do not use assay buffer to reconstitute the<br />
standards.<br />
3. Gently vortex the reconstituted standard for 1–3 sec, then incubate on<br />
ice for 30 min. Be consistent with this incubation time to ensure<br />
optimal assay performance and reproducibility.<br />
4. During the incubation period, prepare the samples as instructed in the<br />
Prepare Samples section.<br />
15<br />
Low PMT<br />
(RP1)<br />
•<br />
•<br />
•<br />
High PMT<br />
(RP1)<br />
•
Prepare Dilution Series<br />
The following procedure produces an eight-point standard curve with a<br />
fourfold dilution between each point. Pipet carefully using calibrated pipets<br />
and use new pipet tips for every volume transfer.<br />
1. Label nine 1.5 ml polypropylene tubes S1 through S8 and Blank.<br />
2. Add the specified volume of standard diluent to each tube<br />
(Figures 4 and 5).<br />
3. Vortex reconstituted standards gently for 1–3 sec before removing<br />
any volume. When using a single standard, add 128 µl of the<br />
reconstituted standard to the S1 tube containing 72 µl of the<br />
chosen standard diluent. When mixing two different standards<br />
together, add 64 µl of each standard (128 µl total) to the S1 tube<br />
containing 72 µl of standard diluent, as shown in Figure 4.<br />
Vortex for 1–3 sec.<br />
4. Use a new pipet tip to transfer 50 µl from the S1 tube to the<br />
S2 tube. Vortex for 1–3 sec.<br />
5. Continue with 1:4 serial dilutions as shown in Figure 4 when using<br />
a single standard or as in Figure 5 when mixing two different<br />
standards together.<br />
6. Use reconstituted and diluted standards immediately. Do not freeze<br />
for future use.<br />
Figure 4. Preparing a fourfold dilution series with a single reconstituted standard.<br />
One<br />
Reconstituted<br />
Standard<br />
128 50 50 50 50 50 50 50 Transfer Volume (µl)<br />
72 150 150 150 150 150 150 150 150<br />
S1 S2 S3 S4 S5 S6 S7 S8 Blank<br />
16<br />
Diluent (µl)
Fig. 5. Preparing a fourfold dilution series when mixing two different standards.<br />
64 64 50 50 50 50 50 50 50 Transfer Volume (µl)<br />
Two<br />
Reconstituted<br />
Standards<br />
72 150 150 150 150 150 150 150 150<br />
S1 S2 S3 S4 S5 S6 S7 S8 Blank<br />
17<br />
Diluent (µl)
5. Prepare Samples<br />
General guidelines for preparing serum, plasma, tissue culture supernatant,<br />
and other biological fluids are provided here. For more information, consult<br />
publications listed in <strong>Bio</strong>-<strong>Rad</strong> bulletin 5297, available for download at www.<br />
bio-rad.com, or contact <strong>Bio</strong>-<strong>Rad</strong> Technical Support. Do not freeze diluted<br />
samples; prepare dilutions just prior to the start of the assay.<br />
Table 6. Summary of recommended sample dilutions.<br />
Assay<br />
Human, mouse,<br />
and rat cytokines<br />
Human<br />
ICAM-1/VCAM-1<br />
Mouse ICAM-1*<br />
TGF-b**<br />
Serum and Plasma Culture Sup and<br />
Other Fuids<br />
Dilution Diluent Dilution Diluent<br />
1:4<br />
1:100<br />
1:200<br />
1:16<br />
<strong>Bio</strong>-<strong>Plex</strong> ®<br />
sample<br />
diluent<br />
<strong>Bio</strong>-<strong>Plex</strong><br />
sample,<br />
standard<br />
diluent***<br />
<strong>Bio</strong>-<strong>Plex</strong><br />
serumbased<br />
diluent***<br />
<strong>Bio</strong>-<strong>Plex</strong><br />
sample<br />
diluent<br />
User<br />
optimized<br />
(Neat – 1:10)<br />
User<br />
optimized<br />
User<br />
optimized<br />
User<br />
optimized<br />
Cell<br />
culture<br />
medium<br />
or buffer<br />
similar to<br />
sample<br />
* Coming soon.<br />
** TGF-b samples are first activated as described below.<br />
*** Requires a two-step dilution scheme as described on page 20.<br />
Cell and Tissue<br />
Lysates<br />
Dilution Diluent<br />
User<br />
optimized<br />
(1:2 of<br />
lysates at<br />
200–900<br />
ug/ml<br />
protein)<br />
<strong>Bio</strong>-<strong>Plex</strong> ®<br />
sample<br />
diluent<br />
<strong>Bio</strong>-<strong>Plex</strong> <strong>Pro</strong> Human, Mouse, and Rat Cytokine <strong>Assays</strong><br />
and TGF-b <strong>Assays</strong><br />
Sample Preparation<br />
Further instructions for treating and diluting TGF-b assay samples are<br />
provided on page 21.<br />
Serum and Plasma<br />
EDTA or citrate is preferred as an anticoagulant. Heparin-treated plasma,<br />
while compatible with <strong>Bio</strong>-<strong>Plex</strong> <strong>Pro</strong> assays, may absorb certain soluble<br />
proteins of interest. Avoid using hemolyzed samples as this may lead to<br />
false positive results.<br />
18
1. Draw whole blood into collection tubes containing anticoagulant.<br />
Invert tubes several times to mix.<br />
2. For Serum, allow blood to clot at room temperature for 30 to 45 min.<br />
For plasma, proceed directly to the centrifugation steps.<br />
3. Perform centrifugation at 1,000 x g for 15 min at 4°C and transfer the<br />
serum or plasma to a clean polypropylene tube.<br />
4. To completely remove platelets and precipitates, centrifuge again at<br />
10,000 x g for 10 min at 4°C.<br />
5. Assay samples immediately or aliquot into single-use tubes and store<br />
at –70°C. Avoid repeated freeze/thaw cycles.<br />
Tissue Culture Supernatant<br />
1. Collect supernatants and perform centrifugation at 1,000 x g for<br />
15 min at 4°C. For cell lines cultured in serum-free culture media,<br />
collect samples and add a carrier protein (such as BSA) at a final<br />
concentration of at least 0.5% to stabilize protein analytes and to<br />
prevent adsorption to labware.<br />
2. Transfer to a clean polypropylene tube. If cellular debris or precipitates<br />
are present, centrifuge again at 10,000 x g for 10 min at 4°C.<br />
3. Assay immediately or store samples in single-use aliquots at –70°C.<br />
Avoid repeated freeze/thaw cycles.<br />
Lavage, Sputum, and Other <strong>Bio</strong>logical Fluid Samples<br />
Keep all samples on ice until ready for use.<br />
1. Reconstitute and dilute the standard in a buffer that is as similar to the<br />
sample as possible.<br />
2. Add carrier protein (such as BSA) at a concentration of at least 0.5%<br />
to the standard diluent. Centrifugation may be required, depending<br />
on the sample.<br />
Lysates<br />
The <strong>Bio</strong>-<strong>Plex</strong> cell lysis kit is required for lysate preparation (available<br />
separately, catalog #171-304011 and #171-304012). Refer to bulletin 5297<br />
for a list of published articles on cytokine analysis in tissue samples.<br />
19
1. Prepare the cell or tissue lysates according to the instructions<br />
provided with the <strong>Bio</strong>-<strong>Plex</strong> cell lysis kit.<br />
2. Determine the protein concentration. The protein concentration<br />
should be 200–900 μg/ml. It may be necessary to test-lyse your<br />
samples with different volumes of lysing solution to obtain the<br />
specified protein concentration range.<br />
3. Add an equal volume of <strong>Bio</strong>-<strong>Plex</strong> sample diluent to the lysate.<br />
4. If the lysate is not tested immediately, store at –20°C. Lysates are<br />
stable for up to five freeze/thaw cycles.<br />
<strong>Bio</strong>-<strong>Plex</strong> <strong>Pro</strong> Human, Mouse, and Rat Cytokine <strong>Assays</strong> Only<br />
Sample Dilution<br />
1. For serum and plasma samples, dilute 1:4 by adding 1 volume of<br />
sample to 3 volumes of sample diluent (for example, 50 µL sample +<br />
150 µL sample diluent).<br />
2. For cell culture supernatants and other biological fluids, we<br />
recommend testing undiluted samples first. If levels are anticipated<br />
to be high, samples can be further diluted in culture medium.<br />
Rarely would samples need to be diluted greater than 1:10.<br />
3. Keep samples on ice until ready for use.<br />
NOTE: Physiological levels of ICAM-1 and VCAM-1 are typically found<br />
at much higher concentrations; therefore, higher sample dilutions are<br />
required to achieve measurable concentrations within the standard curve.<br />
For human ICAM-1 and VCAM-1 assays, dilute serum or plasma 1:100.<br />
For example:<br />
• First dilution (1:4)—10 µL sample + 30 µL sample diluent<br />
• Second dilution (1:25)—5 µL from the first dilution + 120 µL<br />
standard diluent<br />
For the mouse ICAM-1 assay, dilute serum or plasma 1:200 in<br />
<strong>Bio</strong>- <strong>Plex</strong> serum based diluent<br />
For example:<br />
• First dilution (1:10)—10 µL sample + 90 µL diluent<br />
• Second dilution (1:20)—10 µL from the first dilution + 190 µL diluent<br />
20
<strong>Bio</strong>-<strong>Plex</strong> <strong>Pro</strong> TGF-b <strong>Assays</strong><br />
Sample Treatment and Dilution<br />
First, prepare samples as described beginning on page 18. To measure<br />
immuno-reactive TGF-b, it is necessary to treat all sample types with the<br />
following activation procedure. Samples should be assayed immediately<br />
after the neutralization step. Do not activate the TGF-b standards.<br />
Serum and Plasma<br />
1. To activate the sample, add 1 volume of acid (1 N HCl) to 5 volumes<br />
of sample. For example, add 5 μl acid to 25 μl of sample. Mix<br />
thoroughly and incubate for 10 min at room temperature.<br />
2. To neutralize the sample, add a volume of base (1.2 N NaOH/0.5 M<br />
HEPES) equal to the volume of 1 N HCl used. In this example, add<br />
5 μl base and Mix thoroughly. Treated sample volume is now 35 μl.<br />
3. The recommended dilution is 1:16 of the starting (untreated) sample<br />
volume. In this example, starting sample volume was 25 μl and a 1:16<br />
dilution gives 400 μl. To reach a final volume of 400 µl, add 365 μl<br />
<strong>Bio</strong>-<strong>Plex</strong> sample diluent to 35 μl treated sample.<br />
NOTE: To achieve neutral pH of a sample (pH 7.2 to 7.6), the actual volume<br />
of base required may vary depending on initial sample pH and the buffering<br />
capacity of the sample. Verify pH using pH paper before running the assay.<br />
Tissue Culture Supernatant and Other <strong>Bio</strong>logical Fluids<br />
Samples may be run “neat” after activation/neutralization or be diluted as<br />
required. The appropriate dilution factor should be optimized by the user.<br />
Ensure a final sample volume after treatment and dilution of at least 125 µl<br />
to allow for duplicate wells on the assay plate.<br />
1. For example, if a 1:4 dilution is desired, activate the sample by<br />
adding 10 µl acid to 50 µl sample. Mix thoroughly and incubate for<br />
10 min at room temperature.<br />
2. To neutralize sample, add 10 µl base. Mix thoroughly.<br />
3. Dilute to 1:4 final in the same diluent used to prepare the standards.<br />
For example, add 130 µl diluent to reach a final volume of 200 µl.<br />
NOTE: Serum-containing culture medium may contain high<br />
concentrations of TGF-b. A preliminary measurement of medium alone is<br />
recommended to determine baseline levels.<br />
21
6. Prepare Coupled Beads<br />
One tube of coupled beads is included with each kit. Instructions are<br />
provided for diluting the coupled beads to a 1x concentration.<br />
NOTE: When using 10-pack reagents, ensure that only the required<br />
volumes of coupled beads, detection antibodies, streptavidin-PE,<br />
and buffers have been removed from the tubes or bottles.<br />
For example, transfer a one-time volume of assay buffer, sufficient<br />
to perform all steps of the assay procedure (that is, prewetting the<br />
filter plate, diluting coupled beads, diluting streptavidin-PE, and<br />
resuspending the beads) into a 50 ml reservoir.<br />
1. Use the Calculation Worksheet on page 44 to calculate the volume<br />
of coupled beads and assay buffer needed.<br />
2. Add the required volume of assay buffer to a 15 ml<br />
polypropylene tube.<br />
3. Vortex the coupled beads at mid speed for 30 sec. Carefully open<br />
the cap and pipet any liquid trapped in the cap back into the tube.<br />
This is important to ensure maximum bead recovery. Do not<br />
centrifuge the vial; doing so will cause the beads to pellet.<br />
4. Pipet the required volume of stock coupled beads into the 15 ml<br />
tube containing assay buffer to dilute the coupled beads to a 1x<br />
concentration. Each well requires either 5 µl coupled beads (10x)<br />
or 2.5 µl coupled beads (20x) adjusted to a final volume of 50 µl<br />
using assay buffer.<br />
Refer to the example bead calculations in Tables 7–10, which include a<br />
20% excess to compensate for transfer loss.<br />
22
Tables 7–10 summarize the volumes required to prepare 1x beads from<br />
a single 10x or 20x stock. Also shown are volumes for preparing 1x beads<br />
when mixing two 10x or two 20x stocks. For instructions on preparing<br />
1x beads from two stocks at different concentrations (for example when<br />
mixing human diabetes (20x) with human group I assays (10x), refer to the<br />
<strong>Bio</strong>-<strong>Plex</strong> <strong>Pro</strong> diabetes instruction manual.<br />
Preparing 1x coupled beads from 10x stock<br />
Table 7. Premixed panel or one singleplex assay.<br />
# of Wells<br />
96<br />
48<br />
10x Beads<br />
(µl)<br />
575<br />
288<br />
Table 8. Mixing singleplex assays.<br />
# of Wells<br />
96<br />
48<br />
Preparing 1x coupled beads from 20x stock<br />
Table 9. Premixed panel or one singleplex assay.<br />
# of Wells<br />
96<br />
48<br />
10x Beads (µl),<br />
Singleplex #1<br />
575<br />
288<br />
20x Beads<br />
(µl)<br />
288<br />
144<br />
Table 10. Mixing singleplex assays.<br />
# of Wells<br />
96<br />
48<br />
20x Beads (µl),<br />
Singleplex #1<br />
288<br />
144<br />
Assay Buffer<br />
(µl)<br />
5,175<br />
2,587<br />
10x Beads (µl),<br />
Singleplex #2<br />
575<br />
288<br />
Assay Buffer<br />
(µl)<br />
5,472<br />
2,736<br />
20x Beads (µl),<br />
Singleplex #2<br />
288<br />
144<br />
5. <strong>Pro</strong>tect the beads from light with aluminum foil. Equilibrate at room<br />
temperature for 20 min prior to use.<br />
23<br />
Total<br />
Volume<br />
(µl)<br />
5,750<br />
2,875<br />
Assay Buffer<br />
(µl)<br />
4,600<br />
2,300<br />
Total<br />
Volume<br />
(µl)<br />
5,760<br />
2,880<br />
Assay Buffer<br />
(µl)<br />
5,184<br />
2,592<br />
Total Volume<br />
(µl)<br />
5,750<br />
2,876<br />
Total<br />
Volume<br />
(µl)<br />
5,760<br />
2,880
7. Run Assay<br />
The following instructions apply to premixed multiplex, singleplex, x-<strong>Plex</strong> ,<br />
or Express assay formats.<br />
Bring all buffers, diluted standards, diluted coupled beads, and samples<br />
to room temperature prior to use. To ensure optimal performance, pipet<br />
carefully (avoiding bubbles) with a calibrated pipet, and use new pipet tips.<br />
Assay Key — The terms in Table 11 are repeated throughout the assay<br />
procedure. Refer to the detailed instructions when wash and incubate on<br />
shaker are required.<br />
Table 11. Detailed wash and incubation instructions.<br />
Wash<br />
Vacuum Manifold<br />
Place the filter assay plate on a calibrated vacuum apparatus and remove the buffer by<br />
vacuum filtration. Add 100 μl wash buffer to each well and remove the liquid as before.<br />
Repeat as specified. Thoroughly blot the bottom of the filter plate with a clean paper towel<br />
between each vacuum step to prevent cross contamination and plate leakage. Place the<br />
assay plate on the plastic plate holder.<br />
TIP: Ensure that all wells are exposed to the vacuum. As a general guideline, 100 μl should<br />
take approximately 3–4 seconds to completely clear the well.<br />
<strong>Bio</strong>-<strong>Plex</strong> <strong>Pro</strong> or <strong>Pro</strong> II Wash Station<br />
Add 100 μl wash buffer to each well. For preloaded magnetic programs with the <strong>Bio</strong>-<strong>Plex</strong><br />
<strong>Pro</strong> flat bottom plates, use MAG X2 for two cycles of initial bead wash and MAG X3 for three<br />
cycles of washing following three incubation steps.<br />
For <strong>Bio</strong> <strong>Plex</strong> <strong>Pro</strong> II Wash Station only<br />
For preloaded vacuum programs using filter plates, use VAC X2 for two cycles of initial bead<br />
wash and VAC X3 for three cycles of wash following three incubation steps.<br />
Always rinse the instrument after use. Prime the instrument without liquid to empty all liquid<br />
from the system before removing the manifold.<br />
Incubate on Shaker<br />
Gently cover the plate with a new sheet of sealing tape. To prevent cross-well contamination<br />
or leaking from the bottom of filterplates, do not press down on the tape. Place the filter plate<br />
on a microplate shaker and cover with aluminum foil to prevent photobleaching. Shake at<br />
room temperature at 1,100 rpm for 30 sec, and then at 300 rpm for the specified incubation<br />
time. Slowly ramp up the shaker to the maximum speed to avoid splashing of samples.<br />
24
Add Coupled Beads, Standards, and Samples<br />
1. Cover unused wells with sealing tape.<br />
2. Prewet the filter plate. Go to step 3 if using a flat-bottom plate.<br />
a) Vacuum manifold<br />
Prewet the wells of a 96-well filter plate using 100 µl assay<br />
buffer and remove the liquid by vacuum filtration. Dry the bottom<br />
of the filter plate thoroughly by blotting on a clean paper towel.<br />
b) Vacuum with <strong>Bio</strong>-<strong>Plex</strong> <strong>Pro</strong> II wash station<br />
Prewet the wells of a 96-well filter plate using 100 µl of assay<br />
buffer, and remove the liquid following the PREVAC program of<br />
the wash station.<br />
3. Vortex the diluted coupled beads for 30 sec at medium speed.<br />
Pour the diluted coupled beads into a reagent reservoir and add 50 µl<br />
to each well.<br />
TIP: A multichannel pipet is highly recommended for ease of use<br />
and efficiency.<br />
4. Wash the wells twice with the wash method of choice.<br />
5. Gently vortex the diluted standards, blanks, samples, and controls<br />
(if applicable) for 1–3 sec. Add 50 µl diluted standard,<br />
control, or sample to each well, changing the pipet tip after<br />
every volume transfer.<br />
6. Incubate on shaker at room temperature as specified below.<br />
Table 12. Assay incubation times.<br />
Assay<br />
<strong>Bio</strong>-<strong>Plex</strong> <strong>Pro</strong> human cytokine (group I and II)<br />
<strong>Bio</strong>-<strong>Plex</strong> <strong>Pro</strong> mouse cytokine (group I and II)<br />
<strong>Bio</strong>-<strong>Plex</strong> <strong>Pro</strong> mouse cytokine (group III)<br />
<strong>Bio</strong>-<strong>Plex</strong> <strong>Pro</strong> rat cytokine (group I)<br />
<strong>Bio</strong>-<strong>Plex</strong> <strong>Pro</strong> TGF-b<br />
25<br />
Incubation Time<br />
30 min<br />
30 min<br />
1 hr<br />
1 hr<br />
2 hr<br />
NOTE: Incubation times have been optimized for each assay and should not exceed 4 hr.<br />
Be consistent with this incubation time for optimal reproducibility.
Prepare and Add Detection Antibodies<br />
One tube of detection antibodies is included with each kit. Instructions are<br />
provided for diluting the detection antibodies to a 1x concentration.<br />
1. While the samples are incubating, use the Calculation Worksheet<br />
on page 44 to calculate the volume of detection antibodies and<br />
detection antibody diluent needed. Detection antibodies should be<br />
prepared 10–15 min before use.<br />
2. Add the required volume of detection antibody diluent to a<br />
15 ml tube.<br />
3. Vortex the detection antibodies for 15–20 sec at medium speed,<br />
then perform a 30 sec spin to collect the entire volume at the bottom<br />
of the vial.<br />
4. Pipet the required volume from each detection antibody tube into<br />
a 15 ml polypropylene tube. Each well of the assay requires<br />
either 2.5 µl detection antibody (10x) or 1.25 µl detection<br />
antibody (20x) adjusted to a final volume of 25 µl.<br />
Refer to the example detection antibody calculations in Tables 13–16.<br />
These calculations include a 25% excess to compensate for transfer loss.<br />
Tables 13–16 summarize the volumes required to prepare 1x detection<br />
antibodies from a single 10x or 20x stock. Also shown are volumes to<br />
prepare 1x antibodies when mixing two 10x or two 20x stocks.<br />
For instructions on preparing 1x antibodies from two stocks at different<br />
concentrations (for example when mixing human diabetes (20x)<br />
with human group I assays (10x), refer to the <strong>Bio</strong>-<strong>Plex</strong> <strong>Pro</strong> diabetes<br />
instruction manual (bulletin #10010747).<br />
26
Preparing 1x detection antibodies from 10x stock<br />
Table 13. Premixed panel or one singleplex assay.<br />
10x Detection Detection Anti-<br />
# of Wells<br />
Antibodies<br />
(µl)<br />
body Diluent<br />
(µl)<br />
96<br />
300<br />
2,700<br />
48<br />
150<br />
1,350<br />
Table 14. Mixing singleplex assays.<br />
# of Wells<br />
96<br />
48<br />
10x Detection<br />
Antibodies (µl),<br />
Singleplex #1<br />
300<br />
150<br />
Table 16. Mixing singleplex assays.<br />
10x Detection<br />
Antibodies (µl),<br />
Singleplex #2<br />
300<br />
150<br />
Preparing 1x detection antibodies from 20x Stock<br />
Table 15. Premixed panel or one singleplex assay.<br />
20x Detection Detection Anti-<br />
# of Wells<br />
Antibodies<br />
(µl)<br />
body Diluent<br />
(µl)<br />
96<br />
150<br />
2,850<br />
48<br />
75<br />
1,425<br />
# of Wells<br />
96<br />
48<br />
20x Detection<br />
Antibodies (µl),<br />
Singleplex #1<br />
150<br />
75<br />
20x Detection<br />
Antibodies (µl),<br />
Singleplex #2<br />
150<br />
75<br />
5. After incubating the samples, slowly remove and discard the sealing tape.<br />
6. Wash three times with the wash method of choice.<br />
7. Vortex the diluted detection antibodies gently for 1–3 sec. Pour the<br />
diluted detection antibodies into a reagent reservoir and add<br />
25 µl to each well using a multichannel pipet.<br />
8. Cover the plate with a new sheet of sealing tape and seal the wells.<br />
Incubate on shaker at room temperature as specified in Table 17.<br />
27<br />
Total<br />
Volume<br />
(µl)<br />
3,000<br />
1,500<br />
Detection<br />
Antibody<br />
Diluent (µl)<br />
2,400<br />
1,200<br />
Total<br />
Volume<br />
(µl)<br />
3,000<br />
1,500<br />
Detection<br />
Antibody<br />
Diluent (µl)<br />
2,700<br />
1,350<br />
Total<br />
Volume<br />
(µl)<br />
3,000<br />
1,500<br />
Total<br />
Volume<br />
(µl)<br />
3,000<br />
1,500
Table 17. Assay incubation times.<br />
Assay<br />
<strong>Bio</strong>-<strong>Plex</strong> <strong>Pro</strong> human cytokine (group I and II)<br />
<strong>Bio</strong>-<strong>Plex</strong> <strong>Pro</strong> mouse cytokine (group I, II, III)<br />
<strong>Bio</strong>-<strong>Plex</strong> <strong>Pro</strong> rat cytokine (group I)<br />
<strong>Bio</strong>-<strong>Plex</strong> <strong>Pro</strong> TGF-b<br />
Prepare and Add Streptavidin-PE<br />
1. While the detection antibodies are incubating, use the Calculation<br />
Worksheet on page 44 to calculate the volume of streptavidin-PE<br />
(100x) and assay buffer needed. Each well requires 0.5 µl<br />
streptavidin-PE (100x) adjusted to a final volume of 50 µl with assay<br />
buffer. Streptavidin-PE should be prepared 10 min before use.<br />
2. Add the required volume of assay buffer to a 15 ml tube.<br />
3. Vortex the streptavidin-PE tube for 15–20 sec at medium speed.<br />
Perform a 30 sec spin to collect the entire volume at the bottom of<br />
the vial.<br />
4. Pipet the required volume of streptavidin-PE into a 15 ml<br />
polypropylene tube containing assay buffer to dilute the<br />
streptavidin-PE to a 1x concentration.<br />
Table 18 shows an example calculation to dilute streptavidin-PE,<br />
which includes a 25% excess to compensate for transfer loss.<br />
<strong>Pro</strong>tect the streptavidin-PE from light until ready to use.<br />
Table 18. Preparing streptavidin-PE from 100x stock.<br />
# of Wells<br />
96<br />
48<br />
100x<br />
Streptavidin-PE<br />
(µl)<br />
60<br />
30<br />
Assay Buffer<br />
(µl)<br />
5,940<br />
2,970<br />
5. After detection antibody incubation, slowly remove and discard<br />
the sealing tape.<br />
28<br />
Total Volume<br />
(µl)<br />
6,000<br />
3,000<br />
Incubation Time<br />
30 min<br />
30 min<br />
30 min<br />
1 hr
6. Wash three times with the wash method of choice.<br />
7. Vortex the diluted streptavidin-PE at medium speed for 3–5 sec.<br />
Pour the diluted streptavidin-PE into a reagent reservoir and add<br />
50 µl to each well using a multichannel pipet.<br />
8. Incubate on shaker at room temperature for the specified time<br />
shown in Table 19.<br />
Table 19. Assay incubation times.<br />
Assay<br />
9. After the streptavidin-PE incubation step, slowly remove and<br />
discard the sealing tape.<br />
10. Wash the wells three times with the wash method of choice.<br />
11. Add 125 µl assay buffer to each well. Cover the plate with a<br />
new sheet of sealing tape. Shake the plate at room temperature<br />
at 1,100 rpm for 30 sec and slowly remove the sealing tape.<br />
Ensure that the plate cover has been removed before placing the<br />
plate on the reader.<br />
29<br />
Incubation Time<br />
<strong>Bio</strong>-<strong>Plex</strong> <strong>Pro</strong> human cytokine (group I and II)<br />
10 min<br />
<strong>Bio</strong>-<strong>Plex</strong> <strong>Pro</strong> mouse cytokine (group I, II, III)<br />
10 min<br />
<strong>Bio</strong>-<strong>Plex</strong> <strong>Pro</strong> rat cytokine (group I)<br />
10 min<br />
<strong>Bio</strong>-<strong>Plex</strong> <strong>Pro</strong> TGF-b<br />
30 min<br />
NOTE: Monitor the incubation time closely for optimal assay performance and reproducibility.
8. Read Plate<br />
<strong>Bio</strong>-<strong>Plex</strong> Manager software is recommended for all <strong>Bio</strong>-<strong>Plex</strong> <strong>Pro</strong> assay<br />
data acquisition and analysis. Instructions for Luminex xPONENT software<br />
are also included. For instructions using other xMAP system software<br />
packages, contact <strong>Bio</strong>-<strong>Rad</strong> Technical Support or your regional <strong>Bio</strong>-<strong>Rad</strong><br />
field applications specialist.<br />
Prepare <strong>Pro</strong>tocol in <strong>Bio</strong>-<strong>Plex</strong> Manager 6.0 Software<br />
The protocol should be prepared in advance so that the plate is read as<br />
soon as the experiment is complete.<br />
A protocol file specifies the analytes used in the reading, the plate wells<br />
to be read, sample information, the values of standards and controls,<br />
and instrument settings. <strong>Pro</strong>tocols may be obtained from within <strong>Bio</strong>-<strong>Plex</strong><br />
Manager software version 6.0 or created from the File menu.<br />
<strong>Bio</strong>-<strong>Plex</strong> Manager software version 6.0 contains protocols for most<br />
<strong>Bio</strong>-<strong>Plex</strong> ® assays. Choose from available protocols or create a new<br />
protocol. To create a new protocol, select File, then New from the main<br />
menu. Locate and follow the steps under <strong>Pro</strong>tocol Settings.<br />
1. Describe <strong>Pro</strong>tocol and enter information about the assay (optional).<br />
2. Select Analytes and create a new panel. Do not use preset panels<br />
found in <strong>Bio</strong>-<strong>Plex</strong> Manager software, version 5.0 or lower.<br />
Visually confirm the selected analytes and proceed to step 3.<br />
a. Click the Add Panel button in the Select Analytes toolbar.<br />
Enter a new panel name. Select <strong>Bio</strong>-<strong>Plex</strong> <strong>Pro</strong> Assay Magnetic<br />
from the assay pull-down menu. If using <strong>Bio</strong>-<strong>Plex</strong> Manager version<br />
5.0 or lower, select Mag<strong>Plex</strong> from the assay pull-down menu.<br />
b. Click the Add button. Enter the bead region number and name<br />
for the first analyte. Click Add Continue to repeat for each analyte<br />
in the assay. Refer to the bead regions in parentheses ( ) listed on<br />
the peel-off label provided with the standards.<br />
30
For reference, bead regions for TGF-b and human, mouse, and<br />
rat assays are shown in Tables 20–22.<br />
c. Click the Add button when the last analyte has been added and<br />
click OK to save the new panel.<br />
d. Highlight analytes from the Available list (left) and move to the<br />
Selected list (right) using the Add button. To move all analytes at<br />
once, simply click the Add All button.<br />
e. If some of the analytes need to be removed from the Selected<br />
list, highlight them and select Remove. If desired, it is possible to<br />
rename the panel by clicking on Rename Panel and entering a<br />
new panel name.<br />
NOTE: Do not use preset panels found in <strong>Bio</strong>-<strong>Plex</strong> Manager<br />
software version 5.0 or earlier as the bead regions are not<br />
identical to existing preset panels.<br />
Table 20. TGF-b assay bead regions.<br />
TGF-b Assay Panel<br />
TGF-b1<br />
TGF-b2<br />
TGF-b3<br />
31<br />
Bead Region<br />
13<br />
72<br />
66
Table 21. Human, mouse, and rat cytokine assay bead regions.<br />
* Coming soon.<br />
Human Cytokines Mouse Cytokines Rat Cytokines<br />
Group I Bead Group II Bead Group I Bead Group II Bead Group I Bead<br />
Region Region Region Region Region<br />
IL-1b 39 IL-1a 63 IL-1a 53 IL-15 42 IL-1a 21<br />
IL-1ra 25 IL-2Ra 13 IL-1b 19 IL-18 20 IL-1b 28<br />
IL-2 38 IL-3 64 IL-2 36 Basic FGF 25 IL-2 22<br />
IL-4 52 IL-12 (p40) 28 IL-3 18 LIF 45 IL-4 33<br />
IL-5 33 IL-16 27 IL-4 39 M-CSF 26 IL-5 52<br />
IL-6 19 IL-18 42 IL-5 52 MIG 44 IL-6 56<br />
IL-7 74 CTACK 72 IL-6 38 MIP-2 27 IL-7 38<br />
IL-8 54 GRO-a 61 IL-9 33 PDGF-BB 35 IL-10 19<br />
IL-9 77 HGF 62 IL-10 56 VEGF 47 IL-12 (p40) 76<br />
IL-10 56<br />
IL-12 (p70) 75<br />
IFN-a2<br />
LIF<br />
20<br />
29<br />
IL-12 (p40) 76<br />
IL-12 (p70) 78<br />
Group III<br />
IL-12 (p70) 78<br />
IL-13 15<br />
IL-13 51 MCP-3 26 IL-13 37 IL-17F 28 IL-17 72<br />
IL-15 73 M-CSF 67 IL-17 72 IL-21 14 IL-18 20<br />
IL-17 76 MIF 35 Eotaxin 74 IL-22 15 EPO 14<br />
Eotaxin 43 MIG 14 G-CSF 54 IL-23p19 61 G-CSF 54<br />
Basic FGF 44 b-NGF 46 GM-CSF 73 IL-31 29 GM-CSF 37<br />
G-CSF 57 SCF 65 IFN-g 34 IL-33 13 GRO/KC 57<br />
GM-CSf 34 SCGF-b 78 KC 57 CD40L 12 IFN-g 34<br />
IFN-y 21 SDF-1a 22 MCP-1 51 MIP-3a 30 M-CSF 26<br />
IP-10<br />
MCP-1<br />
48<br />
53<br />
TNF-a<br />
TRAIL<br />
30<br />
66<br />
MIP-1a<br />
MIP-1b<br />
77<br />
75<br />
Group III<br />
Singleplexes<br />
MIP-1a<br />
MIP-2<br />
77<br />
27<br />
MIP-1a 55<br />
MIP-1b 18<br />
Group II<br />
Singleplexes<br />
RANTES<br />
TNF-a<br />
55<br />
21<br />
MIP-3a 36<br />
IL-17E (IL-25) 67 PDGF-BB 47<br />
ICAM-1 12<br />
RANTES 55<br />
IL-27p28 43 RANTES 37<br />
VCAM-1 15<br />
TNF-a 43<br />
ICAM-1 22 VEGF 47<br />
TNF-a 36 Eotaxin *<br />
VEGF 45 MCP-1 *<br />
3. Format Plate – Format the plate according to the Plate Layout<br />
Template (located at the back of the manual) created for the assay.<br />
To modify the plate layout, follow the steps below (see Figure 6).<br />
a. Select the Plate Formatting tab.<br />
b. Select the standards icon S and drag the cursor over all<br />
the wells that contain standards. Repeat this process for<br />
Blanks B , Controls C , and Samples X .<br />
32
Fig. 6. Plate formatting<br />
4. Enter Standards Info into <strong>Bio</strong>-<strong>Plex</strong> Manager 6.0 software.<br />
a. Enter the highest concentration of each analyte in the top row<br />
(labeled S1) of the table. S1 concentration information is included<br />
on the peel-off label provided with each vial of standards.<br />
b. Enter a dilution factor of 4 and click Calculate. The concentrations<br />
for each standard point will be populated for all analytes in the table.<br />
c. Optional: enter the lot number of the vial of standards into the<br />
Standard Lot box and click Save.<br />
5. Enter Controls Info – Select an analyte from the pull-down menu,<br />
then enter description, concentration, and dilution information for<br />
each user-specified control. Repeat the process for each<br />
additional analyte in the assay.<br />
33
6. Enter Sample Info – Enter sample information and the appropriate<br />
dilution factor.<br />
7. Run <strong>Pro</strong>tocol – Confirm that the assay settings are correct.<br />
a. Human, mouse, and TGF-b assays are run at the default<br />
setting in <strong>Bio</strong>-<strong>Plex</strong> Manager 6.0 - low RP1 target (low PMT).<br />
Rat assays were optimized at high RP1 target (high PMT).<br />
Therefore, check the box next to Run at High RP1 Target before<br />
running the protocol.<br />
b. Confirm that data acquisition is set to 50 beads per region.<br />
In Advanced Settings, confirm that the bead map is set to 100<br />
region, the sample size is set to 50 µl, and the DD gates are<br />
set to 5,000 (Low) and 25,000 (High). In <strong>Bio</strong>-<strong>Plex</strong> Manager<br />
software versions 4.0, 4.1, 4.1.1, and 5.0, check Override<br />
Gates and set the DD gate values as indicated.<br />
Select Start, name and save the .rbx file, and begin data<br />
acquisition. The Run <strong>Pro</strong>tocol pop-up screen will appear.<br />
Click Eject/Retract to eject the plate carrier.<br />
Acquire Data<br />
1. Shake the assay plate at 1,100 rpm for 30 sec, and visually inspect<br />
the plate to ensure that the assay wells are filled with buffer. Slowly<br />
remove the sealing tape and any plate cover before placing the plate<br />
on the plate carrier.<br />
2. Run <strong>Pro</strong>tocol – on the pop-up screen, select Load Plate and click OK<br />
to start acquiring data.<br />
3. Use the Wash Between Plates command after every plate run<br />
to reduce the possibility of clogging the instrument.<br />
4. If acquiring data from more than one plate, empty the waste bottle<br />
and refill the sheath bottle after each plate (if HTF are not present).<br />
Select Wash Between Plates and follow the instructions. Then repeat<br />
the Prepare <strong>Pro</strong>tocol and Acquire Data instructions.<br />
34
5. When data acquisition is complete, select Shut Down and<br />
follow the instructions.<br />
Reacquire Data<br />
It is possible to acquire data from a well or plate a second time using the<br />
Rerun/Recovery mode located below Start in the Run <strong>Pro</strong>tocol step.<br />
Any previous data will be overwritten.<br />
1. Check the wells from which data will be reacquired.<br />
2. Remove the buffer with the wash method of choice.<br />
3. Add 100 µl assay buffer to each well. Cover the filter plate with a<br />
new sheet of sealing tape.<br />
4. Repeat the Acquire Data steps to reacquire data. The data acquired<br />
should be similar to those acquired initially; however, the acquisition<br />
time will be extended because the wells have fewer beads.<br />
Data Analysis: Removing Outliers<br />
Outliers are identified as standard data points that do not meet accuracy<br />
or precision requirements and should be considered invalid when<br />
performing curve fitting. As such, they should be removed to generate a<br />
more realistic and accurate standard curve. This may result in an extended<br />
assay working range and allow quantitation of samples that might<br />
otherwise be considered out of range (OOR).<br />
In <strong>Bio</strong>-<strong>Plex</strong> Manager software version 6.0, outliers can be automatically<br />
removed by selecting the Optimize button in the Standard Curve window.<br />
In <strong>Bio</strong>-<strong>Plex</strong> Manager software 6.0 and earlier versions, outliers also can<br />
be manually selected in the Report Table. Visit online Help to learn more<br />
about the standard curve optimizer feature (available only in version 6.0)<br />
and how outliers are determined.<br />
Previous Versions of <strong>Bio</strong>-<strong>Plex</strong> Manager Software<br />
For instructions using previous versions of <strong>Bio</strong>-<strong>Plex</strong> manager software,<br />
download bulletin XXXX from www.bio-rad.com/bio-plex or call <strong>Bio</strong>-<strong>Rad</strong><br />
Technical Service.<br />
35
Luminex xPONENT Software<br />
Luminex xPONENT software may be used to analyze <strong>Bio</strong>-<strong>Plex</strong> assays.<br />
Although guidelines are provided here, consult the xPONENT software<br />
manual for more details. Perform a system initialization with Luminex’s<br />
calibration and performance verification kit, as directed by Luminex.<br />
Select Batches to set up the protocol and follow the information<br />
under Settings.<br />
1. Select Mag<strong>Plex</strong> as the bead type for magnetic beads, which<br />
automatically sets the DD gates.<br />
2. Volume = 50 µl<br />
3. Human, mouse, and TGF-b assays are run at low PMT (Standard<br />
PMT). Rat assays are run at High PMT (Enhanced PMT).<br />
4. Plate name: 96-well plate.<br />
5. Analysis type: Quantitative; 5PL Curve Fit.<br />
6. Number of standards: 8.<br />
Select Analytes to set up the panel.<br />
1. Enter “pg/ml” in the Units field.<br />
2. Enter 50 in the Count field.<br />
3. Select the bead region and enter the analyte name.<br />
4. Click Apply all for Units and Count.<br />
Select Stds and Ctrls.<br />
1. Enter standard concentrations, lot number, dilution factor, and other<br />
information, as applicable.<br />
After the assay is complete, select Results, then select Saved Batches.<br />
36
Troubleshooting Guide<br />
This troubleshooting guide addresses problems that may be encountered<br />
with <strong>Bio</strong>-<strong>Plex</strong> <strong>Pro</strong> assays. If you experience any of the problems listed<br />
below, review the possible causes and solutions provided. Poor assay<br />
performance may also be due to the <strong>Bio</strong>-<strong>Plex</strong> ® suspension array reader.<br />
To eliminate this possibility, use the validation kit to validate all the key<br />
functions of the array reader and to assist in determining whether or not<br />
the array reader is functioning properly.<br />
Possible Causes<br />
High Inter-Assay CV<br />
Standards were not reconstituted<br />
consistently between assays<br />
Reconstituted standards and<br />
diluted samples were not stored<br />
properly<br />
Bottom of filter plate not dry<br />
37<br />
Possible Solutions<br />
Incubate the reconstituted<br />
standards for 30 min on ice. Always<br />
be consistent with the incubation<br />
time and temperature.<br />
Reconstituted standards and diluted<br />
samples should be prepared on ice<br />
as instructed. Prior to plating, the<br />
reconstituted standards and diluted<br />
samples should be equilibrated to<br />
room temperature.<br />
Dry the bottom of the filter plate with<br />
absorbent paper towel (preferably<br />
lint-free) to prevent cross-well<br />
contamination.
Possible Causes<br />
High Intra-Assay CV<br />
Improper pipetting technique<br />
Reagents and assay components<br />
not equilibrated to room<br />
temperature prior to pipetting<br />
Contamination with wash buffer<br />
during wash steps<br />
Slow pipetting of samples and<br />
reagents across the plate<br />
Possible Solutions<br />
Pipet carefully when adding<br />
standards, samples, detection<br />
antibodies, and streptavidin-PE,<br />
especially when using a multichannel<br />
pipet. Use a calibrated pipet. Change<br />
pipet tip after every volume transfer.<br />
All reagents and assay components<br />
should be equilibrated to room<br />
temperature prior to pipetting.<br />
During the wash steps, be careful<br />
not to splash wash buffer from one<br />
well to another. Be sure that the<br />
wells are filtered completely and that<br />
no residual volume remains. Ensure<br />
that the microplate shaker setting is<br />
not too high. Reduce the microplate<br />
shaker speed to minimize splashing<br />
Sample pipetting across the entire<br />
plate should take less than 4 min.<br />
Reagent pipetting across the entire<br />
plate should take less than 1 min.<br />
38
Possible Causes<br />
Low Bead Count<br />
Miscalculation of bead dilution<br />
Beads clumped in multiplex<br />
bead stock tube<br />
Vacuum on for too long when<br />
aspirating buffer from wells<br />
Filter plate not shaken enough<br />
before incubation steps and prior<br />
to reading<br />
Reader is clogged<br />
Low Signal or Poor Sensitivity<br />
Standards reconstituted incorrectly<br />
Detection antibody or<br />
streptavidin-PE diluted incorrectly<br />
Possible Solutions<br />
Check your calculations and be<br />
careful to add the correct volumes<br />
Vortex for 30 sec at medium speed<br />
before aliquoting beads.<br />
Do not apply vacuum to the filter<br />
plate for longer than 10 sec after the<br />
buffer is completely drained from<br />
each well.<br />
Shake the filter plate at 1,100 rpm<br />
for 30 sec before incubation steps<br />
and immediately before reading<br />
the plate.<br />
Refer to the troubleshooting guide<br />
in the <strong>Bio</strong>-<strong>Plex</strong> system hardware<br />
instruction manual (bulletin<br />
#10005042).<br />
Follow the cytokine standard<br />
instructions carefully.<br />
Check your calculations and be<br />
careful to add the correct volumes.<br />
39
Possible Causes<br />
High Background Signal<br />
Incorrect buffer was used<br />
(for example, assay buffer used<br />
to dilute standards)<br />
Accidentally spiked blank wells<br />
Detection antibodies or<br />
streptavidin-PE incubated too long<br />
Poor Recovery<br />
Expired <strong>Bio</strong>-<strong>Plex</strong> reagents<br />
were used<br />
Incorrect amounts of components<br />
were added<br />
Microplate shaker set to an<br />
incorrect speed<br />
Possible Solutions<br />
Use sample matrix standard diluent<br />
to dilute standards.<br />
Be careful when spiking standards.<br />
Do not add any antigens to the<br />
blank wells.<br />
Follow the procedure incubation<br />
time precisely.<br />
Check that reagents have not<br />
expired. Use new or nonexpired<br />
components.<br />
Check your calculations and be<br />
careful to add the correct volumes.<br />
Check the microplate shaker speed<br />
and use the recommended setting.<br />
Setting the speed too high may<br />
cause splashing and contamination.<br />
Use the recommended plate shaker.<br />
40
Possible Causes<br />
Poor Recovery<br />
Improper pipetting technique<br />
Impact of Sample Matrix<br />
Negative MFI values in samples<br />
Poor precision in serum and<br />
plasma sample measurements<br />
Possible Solutions<br />
Pipet carefully when adding<br />
standards, samples, detection<br />
antibodies, and streptavidin-PE,<br />
especially when using a multichannel<br />
pipet. Use a calibrated pipet.<br />
Change pipet tip after every<br />
volume transfer.<br />
If samples contain little or no analyte,<br />
negative values observed may<br />
be due to statistical variation.<br />
If assay drift is suspected, retest the<br />
samples by positioning them next<br />
to the standards. If contamination<br />
of standards is suspected, check<br />
the standard replicate value and<br />
be careful when adding samples to<br />
the wells. Matrix effects could also<br />
produce negative sample values.<br />
Check if any interfering components<br />
such as heparin-based<br />
anticoagulant, additives, or gel from<br />
separators were introduced into the<br />
samples. Avoid using hemolyzed and<br />
heavily lipemic samples. Remove<br />
visible particulate in samples by<br />
centrifugation. Avoid multiple freeze/<br />
thaw cycles of samples.<br />
41
Safety Considerations<br />
Eye protection and gloves are recommended when using these products.<br />
Consult the MSDS for additional information. The <strong>Bio</strong>-<strong>Plex</strong> <strong>Pro</strong> assays<br />
contain components of animal origin. This material should be handled as<br />
if capable of transmitting infectious agents. Use universal precautions.<br />
These components should be handled at <strong>Bio</strong>safety Level 2 containment<br />
(U.S. government publication: <strong>Bio</strong>safety in Microbiological and <strong>Bio</strong>medical<br />
Laboratories (CDC, 1999).<br />
Legal Notices<br />
Acrodisc, Acroprep, and Supor are trademarks of Pall Corporation.<br />
Mag<strong>Plex</strong>, xMAP, xPONENT, MAGPIX, FLEXMAP 3D, and Luminex are<br />
trademarks of Luminex Corporation.<br />
The <strong>Bio</strong>-<strong>Plex</strong> suspension array system includes fluorescently labeled<br />
microspheres and instrumentation licensed to <strong>Bio</strong>-<strong>Rad</strong> Laboratories, Inc.<br />
by the Luminex Corporation.<br />
42
Plate Layout Template<br />
43
Calculation Worksheet<br />
Plan Plate Layout<br />
1. Fill out the 96-well plate template (page 43) as instructed in the Plan Plate Layout<br />
section (page 13).<br />
If using either a premixed panel or one singleplex assay, follow these directions.<br />
Enter the number of wells that will be used in the assay:_______ (1)<br />
Calculations for Coupled Beads<br />
1. Determine the volume of 1x coupled beads needed.<br />
a. Each well requires 50 µl of coupled beads (1x): _______ (1) x 50 µl = _______ µl (2)<br />
b. Include a 20% excess to ensure enough volume: _______ µl (2) x 0.20 = _______ µl (3)<br />
c. Total volume of 1x coupled beads: _______ µl (2) + _______ µl (3) = _______ µl (4)<br />
d. Volume of 20x coupled beads stock: _______ µl (4)/20 = _______ µl (5)<br />
e. Volume of assay buffer required: _______ µl (4) – _______ µl (5) = _______ (6)<br />
Calculations for Detection Antibodies<br />
2. Determine the volume of 1x detection antibody needed.<br />
a. Each well requires 25 µl detection antibodies (1x): _______ (1) x 25 µl = _______ µl (7)<br />
b. Include a 25% excess to ensure enough volume: _______ µl (7) x 0.25 = _______ µl (8)<br />
c. Total volume of 1x detection antibodies: _______ µl (7) + _______ µl (8) = _______ µl (9)<br />
d. Volume of 20x detection antibodies stock: _______ µl (9)/20 = _______ µl (10)<br />
e. Volume of detection antibody diluent required: _____ µl (9) – _____ µl (10) = _____ µl (11)<br />
Calculations for Streptavidin-PE<br />
3. Determine the volume of 1x streptavidin-PE needed.<br />
a. Each well requires 50 µl streptavidin-PE (1x): _______ (1) x 50 µl = _______ µl (10)<br />
b. Include 25% excess to ensure enough volume: _______ µl (10) x 0.25 = _______ µl (11)<br />
c. Total volume of 100x streptavidin-PE: ______ µl (10) + ______ µl (11) = ______ µl (12)<br />
d. Volume of 100x streptavidin-PE required: _______ µl (12) / 100 = _______ µl (13)<br />
e. Volume of assay buffer required: _______ µl (12) – _______ µl (13) = _______ µl (14)<br />
44
If mixing singleplex assays, follow these directions.<br />
Calculations for Coupled Beads<br />
1. Determine the volume of 1x coupled beads needed.<br />
a. Each well requires 50 µl coupled beads (1x): _______ (1) x 50 µl = _______ µl (2)<br />
b. Include 20% excess to ensure enough volume: _______ µl (2) x 0.20 = _______ µl (3)<br />
c. Total volume of 1x coupled beads: _______ µl (2) + _______ µl (3) = _______ µl (4)<br />
d. Enter the number of diabetes single set (or analytes) tubes that will be multiplexed = _______ (5)<br />
e. Volume of 20x coupled beads required from each coupled beads tube:<br />
_______ µl (4) / 20 = _______ µl (6)<br />
f. Total volume of diabetes bead stock required: _______ (5) x _______ µl (6) = _______ µl (7)<br />
g. Volume of assay buffer required: _______ µl (4) – _______ µl (7) = _______ µl (8)<br />
Calculations for Detection Antibodies<br />
2. Determine the volume of 1x detection antibody needed.<br />
a. Each well requires 25 µl detection antibodies (1x): _______ (1) x 25 µl = _______ µl (9)<br />
b. Include a 25% excess to ensure enough volume: _______ µl (9) x 0.25 = _______ µl (10)<br />
c. Total volume of 1x detection antibodies: _______ µl (9) + _______ µl (10) = _______ µl (11)<br />
d. Enter the number of diabetes single set (or analytes) tubes that will be multiplexed = _______ (5)<br />
e. Volume of 20x detection antibodies required from each detection antibody tube:<br />
_______ µl (11) / 20 = _______ µl (12)<br />
f. Total volume of diabetes detection antibody stock: _____ µl (12) x _____ (5) = _____ µl (13)<br />
g. Volume of detection antibody diluent required: ____ µl (11) – ____ µl (13) = ____µl (14)<br />
Calculations for Streptavidin-PE<br />
3. Determine the volume of 1x streptavidin-PE needed.<br />
a. Each well requires 50 µl streptavidin-PE (1x): _______ (1) x 50 µl = _______ µl (15)<br />
b. Include 25% excess to ensure enough volume: _______ µl (15) x 0.25 = _______ µl (16)<br />
c. Total volume of 100x streptavidin-PE: ______ µl (15) + ______ µl (16) = _______ µl (17)<br />
d. Volume of 100x streptavidin-PE required: _______ µl (17) / 100 = _______ µl (18)<br />
e. Volume of assay buffer required: _______ µl (17) _______ µl (18) = _______ µl (19)<br />
45
Ordering Information<br />
Premixed Multiplex <strong>Assays</strong><br />
Description Catalog #<br />
<strong>Bio</strong>-<strong>Plex</strong> <strong>Pro</strong> Human Cytokine 8-<strong>Plex</strong> Panel, 1x96 M50-000007A<br />
<strong>Bio</strong>-<strong>Plex</strong> <strong>Pro</strong> Human Cytokine 17-<strong>Plex</strong> Panel, 1x96 M50-00031YV<br />
<strong>Bio</strong>-<strong>Plex</strong> <strong>Pro</strong> Human Cytokine 21-<strong>Plex</strong> Panel, 1x96 MF0-005KMII<br />
<strong>Bio</strong>-<strong>Plex</strong> <strong>Pro</strong> Human Cytokine 27-<strong>Plex</strong> Panel, 1x96 M50-0KCAF0Y<br />
<strong>Bio</strong>-<strong>Plex</strong> <strong>Pro</strong> Human Cytokine Th1/Th2 Panel, 1x96 M50-00005L3<br />
<strong>Bio</strong>-<strong>Plex</strong> <strong>Pro</strong> Mouse Cytokine 8-<strong>Plex</strong> Panel, 1x96 M60-000007A<br />
<strong>Bio</strong>-<strong>Plex</strong> <strong>Pro</strong> Mouse Cytokine 9-<strong>Plex</strong> Panel, 1x96 MD0-00000EL<br />
<strong>Bio</strong>-<strong>Plex</strong> <strong>Pro</strong> Mouse Cytokine 23-<strong>Plex</strong> Panel, 1x96 M60-009RDPD<br />
<strong>Bio</strong>-<strong>Plex</strong> <strong>Pro</strong> Mouse Cytokine Th1/Th2 Panel, 1x96 M60-00003J7<br />
<strong>Bio</strong>-<strong>Plex</strong> <strong>Pro</strong> Mouse Th17 Cytokine Panel A 6-<strong>Plex</strong>, 1x96 M60-00007NY<br />
<strong>Bio</strong>-<strong>Plex</strong> <strong>Pro</strong> Mouse Th17 Cytokine Panel B 8-<strong>Plex</strong>, 1x96 171-FA001M<br />
<strong>Bio</strong>-<strong>Plex</strong> <strong>Pro</strong> Rat Th1/Th2 Panel, 1x96 171-K1002M<br />
<strong>Bio</strong>-<strong>Plex</strong> <strong>Pro</strong> Rat 23-<strong>Plex</strong> Panel, 1x96 171-K1001M<br />
<strong>Bio</strong>-<strong>Plex</strong> <strong>Pro</strong> TGF-b 3-<strong>Plex</strong> Panel, 1x96 171-W4001M<br />
COMING SOON! <strong>Bio</strong>-<strong>Plex</strong> <strong>Pro</strong> Mouse Group III and <strong>Bio</strong>-<strong>Plex</strong> <strong>Pro</strong> Rat Cytokine assays.<br />
To obtain ordering information, go to www.bio-rad.com/bio-plex<br />
<strong>Bio</strong>-<strong>Plex</strong> x-<strong>Plex</strong> <strong>Assays</strong><br />
Custom mixing service using the <strong>Bio</strong>-<strong>Plex</strong> Assay Builder,<br />
www.bio-rad.com/bio-plex/assaybuilder, to select analytes of interest.<br />
<strong>Assays</strong> are supplied with premixed coupled beads and detection<br />
antibodies in the all-in-one kit format.<br />
<strong>Bio</strong>-<strong>Plex</strong> Express <strong>Assays</strong><br />
Custom packaging service using the <strong>Bio</strong>-<strong>Plex</strong> Assay Builder,<br />
www.bio-rad.com/bio-plex/assaybuilder, to select analytes of interest.<br />
<strong>Assays</strong> are supplied with individual tubes of coupled beads and detection<br />
antibodies (to mix at the bench) in the all-in-one kit format.<br />
Individual Components<br />
Singleplex sets (coupled magnetic beads and detection antibodies),<br />
standards, reagent kit, wash buffer, and <strong>Bio</strong>-<strong>Plex</strong> <strong>Pro</strong> flat-bottom<br />
plates are available individually. For more detailed ordering information,<br />
refer to bulletin 5507 or go to www.bio-rad.com/bio-plex.<br />
46
Life Science<br />
Group<br />
10014905 Rev C US/EG<br />
<strong>Bio</strong>-<strong>Rad</strong><br />
Laboratories, Inc.<br />
Web site www.bio-rad.com USA 800 424 6723<br />
Australia 61 2 9914 2800 Austria 01 877 89 01 Belgium 09 385 55 11<br />
Brazil 55 31 3689 6600 Canada 905 364 3435 China 86 21 6169 8500<br />
Czech Republic 420 241 430 532 Denmark 44 52 10 00<br />
Finland 09 804 22 00 France 01 47 95 69 65 Germany 089 31 884 0<br />
Greece 30 210 777 4396 Hong Kong 852 2789 3300<br />
Hungary 36 1 459 6100 India 91 124 4029300 Israel 03 963 6050<br />
Italy 39 02 216091 Japan 03 6361 7000 Korea 82 2 3473 4460<br />
Malaysia 60 3 2117 5260 Mexico 52 555 488 7670<br />
The Netherlands 0318 540666 New Zealand 64 9 415 2280<br />
Norway 23 38 41 30 Poland 48 22 331 99 99 Portugal 351 21 472 7700<br />
Russia 7 495 721 14 04 Singapore 65 6415 3170<br />
South Africa 27 861 246 723 Spain 34 91 590 5200<br />
Sweden 08 555 12700 Switzerland 061 717 95 55<br />
Taiwan 886 2 2578 7189 Thailand 66 2 6518311<br />
United Kingdom 020 8328 2000 Vietnam 84 8 38131140<br />
10-0021 1210 Sig 1110


