Steel Section Design and Connections Tutorial - Kxcad.net
Steel Section Design and Connections Tutorial - Kxcad.net
Steel Section Design and Connections Tutorial - Kxcad.net

Create successful ePaper yourself
Turn your PDF publications into a flip-book with our unique Google optimized e-Paper software.
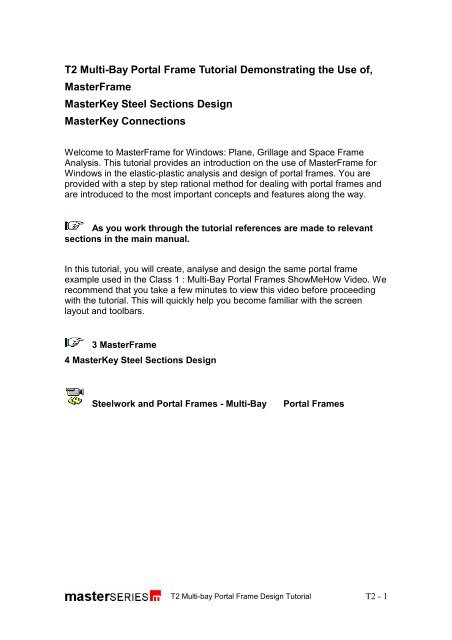
T2 Multi-Bay Portal Frame <strong>Tutorial</strong> Demonstrating the Use of,<br />
MasterFrame<br />
MasterKey <strong>Steel</strong> <strong>Section</strong>s <strong>Design</strong><br />
MasterKey <strong>Connections</strong><br />
Welcome to MasterFrame for Windows: Plane, Grillage <strong>and</strong> Space Frame<br />
Analysis. This tutorial provides an introduction on the use of MasterFrame for<br />
Windows in the elastic-plastic analysis <strong>and</strong> design of portal frames. You are<br />
provided with a step by step rational method for dealing with portal frames <strong>and</strong><br />
are introduced to the most important concepts <strong>and</strong> features along the way.<br />
As you work through the tutorial references are made to relevant<br />
sections in the main manual.<br />
In this tutorial, you will create, analyse <strong>and</strong> design the same portal frame<br />
example used in the Class 1 : Multi-Bay Portal Frames ShowMeHow Video. We<br />
recommend that you take a few minutes to view this video before proceeding<br />
with the tutorial. This will quickly help you become familiar with the screen<br />
layout <strong>and</strong> toolbars.<br />
3 MasterFrame<br />
4 MasterKey <strong>Steel</strong> <strong>Section</strong>s <strong>Design</strong><br />
<strong>Steel</strong>work <strong>and</strong> Portal Frames - Multi-Bay Portal Frames<br />
T2 Multi-bay Portal Frame <strong>Design</strong> <strong>Tutorial</strong><br />
T2 - 1
T2.1 MasterFrame<br />
T2.1.1 Loading MasterFrame<br />
T2 Multi-bay Portal Frame <strong>Design</strong> <strong>Tutorial</strong><br />
To start this tutorial:<br />
Double click on the<br />
MasterSeries for<br />
Windows icon to start<br />
the MasterSeries.<br />
Select Frames from the<br />
top menu <strong>and</strong> then<br />
‘MasterFrame : Analyse<br />
<strong>Design</strong> Drafting’ from<br />
the drop down menu.<br />
T2.1.2 The File Selection Menu<br />
The MasterFrame File Selection menu will now be displayed.<br />
This menu enables you to load existing files or create new data files. As each<br />
existing file is selected, a picture of the frame is displayed in the window to<br />
assist your selection.<br />
Select the New File button to clear <strong>and</strong> set the focus to file name input box.<br />
Type “Tutor03”.<br />
The Get File button has changed to Create New<br />
Select Create New.<br />
T2 - 2
2.2 General File Management<br />
T2.1.3 The Frame Generation Menu<br />
In most cases you will be able to select a start-up<br />
frame <strong>and</strong> then tailor it to your specific requirements.<br />
In this case we shall generate a multi-storey frame,<br />
edit the co-ordinates of the roof beams <strong>and</strong> then add<br />
the two parapet walls.<br />
The Frame Generation Menu (Frame Wizard) is now<br />
displayed as shown.<br />
TIP! If the frame you are generating does not match<br />
one of the pre-processor frames, choose a frame that<br />
is similar to, but larger than, your frame. It is easier to<br />
delete members than to add them. If in doubt a multistorey<br />
frame makes a good basic grid.<br />
Select the Multi-Bay Portal Frame button<br />
3.3.2 Frame Generation Procedures <strong>and</strong> Templates<br />
The Start-up Frame<br />
The multi-bay portal frame pre-processor is now displayed.<br />
This option enables you to generate a wide variety of single <strong>and</strong> multi-bay<br />
portal frames including all the basic information such as the rafter <strong>and</strong> column<br />
sections, haunch dimensions, the values of the dead <strong>and</strong> live loads <strong>and</strong> base<br />
fixity.<br />
You can select equal or unequal bays.<br />
T2 Multi-bay Portal Frame <strong>Design</strong> <strong>Tutorial</strong><br />
T2 - 3
Click on Span (m)<br />
Type 24<br />
Click on Height to Eave<br />
(m)<br />
Type 6<br />
Click on Rise (m)<br />
Type 3<br />
Click on Haunch depth<br />
(m)<br />
Type .625<br />
Click on L @ Eaves (m)<br />
Type 2.4<br />
Click on L @ Apex (m)<br />
Type 1<br />
Click on Partial Fixity %<br />
Type 10<br />
As we change the input in the pre-processor the graphical display is always<br />
updated. This is because the ShowNewFrame button is depressed.<br />
Select Proceed to generate the frame. The frame now turns to black as it<br />
has been generated.<br />
This option generates a Multi-Bay Portal Frame of varying spans, rises <strong>and</strong><br />
haunch depths.<br />
Notes on Changing the <strong>Section</strong>s in the<br />
Pre-processor<br />
3.3.2 Frame Generation Procedures <strong>and</strong><br />
Templates<br />
Click to paste section<br />
from sections list<br />
T2.1.4 Portal Frame Loading Cases<br />
In the process of generating a new frame, two loading cases are automatically<br />
created, namely:<br />
Loading Case 01 : Dead plus Live (Ultimate)<br />
1.4 D1 + 1.6 L1<br />
T2 Multi-bay Portal Frame <strong>Design</strong> <strong>Tutorial</strong><br />
T2 - 4
Where:<br />
D1 Dead Loads<br />
L1 Live Loads<br />
Loading Case 02 : Live Only (Serviceability)<br />
0.0 D1 + 1.0 L1<br />
Adding a Sway Stability Loading Case:<br />
The following few steps demonstrate how to:<br />
1. Add a new loading case (Sway Stability)<br />
Use the Find Notional Loads option (.5% of the factored loads in case 1)<br />
Use the Add Notional Loads option (add the notional loads to loading case 3)<br />
Select Loading Case Titles (Number of)<br />
from the Cases menu<br />
Click on Add Case<br />
Click on the Quick Word button (Sway<br />
Stability)<br />
Select the Loading Combinations Tab<br />
Use the Spin Button to view the<br />
Loading Combination for the first two<br />
loading Cases<br />
Move to Loading Case 01 : Dead plus<br />
Live (Ultimate)<br />
Select the Notional Loads & P-Delta Tab<br />
Click on Find Notional Load<br />
Type .5 in the Percentage Box<br />
T2 Multi-bay Portal Frame <strong>Design</strong> <strong>Tutorial</strong><br />
T2 - 5
Using the Spin Button move to Loading<br />
Case 03 : (Sway Stability)<br />
Click on Add Notional Load<br />
T2.1.5 Analysing the frame<br />
Select Analyse from the top menu.<br />
Select Plane Frame.<br />
3.14 Analysing the Frame<br />
T2 Multi-bay Portal Frame <strong>Design</strong> <strong>Tutorial</strong><br />
T2 - 6
T2.2 MasterKey: <strong>Section</strong>s<br />
We will now move into MasterKey <strong>Steel</strong> <strong>Section</strong>s <strong>and</strong> use the AutoCheck to<br />
determine the state of all the members under local capacity <strong>and</strong> overall buckling<br />
checks.<br />
Select <strong>Steel</strong> <strong>Design</strong> from the<br />
<strong>Design</strong> menu<br />
From the Options menu, select<br />
Display MasterKey Menu<br />
MasterKey <strong>Section</strong>s offers three<br />
design menus, namely Elements,<br />
Independent <strong>and</strong> Integrated.<br />
The Independent menu offers the<br />
same type of checks as the<br />
Integrated menu to be used without<br />
frame link. The Options menu<br />
enables you to convert an<br />
Integrated design to an<br />
Independent design check.<br />
The Elements menu offers basic design checks such as Compression<br />
Resistance, Lateral Buckling Resistance Moment, Local Capacity Check, Axial<br />
Load with Moments, Web Bearing <strong>and</strong> Buckling Capacities, <strong>Section</strong> Properties<br />
<strong>and</strong> Classification.<br />
T2.2.1 Using the Integrated Menu<br />
From the Options menu, de-select Display MasterKey Menu<br />
Select AutoCheck - Group Check from the Integrated <strong>Design</strong> menu<br />
Draw a window around the frame to select all members<br />
T2 Multi-bay Portal Frame <strong>Design</strong> <strong>Tutorial</strong><br />
T2 - 7
The results of the AutoCheck are colour coded as follows:<br />
1. Red members are locally over stressed (plastic hinge location)<br />
2. Cyan members require additional lateral restraints<br />
3. Black members pass the local <strong>and</strong> buckling checks<br />
4. Grey members are not checked (e.g. concrete or sections not<br />
licensed)<br />
The above results show that the members are over-sized. We will use the<br />
Axially Loaded Members with Moments check, to select suitable sections.<br />
T2.2.2 <strong>Design</strong>ing the Outer Column <strong>Section</strong>s<br />
An ideal column section is that which creates a small amount of over-stressing<br />
under the haunch (local capacity not greater than 1.25)<br />
T2 Multi-bay Portal Frame <strong>Design</strong> <strong>Tutorial</strong><br />
T2 - 8
Select Axially Loaded Members<br />
with Moments from the Integrated<br />
<strong>Design</strong> menu. The Apply To<br />
mode is activated<br />
Click on the lower part of the outer<br />
left h<strong>and</strong> column<br />
Let us use the <strong>Section</strong>s AutoChange<br />
to select <strong>and</strong> then store a suitable<br />
column section.<br />
Click on the section list down<br />
arrow <strong>and</strong> select section 457x191<br />
UB 67<br />
With a Local Capacity value of 1.061,<br />
this new section now shows a small<br />
amount of overstressing.<br />
Click on the Store button<br />
Select Current Group to change the<br />
section for all the outer columns<br />
Select Current Group<br />
Click on Change<br />
It is advisable to change the rafter<br />
section before we re-analyse the<br />
frame<br />
Click on Exit Store<br />
T2 Multi-bay Portal Frame <strong>Design</strong> <strong>Tutorial</strong><br />
T2 - 9
T2.2.4 <strong>Design</strong>ing the Rafter <strong>Section</strong><br />
We will use the same design brief to<br />
select a suitable rafter section in<br />
which the bending moment <strong>and</strong><br />
moment of resistance are as close as<br />
possible.<br />
Select Axially Loaded Members<br />
with Moments from the Integrated<br />
<strong>Design</strong> menu<br />
Click on the outer left h<strong>and</strong> rafter<br />
Click on the section list down<br />
arrow <strong>and</strong> select section 457x152<br />
UB 52<br />
Note the bending moment diagram.<br />
Click on the section list down arrow <strong>and</strong> select section 406x140 UB 46<br />
Please note that the small amount of over-stressing at the end of the haunch<br />
will be eliminated when the plastic hinges are formed <strong>and</strong> the moments are<br />
redistributed.<br />
Click on the Store button<br />
Select Current Group<br />
Click on Change<br />
T2.2.6 <strong>Design</strong>ing the Inner Column <strong>Section</strong>s<br />
We will use the same design brief to select a suitable rafter section in which the<br />
bending moment <strong>and</strong> moment of resistance are as close as possible.<br />
Select Axially Loaded Members with Moments from the Integrated <strong>Design</strong><br />
menu<br />
Click on the inner left h<strong>and</strong> column<br />
Change to Copy Current Brief Mode<br />
Click on other (right h<strong>and</strong>) inner column<br />
Return to Search for Next Brief Mode<br />
Click on the ‘AutoSize Current Member’ button<br />
Click on the Store button<br />
Select Selected Members<br />
Selected members are highlighted in red. Select only the two inner columns,<br />
deselecting any other members highlighted.<br />
Click on Change<br />
Click on Re-Analyse<br />
T2.2.7 Review the AutoCheck<br />
Having re-analysed the frame with the new sections, let us view the results of<br />
AutoCheck<br />
T2 Multi-bay Portal Frame <strong>Design</strong> <strong>Tutorial</strong><br />
T2 - 10
Select the AutoCheck - Group Check from the list of existing <strong>Design</strong> Briefs:<br />
<strong>Design</strong> Brief 1 of 2 (bottom left h<strong>and</strong> corner of screen)<br />
The results indicate that the outer columns are slightly over stressed (shown in<br />
red). Other values indicate that the sections selected for the various members<br />
are all appropriate for plastic analysis (please note that plastic analysis is a<br />
form of moment re-distribution).<br />
T2.2.8 Placing the Plastic Hinges<br />
Select the Axial With Moments check for the outer left h<strong>and</strong> column from the<br />
list of existing <strong>Design</strong> Briefs: <strong>Design</strong> Brief 2 of 2.<br />
From the Options menu, select<br />
Plastic Hinges<br />
Select Apply To Mode<br />
Click on the lower part of the<br />
right h<strong>and</strong> column<br />
Click on the Add button<br />
Click on the lower part of the<br />
left h<strong>and</strong> column<br />
Click on the Add button<br />
Click on the Re-Analyse button<br />
T2.2.9 Changing the Haunch Dimensions<br />
Click on 1 st , 2 nd <strong>and</strong> 3 rd rafter in turn<br />
The applied moment at the end of the haunch is<br />
very close to the section capacity. This is likely to<br />
require lateral restraints at close intervals. To<br />
avoid the above, let us increase the haunch<br />
length by say 400 mm.<br />
Click on the <strong>Section</strong> Auto<strong>Design</strong> tab<br />
Click once on the top of the spin button to increase the haunch Dep1(H/D) to<br />
2.05<br />
Click several times on the top of the spin button to increase the increment to<br />
0.400<br />
Click on the top of the spin button to increase the haunch length XH1(m) to<br />
2.8<br />
Click on the Store button<br />
Select Current Group<br />
Click on Change<br />
Click on Re-Analyse<br />
T2 Multi-bay Portal Frame <strong>Design</strong> <strong>Tutorial</strong><br />
T2 - 11
T2.2.10 Column Lateral Restraints<br />
Ensure you are in Search for<br />
Next Brief Mode<br />
Click on the lower part of the<br />
outer left h<strong>and</strong> column<br />
The cyan background indicates<br />
that the column requires lateral<br />
restraints. Let us specify the side<br />
rail positions (1.4 m centres) <strong>and</strong><br />
then check the various portions<br />
for axial with moments.<br />
Click on the Lateral Restraints<br />
tab<br />
Type 1.4 in the Portion 1 input<br />
box<br />
Click on the 3rd <strong>and</strong> 4th portions on the bending moment in the output area<br />
Change to Copy Current Brief Mode<br />
Select right h<strong>and</strong> outer column to copy the Axial with Moment brief including<br />
the lateral restraints information to the other outer column<br />
The side rail spacing is satisfactory. Let us now check the column stability <strong>and</strong><br />
determine the positions of the torsional restraints.<br />
T2.2.11 Column Torsional Restraints<br />
Select Appendix-G : Stability Checks from the Integrated <strong>Design</strong> menu<br />
The cyan background indicates<br />
that the column requires<br />
additional torsional restraints.<br />
Please note that the column<br />
must be restrained at the plastic<br />
hinge location in all cases.<br />
We shall now increase <strong>and</strong><br />
decrease the length between the<br />
points of torsional restraints<br />
(Portion 1).<br />
Click the Torsional Restraints<br />
tab<br />
Enter a value of 4.2 in Portion<br />
1<br />
Change to Copy Current Brief Mode<br />
Select right h<strong>and</strong> outer column to copy the Appendix-G brief including the<br />
torsional restraints information to the other outer column<br />
T2 Multi-bay Portal Frame <strong>Design</strong> <strong>Tutorial</strong><br />
T2 - 12
The outer columns require two torsional restraints each, one at 4.200 m <strong>and</strong> the<br />
other under the haunch at the plastic hinge locations.<br />
T2.2.12 Rafter Lateral Restraints<br />
We will now check the rafter for a purlin spacing of 1.8 m.<br />
Ensure you are in Search<br />
for Next Brief Mode<br />
Click on the outer left h<strong>and</strong><br />
rafter<br />
Click on the Lateral<br />
Restraints tab<br />
Enter a value of 1.8 in the<br />
Portion 1 input box<br />
Click on the critical<br />
portions of the bending<br />
moment in the output area<br />
Purlin spacing of 1.8 m is<br />
satisfactory for the first rafter.<br />
Varying the Purlin Spacing<br />
The purlin spacing will need to be reduced in some areas. It is therefore<br />
necessary to enter the spacing for all portions <strong>and</strong> then reduce it in the critical<br />
locations.<br />
Enter a value of 1.8 in Portion 2 to Portion 7<br />
Let us now reduce the spacing in the critical portions using an increment of 0.1<br />
m.<br />
Click on Portion 2 in the Input Data<br />
Click on the left part of the horizontal spin button to the right of the Portion 2<br />
value to reduce the length of Portion 2 from 1.8 to 1.7m<br />
Purlin spacing is now satisfactory. However, let us reduce the first <strong>and</strong> second<br />
portions to 1.4 m, so that a purlin is coincident with the end of the haunch.<br />
Use the horizontal spin button to reduce Portion 1 <strong>and</strong> 2 to 1.4, or<br />
alternatively<br />
Directly type the values in Portion 1 <strong>and</strong> 2 to 1.4<br />
Let us check the 2 nd <strong>and</strong> 3 rd bay rafters using the same brief.<br />
Change to Copy Current Brief Mode<br />
Select rafter members 2, 3, 4, 5, <strong>and</strong> 6 to copy the Axial with Moment brief<br />
including the lateral restraints information to all other rafter members<br />
Click on Search for Next Brief Mode<br />
Click on the critical portions of the bending moment in the output area<br />
T2 Multi-bay Portal Frame <strong>Design</strong> <strong>Tutorial</strong><br />
T2 - 13
T2.2.13 Rafter Torsional Restraints<br />
Ensure you are in Search for Next Brief Mode<br />
Click on the outer left h<strong>and</strong> rafter<br />
Select Appendix-G : Stability Checks from the Integrated <strong>Design</strong> menu<br />
To determine the position of the torsional restraints required in the rafter, we<br />
first check the stability over the first two portions (2 @ 1.4 m = 2.8 m length<br />
starting @ 0 m).<br />
If this fails then provide a torsional restraint at 1.4 m <strong>and</strong> check the stability over<br />
the second <strong>and</strong> third portions (1 @ 1.4 + 1 @ 1.8 = 3.2 m length starting @ 1.4<br />
m).<br />
If this also fails then provide a second torsional restraint at 2.8 m <strong>and</strong> check the<br />
stability over the third <strong>and</strong> forth portions (2 @ 1.8 = 3.6 m length starting @ 2.8<br />
m).<br />
Click on the torsional restraint tab<br />
Enter the value of 2.8 in Portion<br />
1<br />
This portion is unstable, so we<br />
provide our first torsional restraint<br />
@ 1.4 m<br />
Enter a value of 1.4 in the ‘Start<br />
at’ just before Portion 1 the Input<br />
Data<br />
This portion is still unstable, so we<br />
provide our second torsional<br />
restraint @ 2.8 m<br />
Enter a value of 2.8 in the ‘Start<br />
at’ just before Portion 1 the Input<br />
Data<br />
Enter a value of 3.6 in Portion 1<br />
This provides torsional restraints at 2.8 <strong>and</strong> 3.6 m. Let us check other rafters by<br />
copying <strong>and</strong> applying this design brief.<br />
Change to Copy Current Brief Mode<br />
Select rafter members 2, 3, 4, 5, <strong>and</strong> 6 to copy theAppendix-G brief including<br />
the torsional restraints information to all other rafter members<br />
Click on Search for Next Brief Mode<br />
Important Note:<br />
Although the length of portion 1 is defined as 3.6 m, it will automatically check a<br />
portion between the torsional restraint at 2.8 <strong>and</strong> the point of contraflexure in<br />
each rafter.<br />
T2 Multi-bay Portal Frame <strong>Design</strong> <strong>Tutorial</strong><br />
T2 - 14
T2.2.14 Checking for Failures<br />
Click on the <strong>Section</strong> Auto<strong>Design</strong> Tab<br />
Click the ‘Fail’ button to search all design briefs for design failures.<br />
All design briefs are scanned <strong>and</strong> stops at any design failures encountered<br />
allowing you to rectify the problem. In the current example no failures should<br />
be present, <strong>and</strong> the dialog box as shown below is displayed.<br />
T2.2.15 Printing <strong>Design</strong> Checks<br />
The following few steps demonstrate the selective printing options of the design<br />
checks.<br />
Select Print <strong>Design</strong> Output from the Print menu<br />
Click on Include All to activate all checks<br />
Click on AutoSelect<br />
The “AutoSelect” automatically selects the critical portions from each check.<br />
The “All above” option allows to print only those checks with utilisation above<br />
the specified value.<br />
You can select to print a list of all the design checks (summary of results) <strong>and</strong><br />
then print detailed results for critical portions.<br />
You can also print the checks one per page for ease of reference <strong>and</strong> partial reprinting.<br />
Click on the Print List (Summary) button to print a list of all the checks that<br />
were covered<br />
Click on the Printer button in the Job Reference form<br />
Click on the Print button to print detailed output for the selected checks<br />
Click on the Printer button in the Job Reference form<br />
T2 Multi-bay Portal Frame <strong>Design</strong> <strong>Tutorial</strong><br />
T2 - 15
T2.2.16 Deflections <strong>and</strong> Sway Stability<br />
We will now view the frame deflection under serviceability <strong>and</strong> sway stability<br />
conditions.<br />
Select ‘List of Selected Nodal Displacements’ from the Edit-View menu.<br />
The Nodal displacements check is also accessible by selecting the AutoCheck<br />
design brief.<br />
Serviceability <strong>and</strong> Sway Stability nodal displacement are automatically<br />
extracted for eaves <strong>and</strong> apex nodes. The Sway Stability displacement limit of<br />
h/1000 is also automatically inserted.<br />
The maximum horizontal sway is only 2.95 mm which is less than half the<br />
permissible value of h/1000 (6 mm).<br />
Other analysis information can be viewed using ‘View Analysis Output’ <strong>and</strong><br />
‘Bending, shear <strong>and</strong> deflection’ from the Print menu.<br />
3.15 View <strong>and</strong> Print Results<br />
T2 Multi-bay Portal Frame <strong>Design</strong> <strong>Tutorial</strong><br />
T2 - 16
T2.3 MasterKey : Moment <strong>Connections</strong><br />
Let us now move to MasterKey Moment <strong>Connections</strong>.<br />
T2.3.1 The Eaves Connection<br />
Select <strong>Connections</strong> <strong>Design</strong> from the <strong>Design</strong> menu<br />
The Connection Pre-processor is<br />
displayed.<br />
Click O.K. to design an Eaves<br />
Connection<br />
Click on the outer left h<strong>and</strong> rafter<br />
near the eaves<br />
Scroll the design output to view<br />
failures<br />
Click on the button<br />
from the top tool bar for an<br />
explanation of the failure<br />
symbols.<br />
Click on the Auto<strong>Design</strong> button at<br />
the top of the edit area<br />
T2 Multi-bay Portal Frame <strong>Design</strong> <strong>Tutorial</strong><br />
The All <strong>and</strong> Ult. buttons are active<br />
to design for only all ultimate<br />
loading cases. In this example only<br />
loading case 1.<br />
Click on the Auto button in Auto<br />
<strong>Design</strong> dialog box<br />
Close the Auto <strong>Design</strong> by clicking<br />
on the X on the top right of the<br />
dialog box<br />
Feel free to examine the results <strong>and</strong> modify the joint details as you wish.<br />
Please also feel free to use the top toolbar to display dimensions <strong>and</strong> to zoom<br />
on various parts of the connection.<br />
T2 - 17
T2.3.2 The Apex Connection<br />
Click on the Add button in the<br />
top toolbar<br />
Select Apex (Beam to Beam)<br />
Click O.K. to design an Apex<br />
Connection<br />
Click on the outer left h<strong>and</strong><br />
rafter near the apex<br />
This joint is satisfactory with the<br />
minimum bolts. Auto<strong>Design</strong> can<br />
also be carried out on an Apex<br />
connection, as shown in the<br />
previous Eaves design.<br />
T2.3.3 The Base Plate<br />
Click on the Add button in the<br />
top toolbar<br />
Select Base Plate<br />
Click O.K. to design a Base<br />
Plate Connection<br />
Click on the outer left h<strong>and</strong><br />
column near the base Scroll<br />
the design output to view<br />
failures<br />
Click on the button<br />
from the top tool bar for an<br />
explanation of the failure<br />
symbols.<br />
Select <strong>Design</strong> Options from<br />
the Options tab<br />
Click on the Base Plates tab<br />
For a description of all design<br />
options;<br />
Click on Close<br />
6.11 <strong>Design</strong> Options<br />
Click on the Auto<strong>Design</strong><br />
button at the top of the edit<br />
T2 Multi-bay Portal Frame <strong>Design</strong> <strong>Tutorial</strong><br />
T2 - 18
area<br />
Click on the Auto button in<br />
Auto <strong>Design</strong> dialog box<br />
Close the Auto <strong>Design</strong> by<br />
clicking on the X on the top<br />
right of the dialog box<br />
T2.3.4 Printing Results<br />
Select ‘Print…’ from the Print menu<br />
Click on any of the items in the<br />
connection brief listing to include or<br />
exclude from printing.<br />
Click on the Printer button (or the<br />
Word export button if you have<br />
PowerPad)<br />
Check that the print orientation is<br />
Portrait<br />
Click on the Printer button inside the<br />
Job Reference form<br />
Feel free to experiment <strong>and</strong> print any output as you wish.<br />
T2.3.5 DXF Output<br />
Select DXF Output from<br />
the DXF Output menu<br />
Click on the Page<br />
Layout tab<br />
Select A2 from the Page Size List<br />
T2 Multi-bay Portal Frame <strong>Design</strong> <strong>Tutorial</strong><br />
T2 - 19
Drag the objects on the screen <strong>and</strong> place them anywhere you like<br />
Check the AutoCAD box to auto start AutoCAD upon export.<br />
Check the Border <strong>and</strong> L’Scape boxes<br />
Click Export, <strong>and</strong> the drawing is automatically imported to AutoCAD<br />
Close<br />
We hope you have enjoyed working through this tutorial, you will have learned<br />
the basics of using MasterFrame, MasterKey I-<strong>Section</strong> <strong>and</strong> MasterKey Moment<br />
<strong>Connections</strong> in the elastic-plastic analysis <strong>and</strong> design of portal frames.<br />
T2 Multi-bay Portal Frame <strong>Design</strong> <strong>Tutorial</strong><br />
T2 - 20