
You also want an ePaper? Increase the reach of your titles
YUMPU automatically turns print PDFs into web optimized ePapers that Google loves.
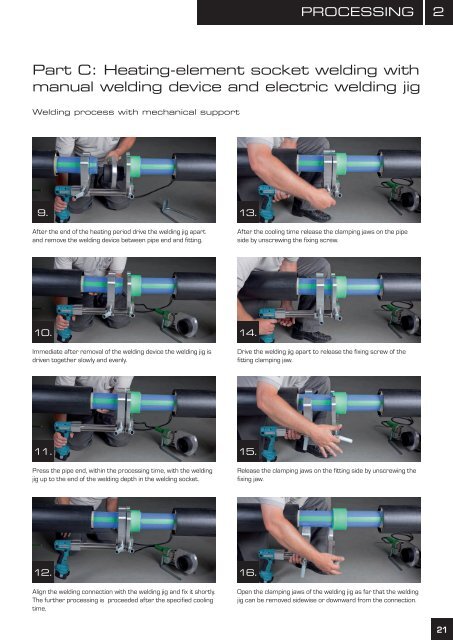
Part C: Heating-element socket welding with<br />
manual welding device and electric welding jig<br />
Welding process with mechanical support<br />
9.<br />
After the end of the heating period drive the welding jig apart<br />
and remove the welding device between pipe end and fitting.<br />
10.<br />
Immediate after removal of the welding device the welding jig is<br />
driven together slowly and evenly.<br />
11.<br />
Press the pipe end, within the processing time, with the welding<br />
jig up to the end of the welding depth in the welding socket.<br />
12.<br />
Align the welding connection with the welding jig and fix it shortly.<br />
The further processing is proceeded after the specified cooling<br />
time.<br />
13.<br />
PrOCESSINg<br />
After the cooling time release the clamping jaws on the pipe<br />
side by unscrewing the fixing screw.<br />
14.<br />
Drive the welding jig apart to release the fixing screw of the<br />
fitting clamping jaw.<br />
15.<br />
Release the clamping jaws on the fitting side by unscrewing the<br />
fixing jaw.<br />
16.<br />
Open the clamping jaws of the welding jig as far that the welding<br />
jig can be removed sidewise or downward from the connection.<br />
2<br />
21