
You also want an ePaper? Increase the reach of your titles
YUMPU automatically turns print PDFs into web optimized ePapers that Google loves.
<strong>aquatherm</strong> <strong>ISO</strong>-socket<br />
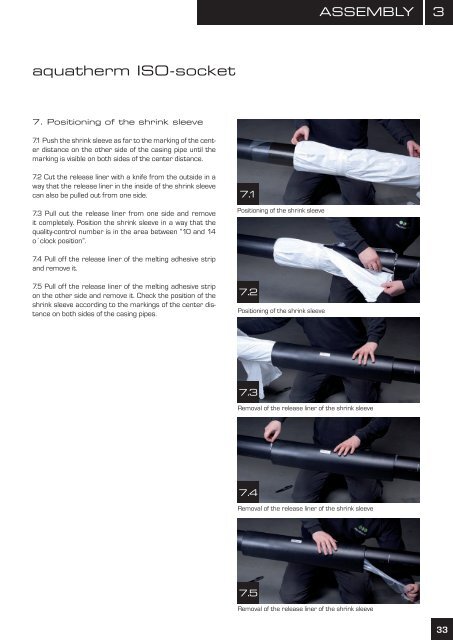
7. Positioning of the shrink sleeve<br />
7.1 Push the shrink sleeve as far to the marking of the center<br />
distance on the other side of the casing pipe until the<br />
marking is visible on both sides of the center distance.<br />
7.2 Cut the release liner with a knife from the outside in a<br />
way that the release liner in the inside of the shrink sleeve<br />
can also be pulled out from one side.<br />
7.3 Pull out the release liner from one side and remove<br />
it completely. Position the shrink sleeve in a way that the<br />
quality-control number is in the area between “10 and 14<br />
o´clock position”.<br />
7.4 Pull off the release liner of the melting adhesive strip<br />
and remove it.<br />
7.5 Pull off the release liner of the melting adhesive strip<br />
on the other side and remove it. Check the position of the<br />
shrink sleeve according to the markings of the center distance<br />
on both sides of the casing pipes.<br />
7.1<br />
Positioning of the shrink sleeve<br />
7.2<br />
Positioning of the shrink sleeve<br />
7.3<br />
aSSEMBLy<br />
Removal of the release liner of the shrink sleeve<br />
7.4<br />
Removal of the release liner of the shrink sleeve<br />
7.5<br />
Removal of the release liner of the shrink sleeve<br />
3<br />
33