
Create successful ePaper yourself
Turn your PDF publications into a flip-book with our unique Google optimized e-Paper software.
<strong>aquatherm</strong> <strong>ISO</strong>-socket<br />
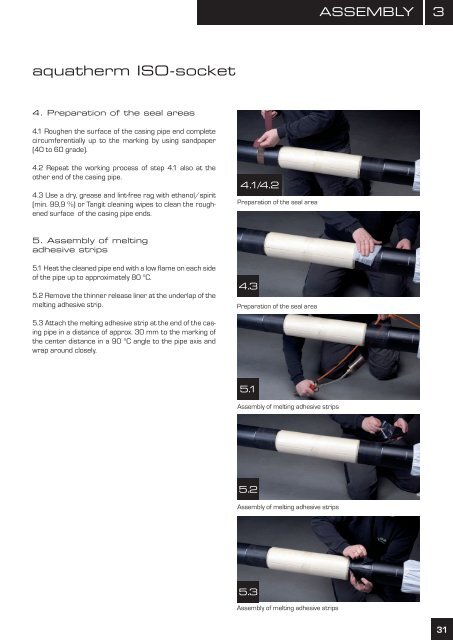
4. Preparation of the seal areas<br />
4.1 Roughen the surface of the casing pipe end complete<br />
circumferentially up to the marking by using sandpaper<br />
(40 to 60 grade).<br />
4.2 Repeat the working process of step 4.1 also at the<br />
other end of the casing pipe.<br />
4.3 Use a dry, grease and lint-free rag with ethanol/spirit<br />
(min. 99,9 %) or Tangit cleaning wipes to clean the roughened<br />
surface of the casing pipe ends.<br />
5. assembly of melting<br />
adhesive strips<br />
5.1 Heat the cleaned pipe end with a low flame on each side<br />
of the pipe up to approximately 80 °C.<br />
5.2 Remove the thinner release liner at the underlap of the<br />
melting adhesive strip.<br />
5.3 Attach the melting adhesive strip at the end of the casing<br />
pipe in a distance of approx. 30 mm to the marking of<br />
the center distance in a 90 °C angle to the pipe axis and<br />
wrap around closely.<br />
4.1 / 4.2<br />
Preparation of the seal area<br />
4.3<br />
Preparation of the seal area<br />
5.1<br />
Assembly of melting adhesive strips<br />
5.2<br />
Assembly of melting adhesive strips<br />
5.3<br />
Assembly of melting adhesive strips<br />
aSSEMBLy<br />
3<br />
31