Manual de reparaciones - HT Laser Oy
Manual de reparaciones - HT Laser Oy
Manual de reparaciones - HT Laser Oy
You also want an ePaper? Increase the reach of your titles
YUMPU automatically turns print PDFs into web optimized ePapers that Google loves.
Eje principal y cojinete<br />
<strong>Manual</strong> <strong>de</strong> <strong>reparaciones</strong><br />
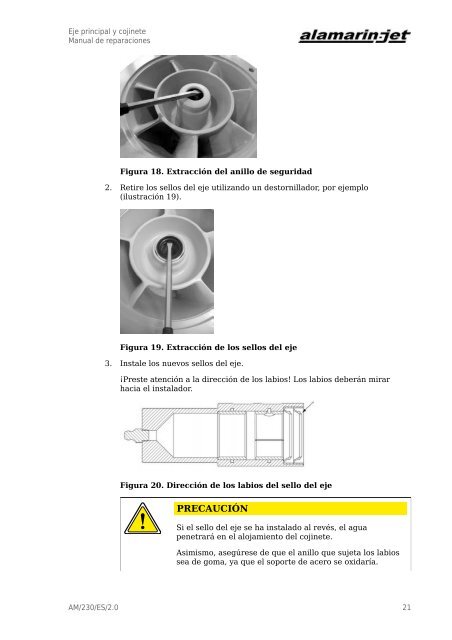
Figura 18. Extracción <strong>de</strong>l anillo <strong>de</strong> seguridad<br />
2. Retire los sellos <strong>de</strong>l eje utilizando un <strong>de</strong>stornillador, por ejemplo<br />
(ilustración 19).<br />
Figura 19. Extracción <strong>de</strong> los sellos <strong>de</strong>l eje<br />
3. Instale los nuevos sellos <strong>de</strong>l eje.<br />
¡Preste atención a la dirección <strong>de</strong> los labios! Los labios <strong>de</strong>berán mirar<br />
hacia el instalador.<br />
Figura 20. Dirección <strong>de</strong> los labios <strong>de</strong>l sello <strong>de</strong>l eje<br />
PRECAUCIÓN<br />
Si el sello <strong>de</strong>l eje se ha instalado al revés, el agua<br />
penetrará en el alojamiento <strong>de</strong>l cojinete.<br />
Asimismo, asegúrese <strong>de</strong> que el anillo que sujeta los labios<br />
sea <strong>de</strong> goma, ya que el soporte <strong>de</strong> acero se oxidaría.<br />
AM/230/ES/2.0 21


