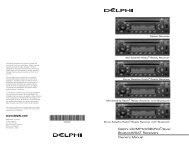
Delphi AM/FM Stereo and CD Receivers - Pana-Pacific
Delphi AM/FM Stereo and CD Receivers - Pana-Pacific
Delphi AM/FM Stereo and CD Receivers - Pana-Pacific

You also want an ePaper? Increase the reach of your titles
YUMPU automatically turns print PDFs into web optimized ePapers that Google loves.
Button Functions<br />
DSPL/TIME: Press DSPL/TIME to toggle between the track number/elapsed<br />
time <strong>and</strong> time of day. To change the display, see the Display section of this<br />
manual.<br />
TUNE/SEEK : Press to forward to the next track. The track number <strong>and</strong><br />
elapsed time will appear.<br />
TUNE/SEEK : Press to go to the beginning of the track being played. Press<br />
this button within the first 8 seconds of the track to go to the beginning of the<br />
previous track. The track number <strong>and</strong> elapsed time will appear.<br />
1/PAUSE: Press the 1/ button to pause a <strong>CD</strong>. PAU will appear on the display<br />
<strong>and</strong> the audio will be muted. Press the button again to resume play of the <strong>CD</strong>.<br />
2/RDM: Press the RDM button to activate r<strong>and</strong>om track selection. RDM will<br />
appear on the display <strong>and</strong> the tracks on the loaded disc will play in r<strong>and</strong>om order.<br />
Press the RDM button to turn off r<strong>and</strong>om play.<br />
3/RPT: Press the RPT button to repeat the track you are playing. RPT will appear<br />
on the display <strong>and</strong> the track you are playing will be repeated until you press the<br />
RPT button again.<br />
5/FF: Press <strong>and</strong> hold the FF button to fast-forward through a track. When you<br />
release the button, play will resume at normal speed. The track number <strong>and</strong><br />
elapsed time will appear for 5 seconds before the default display reappears.<br />
6/REV: Press <strong>and</strong> hold the REV button to fast reverse. When you release the<br />
button, play will resume at normal speed. The track number <strong>and</strong> elapsed time will<br />
appear for 5 seconds before the default display reappears.<br />
TRACK SCAN: Press SCAN/PSCAN to scan all tracks on the <strong>CD</strong>. After playing 10<br />
seconds of the current track, the player will automatically go to the next track. To<br />
end track scan, press SCAN/PSCAN again.<br />
EJECT: Press the<br />
11<br />
button to eject a <strong>CD</strong>.<br />
Troubleshooting<br />
The following error messages may appear while playing a compact disc:<br />
NO <strong>CD</strong>:<br />
FOCUS:<br />
No <strong>CD</strong> has been loaded in the player.<br />
Lens could not focus on disc. Possible reasons include:<br />
– Disc is inserted upside down – Eject <strong>and</strong> reinsert disc.<br />
– Disc is dirty, scratched, or wet – Try cleaning disc.<br />
– Lens is dirty – Clean disc lens with a lens cleaner.<br />
– It is very humid – Wait an hour <strong>and</strong> try again.<br />
ADVERTENCIAS DE DAÑOS AL VEHÍCULO<br />
En este manual encontrará las siguientes Precauciones y Avisos:<br />
PRECAUCIÓN:<br />
Significa que hay algo que podría<br />
lastimarle a usted o a otros.<br />
AVISO:<br />
En el área de PRECAUCIÓN se le informa qué peligro existe. Después se<br />
le indica qué hacer para evitar o reducir el riesgo. Por favor lea y siga estas<br />
precauciones. Podrían lastimarse usted u otros si no lo hace.<br />
En el área de AVISO se le informa de algo que podría dañar el vehículo. En<br />
muchas ocasiones este daño no está cubierto por su garantía y podría ser<br />
costoso. El aviso le indica qué hacer para evitar el daño.<br />
NOTA: Es posible que otros manuales utilicen PRECAUCIÓN y AVISO de<br />
forma distinta.<br />
INSTRUCCIONES DE FUNCION<strong>AM</strong>IENTO<br />
Significa que hay algo que podría<br />
dañar su vehículo.<br />
Para aprender cómo aprovechar su radio <strong>Delphi</strong> al máximo lea todas las<br />
siguientes instrucciones.<br />
PRECAUCIÓN:<br />
Al manejar, siempre mantenga sus ojos en el camino y sus manos en el<br />
volante, poniendo atención a las operaciones de manejo. Como siempre,<br />
el conductor es responsable de operar el vehículo de forma segura. El no<br />
mantener su vista en el camino y sus manos en el volante mientras maneja<br />
puede resultar en lesiones para usted y para otras personas.<br />
Uso del reloj<br />
Su reloj puede funcionar en modo de 12 ó 24 horas. El modo de 12 horas<br />
distingue entre <strong>AM</strong> y PM. El modo de 24 horas funciona en el horario militar.<br />
Para cambiar del sistema de 12 horas al de 24 horas:<br />
1. Conecte el encendido.<br />
2. Mantenga presionado el botón DSPL/TIME hasta que parpadeen las horas<br />
y los minutos y escuche un “beep”. Así se indica que está en el modo de<br />
configuración del reloj.<br />
3. Presione y suelte el botón 5 para cambiar entre los modos de 12 y 24 horas.<br />
El display regresa a su función predeterminada después de 5 segundos de<br />
inactividad y el modo actual queda activado.<br />
Configuración del reloj<br />
1. Conecte el encendido.<br />
2. Mantenga presionado el botón DSPL/TIME hasta que parpadeen las horas<br />
y los minutos y escuche un “beep”. Así se indica que está en el modo de<br />
configuración del reloj.<br />
3. Presione otra vez el botón DSPL/TIME hasta que parpadee la hora.<br />
4. Gire la perilla SETUP para cambiar la hora. Gir<strong>and</strong>o la perilla en el sentido<br />
de las manecillas del reloj aumenta la hora; girándola a contrarreloj se<br />
reduce la hora.<br />
32