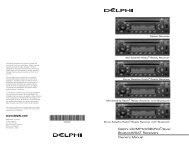
Delphi AM/FM Stereo and CD Receivers - Pana-Pacific
Delphi AM/FM Stereo and CD Receivers - Pana-Pacific
Delphi AM/FM Stereo and CD Receivers - Pana-Pacific

You also want an ePaper? Increase the reach of your titles
YUMPU automatically turns print PDFs into web optimized ePapers that Google loves.
5. Press the DSPL/TIME button again causing the minutes digits to flash.<br />
Rotate the SETUP knob to change the minutes. Rotating the knob<br />
clockwise will increase the minutes; rotating counterclockwise will<br />
decrease the minutes.<br />
6. Press the DSPL/TIME button again to complete the time set procedure. The<br />
display will return to the default display.<br />
At any time during the time set process, not pressing a button or rotating the<br />
knob for 5 seconds will cancel time set mode, return the radio to normal<br />
operation <strong>and</strong> keep whatever changes you have made.<br />
CAUTION:<br />
Only set the clock when you are not operating your vehicle. Setting the clock<br />
while operating the vehicle could result in injury to you or others. As always,<br />
the driver is responsible for safe vehicle operation.<br />
Using the Alarm<br />
The alarm activates the radio at a set time. Momentarily pressing the ALARM<br />
CLOCK button will display the alarm set time.<br />
Setting the Alarm<br />
1 With the radio on, press <strong>and</strong> hold the ALARM CLOCK button until you see<br />
the “ALARM” icon <strong>and</strong> SET. You are now in alarm set mode. The hour digits<br />
for the alarm time will begin to flash.<br />
2. Rotate the SETUP knob until the desired hour appears on the display.<br />
Rotating the knob clockwise will increase the hour; rotating<br />
counterclockwise will decrease the hour.<br />
3. Press the ALARM CLOCK button again until the minutes digits flash.<br />
4. Rotate the SETUP knob to change the minutes.<br />
5. Press the ALARM CLOCK button again until SET TONE appears on the<br />
display.<br />
6. Press the ALARM button again until VOL appears on the display. Press<br />
the button again <strong>and</strong> you will hear the alarm tone. To increase the alarm<br />
volume, rotate the SETUP knob clockwise. To decrease the alarm volume,<br />
rotate the SETUP knob counterclockwise.<br />
7. Press the ALARM CLOCK button again to finish <strong>and</strong> return the display to<br />
normal operation. The icon will appear on the display to indicate that<br />
the alarm is active.<br />
NOTE:<br />
5<br />
If you do not press any button or rotate the knob for 5 seconds during<br />
the alarm set process, alarm clock setup will be cancelled <strong>and</strong> the radio<br />
will return to normal operation, keeping whatever setting changes have<br />
been made.<br />
CAUTION:<br />
Only set the alarm when you are not operating your vehicle. Setting the alarm<br />
while operating the vehicle could result in injury to you or others. As always,<br />
the driver is responsible for safe vehicle operation.<br />
Utiliz<strong>and</strong>o la b<strong>and</strong>a meteorológica<br />
El radio meteorológico NOAA (Administración oceánica y atmosférica nacional)<br />
es un servicio del Servicio meteorológico nacional. Ofrece transmisiones<br />
continuas con la información meteorológica más reciente directamente desde<br />
las instalaciones del Servicio meteorológico nacional. Se repiten mensajes<br />
meteorológicos grabados cada cuatro a seis minutos y se actualizan cada hora<br />
hasta tres horas o con más frecuencia en caso de ser necesario. La mayoría<br />
de las estaciones transmiten las 24 horas del día.<br />
El clima para el área donde usted esté se puede encontrar en una de las 7<br />
estaciones. Cu<strong>and</strong>o se encuentre en la modalidad de la b<strong>and</strong>a meteorológica,<br />
el display muestra WEATHER, WX y el número del canal. El canal se puede<br />
cambiar con los botones TUNE/SEEK y también se pueden programar<br />
estaciones en los botones.<br />
Las frecuencias relacionadas con los canales meteorológicos son las siguientes:<br />
1. 162.400 MHz 5. 162.500 MHz<br />
2. 162.425 MHz 6. 162.525 MHz<br />
3. 162.450 MHz 7. 162.550 MHz<br />
4. 162.475 MHz<br />
El servicio meteorológico nacional transmite aproximadamente 372 estaciones.<br />
Casi el 90 por ciento de la población nacional se encuentra dentro de la<br />
cobertura de alguna transmisión del radio meteorológico de NOAA.<br />
Uso del reproductor de discos compactos (si así está equipado)<br />
El reproductor de <strong>CD</strong> integrado reproduce discos compactos de tamaño gr<strong>and</strong>e.<br />
AVISO:<br />
Nunca introduzca algo que no sea un <strong>CD</strong> en el reproductor. Esto puede dañar<br />
al reproductor, resultar en reparaciones innecesarias y/o nulificar la garantía<br />
dela unidad.<br />
Reproducción de un disco compacto<br />
1. Conecte el encendido y encienda el radio.<br />
2. Inserte un disco parcialmente en la ranura, con su etiqueta hacia arriba. El<br />
reproductor automáticamente inserta el disco después de haberlo insertado<br />
parcialmente. El ícono de <strong>CD</strong> y la palabra LOADING aparecen en el display<br />
seguidos por el número de pista y el tiempo transcurrido. Entonces el disco<br />
comienza a tocar.<br />
3. Si está escuch<strong>and</strong>o <strong>AM</strong>/<strong>FM</strong>/WX, presione el botón /AUX para reproducir<br />
un disco que esté cargado en el reproductor. Si no hay discos cargados,<br />
el display indica“NO <strong>CD</strong>”durante cinco segundos y regresa al display<br />
predeterminado. Si se ha cargado un disco, el display muestra el número<br />
de pista y el tiempo transcurrido.<br />
Si se expulsa un <strong>CD</strong> y no se saca en 16 segundos, el <strong>CD</strong> se carga de nuevo,<br />
pero no comienza su reproducción hasta que se presione el botón /AUX.<br />
38