WARRANTY SSW-05 Plus - Dimotec
WARRANTY SSW-05 Plus - Dimotec
WARRANTY SSW-05 Plus - Dimotec

Create successful ePaper yourself
Turn your PDF publications into a flip-book with our unique Google optimized e-Paper software.
ENGLISH<br />
SUMMARY - English<br />
1. Safety Instructions .......................................................................................................................................03<br />
2. What is the <strong>SSW</strong>-<strong>05</strong> <strong>Plus</strong> Soft-Starter .........................................................................................................03<br />
3. How to identify the <strong>SSW</strong>-<strong>05</strong> <strong>Plus</strong> .................................................................................................................03<br />
4. Technical Data .............................................................................................................................................04<br />
5. <strong>SSW</strong>-<strong>05</strong> <strong>Plus</strong> Description ............................................................................................................................<strong>05</strong><br />
6. Table of Powers / Currents / Power Wiring (copper wire at 70°C (158 o F)) ......................................................<strong>05</strong><br />
7. Table of Connector Tightening Torque ...........................................................................................................<strong>05</strong><br />
8. Capacity of the Power Supply Line ...............................................................................................................06<br />
9. Table of Fuses and Contactors .....................................................................................................................06<br />
10. Dimensions ................................................................................................................................................06<br />
11. <strong>SSW</strong>-<strong>05</strong> <strong>Plus</strong> Installation and Connection ..................................................................................................07<br />
12. <strong>SSW</strong>-<strong>05</strong> <strong>Plus</strong> Setting .................................................................................................................................08<br />
13. Operation of the Digital Relay Outputs........................................................................................................10<br />
14. Protections and Displays ........................................................................................................................... 11<br />
15. Overload Protection ....................................................................................................................................12<br />
16. Reset .........................................................................................................................................................13<br />
17. Faults and Possibles Causes .....................................................................................................................13<br />
18. Solving the most frequent problems ............................................................................................................15<br />
19. <strong>SSW</strong>- Options and Accessories .................................................................................................................15<br />
20. Table of Parameters (for serial communication/HMI-<strong>SSW</strong><strong>05</strong>-RS) ................................................................20<br />
21. Error code and description (for serial communication / HMI-<strong>SSW</strong><strong>05</strong>-RS) ....................................................21<br />
22. Detailed Parameter Description (for serial communication/HMI-<strong>SSW</strong><strong>05</strong>-RS) ...............................................21<br />
23. Appendix for CE Conformance ....................................................................................................................28<br />
24. EU Declaration of Conformity......................................................................................................................29<br />
Warranty <strong>SSW</strong>-<strong>05</strong> <strong>Plus</strong> ....................................................................................................................................30<br />
English-1
ENGLISH<br />
INSTALLATION<br />
AND OPERATION<br />
MANUAL<br />
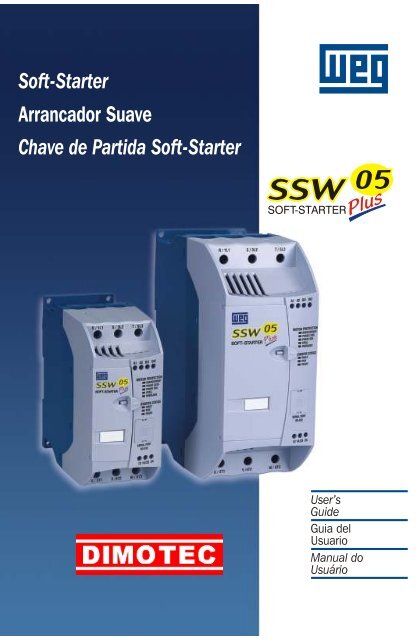
Series: <strong>SSW</strong>-<strong>05</strong> <strong>Plus</strong><br />
Software Version: 2.0X<br />
0899.4668 /5<br />
Note: 1) The <strong>SSW</strong>-<strong>05</strong> <strong>Plus</strong> electronic Soft-Starter has been designed to drive three-phase induction motors<br />
applied to light duty loads, such as centrifugal pumps, small fans and screw compressors.<br />
If the Soft-Starter shall be applied on heavy duty loads, please contact WEG.<br />
2) The serial communication is available in the <strong>SSW</strong>-<strong>05</strong> with software versions greater than V2.00.<br />
The manual of the serial communication (0899.4587) is available for download on the website<br />
www.weg.com.br.<br />
With the serial communication is possible:<br />
a) to connect the Soft-Starter in an equipment network, like PC, PLC, and others;<br />
b) to use with SuperDrive software (4171025<strong>05</strong>) for Microsoft Windows, allowing the <strong>SSW</strong>-<strong>05</strong><br />
programming and operation;<br />
c) to use the remote HMI (human machine interface) for <strong>SSW</strong>-<strong>05</strong> programming and operation.<br />
1. SAFETY INSTRUCTIONS:<br />
Always disconnect the power supply from the equipment before attempting any maintenance work.<br />
Personnel must review this entire Manual before attempting to install and operate the <strong>SSW</strong>-<strong>05</strong> <strong>Plus</strong> Soft-Starter.<br />
Only qualified personnel should plan or implement the installation, start-up, setting, operation and maintenance of<br />
this equipment.<br />
2. WHAT IS THE <strong>SSW</strong>-<strong>05</strong> PLUS SOFT-STARTER:<br />
The <strong>SSW</strong>-<strong>05</strong> <strong>Plus</strong> Soft-Starter allows smooth start/stop of three-phase induction motors.<br />
3. HOW TO IDENTIFY THE <strong>SSW</strong>-<strong>05</strong> PLUS:<br />
<strong>SSW</strong><strong>05</strong><br />
Soft-Starter<br />
WEG Series <strong>05</strong><br />
0003<br />
Rated Output<br />
Current:<br />
0003 = 3A<br />
0010 = 10A<br />
0016 = 16A<br />
0023 = 23A<br />
0030 = 30A<br />
0045 = 45A<br />
0060 = 60A<br />
0085 = 85A<br />
T<br />
Three-phase<br />
Power Supply<br />
2246<br />
Power Supply<br />
Voltage:<br />
2246 =<br />
220 to 460V<br />
4657 =<br />
460 to 575V<br />
P<br />
Manual<br />
Language:<br />
P= Portuguese<br />
E= English<br />
S= Spanish<br />
P<br />
<strong>SSW</strong>-<strong>05</strong><br />
Version:<br />
P= <strong>Plus</strong><br />
Z<br />
End of Code<br />
Example: The code <strong>SSW</strong><strong>05</strong>0010T2246PPZ means a 10A <strong>SSW</strong>-<strong>05</strong> <strong>Plus</strong>, three-phase power supply in the range<br />
from 220 to 460V, manual in Portuguese, PLUS version.<br />
English-3
ENGLISH<br />
4. TECHNICAL DATA:<br />
AC Input Power<br />
Settings<br />
Diagnostics<br />
Start Duty<br />
Digital Inputs<br />
(90...250Vac 6mA)<br />
Relay<br />
Outputs (1A 250Vac)<br />
Communication<br />
Ambient<br />
Mounting<br />
Standards<br />
Model<br />
Control Voltage (A1 and A2)<br />
Power supply<br />
(R/1L1, S/3L2, T/5L3)<br />
Pedestal Voltage<br />
Acceleration Time<br />
Deceleration Time<br />
Motor Current<br />
Maximum Number of Starts<br />
per hour<br />
Starting Cycle<br />
Temperature<br />
Humidity<br />
Altitude<br />
Degree of Protection<br />
Polution Degree (UL508)<br />
Fastening<br />
Enclosure<br />
Electromagnetic Compatibility<br />
(EMC)<br />
Low Voltage<br />
<strong>SSW</strong>-<strong>05</strong> <strong>Plus</strong><br />
90 ... 250Vac 50/60 Hz (+/- 6Hz)<br />
200 mA<br />
220 ...460 Vac (+10%,-15%) 50/60 Hz (+/- 5Hz) 3φ<br />
460 ... 575 Vac (+10%,-15%) 50/60 Hz (+/- 5Hz) 3φ<br />
30 ... 80% U N<br />
1 ... 20 s<br />
Off ... 20 s<br />
30 ... 100% I N<br />
Motor Overload Protection<br />
Incorrect Phase Sequence<br />
Phase Loss<br />
Immediate Overcurrent<br />
Locked Rotor<br />
Thyristor Overload<br />
Immediate Overload at<br />
By-pass Relay<br />
Overcurrent before By-pass<br />
Frequency out of Tolerance<br />
Internal By-pass Relay<br />
Contact is open<br />
Undervoltage at control<br />
voltage<br />
4 ( 1 start every 15 minutes)<br />
3 x I N<br />
during 10 seconds<br />
DI1 – Enable/Disable Function<br />
DI2 – Reset Function<br />
Operation Function (13 – 14/23)<br />
Full Voltage Function (14/23 – 24)<br />
Serial Interface (RS232C)<br />
0 ... 55°C (32...131°F)<br />
5 ... 90% Non Condensing<br />
0 ... 1000m (up to 13,200 ft (4000m) with<br />
10% output current derating/1000m)<br />
IP 00 (Chassis)<br />
2<br />
DIN 35mm rail or M4 fastening bolts<br />
Molded plastic box<br />
Class A (industrial use)<br />
IEC 60947-4-2 Standard<br />
UL 508 / IEC 60947-4-2<br />
English-4
ENGLISH<br />
5. <strong>SSW</strong>-<strong>05</strong> PLUS DESCRIPTION:<br />
Three-phase Input Power Supply<br />
Reset (DI2)<br />
Motor Enable/Disable Command (DI1)<br />
Electronics Power Supply (A1 and A2)<br />
Dip-switch for Protection<br />
Enable<br />
Reset Button<br />
<strong>SSW</strong>-<strong>05</strong> <strong>Plus</strong> Status LEDS<br />
Setting Trimpots<br />
Connector for Serial<br />
Interface or HMI<br />
Relay Output (13, 14/23 and 24)<br />
Output to motor<br />
6. TABLE OF POWERS / CURRENTS / POWER WIRING (COPPER WIRE AT 70°C (158 O F)):<br />
Model<br />
Rated<br />
Current<br />
Size<br />
220V...240V* 380V...415V* 440V...480V* 525V**<br />
HP<br />
kW<br />
HP<br />
kW<br />
HP<br />
kW<br />
kW<br />
575V*<br />
HP<br />
Power Wiring<br />
mm 2 (AWG)<br />
<strong>SSW</strong>-<strong>05</strong>.3<br />
<strong>SSW</strong>-<strong>05</strong>.10<br />
<strong>SSW</strong>-<strong>05</strong>.16<br />
<strong>SSW</strong>-<strong>05</strong>.23<br />
<strong>SSW</strong>-<strong>05</strong>.30<br />
<strong>SSW</strong>-<strong>05</strong>.45<br />
<strong>SSW</strong>-<strong>05</strong>.60<br />
<strong>SSW</strong>-<strong>05</strong>.85<br />
3A<br />
10A<br />
16A<br />
23A<br />
30A<br />
45A<br />
60A<br />
85A<br />
1<br />
2<br />
0.75 0.55<br />
3 2.2<br />
5 3.7<br />
7.5 5.5<br />
10 7.5<br />
15 11<br />
20 15<br />
30 22<br />
1.5 1.1<br />
5 3.7<br />
7.5 5.5<br />
10 7.5<br />
15 11<br />
25 18.5<br />
30 22<br />
50 37<br />
1.5 1.1<br />
5 3.7<br />
10 7.5<br />
15 11<br />
20 15<br />
30 22<br />
40 30<br />
60 45<br />
1.5<br />
5.5<br />
11<br />
15<br />
18.5<br />
30<br />
45<br />
55<br />
2<br />
7.5<br />
10<br />
20<br />
25<br />
40<br />
50<br />
75<br />
0.75 (18)<br />
1.5 (16)<br />
4 (12)<br />
6 (10)<br />
10 (8)<br />
16 (6)<br />
25 (4)<br />
35 (2)<br />
* According to able 45.2, UL508.<br />
** Valid for Standard 4 pole WEG motors.<br />
7. TABLE OF CONNECTOR TORQUE SETTINGS:<br />
<strong>SSW</strong>-<strong>05</strong> <strong>Plus</strong><br />
Size<br />
1<br />
2<br />
Torque of<br />
Electronics Terminal<br />
Nm (lb-in)<br />
0.5 (4.5)<br />
0.5 (4.5)<br />
Torque-Power Terminals<br />
(R, S, T, U, V and W)<br />
Nm (lb-in)<br />
3.0 (32.7)<br />
5.5 (60.0)<br />
English-5
ENGLISH<br />
8. CAPACITY OF THE POWER SUPPLY LINE:<br />
The <strong>SSW</strong>-<strong>05</strong> <strong>Plus</strong> is suitable to be used in circuits that can not supply more than X A RMS<br />
(according to table below)<br />
symmetric Ampères, Y Volts maximum:<br />
<strong>SSW</strong>-<strong>05</strong> <strong>Plus</strong><br />
Model<br />
3A<br />
10A<br />
16A<br />
23A<br />
30A<br />
45A<br />
60A<br />
85A<br />
Y = 220- 575V<br />
X (kA)<br />
5<br />
5<br />
5<br />
5<br />
5<br />
5<br />
5<br />
10<br />
9. TABLE OF FUSES AND CONTACTORS (SEE ITEM 11):<br />
<strong>SSW</strong>-<strong>05</strong> <strong>Plus</strong><br />
Model<br />
3A<br />
10A<br />
16A<br />
23A<br />
30A<br />
45A<br />
60A<br />
85A<br />
Contactor<br />
(K1)<br />
CWM09<br />
CWM12<br />
CWM18<br />
CWM25<br />
CWM32<br />
CWM50<br />
CWM65<br />
CWM95<br />
Fuse<br />
(F1, F2,F3)<br />
Type D 10A<br />
Type D 16A<br />
Type D 25A<br />
Type D 35A<br />
Type D 50A<br />
Type D 63A<br />
Type NH 100A<br />
Type NH 125A<br />
Fuse<br />
(F11, F12, F21)<br />
Type D 6A<br />
10. DIMENSIONS:<br />
Size<br />
1<br />
2<br />
Width L<br />
mm (in)<br />
59 (2.32)<br />
79 (3.11)<br />
Height H<br />
mm (in)<br />
130 (5.11)<br />
185 (7.28)<br />
Depth P<br />
mm (in)<br />
145 (5.70)<br />
172 (6.77)<br />
Fixing A<br />
mm (in)<br />
51 (2.00)<br />
71 (2.79)<br />
Fixing B<br />
mm (in)<br />
122 (4.80)<br />
177 (6.17)<br />
Fixing D<br />
mm (in)<br />
61 (2.40)<br />
99 (3.89)<br />
Fixing<br />
M4 screw/ Rail<br />
M4 screw/ Rail<br />
Weight<br />
kg (Lb)<br />
0.74 (1.63)<br />
1.67 (3.68)<br />
Notes:<br />
1) The <strong>SSW</strong>-<strong>05</strong> <strong>Plus</strong> can be fixed on DIN 35mm rail.<br />
2) In the case of fixing through M4 screw, the torque should not be greater than 0.2 Nm (1.77 lb in) for the upper<br />
screws and 1.0 Nm (8.85 lb in) for the lower screws.<br />
English-6
ENGLISH<br />
11. <strong>SSW</strong>-<strong>05</strong> PLUS INSTALLATION AND CONNECTION:<br />
11.1. Simplified Start/Stop on 230V/400 line:<br />
230/400V<br />
Symbol<br />
Description<br />
Fuse<br />
Disconnecting Switch<br />
(opens under load)<br />
Transformer<br />
N.O. switch<br />
(with holding)<br />
N.C. push button<br />
(with automatic return)<br />
N.O. push button<br />
(with automatic return)<br />
Contactor (coil)<br />
Three-phase induction<br />
motor<br />
11.2. Starting and Stopping using Contactor and Push Buttons:<br />
Symbol<br />
Description<br />
Fuse<br />
Disconnecting Switch<br />
(opens under load)<br />
Transformer<br />
N.O. switch<br />
(with holding)<br />
N.C. push button<br />
(with automatic return)<br />
N.O. push button<br />
(with automatic return)<br />
Contactor (coil)<br />
Three-phase induction<br />
motor<br />
The “T1” transformer is only required when the<br />
line voltage is out of the range allowed for the<br />
electronics supply (90 – 250Vac). For 400V,<br />
use neutral conductor (N) and one phase.<br />
English-7
ENGLISH<br />
11.3. Start/Stop by using Push Button and Operation Function Relay of the <strong>SSW</strong>-<strong>05</strong> <strong>Plus</strong>:<br />
Symbol<br />
Description<br />
Fuse<br />
Disconnecting Switch<br />
(opens under load)<br />
Transformer<br />
N.O. switch<br />
(with holding)<br />
N.C. push button<br />
(with automatic return)<br />
N.O. push button<br />
(with automatic return)<br />
Contactor (coil)<br />
Three-phase induction<br />
motor<br />
The “T1” transformer is only required when the<br />
line voltage is out of the range allowed for the<br />
electronics supply (90 – 250Vac). For 400V,<br />
use neutral conductor (N) and one phase.<br />
12. <strong>SSW</strong>-<strong>05</strong> PLUS SETTING:<br />
12.1. Pedestal Voltage Setting:<br />
Set the pedestal voltage to a value that the motor starts to run as soon as run command is given by the <strong>SSW</strong>-<strong>05</strong><br />
<strong>Plus</strong>.<br />
The dot<br />
indicates the<br />
factory default<br />
Trimpot for the<br />
pedestal<br />
voltage setting<br />
12.2. Setting of the acceleration ramp time:<br />
Set the value so that the motor accelerates to the rated speed.<br />
Note: Please consider that in the cases where rated <strong>SSW</strong>-<strong>05</strong> <strong>Plus</strong> current is equal to the rated motor current,<br />
the <strong>SSW</strong>-<strong>05</strong> <strong>Plus</strong> can be operated, at maximum, during 10 seconds at 3 x IN.<br />
Trimpot for<br />
the<br />
acceleration<br />
Ramp time<br />
setting<br />
English-8
ENGLISH<br />
12.3. Setting of the deceleration ramp:<br />
This setting should be used only for deceleration of pumps in order to reduce hydraulic shocks. This setting must be<br />
made in order to obtain the best pump performance.<br />
Trimpot for the<br />
deceleration<br />
Ramp time<br />
setting<br />
12.4. Setting of the Motor Current:<br />
This setting defines the ratio of the <strong>SSW</strong>-<strong>05</strong> <strong>Plus</strong> current and the driven motor current. The setting of this value is very<br />
important, since it defines the protection of the motor driven by the <strong>SSW</strong>-<strong>05</strong> <strong>Plus</strong>. The setting of this function has<br />
direct influence over the following motor protections: overcurrent, overload, locked rotor, phase loss.<br />
Calculation example:<br />
Used <strong>SSW</strong>-<strong>05</strong> <strong>Plus</strong>: 30A<br />
Used Motor: 25A<br />
I Motor<br />
Setting of the Motor Current =<br />
I <strong>SSW</strong>-<strong>05</strong> <strong>Plus</strong><br />
Setting of the Motor Current = 25A<br />
30A<br />
Setting of the Motor Current = 0.833<br />
Thus it must be set at 83%.<br />
Trimpot for<br />
the motor<br />
current<br />
setting<br />
English-9
ENGLISH<br />
13. OPERATION OF THE DIGITAL RELAY OUTPUTS:<br />
t<br />
t<br />
Relay On<br />
t<br />
The relay of the Operation Function closes its N.O. contact (13-14/23) always when the <strong>SSW</strong>-<strong>05</strong> <strong>Plus</strong> receives the<br />
enable command. This contact is open only at the end of the deceleration ramp (when it is set via trimpot) or when<br />
the <strong>SSW</strong>-<strong>05</strong> <strong>Plus</strong> receives the disable command.<br />
The relay of the Full Voltage Function closes the N.O. contact (14/23-24) always when the <strong>SSW</strong>-<strong>05</strong> <strong>Plus</strong> applies<br />
100% voltage to the driven motor. This contact opens when the <strong>SSW</strong>-<strong>05</strong> <strong>Plus</strong> receives the disable command.<br />
English-10
ENGLISH<br />
14. PROTECTIONS AND DISPLAYS:<br />
Protection/Display<br />
Description<br />
Overcurrent*<br />
Phase Loss*<br />
Locked Rotor*<br />
Motor overload<br />
protection*<br />
Overcurrent of the<br />
<strong>SSW</strong>-<strong>05</strong> <strong>Plus</strong><br />
By-pass relay<br />
Overcurrent before<br />
By-pass<br />
Thyristor<br />
overload<br />
Frequency out<br />
of Tolerance<br />
Internal By-pass<br />
relay contact is<br />
open<br />
Display<br />
LED<br />
(overcurrent)<br />
LED<br />
(Phase Loss)<br />
Incorrect Phase LED<br />
Sequence* (Phase Seq)<br />
Undervoltage in the<br />
Control Supply<br />
Ready to operate<br />
In Operation<br />
LED (Stall)<br />
LED<br />
(Overload)<br />
LED<br />
(Internal Fault)<br />
LED<br />
Internal Fault)<br />
LED<br />
(Internal Fault)<br />
LED<br />
(Internal Fault)<br />
LED<br />
(Internal Fault)<br />
LED<br />
(Internal Fault)<br />
LED<br />
(Ready)<br />
LED<br />
(Run)<br />
Activation<br />
Monitoring is activated only when the <strong>SSW</strong>-<strong>05</strong> <strong>Plus</strong> is in rated duty<br />
(100% voltage). It trips, when the motor current exceeds 3 times the<br />
value set with the trimpot (Motor Current) during a time longer than 1<br />
second.<br />
It trips after 1s elapses with phase loss, both at the input and at the<br />
output (Motor).<br />
It trips when the current flowing through the <strong>SSW</strong>-<strong>05</strong> is lower than<br />
30% of the current set with trimpot (Motor Current).<br />
The error trips when in incorrect phase sequence.<br />
This protection trips during the transition between the end<br />
of the acceleration ramp time and the contact closure of the internal<br />
by-pass relays of the <strong>SSW</strong>-<strong>05</strong> <strong>Plus</strong>, when the current flowing through<br />
the <strong>SSW</strong>-<strong>05</strong> <strong>Plus</strong> is higher than or equal to 2 times the current set<br />
with trimpot (Motor Current).<br />
This protection monitors constantly the motor current and compares<br />
it with the value set by the trimpot (Motor Current).<br />
See Item 15.<br />
This protection monitors only when <strong>SSW</strong>-<strong>05</strong> <strong>Plus</strong> is operating at full<br />
voltage (100%). It trips when the current becomes higher than 2<br />
times the rated current of the <strong>SSW</strong>-<strong>05</strong> <strong>Plus</strong> and is present for more<br />
than 1 second. The internal fault LED flashes 5 times intermittently.<br />
This protection trips during the transition between the end of the<br />
acceleration ramp time and the contact making of the internal bypass<br />
relays of the <strong>SSW</strong>-<strong>05</strong> <strong>Plus</strong>, when the current flowing through<br />
the <strong>SSW</strong>-<strong>05</strong> <strong>Plus</strong> is higher or equal to 2 times the rated current of the<br />
<strong>SSW</strong>-<strong>05</strong> <strong>Plus</strong>. The internal fault LED flashes 4 times intermittently.<br />
This protection monitors the current that flows through the <strong>SSW</strong>-<strong>05</strong><br />
<strong>Plus</strong> during the acceleration and deceleration ramp time, and compares<br />
it with the rated current of the <strong>SSW</strong>-<strong>05</strong> <strong>Plus</strong>. Fig. 15.2 shows<br />
the trip time curves when thyristors are overloaded. The internal fault<br />
LED flashes 6 times intermittently.<br />
This protection trips when the line frequency is out of range (+/-<br />
10%), when compared with the rated frequency (50 Hz or 60Hz). The<br />
internal fault LED flashes 1 time intermittently.<br />
This protection monitors, if the contact of the internal by-pass relay<br />
of the <strong>SSW</strong>-<strong>05</strong> <strong>Plus</strong> is closed ( it operates only when the <strong>SSW</strong>-<strong>05</strong><br />
<strong>Plus</strong> is operated at full voltage (100%). The internal fault LED flashes<br />
3 times intermittently.<br />
This protection monitors the control supply voltage of the electronics<br />
(A1 and A2) constantly and trip always when Vac voltage become<br />
lower than 80% of the rated voltage. The internal fault LED flashes 2<br />
times intermittently.<br />
- ON: <strong>SSW</strong>-<strong>05</strong> <strong>Plus</strong> has been powered, and is waiting for the enable<br />
command, or with full voltage at output. - Flashing: <strong>SSW</strong>-<strong>05</strong> <strong>Plus</strong> in<br />
acceleration/deceleration ramp time.<br />
It is On only when <strong>SSW</strong>-<strong>05</strong> <strong>Plus</strong> is operating (motor is operating with<br />
full voltage).<br />
* These protections may be enabled/disabled through the respective dip-switches.<br />
English-11
ENGLISH<br />
15. OVERLOAD PROTECTION:<br />
15.1. Motor Electronic Overload Protection:<br />
The motor electronic overload protection simulates the motor heating (Thermal Image). This heating simulation uses<br />
as input data the True RMS current. Fig. 15.1 shows the curve of the actuation time with motor under overload<br />
condition. The temperature class of this function is, according to the IEC 947-4-2, Class 10.<br />
t(s)<br />
1 + 10 4<br />
1 + 10 3<br />
100<br />
Cold Condition<br />
Hot Condition<br />
10<br />
1<br />
% Ief<br />
100 200 300 400 500 600 700 800<br />
Figure 15.1 - Curve of the motor electronic overload protection.<br />
Notes:<br />
1) When <strong>SSW</strong>-<strong>05</strong> <strong>Plus</strong> electronics (A1 and A2) is without power control supply voltage, the thermal image<br />
is saved internally. When the power supply voltage is re-established again (A1 and A2), the value of the<br />
thermal image returns to the value present before the loss of the power control supply.<br />
2) When the electronic overload protection is disabled via dip-switch, the thermal image is reset;<br />
3) The reset of the electronic overload protection can be set to manual function (man). In this case the<br />
reset must be made via digital input 2 (DI2) or by means of the reset button. If the reset setting has been<br />
set to automatic (auto), the error condition will be reset automatically after the cooling of the equipment.<br />
t(s)<br />
1 + 10 3<br />
100<br />
Cold Condition<br />
10<br />
Hot Condition<br />
1<br />
0.1<br />
% In<br />
100 200 300 400 500 600 700 800<br />
Figure 15.2 - Curve of the thyristor overload.<br />
Note:<br />
When the motor is running in full voltage, the cooling of the thyristor overload Thermal Image happens.<br />
This is because of the By-pass of the thyristors.<br />
English-12
ENGLISH<br />
16. RESET:<br />
The error condition can be reset through the reset button at the front of the <strong>SSW</strong>-<strong>05</strong> <strong>Plus</strong>, or through a momentary<br />
contact closure (0.5 seconds) at DI2 (digital input for reset). Other alternative to reset the <strong>SSW</strong>-<strong>05</strong> <strong>Plus</strong> is by<br />
switching On/Off the power control supply of the electronics (A1 and A2).<br />
Note:<br />
The <strong>SSW</strong>-<strong>05</strong> <strong>Plus</strong> also provides the automatic reset by enabling this function through the dip-switch (auto):<br />
1) The automatic reset occurs after 15 minutes in the following fault conditions:<br />
- Overcurrent, Phase Loss, Locked Rotor, Immediate overcurrent of the <strong>SSW</strong>-<strong>05</strong> <strong>Plus</strong> by-pass relay, Overcurrent<br />
before By-pass, Frequency out of tolerance, Contact of the internal By-pass relay is open and power control<br />
supply undervoltage.<br />
2) For incorrect phase sequence there is no automatic reset.<br />
3) For motor overload and thyristor overload there is a specific algorithm for the automatic reset time.<br />
VERY IMPORTANT!<br />
Both digital input (DI2) and reset button of the <strong>SSW</strong>-<strong>05</strong> <strong>Plus</strong> should be used only for the reset after a fault condition.<br />
If the reset function is used when the <strong>SSW</strong>-<strong>05</strong> <strong>Plus</strong> is operating at rated voltage, the internal by-pass relays will open<br />
their contacts under load, thus jeopardizing their life.<br />
17. FAULTS AND POSSIBLE CAUSES:<br />
When a fault is detected, the Soft-Starter is disabled and the Fault Code is displayed by flashing LED´s or on the<br />
readout display in the EXX form, where XX is the actual Fault Code.<br />
To restart the Soft-Starter after a fault has occurred, the Soft-Starter must be reset. In general, the reset can be made<br />
as follows:<br />
disconnecting and reapplying the AC power (power-on reset);<br />
by pressing the key “RESET” on the <strong>SSW</strong><strong>05</strong>-RS front panel (reset key);<br />
through the HMI-<strong>SSW</strong><strong>05</strong>-RS by pressing the key (manual reset);<br />
automatic reset by enabling the function through the dip-switch (auto) or though P106 and P220.<br />
via digital input: DI2.<br />
Table below explains how to reset the fault and show the possible causes for each Fault Code.<br />
Protection<br />
Description<br />
Phase Loss<br />
Motor Overload<br />
External Fault<br />
Error in the Copy<br />
Function<br />
<strong>SSW</strong>-<strong>05</strong><br />
Front Panel<br />
LED<br />
(Phase Loss)<br />
LED<br />
(Overload)<br />
Fault Display<br />
Available only when<br />
HMI-<strong>SSW</strong><strong>05</strong>-RS or serial<br />
communication is used<br />
(see chapter 19)<br />
Available only when<br />
HMI-<strong>SSW</strong><strong>05</strong>-RS is used<br />
(see chapter 19)<br />
HMI-<strong>SSW</strong><strong>05</strong>-RS<br />
(see chapter 19.3)<br />
E03<br />
E<strong>05</strong><br />
E06<br />
E10<br />
Reset<br />
Power-on<br />
Reset key<br />
key<br />
Auto-reset<br />
DI2.<br />
Power-on<br />
key<br />
Auto-reset<br />
Power-on<br />
Reset key<br />
key<br />
DI2.<br />
Power-on<br />
key<br />
Possibles Causes<br />
Phase fault in the three-phase<br />
network<br />
Short-circuit or thyristor fault<br />
Motor is not connected<br />
Motor connection is not correct<br />
“Motor Current” trimpot or P1<strong>05</strong><br />
(motor current) has been set<br />
incorrectly. The set value is too<br />
low for the motor being used.<br />
Load on the motor shaft too high.<br />
Too much successive motor starts.<br />
The wiring at DI1 is open (not<br />
connected).<br />
Keypad cable misconnected.<br />
Electrical noise in the<br />
installation (electromagnetic<br />
interference).<br />
English-13
ENGLISH<br />
Protection<br />
Description<br />
Keypad HMI<br />
Connection Fault<br />
Locked Rotor<br />
Thyristor overload<br />
Overcurrent<br />
Incorrect phase<br />
sequence<br />
Undervoltage in the<br />
Control Supply<br />
Internal<br />
By-pass relay<br />
contact is open<br />
Overcurrent before<br />
By-pass<br />
Overcurrent of the<br />
<strong>SSW</strong>-<strong>05</strong> By-pass<br />
relay<br />
Frequency out of<br />
tolerance<br />
<strong>SSW</strong>-<strong>05</strong><br />
Front Panel<br />
Available only when<br />
HMI-<strong>SSW</strong><strong>05</strong>-RS is used<br />
(see chapter 19)<br />
LED<br />
(Stall)<br />
LED<br />
(Internal Fault)<br />
flashes 6 times<br />
LED<br />
(Overcurrent)<br />
LED<br />
(Phase Seq)<br />
LED<br />
(Internal Fault)<br />
flashes 2 times<br />
LED<br />
(Internal Fault)<br />
flashes 3 times<br />
LED<br />
(Internal Fault)<br />
flashes 4 times<br />
LED<br />
(Internal Fault)<br />
flashes 5 times<br />
LED<br />
(Internal Fault)<br />
flashes 1 time<br />
Fault Display<br />
HMI-<strong>SSW</strong><strong>05</strong>-RS<br />
(see chapter 19.3)<br />
E31<br />
E63<br />
E64<br />
E66<br />
E67<br />
E70<br />
E71<br />
E72<br />
E73<br />
E75<br />
Reset<br />
Power-on<br />
This fault disappears<br />
automatically<br />
when HMI<br />
reestablishes<br />
the communication<br />
with the<br />
Soft-Starter.<br />
Power-on<br />
Reset key<br />
key<br />
Auto-reset<br />
DI2.<br />
key<br />
Auto-reset<br />
Power-on<br />
Reset key<br />
key<br />
Auto-reset<br />
DI2.<br />
Power-on<br />
Reset key<br />
key<br />
DI2.<br />
Power-on<br />
Reset key<br />
key<br />
Auto-reset<br />
DI2.<br />
Power-on<br />
Reset key<br />
key<br />
Auto-reset<br />
DI2.<br />
Power-on<br />
Reset key<br />
key<br />
Auto-reset<br />
DI2.<br />
Power-on<br />
Reset key<br />
key<br />
Auto-reset<br />
DI2.<br />
Power-on<br />
Reset key<br />
key<br />
Auto-reset<br />
DI2.<br />
Possibles Causes<br />
Keypad cable misconnected.<br />
Electrical noise in the<br />
installation (electromagnetic<br />
interference).<br />
The time programmed for the<br />
acceleration ramp is shorter than<br />
the actual acceleration time.<br />
Load on the motor shaft too high<br />
Too much successive starts.<br />
Short-circuit between phases.<br />
Motor shaft is locked.<br />
Network phase sequence<br />
inverted at the input.<br />
Electronics supply lower than the<br />
required one.<br />
<strong>SSW</strong>-<strong>05</strong> is defective.<br />
The time programmed for the<br />
acceleration ramp is shorter than<br />
the actual acceleration time.<br />
Short-circuit between phases.<br />
Motor shaft is locked.<br />
The line frequency is out of range<br />
(+/- 10%), when compared<br />
with the rated frequency (50Hz<br />
or 60Hz).<br />
Note:<br />
To prevent the E31 fault, when HMI-<strong>SSW</strong><strong>05</strong>-RS is applied, please avoid resetting the fault through the digital inputs<br />
(DI2) and through the reset key located on the <strong>SSW</strong>-<strong>05</strong> front panel.<br />
English-14
ENGLISH<br />
18. SOLVING THE MOST FREQUENT PROBLEMS:<br />
Problem<br />
Motor does not<br />
runs<br />
Motor speed<br />
oscillates<br />
Motor speed<br />
too high or too low<br />
Points to be checked<br />
Wrong wiring<br />
Power Supply Loss<br />
Setting<br />
Fault<br />
Loose connections<br />
Motor Nameplate Data<br />
Corrective Actions<br />
1. Check all power and control connections<br />
1. Check the power supply (R, S, T)<br />
2. Check the power control supply (A1, A2)<br />
1. Check if the settings are correct for the application.<br />
1. Check if the <strong>SSW</strong>-<strong>05</strong> <strong>Plus</strong> is not in locking condition<br />
(refer to item 14 – Protections and Display).<br />
1. Switch Off the <strong>SSW</strong>-<strong>05</strong> <strong>Plus</strong>, switch off the power supply and<br />
tighten all connections.<br />
2. Check all internal <strong>SSW</strong>-<strong>05</strong> <strong>Plus</strong> connections.<br />
1. Check if the motor has been selected according to the application.<br />
Shocks during pump<br />
deceleration<br />
Shocks during pump<br />
acceleration<br />
Soft-Starter Setting<br />
Soft-Starter Setting<br />
1. Reduce the time of the deceleration ramp time.<br />
1. Reduce the time of the acceleration ramp time.<br />
2. Reduce the setting of the pedestal voltage.<br />
19. <strong>SSW</strong>-<strong>05</strong> OPTIONS AND ACCESSORIES:<br />
This chapter describes the optional devices that can be used with the <strong>SSW</strong>-<strong>05</strong>. The table below shows a list of<br />
existing optional devices.<br />
Name<br />
CAB-RS-1<br />
CAB-RS-2<br />
CAB-RS-3<br />
MIW-02<br />
HMI-<strong>SSW</strong><strong>05</strong>-RS<br />
Function<br />
Cable for the remote serial keypad - cable: 1m (3.28ft)<br />
Cable for the remote serial keypad - cable: 2m (6.56ft)<br />
Cable for the remote serial keypad - cable: 3m (9.84ft)<br />
RS-232 to RS-485 conversion module<br />
External serial Keypad HMI. For remote use with the<br />
CAB-RS cable (up to 3m (9.84ft)). Keypad Copy Function.<br />
WEG Item<br />
Number<br />
0307.7827<br />
0307.7828<br />
0307.7829<br />
41710<strong>05</strong>43<br />
417100996<br />
Table 19.1 - Available optional devices for the <strong>SSW</strong>-<strong>05</strong>.<br />
19.1. CAB-RS-1, CAB-RS-2, CAB-RS-3:<br />
Cables used to connect the Soft-Starter to the external serial interface keypad (HMI-<strong>SSW</strong><strong>05</strong>-RS).<br />
There are 3 cables options ranging in lenghts from 1m (3.28ft) to 3m (9.84ft). The user must select among these<br />
lengths according to his requirement.<br />
You must plan carefully the wiring location by separating it at least 10cm (3.9in) from the power wiring.<br />
Soft-Starter<br />
HMI<br />
RJ Connector<br />
DB9 Connector<br />
Figure 19.1 - Cable CAB-RS for HMI-<strong>SSW</strong><strong>05</strong>-RS.<br />
CABLE CONECTIONS<br />
DB9 PINS<br />
1 Vcc<br />
2 RX<br />
3 TX<br />
5 GND<br />
RJ PINS<br />
1 Vcc<br />
6 TX<br />
4 RX<br />
5 GND<br />
English-15
ENGLISH<br />
19.2. MIW-02:<br />
External module for conversion from RS-232 to RS-485: it allows the connection of the <strong>SSW</strong>-<strong>05</strong> to a standard RS-485<br />
line. So the Soft-Starter can participate in a multipoint line up to 1000m (3280ft) without the use of transducers.<br />
For more details about this connection, see the MIW-02 USER MANUAL (0899.4430), available for download on the<br />
website www.weg.com.br .<br />
Weg Network<br />
RS-485<br />
RS-485<br />
RS-232<br />
MIW-02<br />
<strong>SSW</strong>-<strong>05</strong> RJ Connector<br />
Serial Port RS-232<br />
Figure 19.2 - Connection of the <strong>SSW</strong>-<strong>05</strong> to a standard RS-485 communication network.<br />
19.3. HMI-<strong>SSW</strong><strong>05</strong>-RS:<br />
Remote serial keypad: this interface is mounted external to the Soft-Starter and can be used in the following cases:<br />
applications that require a remote keypad;<br />
installation on panel door;<br />
when the keypad copy function is required for the transfer of parameter values from one Soft-Starter to another.<br />
It operates with the cable CAB-RS-X, which length must be chosen according to the needs (up to 9.84ft).<br />
Figure 19.3 - Dimensions of the HMI-<strong>SSW</strong><strong>05</strong>-RS.<br />
English-16
ENGLISH<br />
19.3.1. HMI-<strong>SSW</strong><strong>05</strong>-RS Description:<br />
The HMI-<strong>SSW</strong><strong>05</strong>-RS has a LED display with 4 digits of 7 segments, 2 status LEDs and 5 keys. The figure below<br />
shows the front view of the keypad.<br />
LED Display<br />
Led “Run”<br />
Led “Ready”<br />
Figure 19.4 - Front view of the HMI-<strong>SSW</strong><strong>05</strong>-RS.<br />
Functions of the LED Display:<br />
The LED display shows the parameter number and its value. It also shows the fault codes and status.<br />
Functions of the “ready” and “run” LEDs:<br />
Ready- On: <strong>SSW</strong>-<strong>05</strong> <strong>Plus</strong> has been powered, and is waiting for the enable command, or with full voltage at output.<br />
- Flashing: <strong>SSW</strong>-<strong>05</strong> in acceleration or deceleration ramp time.<br />
Run - It is On only when <strong>SSW</strong>-<strong>05</strong> is operating (motor is operating with full voltage).<br />
Basic Functions of the Keys:<br />
- Enable the Soft-Starter (Start);<br />
- Disable the Soft-Starter (Stop). Also resets the Soft-Starter after a fault has occurred;<br />
- Toggles the LED display between parameter number and its value (number/value);<br />
- Increases the parameter number or the parameter value.<br />
- Decreases the parameter number or the parameter value.<br />
Note:<br />
In the occurrence of errors when using an HMI-<strong>SSW</strong><strong>05</strong>-RS, the reset of errors must be done through the key .<br />
Reset through the key present in the frontal of the Soft-Starter causes loss of communication of the HMI, resulting in<br />
E31. To re-establish the communication between the HMI and the Soft-Starter it is necessary to detach and to<br />
reconnect the serial cable, or else to power down and to power up the Soft-Starter again.<br />
19.3.2. Use of the keypad:<br />
The keypad is used for programming and operating the <strong>SSW</strong>-<strong>05</strong>, allowing the following functions:<br />
- indication of the Soft-Starter status and operation variables;<br />
- fault indication and diagnostics;<br />
- viewing and programming parameters;<br />
- operation of the Soft-Starter (Keys and ).<br />
19.3.3. Signaling/Indications on the HMI-<strong>SSW</strong><strong>05</strong>-RS Display:<br />
Soft-Starter Status:<br />
Soft-Starter is ready to be started.<br />
English-17
ENGLISH<br />
Soft-Starter is in fault condition. The code is flashing. In our example, the fault message is E03<br />
(Phase Loss).<br />
Soft-Starter is executing the function “Load factory setting (P204)”<br />
Note:<br />
The display also flashes, besides the fault condition, in the following condition:<br />
Attempt to change parameter with incorrect password (P000 – Access Parameter);<br />
Attempt to change not permitted parameter. Example: Parameters that cannot be changed with running motor.<br />
19.3.4. Parameter Viewing and Programming:<br />
All <strong>SSW</strong>-<strong>05</strong> settings can be made through parameters. The parameter are shown on the display by the letter P<br />
followed by a number:<br />
Example (P264):<br />
264 = parameter number<br />
Each parameter is associated with a numerical value (parameter value), that corresponds to the selected option<br />
among the available ones for this parameter.<br />
The parameter values define the Soft-Starter programming or the value of a variable (e.g.: current, voltage). For Soft-<br />
Starter programming you should change the parameter content(s).<br />
ACTION HMI DISPLAY DESCRIPTION<br />
Turn ON the Soft-Starter<br />
Soft-Starter is ready to be operated<br />
Press the<br />
key<br />
Use the keys<br />
to reach P264<br />
and<br />
Select the desired parameter<br />
Press the<br />
Key<br />
Numerical value associated with the<br />
parameter (2)<br />
Use the keys<br />
and<br />
Set the new desired value (2)<br />
Press the<br />
Key<br />
(1) (2)<br />
Note:<br />
(1) By pressing the key after the reprogramming, the new programmed value will be stored automatically<br />
and will remain stored until a new value is programmed.<br />
(2) To allow the reprogramming of any parameter (except for P000) it is required to set P000 = 5. Otherwise you can<br />
only read the parameter values, but not reprogram them. For more details, see P000 detailed description.<br />
English-18
ENGLISH<br />
19.3.5. HMI-<strong>SSW</strong><strong>05</strong>-RS Installation:<br />
The HMI-<strong>SSW</strong><strong>05</strong>-RS can be installed directly on the panel door 1 to 3mm (0.04in to 0.12in), as shown in the figure<br />
below:<br />
Figure 19.5 - HMI-<strong>SSW</strong><strong>05</strong>-RS Installation.<br />
19.3.6. HMI-<strong>SSW</strong><strong>05</strong>-RS Start-up:<br />
After installation (including interconnecting cable), power up the Soft-Starter.<br />
The HMI-<strong>SSW</strong><strong>05</strong>-RS must display “rdy”.<br />
To enable the keys and of the HMI-<strong>SSW</strong><strong>05</strong>-RS, is necessary to program P264 ≠ 1.<br />
19.3.7. Keypad Copy Function:<br />
The HMI-<strong>SSW</strong><strong>05</strong>-RS keypad still has an additional function: the Keypad Copy Function. This function is useful when<br />
one wants to copy the settings of one Soft-Starter (source Soft-Starter) to another (target Soft-Starter) or one needs<br />
to program several Soft-Starters with the same settings.<br />
This is done as follows: the parameters of the source Soft-Starter are copied to a non-volatile memory of the HMI-<br />
<strong>SSW</strong><strong>05</strong>-RS Keypad, and then from this keypad to another Soft-Starter (“target Soft-Starter”). The keypad copy<br />
function is controlled by the parameter P215.<br />
For further information on this function, refer to detailed parameter description of P215.<br />
English-19
ENGLISH<br />
20. TABLE OF PARAMETERS (FOR SERIAL COMMUNICATION / HMI-<strong>SSW</strong><strong>05</strong>-RS):<br />
Parameter<br />
Parameter Function Range of the Factory User<br />
(Reading) Internal Values Setting Setting<br />
P000 (2) Parameter Access<br />
0 ... 4, 6... 9999 = Read<br />
5 = Alteration<br />
0 21<br />
P002 Motor Current Indication (%) 000,0 ... 999,9 (% In) 21<br />
P003 Motor Current Indication (A) 000,0 ... 999,9 (A) 21<br />
P023 Software Version 21<br />
P<strong>05</strong>0<br />
Status Indication of the 0 ... 250<br />
motor overload protection 250 = error<br />
21<br />
Page<br />
Parameter<br />
P101 Initial voltage 30 ... 80 (% Un) 30 21<br />
P102 Time of the Acceleration Ramp 1 ... 20 (s) 10 22<br />
P104 Time of the Deceleration Ramp 0 ... 20 (s) 0 = off 22<br />
P1<strong>05</strong> (1) Motor Current Setting 30 ... 100 (%) 100 22<br />
P106 (1) Protection Configuration 0 ... 3F Hexadecimal 1F Hex. 22<br />
P204 (1) Load Factory Setting<br />
0 = No function<br />
1 = No function<br />
2 = No function<br />
3 = No function<br />
4 = No function<br />
5 = Load factory default<br />
0 25<br />
P215 (1) Keypad Copy Function<br />
0 = Off<br />
1 = Copy (<strong>SSW</strong> -> keypad)<br />
2 = Paste (keypad -> <strong>SSW</strong>)<br />
0 25<br />
HMI/(Trimpots and Dip Switch) 0 = Trimpots and Dip Switch<br />
P220 (1) Selection<br />
1 = HMI<br />
0 26<br />
P264 (1)<br />
0 = Not used<br />
Programmable Digital Input<br />
1 = Enable / Disable<br />
DI 1<br />
2 = External Fault<br />
1 26<br />
P277 (1)<br />
1 = Full voltage<br />
Programmable relay output<br />
2 = Error<br />
(14/23 - 24)<br />
3 = Serial Com.<br />
1 26<br />
0 = 3 A<br />
(1) (2)<br />
P295 Rated<br />
Parameter Function Range of the Factory User<br />
(Reading and Writing) Internal Values Setting Setting<br />
current of the Soft-Starter<br />
1 = 10 A<br />
2 = 16 A<br />
3 = 23 A<br />
4 = 30 A<br />
5 = 45 A<br />
6 = 60 A<br />
7 = 85 A<br />
According<br />
to the Type<br />
P308 Network Address 1 ... 30 1 26<br />
1 = only Error<br />
P313<br />
4 = P264 → 1<br />
Action of the serial<br />
2 = ramp disabling<br />
communication verification 3 = General disabling<br />
26<br />
P314<br />
Verification Time of the<br />
Serial Communication<br />
0 ... 5 (s) 0 = oFF 27<br />
Page<br />
26<br />
(1)<br />
These Parameters can be changed only with stopped motor.<br />
(2)<br />
These Parameters are not changed through the function “Loads Parameters with Factory Setting” (P204).<br />
English-20
ENGLISH<br />
21. ERROR CODE AND DESCRIPTION (FOR SERIAL COMMUNICATION / HMI-<strong>SSW</strong><strong>05</strong>-RS):<br />
Display<br />
Description<br />
E03 Phase loss<br />
E<strong>05</strong> Output overload (Ixt function)<br />
E06 External fault<br />
E10 Error in the copy function<br />
E2x Serial communication error<br />
E22 Longitudinal parity fault<br />
E24 Parameterization fault<br />
E25 Variable or parameter not existing<br />
E26 Expected value out of the allowed limits<br />
E27 Writing attempt in a read only variable or logical control disabled<br />
E29 Error of the cyclic serial communication interrupted<br />
E31 Keypad connection fault<br />
E63 Locked rotor<br />
E64 Thyristor overload<br />
E66 Overcurrent<br />
E67 Incorrect phase sequence<br />
E70 Undervoltage in the control supply<br />
E71 Internal By-pass relay contact is open<br />
E72 Overcurrent before the By-pass<br />
E73 Overcurrent of the <strong>SSW</strong>-<strong>05</strong> By-pass relay<br />
E75 Frequency out of tolerance<br />
22. DETAILED PARAMETER DESCRIPTION (FOR SERIAL COMMUNICATION/HMI-<strong>SSW</strong><strong>05</strong>-RS):<br />
Parameter<br />
P000<br />
Access Parameter<br />
Description / Notes<br />
Releases the access to change the parameter values.<br />
The password is 5.<br />
P002<br />
Motor Current Indication<br />
(%)<br />
Indicates the motor current in percent (%) of nominal current.<br />
P003<br />
Motor Current Indication<br />
(A)<br />
Indicates the motor current directly in Amps.<br />
Is necessary to program P295 correctly. This is important in the correct indication value in<br />
amperes<br />
P023<br />
Software Version<br />
Indicates the version of the software installed in the CPU.<br />
P<strong>05</strong>0<br />
Status Indication of the<br />
Motor Thermal Protection<br />
Indicates in percentage the status of the thermal motor protection (0 ... 250). 250 is the<br />
point where the thermal motor protection trips, E<strong>05</strong>.<br />
P101<br />
Initial Voltage (%Un)<br />
It sets the start voltage (%Un) that will be applied to the motor according to Figure 22.1.<br />
When P220 = 0, the parameter content indicates the value that has been set through the<br />
trimpot. When the trimpot has been set to the maximum value, the value indicated at the<br />
Parameter may be lower than expected. This is due to mechanical limits variations. The<br />
parameter content cannot be changed through the keypad when P220 = 0.<br />
With P220=1, the content of the parameter indicates the value programmed through the<br />
serial communication or HMI.<br />
English-21
ENGLISH<br />
Parameter<br />
Description / Notes<br />
UN<br />
P101<br />
t(s)<br />
Figure 22.1 - Acceleration Ramp<br />
P102<br />
P102<br />
Time of the<br />
Acceleration Ramp (s)<br />
It defines the ramp time of the voltage increment, as shown in Figure 22.1.<br />
When P220 = 0, the parameter content indicates the value that has been set through the<br />
trimpot. When the trimpot has been set to the maximum value, the value indicated at the<br />
Parameter may be lower than expected. This is due to mechanical limits variations. The<br />
parameter content cannot be changed through the keypad when P220 = 0.<br />
With P220=1, the content of the parameter indicates the value programmed through the<br />
serial communication or HMI.<br />
Note:<br />
Due to the back-EMF (electromotive Force) generated by the motor, motors without load or with<br />
small loads will have a shorter acceleration time than the time that has been programmed at<br />
P102.<br />
P104<br />
Time of the<br />
Deceleration Ramp (s)<br />
Used on pump application.<br />
Defines the ramp time of the voltage decrement<br />
When P220 = 0, the parameter content indicates the value that has been set through the<br />
trimpot. When the trimpot has been set to the maximum value, the value indicated at the<br />
Parameter may be lower than expected. This is due to mechanical limits variations. The<br />
parameter content cannot be changed through the keypad when P220 = 0.<br />
With P220=1, the content of the parameter indicates the value programmed through the<br />
serial communication or HMI.<br />
Note:<br />
This function is used to delay the normal deceleration time of a load and in that way to not force<br />
a shorter time than that imposed by the own load.<br />
P1<strong>05</strong><br />
Motor Current Setting (%)<br />
It sets the motor current in percent relating to the rated<br />
Soft-Starter current.<br />
The indicated value is related directly to the activation levels of the following motor protection<br />
devices: overload, overcurrent, locked rotor and phase loss.<br />
When P220 = 0, the parameter content indicates the value that has been set through the<br />
trimpot. When the trimpot has been set to the maximum value, the value indicated at the<br />
Parameter may be lower than expected. This is due to mechanical limits variations. The<br />
parameter content cannot be changed through the keypad when P220 = 0.<br />
With P220=1, the content of the parameter indicates the value programmed through the<br />
serial communication or HMI.<br />
P106<br />
Diagnostic Configuration<br />
With P220=0, the content of the parameter indicates the value programmed through dip<br />
switch. In this case the alteration of the content of the parameter through HMI is not possible.<br />
With P220=1, the content of the parameter indicates the value programmed through the<br />
serial communication or HMI.<br />
It configures the protections that are enabled.<br />
The value is indicated as Hexadecimal value. Please find below the protection and the<br />
corresponding bit.<br />
English-22
ENGLISH<br />
Parameter<br />
Description / Notes<br />
LSB<br />
0<br />
1<br />
2<br />
3<br />
4<br />
5<br />
6<br />
7<br />
8<br />
9<br />
10<br />
11<br />
12<br />
13<br />
14<br />
15<br />
MSB<br />
Overcurrent<br />
Phase loss<br />
Incorrect phase sequence<br />
Locked rotor<br />
Motor overload<br />
Automatic reset<br />
-<br />
-<br />
-<br />
-<br />
-<br />
-<br />
-<br />
-<br />
-<br />
-<br />
Example:<br />
P106 = 13 Hex<br />
1 - Enabled - Overcurrent<br />
1 - Enabled - Phase loss<br />
0 - Disabled - Incorrect phase sequence<br />
0 - Disabled - Locked rotor<br />
1 - Enabled - Motor overload<br />
0 - Disabled - Automatic reset<br />
13Hex = 010011bin<br />
The Table below shows the combination of the enabled diagnostics and the corresponding<br />
value to be programmed at P106.<br />
Diagnostic Configuration<br />
Value Programmed<br />
at P106 (hexadecimal)<br />
Automatic Reset<br />
Motor Overload<br />
Stall<br />
Incorrect<br />
Phase sequence<br />
Phase Loss<br />
Overcurrent<br />
Bit 5 Bit 4 Bit 3 Bit 2 Bit 1 Bit 0<br />
1<br />
2<br />
3<br />
4<br />
5<br />
6<br />
7<br />
8<br />
9<br />
A<br />
B<br />
C<br />
D<br />
E<br />
F<br />
10<br />
11<br />
12<br />
13<br />
14<br />
15<br />
English-23
ENGLISH<br />
Parameter<br />
Description / Notes<br />
Diagnostic Configuration<br />
Value Programmed<br />
at P106 (hexadecimal)<br />
Automatic Reset<br />
Motor Overload<br />
Stall<br />
Incorrect<br />
Phase sequence<br />
Phase Loss<br />
Overcurrent<br />
Bit 5 Bit 4 Bit 3 Bit 2 Bit 1 Bit 0<br />
= enabled diagnostic<br />
English-24<br />
16<br />
17<br />
18<br />
19<br />
1A<br />
1B<br />
1C<br />
1D<br />
1E<br />
1F<br />
20<br />
21<br />
22<br />
23<br />
24<br />
25<br />
26<br />
27<br />
28<br />
29<br />
2A<br />
2B<br />
2C<br />
2D<br />
2E<br />
2F<br />
30<br />
31<br />
32<br />
33<br />
34<br />
35<br />
36<br />
37<br />
38<br />
39<br />
3A<br />
3B<br />
3C<br />
3D<br />
3E<br />
3F
ENGLISH<br />
Parameter<br />
P204<br />
Load Factory Setting<br />
P215<br />
Keypad Copy Function<br />
Description / Notes<br />
Programs all parameters to the standard factory default, when P204=5.<br />
The parameters P000 and P295 are not changed when the factory default parameters<br />
are loaded through P204=5.<br />
The keypad copy function is used to transfer the content of the parameters from one<br />
<strong>SSW</strong> to another.<br />
Note:<br />
The Keypad Copy Function is only available when using HMI-<strong>SSW</strong><strong>05</strong>-RS.<br />
P215<br />
0<br />
1<br />
2<br />
Action<br />
Off<br />
Copy<br />
(<strong>SSW</strong>→ keypad)<br />
Paste<br />
(keypad → <strong>SSW</strong>)<br />
Notes<br />
-<br />
Transfers the actual parameter values<br />
of the <strong>SSW</strong> to non volatile memory<br />
(EEPROM) of the HMI-<strong>SSW</strong><strong>05</strong>-RS keypad.<br />
The actual <strong>SSW</strong> parameters are not<br />
changed.<br />
Transfers the content of the non volatile<br />
memory of the keypad (EEPROM) to the<br />
<strong>SSW</strong> parameters.<br />
Procedure is as follows:<br />
1. Connect the keypad (HMI-<strong>SSW</strong><strong>05</strong>-RS) to the <strong>SSW</strong> from which the parameters willl be<br />
copied (<strong>SSW</strong> A - source <strong>SSW</strong>).<br />
2. Set P215=1 (copy) to transfer the parameter values from the <strong>SSW</strong> A to the keypad.<br />
Press key. During running of the Copy Function, display will show .<br />
P215 resets automatically to 0 (Off) after transfer has been completed.<br />
3. Disconnect the keypad from the <strong>SSW</strong> (A).<br />
4. Connect the same keypad to the <strong>SSW</strong> to which the parameters will be transferred<br />
(<strong>SSW</strong> B - target <strong>SSW</strong>).<br />
5. Set P215=2 (paste) to transfer the content of the of the keypad (EEPROM has the<br />
<strong>SSW</strong> A parameters) to <strong>SSW</strong> B.<br />
Press the key. While the keypad is running the paste function, the display shows<br />
, an abbreviation for paste. When P215 returns to 0, the parameter<br />
transfer has been concluded. Now <strong>SSW</strong>s A and B will have the same parameter<br />
values.<br />
To copy the parameter content of the <strong>SSW</strong> A to other <strong>SSW</strong>(s), repeat steps 4 to 5 above.<br />
Soft-Starter<br />
A<br />
Soft-Starter<br />
B<br />
Parameters<br />
Parameters<br />
<strong>SSW</strong>→HMI (Copy)<br />
P215 = 1<br />
Press<br />
HMI→<strong>SSW</strong> (Paste)<br />
P215 = 2<br />
Press<br />
EEPROM<br />
EEPROM<br />
HMI-<strong>SSW</strong><strong>05</strong>-RS<br />
HMI-<strong>SSW</strong><strong>05</strong>-RS<br />
Figure 22.2 - Copying the parameters from the <strong>SSW</strong> A to the <strong>SSW</strong> B, by using the Copy Function<br />
and the HMI-<strong>SSW</strong><strong>05</strong>-RS keypad.<br />
English-25
ENGLISH<br />
Parameter<br />
P220<br />
HMI/(Trimpots and Dip<br />
Switch) Selection<br />
Description / Notes<br />
It configures the operation mode of the Soft-Starter, in Trimpots and Dip Switch mode or HMI mode.<br />
0 “(Trimpot and Dip Switch)” – the programming of the initial voltage, ramp time, motor<br />
current setting and enabling of the protection devices is performed by means of the trimpots<br />
and dip switch. The values programmed through the serial communication is not used.<br />
1 “HMI” - the programming is performed through the serial communication. The values<br />
programmed through trimpots and dip switch is not used.<br />
Note:<br />
In HMI mode (P220=1) the trimpots and dip switch programming is ignored. The start voltage,<br />
ramp times, motor current setting and the protection enabling is programmed through the<br />
parameters P101, P102, P104, P1<strong>05</strong> and P106.<br />
P264<br />
Programmable<br />
Digital Input DI 1<br />
It configures the DI 1 digital input to operate according to the codes described below.<br />
0- “Not used”, DI 1 digital input is disabled. The enabling commands are only accept via<br />
serial communication (V03).<br />
1- “Enable/Disable”, enabling only via digital input. The enabling commands via serial<br />
communication are ignored.<br />
2- “External Fault”, it acts only if the DI 1 digital input is open. It can also be used as additional<br />
load protection. Example: thermal protection of the motor through dry contact (without voltage)<br />
of a protection relay (Thermostat).<br />
The enabling commands are only accepted via serial communication (V03).<br />
P277<br />
Programmable<br />
Relay Output (14/23 – 24)<br />
It enables the relay (14/23 – 24) to operate according to the following parameter setting:<br />
1- Function “Full voltage” – the relay closes the contact only after the Soft-Starter reached<br />
100% of Un (By-pass), and opens the contact when the Soft-Starter has received a switch-<br />
Off order.<br />
2- Function “Error”, the relay closes the N.O. contact when the <strong>SSW</strong>-<strong>05</strong> is with no error.<br />
3- Function “Logic Command”, the relay opens and closes the relay contact according to the<br />
BIT 5 status of the V03 basic variable.<br />
P295<br />
Rated Current of the<br />
Soft-Starter<br />
P308<br />
Network Address<br />
Configures the <strong>SSW</strong>-<strong>05</strong> models.<br />
Its function is to set the software so the current indication in Ampere (P003) is correct.<br />
The possible configurations of the <strong>SSW</strong>-<strong>05</strong> model are:<br />
0 = 3A<br />
1 = 10A<br />
2 = 16A<br />
3 = 23A<br />
4 = 30A<br />
5 = 45A<br />
6 = 60A<br />
7 = 85A<br />
It defines the address at which the Soft-Starter will respond on the communication network<br />
between all equipment connected to this network.<br />
P313<br />
Action of the Serial<br />
Communication<br />
Verification<br />
This parameter has the purpose to set the action to be taken when an error indication occurs.<br />
Note:<br />
To attribute a function to this parameter, set P314 different from 0 = Off.<br />
Values for P313:<br />
1- It indicates only error.<br />
2- Indicates error and disables the Soft-Starter by ramp. If the programmed deceleration time<br />
is equal to 0 sec, the motor driven by the Soft-Starter will be stopped by inertia.<br />
3- Indicates error and causes general disabling of the Soft-Starter. It can be used as emergency<br />
stopping.<br />
4- Indicates error and program P264 with the value 1. The bit 0 of V03 is reseted.<br />
English-26
ENGLISH<br />
Parameter<br />
P314<br />
Verification Time of the<br />
Serial Communication<br />
Description / Notes<br />
This parameter has the function to enable or disable, as well as to set the verification time<br />
of the serial communication. This protection acts when the serial communication between<br />
the master and the Soft-Starter is interrupted generating the respective indication or<br />
introducing an action as set at parameter P313.<br />
Note:<br />
Enable this function only if there is a cyclic serial communication with a master.<br />
Set the verification time according to the time of the telegrams sent by the master.<br />
English-27
ENGLISH<br />
23. APPENDIX FOR CE CONFORMANCE:<br />
The <strong>SSW</strong>-<strong>05</strong> <strong>Plus</strong>, was tested to meet the following directives:<br />
23.1. EMC and LVD Directives:<br />
EMC Directive 89/336/EEC (Electromagnetic Compatibility), using a Technical Construction File and the following<br />
standards:<br />
EN60947-4-2: Low-voltage switchgear and controlgear Part 4, contactors and motor-starters Section 2. AC<br />
semiconductor motor controllers and starters.<br />
Low Voltage Directive (LVD) 73/23/EEC<br />
ATTENTION!<br />
The <strong>SSW</strong>-<strong>05</strong> <strong>Plus</strong> line has been designed for class A equipment. Use of the products in domestic environments may<br />
cause radio interference, in which case the user may be required to employ additional mitigation methods.<br />
Note:<br />
The conformity of the Soft-Starter to any standard does not guarantee that the entire installation will conform.<br />
Many other factors can influence the total installation. Only direct measurements can verify total conformity.<br />
23.2. Requirements for Conforming Installations:<br />
23.2.1. EMC Directive:<br />
The following items are required for CE conformance:<br />
1. The Soft-Starters must be installed into closed metallic boxes or panels that have a door only able to be<br />
opened with a tool. A suitable cooling must be provided to ensure that the temperature will be within the allowed<br />
range.<br />
23.2.2. Low Voltage Directive (LVD):<br />
The following items are required for CE conformance:<br />
1. The same as item 1 above.<br />
2. The installation must provide a supply disconnecting (isolation) device. A hand-operated supply disconnecting<br />
device must be provided for each income supply and be near to the equipment. This device must disconnect<br />
the Soft-Starter from the supply when required (e. g. during work on the eletrical equipment). See EN60204-1, 5.3.<br />
Specify the current and voltage of this disconnecting device according to the data given in the item 6.<br />
DANGER!<br />
This equipment must not be used as an emergency stop mechanism (See EN60204, 9.2.5.4).<br />
English-28
ENGLISH<br />
24. EU Declaration of conformity CE:<br />
English-29
ENGLISH<br />
<strong>WARRANTY</strong> <strong>SSW</strong>-<strong>05</strong> <strong>Plus</strong><br />
WEG warrants its Soft-Starters against defects in workmanship and materials under the following conditions:<br />
1.0 For the effectiveness of this warranty it is essential that the purchaser inspects carefully the purchased<br />
Soft-Starter, immediately after receipt, checking its characteristics and reading its installation, adjustments,<br />
operation and maintenance instructions. The Soft-Starter will be considered as accepted and approved<br />
automatically by the purchaser, when the purchaser does not give written notice within max. five days after<br />
the receipt of the product about verified non-conformities.<br />
2.0 The warranty period is for twelve months from the invoice date of the equipment issued by WEG or its<br />
authorized distributor, proved through equipment invoice, but limited to twenty four months from the<br />
manufacturing date, that is indicated on the product nameplate.<br />
3.0 In case the Soft-Starter fails to function or operate correctly during the warranty time, the warranty services<br />
will be carried out, at WEG discretion, at its Authorized Repair Shops.<br />
4.0 The failed product must be available to the supplier for a required period to detect the cause of the failure and<br />
to make the corresponding repairs.<br />
5.0 WEG Automação, or its Authorized Repair Shops will analyze the returned Soft-Starter and when the existence<br />
of the failure covered by the warranty is proved, it will repair, modify or replace, at its discretion,<br />
the defective Soft-Starter without cost to the purchaser, except as indicated in Item 7.0.<br />
6.0 The present warranty responsibility is limited only to repairs, changes or replacement of the supplied Soft-<br />
Starter. WEG will have no obligation or liability whatsoever to people, third parties, other equipment or<br />
installations, including without limitation, any claims for loss of profits, consequential damages or labor costs.<br />
7.0 Other expenses as freights, packing, disassembling/assembling and parameter setting costs will be paid<br />
exclusively by the purchaser, including all fees, ticket, accommodation and meals expenses for technical<br />
personnel, when needed and/or requested by the customer.<br />
8.0 The present warranty does not cover the normal wear of the product or equipment, neither damages<br />
resulting from incorrect or negligent operation, incorrect parameter setting, improper maintenance or storage,<br />
operation out of the technical specification, bad installation quality, or operated in ambient with corrosives<br />
gases or with harmful electrochemical, electrical, mechanical or atmospheric influences.<br />
9.0 This warranty does not cover parts or components that are considered to wear, such as rubber or<br />
plastic parts, incandescent bulbs, fuses, etc, as well as the thyristors.<br />
10.0 This warranty will be cancelled automatically, independently of any previous written notice or not, when the<br />
purchaser, without previous written authorization by WEG, makes or authorizes third parties to make any<br />
changes or repair on the product or equipment that failed during the warranty period.<br />
11.0 Repairs, changes, or replacements due to manufacturing defects will not stop nor extend the period of the<br />
existing warranty.<br />
12.0 Any request, complaint, communication, etc. related to the product under warranty, servicing, start-up, etc.,<br />
shall be sent in writing to WEG Branch or Representative.<br />
13.0 The Warranty granted by WEG is conditioned by the observation of this warranty that is the only valid<br />
warranty for the good.<br />
English-30
ESPAÑOL<br />
Indice - Español<br />
1. Instrucciones de Seguridad .........................................................................................................................33<br />
2. Que es el arrancador suave (Soft-Starter) <strong>SSW</strong>-<strong>05</strong> <strong>Plus</strong> ..............................................................................33<br />
3. Como identificar el <strong>SSW</strong>-<strong>05</strong> <strong>Plus</strong> .................................................................................................................33<br />
4. Características Técnicas ..............................................................................................................................34<br />
5. Descripción del <strong>SSW</strong>-<strong>05</strong> <strong>Plus</strong> ......................................................................................................................35<br />
6. Tabla de Potencias / Corrientes / Cableados de Potencia (cobre 70 o C) ........................................................35<br />
7. Tabla con par (torque) máximo aplicado en los Conectores ..........................................................................35<br />
8. Capacidad de la Red de Alimentación ..........................................................................................................36<br />
9. Tabla con Fusibles y Contator ......................................................................................................................36<br />
10. Dimensiones ..............................................................................................................................................36<br />
11. Como instalar y conectar el <strong>SSW</strong>-<strong>05</strong> <strong>Plus</strong> ..................................................................................................37<br />
12.Como Ajustar el <strong>SSW</strong>-<strong>05</strong> <strong>Plus</strong> ....................................................................................................................39<br />
13. Funcionamiento de las Salidas digitales al Relé .........................................................................................40<br />
14. Protecciones y Señalizaciones ..................................................................................................................41<br />
15. Protección de Sobrecarga ..........................................................................................................................43<br />
16.Reset ..........................................................................................................................................................43<br />
17. Errors y Posibles Causas ..........................................................................................................................43<br />
18. Solución de Problemas más Frecuentes ....................................................................................................44<br />
19. Dispositivos Opcionales .............................................................................................................................44<br />
20. Tabla de Parámetros (para comunicación serial / HMI-<strong>SSW</strong><strong>05</strong>-RS) ............................................................50<br />
21. Código y descripción de los errores (para comunicación serial / HMI-<strong>SSW</strong><strong>05</strong>-RS) .....................................51<br />
22. Descripción detallada de los parámetros (para comunicación serial / HMI-<strong>SSW</strong><strong>05</strong>-RS) ..............................51<br />
23. Anexos para Conformidad CE .....................................................................................................................58<br />
24. Declaración de la Conformidad CE .............................................................................................................59<br />
Certificado de Garantía <strong>SSW</strong>-<strong>05</strong> <strong>Plus</strong>...............................................................................................................60<br />
Español-31
ESPAÑOL<br />
MANUAL DE<br />
INSTALACION Y<br />
OPERACION<br />
Série: <strong>SSW</strong>-<strong>05</strong> <strong>Plus</strong><br />
Software: versión 2.0X<br />
0899.4668 /5<br />
Nota: 1) La Soft-Starter electrónica <strong>SSW</strong>-<strong>05</strong> <strong>Plus</strong> ha sido proyectada para el accionamiento de motores<br />
eléctricos trifásicos utilizados en cargas consideradas livianas (ejemplo: bombas centrífugas,<br />
ventiladores de pequeño porte y compresores de tornillo). Caso hubiera necesidad de accionar<br />
otro tipo de cargas consideradas pesadas, consulte WEG.<br />
2) A partir de la versión de software V2.00, está disponible la comunicación serial. El manual de<br />
comunicación serial de la <strong>SSW</strong>-<strong>05</strong> (0899.4586) está disponible para download en la dirección<br />
www.weg.com.br.<br />
Con la comunicación serial es posible:<br />
a) Conexión de la Soft-Starter en una red de equipamientos, como PC, CLP y otros;<br />
b) El uso con el software SuperDrive (4171025<strong>05</strong>) para Microsoft Windows, permitiendo la pro<br />
gramación y operación de la <strong>SSW</strong>-<strong>05</strong>.<br />
c) El uso del HMI (interfaces hombre máquina) remota para programación y operación de la <strong>SSW</strong>-<strong>05</strong>.<br />
1. INSTRUCCIONES DE SEGURIDAD:<br />
Siempre desconectar el equipamiento antes de efectuar mantenimiento.<br />
Lea y comprenda este manual antes de instalar y operar el arrancador suave (Soft-Starter) <strong>SSW</strong>-<strong>05</strong> <strong>Plus</strong>.<br />
La instalación y ajustes de este equipamiento deben ser ejecutados solamente por personas con entrenamiento<br />
y calificación técnica adecuados, obedeciendo a los procedimientos legales de seguridad.<br />
2. QUE ES EL ARRANCADOR SUAVE (SOFT-STARTER) <strong>SSW</strong>-<strong>05</strong> PLUS:<br />
Es un equipamiento que permite arrancar y parar suavemente motores de inducción trifásicos.<br />
3. COMO IDENTIFICAR EL <strong>SSW</strong>-<strong>05</strong> PLUS:<br />
<strong>SSW</strong><strong>05</strong><br />
Soft-Starter<br />
WEG Série <strong>05</strong><br />
0003<br />
Corriente<br />
nominal de<br />
salida:<br />
0003 = 3A<br />
0010 = 10A<br />
0016 = 16A<br />
0023 = 23A<br />
0030 = 30A<br />
0045 = 45A<br />
0060 = 60A<br />
0085 = 85A<br />
T<br />
Alimentación<br />
Trifásica de<br />
Entrada<br />
2246<br />
Tensión de<br />
Alimentación<br />
de entrada:<br />
2246 =<br />
220 hasta 460V<br />
4657 =<br />
460 hasta 575V<br />
S<br />
Idioma del<br />
Manual:<br />
P= Portugués<br />
E= Inglés<br />
S= Español<br />
P<br />
Versión de la<br />
<strong>SSW</strong>-<strong>05</strong>:<br />
P= <strong>Plus</strong><br />
Z<br />
Final del<br />
código<br />
Ejemplo: El código <strong>SSW</strong><strong>05</strong>0010T2246SPZ, por tanto, es una <strong>SSW</strong>-<strong>05</strong> <strong>Plus</strong> de 10A, Tensión de alimentación<br />
trifásica de 220 hasta 460V, Manual en Español, versión PLUS.<br />
Español-33
ESPAÑOL<br />
4. CARACTERÍSTICAS TÉCNICAS:<br />
Alimentación<br />
Ajustes<br />
Protecciones<br />
Capacidad<br />
Entradas Digitales<br />
(90...250Vac 6mA)<br />
Salidas Digitales al<br />
Relé (1A 250Vac)<br />
Comunicación<br />
Condiciones<br />
Ambientales<br />
Modelo<br />
Tensión de Control (A1 y A2)<br />
Tensión de Potencia<br />
(R/1L1, S/3L2, T/5L3)<br />
Tensión Inicial<br />
Tiempo de Aceleración<br />
Tiempo de Deceleración<br />
Corriente del Motor<br />
Número Máximo de Arranques<br />
por hora<br />
Ciclo de Arranque<br />
Temperatura<br />
Humedad<br />
Altitud<br />
Grado de Protección<br />
Grado de Polución (UL508)<br />
Fijación<br />
Mecánica<br />
Involucro<br />
Emisión Electromagnética<br />
Conformidad/<br />
Conducida (EMC)<br />
Normas<br />
Baja Tensión<br />
<strong>SSW</strong>-<strong>05</strong> <strong>Plus</strong><br />
90 ... 250Vac 50/60 Hz (+/- 6Hz)<br />
200 mA<br />
220 ...460 Vac (+10%,-15%) 50/60 Hz (+/- 5Hz) 3f<br />
460 ... 575 Vac (+10%,-15%) 50/60 Hz (+/- 5Hz) 3f<br />
30 ... 80% U N<br />
1 ... 20 s<br />
Off ... 20 s<br />
30 ... 100% I N<br />
Sobrecarga Electrónica del Motor<br />
Secuencia de Fase Incorrecta<br />
Falta de Fase<br />
Sobrecorriente Inmediata<br />
Rotor Trabado<br />
Sobrecarga en los Tiristores<br />
Sobrecorriente Inmediata en el<br />
Relé de By-pass<br />
Sobrecorriente antes del By-pass<br />
Frecuencia fuera de la tolerancia<br />
Contacto del Relé de By-pass<br />
interno abierto<br />
Subtensión en la Alimentación<br />
de la Electrónica<br />
4 (1 cada 15 minutos)<br />
3 x I N<br />
durante 10 segundos<br />
DI1 – Función Acicona/Desacciona<br />
DI2 – Función Reset<br />
Función Operación (13 – 14/23)<br />
Función Tensión Plena (14/23 – 24)<br />
Interface Serial (RS232C)<br />
0 ... 55 o C<br />
5 ... 90% sin condensación<br />
0 ... 1000m (hasta 4000m con redución de 10% /<br />
1000m en la corriente de salida)<br />
IP 00 (Chassis)<br />
2<br />
Carril DIN 35mm o tornillo M4<br />
Plástico Inyectado<br />
Clase A (Uso Industrial)<br />
Norma IEC 60947-4-2<br />
UL 508 / IEC 60947-4-2<br />
Español-34
5. DESCRIPCIÓN DEL <strong>SSW</strong>-<strong>05</strong> PLUS:<br />
Entrada de Alimentación Trifásica<br />
Comando Acciona/Desacciona motor (DI1)<br />
Reset (DI2)<br />
Alimentación de la Electrônica (A1 y A2)<br />
Dip-Switch para Habilitar<br />
las Protecciones<br />
Botón para<br />
Reset<br />
Entrada de Alimentación Trifásica<br />
Trimpots para<br />
Ajustes<br />
Conector para Serial o HMI remoto<br />
Salidas al Relé (13, 14/23 y 24)<br />
Salida para motor<br />
6. TABLA DE POTENCIAS / CORRIENTES / CABLEADOS DE POTENCIA (COBRE 70 O C):<br />
Modelo<br />
<strong>SSW</strong>-<strong>05</strong>.3<br />
<strong>SSW</strong>-<strong>05</strong>.10<br />
<strong>SSW</strong>-<strong>05</strong>.16<br />
<strong>SSW</strong>-<strong>05</strong>.23<br />
<strong>SSW</strong>-<strong>05</strong>.30<br />
<strong>SSW</strong>-<strong>05</strong>.45<br />
<strong>SSW</strong>-<strong>05</strong>.60<br />
<strong>SSW</strong>-<strong>05</strong>.85<br />
Corriente<br />
Nominal<br />
3A<br />
10A<br />
16A<br />
23A<br />
30A<br />
45A<br />
60A<br />
85A<br />
Mecánica<br />
1<br />
2<br />
220V...240V<br />
cv<br />
kW<br />
0,75 0,55<br />
3 2,2<br />
5 3,7<br />
7,5 5,5<br />
10 7,5<br />
15 11<br />
20 15<br />
30 22<br />
380V...415V<br />
cv<br />
kW<br />
1,5 1,1<br />
6 4,5<br />
10 7,5<br />
15 11<br />
20 15<br />
30 22<br />
40 30<br />
60 45<br />
440V...480V<br />
cv<br />
kW<br />
2 1,5<br />
7,5 5,5<br />
12,5 9,2<br />
15 11<br />
20 15<br />
30 22<br />
40 30<br />
70 45<br />
Cables de<br />
Potencia mm 2<br />
(AWG)<br />
0,75 (18)<br />
1,5 (16)<br />
4 (12)<br />
6 (10)<br />
10 (8)<br />
16 (6)<br />
25 (4)<br />
35 (2)<br />
Las potencias máximas indicadas en la tabla arriba son para motores Standard 4 polos WEG.<br />
7. TABLA CON PAR (TORQUE) MÁXIMO APLICADO EN LOS CONECTORES:<br />
Par en los Bornes da Electrónica Par en los Bornes da Potencia<br />
Mecánica da<br />
(A1, A2, DI1, DI2, 13, 14/23 y 24)<br />
(R, S, T, U, V y W)<br />
<strong>SSW</strong>-<strong>05</strong> <strong>Plus</strong><br />
Nm (lb-in)<br />
Nm (lb-in)<br />
1<br />
2<br />
0,5 (4,5)<br />
0,5 (4,5)<br />
3,0 (32,7)<br />
5,5 (60,0)
ESPAÑOL<br />
8. CAPACIDAD DE LA RED DE ALIMENTACIÓN:<br />
El <strong>SSW</strong>-<strong>05</strong> <strong>Plus</strong> es adecuado para ser utilizado en un circuito capaz de suministrar no más que X A RMS<br />
(Conforme tabla abajo) ampares simétricos, Y Volts máximo:<br />
Modelo da<br />
<strong>SSW</strong>-<strong>05</strong> <strong>Plus</strong><br />
3A<br />
10A<br />
16A<br />
23A<br />
30A<br />
45A<br />
60A<br />
85A<br />
Y = 220- 575V<br />
X (kA)<br />
5<br />
5<br />
5<br />
5<br />
5<br />
5<br />
5<br />
10<br />
9. TABLA CON FUSIBLES Y CONTATOR (VER ÍTEM 11):<br />
Corriente del<br />
<strong>SSW</strong>-<strong>05</strong> <strong>Plus</strong><br />
3A<br />
10A<br />
16A<br />
23A<br />
30A<br />
45A<br />
60A<br />
85A<br />
Contator<br />
(K1)<br />
CWM09<br />
CWM12<br />
CWM18<br />
CWM25<br />
CWM32<br />
CWM50<br />
CWM65<br />
CWM95<br />
Fusible<br />
(F1, F2,F3)<br />
Tipo D 10A<br />
Tipo D 16A<br />
Tipo D 25A<br />
Tipo D 35A<br />
Tipo D 50A<br />
Tipo D 63A<br />
Tipo NH 100A<br />
Tipo NH 125A<br />
Fusible<br />
(F11, F12, F21)<br />
Tipo D 6A<br />
10. DIMENSIONES:<br />
Mecánica<br />
1<br />
2<br />
Ancho L<br />
(mm)<br />
59<br />
79<br />
Altura H<br />
(mm)<br />
130<br />
185<br />
Profundidad P<br />
(mm)<br />
145<br />
172<br />
Fijación A<br />
(mm)<br />
51<br />
71<br />
Fijación B<br />
(mm)<br />
122<br />
177<br />
Fijación D<br />
(mm)<br />
61<br />
99<br />
Fijación<br />
Tornillo M4 / Carril<br />
Tornillo M4 / Carril<br />
Peso<br />
(kg)<br />
0,74<br />
1,67<br />
Notas:<br />
1) La fijación de la <strong>SSW</strong>-<strong>05</strong> <strong>Plus</strong> puede ser hecha en carril DIN 35mm con alas iguales.<br />
2) En el caso de fijación a través de tornillos M4 el par (torque) no debe ser mayor que 0,2Nm (1,77 lb in) para<br />
los tornillos superiores y 1Nm (8,850 lb in) para los inferiores.<br />
Español-36
ESPAÑOL<br />
11. COMO INSTALAR Y CONECTAR EL <strong>SSW</strong>-<strong>05</strong> PLUS:<br />
11.1. Arranque y Parada Simplificada:<br />
Simbologia<br />
Descripción<br />
Fusible<br />
Seccionadora<br />
(Abertura bajo Carga)<br />
Transformador<br />
Llave N.A<br />
(Con retención)<br />
Botonera N.F<br />
(Con retorno Automático)<br />
Botonera N.A<br />
(Con retorno Automático)<br />
Contactor (Bobina)<br />
Motor de Indución<br />
Trifásico<br />
11.2. Arranque y Parada utilizando Contactor y Botoneras:<br />
Simbologia<br />
Descripción<br />
Fusible<br />
Seccionadora<br />
(Abertura bajo Carga)<br />
Transformador<br />
Llave N.A<br />
(Con retención)<br />
Botonera N.F<br />
(Con retorno Automático)<br />
Botonera N.A<br />
(Con retorno Automático)<br />
Contactor (Bobina)<br />
Motor de Indución<br />
Trifásico<br />
El transformador “T1” solamente es necesario<br />
cuando la tensión de la red fuere distinta de la<br />
faja permitida para alimentación de la<br />
Electrónica (90 _ 250Vac). Para 380V utilizar<br />
el neutro (N) y una fase.<br />
Español-37
ESPAÑOL<br />
11.3. Arranque y Parada utilizando Botoneras y Relé de Operación del <strong>SSW</strong>-<strong>05</strong> <strong>Plus</strong>:<br />
Simbologia<br />
Descripción<br />
Fusible<br />
Seccionadora<br />
(Abertura bajo Carga)<br />
Transformador<br />
Llave N.A<br />
(Con retención)<br />
Botonera N.F<br />
(Con retorno Automático)<br />
Botonera N.A<br />
(Con retorno Automático)<br />
Contactor (Bobina)<br />
Motor de Indución<br />
Trifásico<br />
El transformador “T1” solamente es necesario<br />
cuando la tensión de la red fuere distinta de la<br />
faja permitida para alimentación de la<br />
Electrónica (90 _ 250Vac). Paraà 380V utilizar<br />
el neutro (N) y una fase.<br />
12.COMO AJUSTAR EL <strong>SSW</strong>-<strong>05</strong> PLUS:<br />
12.1. Ajuste de la Tensión Inicial:<br />
Ajuste la tensión inicial para el valor que empece a girar el motor accionado por el <strong>SSW</strong>-<strong>05</strong> <strong>Plus</strong> tan pronto esta<br />
reciba el comando de acciona.<br />
El punto indica el<br />
ajuste padrón<br />
de fábrica<br />
Trimpot de<br />
Ajuste de la<br />
Tensión Inicial<br />
12.2. Ajuste de la Rampa del Tiempo de Aceleración:<br />
Ajuste el valor necesario para que el motor logre llegar hasta su rotación nominal.<br />
Nota: Tomar cuidado en los casos en que la relación de Corriente del <strong>SSW</strong>-<strong>05</strong> <strong>Plus</strong> y de la Corriente nominal<br />
del Motor sea 1,00, pues el tiempo máximo que la <strong>SSW</strong>-<strong>05</strong> <strong>Plus</strong> puede funcionar con 3 x In es de 10<br />
segundos.<br />
Trimpot de<br />
Ajuste de<br />
Tiempo de la<br />
Rampa de<br />
Aceleración<br />
Español-38
ESPAÑOL<br />
12.3. Ajuste de la Rampa del Tiempo de Deceleración:<br />
Este ajuste debe ser utilizado apenas en deceleración de Bombas, para amenizar el golpe de ariete. Este ajuste<br />
debe ser hecho para lograr el mejor resultado práctico.<br />
Trimpot de<br />
Ajuste de<br />
Tiempo de la<br />
Rampa de<br />
Desaceleración<br />
12.4. Ajuste de la Corriente del Motor:<br />
Este ajuste irá definir la relación de corriente del <strong>SSW</strong>-<strong>05</strong> <strong>Plus</strong> y del Motor por el accionado. Este valor es mucho<br />
importante pues irá definir las protecciones del Motor accionado por el <strong>SSW</strong>-<strong>05</strong> <strong>Plus</strong>. El ajuste de esta función tiene<br />
importancia directa en las siguientes protecciones del Motor: Sobrecarga, Sobrecorriente, Rotor Bloqueado, Falta de Fase.<br />
Ejemplo de cálculo:<br />
<strong>SSW</strong>-<strong>05</strong> <strong>Plus</strong> utilizado: 30A<br />
Motor utilizado: 25A<br />
Ajuste de la Corriente del Motor = I Motor<br />
I <strong>SSW</strong>-<strong>05</strong> <strong>Plus</strong><br />
Ajuste de la Corriente del Motor = 25A<br />
30A<br />
Ajuste de la Corriente del Motor = 0,833<br />
Por tanto debe ser ajustado en 83%<br />
Trimpot de<br />
Ajuste de la<br />
Corriente del<br />
Motor<br />
Español-39
ESPAÑOL<br />
13. FUNCIONAMIENTO DE LAS SALIDAS DIGITALES AL RELÉ:<br />
U N<br />
(Tensión en el Motor)<br />
100%<br />
t<br />
Función de Operación<br />
(13-14/23)<br />
t<br />
Relé Ligado<br />
Función Tensión Plena<br />
(14/23-24)<br />
t<br />
El relé para Función de Operación cierra su contacto N.A. (13-14/23) siempre que el <strong>SSW</strong>-<strong>05</strong> <strong>Plus</strong> recibir un<br />
comando de acciona, y este contacto solamente es abierto al final de la rampa de deceleración (cuando fuere<br />
ajustado vía trimpot) o cuando el <strong>SSW</strong>-<strong>05</strong> <strong>Plus</strong> recibe un comando de desacciona.<br />
El relé para Función Tensión Plena cierra su contacto N.A. (14/23-24) siempre que el <strong>SSW</strong>-<strong>05</strong> <strong>Plus</strong> estuviere con<br />
100% de la tensión aplicada al motor por el accionado, y este contacto es abierto cuando el <strong>SSW</strong>-<strong>05</strong> <strong>Plus</strong> recibe un<br />
comando de desacciona.<br />
Español-40
ESPAÑOL<br />
14. PROTECCIONES Y SEÑALIZACIONES:<br />
Descrición de la<br />
Protección/Indicación<br />
Sobrecorriente*<br />
Falta de Fase*<br />
Secuencia de Fase<br />
Incorreta*<br />
Rotor Trabado*<br />
Sobrecarga<br />
Electrónica<br />
del Motor*<br />
Sobrecorriente<br />
Inmediata del Relé<br />
de By-pass del<br />
<strong>SSW</strong>-<strong>05</strong> <strong>Plus</strong><br />
Sobrecorriente<br />
antes del<br />
By-pass<br />
Sobrecarga en los<br />
Tiristores<br />
Frecuencia fuera<br />
de la Tolerancia<br />
Contacto del Relé<br />
de By-pass interno<br />
abierto<br />
Subtensión<br />
en la Alimentación<br />
de la Electrónica<br />
Listo para Operar<br />
En Operación<br />
Señalización<br />
LED<br />
(Overcurrent)<br />
LED<br />
(Phase Loss)<br />
LED<br />
(Phase Seq)<br />
LED (Stall)<br />
LED<br />
(Overload)<br />
LED<br />
(Internal Fault)<br />
LED<br />
(Internal Fault)<br />
LED<br />
(Internal Fault)<br />
LED<br />
(Internal Fault)<br />
LED<br />
(Internal Fault)<br />
LED<br />
(Internal Fault)<br />
LED<br />
(Ready)<br />
LED<br />
(Run)<br />
Actuación<br />
Monitoramiento solamente cuando el <strong>SSW</strong>-<strong>05</strong> <strong>Plus</strong> está en régimen (100% de<br />
la tensión). Actúa cuando la corriente del motor ultrapasa el valor de 3 veces<br />
el valor ajustado en el trimpot (Motor Current) durante un tiempo superior a<br />
1s.<br />
Actúa después de transcurrido 1 s de la falta de fase, tanto en la entrada<br />
cuanto en la salida (Motor). Actúa cuando la corriente que pasa por la <strong>SSW</strong>-<br />
<strong>05</strong> es inferior al 30% de la corriente ajustada en el Trimpot (Motor Current).<br />
El error es activado cuando la secuencia de fase estuviere incorreta.<br />
Esta protección actúa en la transición entre final de rampa de aceleración y<br />
cierre de los contactos de los relés de by-pass internos del <strong>SSW</strong>-<strong>05</strong> <strong>Plus</strong>,<br />
caso la corriente que circula por el <strong>SSW</strong>-<strong>05</strong> <strong>Plus</strong> fuere superior o igual a 2<br />
veces la corriente ajustada en el trimpot (Motor Current).<br />
Esta protección monitora constantemente la corriente del motor y la compara<br />
con el valor ajustado en el trimpot (Motor Current). Ver ítem 15.<br />
Monitoramiento solamente cuando el <strong>SSW</strong>-<strong>05</strong> <strong>Plus</strong> está en régimen (100% de<br />
la tensión). Actúa cuando la corriente es mayor que 2 veces la corriente<br />
nominal del <strong>SSW</strong>-<strong>05</strong> <strong>Plus</strong>, durante un tiempo superior a 1 segundo. El led<br />
internal fault irá parpadear intermitentemente 5 veces.<br />
Esta protección actúa en la transición entre final de rampa de aceleración y<br />
cierre de los contactos de los relés de by-pass internos del <strong>SSW</strong>-<strong>05</strong> <strong>Plus</strong>,<br />
caso la corriente que circula por el <strong>SSW</strong>-<strong>05</strong> <strong>Plus</strong> fuere superior o igual a 2<br />
veces la corriente nominal del <strong>SSW</strong>-<strong>05</strong> <strong>Plus</strong>. El led internal fault irá parpadear<br />
intermitentemente 4 veces.<br />
Esta protección monitora la corriente que circula por el <strong>SSW</strong>-<strong>05</strong> <strong>Plus</strong> durante la<br />
rampa de aceleración y deceleración, y la compara con el valor de la corriente<br />
nominal del <strong>SSW</strong>-<strong>05</strong> <strong>Plus</strong>. La curva de los tiempos de actuación de la condición<br />
de sobrecarga de los tiristores está definida en la figura 15.2 luego abajo. El led<br />
internal fault irá parpadear intermitentemente 6 veces.<br />
Esta protección actúa siempre que la frecuencia de la red estuviere fuera de<br />
los niveles de +/- 10% en relación a los valores nominales 50 Hz o 60Hz. El<br />
led internal fault irá parpadear 1 vez.<br />
Esta protección queda monitorando si el contacto del relé de by-pass interno<br />
del <strong>SSW</strong>-<strong>05</strong> <strong>Plus</strong> está cerrado ( funciona solamente cuando el <strong>SSW</strong>-<strong>05</strong> <strong>Plus</strong><br />
está en régimen - 100% de tensión). El led internal fault irá parpadear intermitentemente<br />
3 veces.<br />
Esta protección queda monitorando siempre la tensión de alimentación de la<br />
electrónica (A1 y A2), siendo que caso la tensión quedar abajo de 80 Vac<br />
actúa la protección. El led internal fault irá parpadear intermitentemente 2<br />
veces.<br />
- Acceso: <strong>SSW</strong>-<strong>05</strong> <strong>Plus</strong> con tensión, aguardando comando de acciona, o<br />
con tensión plena en la salida. - Parpadeando: <strong>SSW</strong>-<strong>05</strong> <strong>Plus</strong> en rampa de<br />
aceleración/deceleración<br />
Enciende solamente cuando el <strong>SSW</strong>-<strong>05</strong> <strong>Plus</strong> está en régimen (el motor está<br />
con tensión plena).<br />
* Estas protecciones pueden ser habilitadas o deshabilitadas por sus respectivas llaves dip-switch.<br />
Español-41
ESPAÑOL<br />
15. PROTECCIÓN DE SOBRECARGA:<br />
15.1. Protección de Sobrecarga Electrónica del Motor:<br />
La protección de sobrecarga electrónica del motor hace la simulación del calentamiento del motor (Imagen Térmica).<br />
Esta simulación usa como dato de entrada el valor de corriente eficaz verdadero (True RMS). La curva con el<br />
tiempo de actuación en la condición de sobrecarga del motor está definida en la figura 15.1, siendo que la clase<br />
térmica de esta función conforme IEC 947-4-2 es la clase 10.<br />
t(s)<br />
1 + 10 4<br />
1 + 10 3<br />
100<br />
Condición en Frío<br />
Condición en Caliente<br />
10<br />
1<br />
% Ief<br />
100 200 300 400 500 600 700 800<br />
Figura 15.1 - Curva de sobrecarga electrónica del motor.<br />
Notas:<br />
1) Cuando el <strong>SSW</strong>-<strong>05</strong> <strong>Plus</strong> quedar sin tensión de alimentación de la electrónica (A1 y A2), el imagen<br />
térmica es salvado internamente. Al retornar la alimentación (A1 y A2) el valor del imagen térmica<br />
retorna al valor anterior a la falta de alimentación de la electrónica;<br />
2) Al deshabilitar vía dip-switch la protección de sobrecarga electrónica el imagen térmica es llevado al<br />
valor cero;<br />
3) El reset de la protección de sobrecarga electrónica puede ser ajustado para función manual (man), en<br />
este caso débese hacer el reset vía entrada digital 2 (DI2) o a través del botón de reset. Si el ajuste de<br />
reset estuviere ajustado para automático (auto) la condición de error es automáticamente reseteada<br />
después de transcurrir el tiempo de enfriamiento.<br />
t(s)<br />
1 + 10 3<br />
100<br />
Condición en Frío<br />
10<br />
Condición en Caliente<br />
1<br />
0.1<br />
% In<br />
100 200 300 400 500 600 700 800<br />
Figura 15.2 - Curva de sobrecarga electrónica de los tiristores.<br />
Nota:<br />
Con el motor operando en tensión plena, ocurre un enfriamiento de la Imagen Térmica de la protección de sobrecarga<br />
de los tiristores. El enfriamiento es debido al By-pass de los tiristores.<br />
Español-42
ESPAÑOL<br />
16.RESET:<br />
Una condición de error puede ser reseteada a través del botón de reset en la parte frontal del <strong>SSW</strong>-<strong>05</strong> <strong>Plus</strong>, o a<br />
través de una botonera de pulso (0,5 segundos) en la DI2 (Entrada digital para reset). Otra condición para efectuar<br />
reset en el <strong>SSW</strong>-<strong>05</strong> <strong>Plus</strong> es desconectando y reconectando la tensión de la Electrónica (A1 y A2).<br />
Nota:<br />
En la <strong>SSW</strong>-<strong>05</strong> <strong>Plus</strong> existe la posibilidad de reset automático, bastando habilitar esta función vía dip-switch (auto):<br />
1) El tiempo para ocurrir el reset automático después de la ocurrencia del error es de 15 minutos para las<br />
siguientes condiciones:<br />
- Sobrecorriente, Falta de Fase, Rotor Trabado, Sobrecorriente Inmediata del relé de By-pass del <strong>SSW</strong>-<strong>05</strong> <strong>Plus</strong>,<br />
Sobrecorriente antes del By-pass, Frecuencia fuera de la Tolerancia, Contacto del relé de By-pass interno<br />
abierto y Subtensión en la Alimentación de la Electrónica.<br />
2) Para secuencia de fase incorrecta no existe reset automático.<br />
3) Para Sobrecarga electrónica del motor y de los tiristores existe un algoritmo específico para tiempo de reset<br />
automático.<br />
ATENCIÓN!<br />
Tanto la entrada digital (DI2) cuanto el botón de reset en el <strong>SSW</strong>-<strong>05</strong> <strong>Plus</strong> <strong>Plus</strong> solamente deben ser utilizados para<br />
efectuar el reset después de la ocurrencia de error. Pues caso esta función reset sea utilizada cuando el <strong>SSW</strong>-<strong>05</strong><br />
<strong>Plus</strong> esté en funcionamiento en tensión plena los relés internos de By-pass abrirán sus contactos bajo carga<br />
comprometiendo su vida útil.<br />
17 ERRORS Y POSIBLES CAUSAS:<br />
Cuando un error es detectado, la Soft-Starter es bloqueada (desabilitada) y el error es mostrado a través de<br />
pestañeadas en los leds o a través del display, mostrando EXX, siendo XX el código del error.<br />
Para volver a operar normalmente la Soft-Starter después de la ocurrencia de un error es necesario resetarlo. De<br />
forma genérica esto puede ser echo a través de las siguientes formas:<br />
Desligando la alimentación de la electrónica y ligándola nuevamente (power-on reset);<br />
A través de la botonera de reset en la frontal de la <strong>SSW</strong>-<strong>05</strong> (botonera de reset);<br />
A través de la HMI-<strong>SSW</strong><strong>05</strong>-RS presionando la tecla (reset manual);<br />
Automáticamente a través del reset automático. Habilitar esta función vía dip-switch (auto) o vía P106 e P220.<br />
Vía entrada digital DI2.<br />
Ver en la tabla abajo detalles de reset para cada error y probables causas.<br />
Descripción de la<br />
Protección<br />
Falta de fase<br />
Sobrecarga<br />
electrónica del<br />
motor<br />
Error Externo<br />
Error de la<br />
función Copy<br />
Señalización del Error<br />
Frontal da<br />
<strong>SSW</strong>-<strong>05</strong><br />
LED<br />
(Phase Loss)<br />
LED<br />
(Overload)<br />
Disponible solamente<br />
con uso de HMI-<strong>SSW</strong><strong>05</strong>-RS<br />
o comunicación serial<br />
(ver capítulo 19)<br />
Disponible solamente<br />
con uso de HMI-<strong>SSW</strong><strong>05</strong>-RS<br />
o comunicación serial<br />
(ver capítulo 19)<br />
HMI-<strong>SSW</strong><strong>05</strong>-RS<br />
(ver capítulo 19.3)<br />
E03<br />
E<strong>05</strong><br />
E06<br />
E10<br />
Reset<br />
Power-on<br />
Botonera reset<br />
Tecla<br />
Auto-reset<br />
DI2.<br />
Power-on<br />
Tecla<br />
Auto-reset<br />
Power-on<br />
Botonerareset<br />
Tecla<br />
DI2.<br />
Power-on<br />
Tecla<br />
Causas Más Probables<br />
Falta de fase da rede trifásica.<br />
Corto o falla en el tiristor.<br />
Motor no conectado.<br />
Tipo de conexión del motor<br />
equivocada.<br />
Ajuste incorrecto do trimpot “Motor<br />
Current” o de P1<strong>05</strong> (ajuste<br />
de la corriente del motor). Valor<br />
ajustado demasiado bajo para<br />
el motor utilizado.<br />
Carga en el eje demasiada alta.<br />
Elevado número de partidas<br />
sucesivas.<br />
Conexión de los cables en las<br />
entradas DI1 abierta.<br />
Malo contacto en el cable de la<br />
HMI-<strong>SSW</strong><strong>05</strong>-RS.<br />
Ruido eléctrico en la instalación<br />
(interferencia electromagnética).<br />
Español-43
ESPAÑOL<br />
Descripción de la<br />
Protección<br />
Falha de conexión<br />
de la HMI remota<br />
Rotor bloqueado<br />
Sobrecarga nos<br />
tiristores<br />
Sobre corriente<br />
Secuencia de<br />
fase incorrecta<br />
Sub. tensión en la<br />
alimentación<br />
electrónica<br />
Contato del relee de<br />
By-pass interno<br />
abierto<br />
Sobre corriente<br />
antes del<br />
By-pass<br />
Sobre corriente<br />
inmediata do relee<br />
de By-pass<br />
Frecuencia fora de<br />
la tolerância<br />
Siñalización de Error<br />
Frontal da<br />
<strong>SSW</strong>-<strong>05</strong><br />
Disponible solamente<br />
con uso de HMI-<strong>SSW</strong><strong>05</strong>-RS<br />
o comunicación serial<br />
(ver capítulo 19)<br />
LED<br />
(Stall)<br />
LED<br />
(Internal Fault)<br />
pestañea 6 veces<br />
LED<br />
(Overcurrent)<br />
LED<br />
(Phase Seq)<br />
LED<br />
(Internal Fault)<br />
pestañea 2 veces<br />
LED<br />
(Internal Fault)<br />
pestañea 3 veces<br />
LED<br />
(Internal Fault)<br />
pestañea 4 veces<br />
LED<br />
(Internal Fault)<br />
pestañea 5 veces<br />
LED<br />
(Internal Fault)<br />
pestañea 1 vez<br />
HMI-<strong>SSW</strong><strong>05</strong>-RS<br />
(ver capítulo 19.3)<br />
E31<br />
E63<br />
E64<br />
E66<br />
E67<br />
E70<br />
E71<br />
E72<br />
E73<br />
E75<br />
Reset<br />
Power-on<br />
Desaparece<br />
automaticamente<br />
quando a HMI<br />
voltar a estabelecer<br />
comunicação<br />
normal com<br />
a Soft-Starter.<br />
Power-on<br />
Botonera reset<br />
Tecla<br />
Auto-reset<br />
DI2.<br />
Tecla<br />
Auto-reset<br />
Power-on<br />
Botonera reset<br />
Tecla<br />
Auto-reset<br />
DI2.<br />
Power-on<br />
Botonera reset<br />
Tecla<br />
DI2.<br />
Power-on<br />
Botonera reset<br />
Tecla<br />
Auto-reset<br />
DI2.<br />
Power-on<br />
Botonera reset<br />
Tecla<br />
Auto-reset<br />
DI2.<br />
Power-on<br />
Botonera reset<br />
Tecla<br />
Auto-reset<br />
DI2.<br />
Power-on<br />
Botonera reset<br />
Tecla<br />
Auto-reset<br />
DI2.<br />
Power-on<br />
Botonera reset<br />
Tecla<br />
Auto-reset<br />
DI2.<br />
Causas Más Probables<br />
Malo contacto en el cable da<br />
HMI-<strong>SSW</strong><strong>05</strong>-RS.<br />
Ruido eléctrico en la instalación<br />
(interferencia electromagnética).<br />
Tiempo da rampa de<br />
aceleración programada menor<br />
que el tiempo real de<br />
aceleración.<br />
Carga en el eje demasiada o alta.<br />
Elevado número de partidas<br />
sucesivas.<br />
Corto circuito entre fases.<br />
Eje del motor bloqueado.<br />
Seqüência de fase da rede de<br />
entrada invertida.<br />
Alimentación da electrónica<br />
abajo del valor mínimo.<br />
<strong>SSW</strong>-<strong>05</strong> con defecto.<br />
Tiempo de la rampa de<br />
aceleración programada menor<br />
que el tiempo real de<br />
aceleración.<br />
Curto circuito entre fases.<br />
Eje del motor bloqueado.<br />
Frecuencia de la red está fuera<br />
de los níveis de +/- 10% en<br />
relación a los valores nominales<br />
50Hz o 60Hz.<br />
Nota:<br />
En el caso de uso de la HMI-<strong>SSW</strong><strong>05</strong>-RS, para evitar ocurrencia de E31, se debe evitar resetar los errores a través<br />
de entrada digital (DI2) e a través de la botonera de reset presente en la frontal da <strong>SSW</strong>-<strong>05</strong>.<br />
Español-44
ESPAÑOL<br />
18. SOLUCIÓN DE PROBLEMAS MÁS FRECUENTES:<br />
Motor<br />
no Gira<br />
Problema<br />
Rotación del<br />
motor oscila<br />
(flúctua)<br />
Rotación del motor<br />
mucho alta o<br />
mucho baja<br />
Trancos en la<br />
deceleración<br />
de Bombas<br />
Trancos en la<br />
aceleración<br />
Punto a ser Verificado<br />
Error en el Cableado<br />
Falta de Alimentación<br />
Ajuste Errado<br />
Error<br />
Conexiones Flojas<br />
Datos de placa del motor<br />
Ajustes del Soft-Starter<br />
Ajustes del Soft-Starter<br />
Acción Correctiva<br />
1. Verificar todas las conexiones de potencia y comando.<br />
1. Verificar la alimentación de la Potencia (R, S, T)<br />
2. Verificar la alimentación de la Electrónica (A1, A2)<br />
1. Verificar si los ajustes están correctos para la aplicación.<br />
1. Verificar si el <strong>SSW</strong>-<strong>05</strong> <strong>Plus</strong> no está en una condición de bloqueo<br />
(ver ítem 14 – protecciones y señalizaciones).<br />
1. Desconecte el <strong>SSW</strong>-<strong>05</strong> <strong>Plus</strong>, desconecte las alimentaciones y<br />
reapriete todas las conexiones.<br />
2. Chequear todas las conexiones internas del <strong>SSW</strong>-<strong>05</strong> <strong>Plus</strong>.<br />
1. Verificar si el motor utilizado está de acuerdo con la aplicación.<br />
1. Reducir el tiempo de la rampa de deceleración.<br />
1. Reducir el tiempo de la rampa de aceleración.<br />
2. Reducir el ajuste de tensión de pedestal.<br />
19. DISPOSITIVOS OPCIONALES:<br />
Este capítulo describe los dispositivos opcionales que pueden ser utilizados con la Soft-Starter. La tabla 18.1<br />
muestra un resumen de los opcionales existentes<br />
Nombre<br />
CAB-RS-1<br />
CAB-RS-2<br />
CAB-RS-3<br />
MIW-02<br />
HMI-<strong>SSW</strong><strong>05</strong>-RS<br />
Función<br />
Cable para HMI remoto serial con 1m<br />
Cable para HMI remoto serial con 2m<br />
Cable para HMI remoto serial con 3m<br />
Módulo externo para conversión de RS-232 para RS-485.<br />
HMI remoto serial. Para uso remoto con cable CAB-RS<br />
hasta 3m.<br />
Tabla 19.1 - Opcionales disponibles para la <strong>SSW</strong>-<strong>05</strong><br />
Ítem de Estoque<br />
WEG<br />
0307.7827<br />
0307.7828<br />
0307.7829<br />
41710<strong>05</strong>43<br />
417100996<br />
19.1. CAB-RS-1, CAB-RS-2, CAB-RS-3:<br />
Cables utilizados para interconectar la Soft-Starter y el HMI remoto serial (HMI-<strong>SSW</strong><strong>05</strong>-RS). Existen 3 opciones de<br />
cables con largos de 1,2 y 3m. Uno de estos debe ser utilizado por el usuario de acuerdo con la aplicación.<br />
El cable CAB-RS-X debe ser instalado separadamente de los cables de potencia. Debe tenerse el cuidado de<br />
separar el cable CAB-RS-X de los demás cables existentes en la instalación en una distancia mínima de 10cm.<br />
HMI<br />
Soft-Starter<br />
Conector RJ<br />
Figura 19.1- Cable CAB-RS para HMI-<strong>SSW</strong><strong>05</strong>-RS<br />
Conector DB9<br />
CONEXIÓN DE LOS CABLES<br />
PINES DB9<br />
1 Vcc<br />
2 RX<br />
3 TX<br />
5 GND<br />
PINES RJ<br />
1 Vcc<br />
6 TX<br />
4 RX<br />
5 GND<br />
Español-45
ESPAÑOL<br />
19.2. MIW-02:<br />
Módulo externo para conversión de RS-232 para RS-485: permite la conexión de la <strong>SSW</strong>-<strong>05</strong> en una red RS-485<br />
padrón. De esta forma, la Soft-Starter puede participar de una red multipunto de hasta 1000m sin la necesidad de<br />
transductores. Para mayores detalles ver “MANUAL DEL USUARIO DEL MIW-02” (0899.4435). El manual está<br />
disponible en el sitio www.weg.com.br.<br />
Red WEG<br />
RS-485<br />
RS-485<br />
RS-232<br />
MIW-02<br />
Conector de la <strong>SSW</strong>-<strong>05</strong> RJ<br />
Serial Port RS-232<br />
Figura 19.2 - Conexión de la <strong>SSW</strong>-<strong>05</strong> a una red de comunicación en el padrón RS-485<br />
19.3. HMI-<strong>SSW</strong><strong>05</strong>-RS:<br />
HMI remoto serial: Es instalado externamente a las Soft-Starters. Debe ser utilizado para los siguientes casos:<br />
Cuando fuere necesario un HMI remoto.<br />
Para instalación del HMI en puerta de panel o mesa de comando.<br />
Cuando necesitar la función copy.<br />
Funciona en conjunto con el cable CAB-RS-X, el cual debe tener su largo elegido de acuerdo con la necesidad<br />
(hasta 3m).<br />
Figura 19.3 – Dimensiones del HMI-<strong>SSW</strong><strong>05</strong>-RS<br />
Español-46
ESPAÑOL<br />
19.3.1. Descripción del HMI-<strong>SSW</strong><strong>05</strong>-RS:<br />
El HMI-<strong>SSW</strong><strong>05</strong>-RS contiene un display de leds con 4 dígitos de 7 segmentos, 2 leds de estado y 5 teclas. La figura<br />
abajo muestra una vista frontal del HMI.<br />
LED Display<br />
Led “Run”<br />
Led “Ready”<br />
Figura 19.4 – Frontal del HMI-<strong>SSW</strong><strong>05</strong>-RS.<br />
Funciones del display de leds:<br />
Muestra el número del parámetro o su contenido y también mensajes de error y estado.<br />
Funciones de los leds “ready” y “run”<br />
Ready - Acceso: <strong>SSW</strong>-<strong>05</strong> <strong>Plus</strong> con tensión, aguardando comando de acciona, o con tensión plena en la salida.<br />
- Parpadeando: <strong>SSW</strong>-<strong>05</strong> <strong>Plus</strong> en rampa de aceleración /deceleración.<br />
Run<br />
- Enciende solamente cuando la <strong>SSW</strong>-<strong>05</strong> <strong>Plus</strong> está en régimen (el motor está con tensión plena).<br />
Funciones básicas de las teclas:<br />
- Habilita la Soft-Starter (arranque);<br />
- Deshabilita la Soft-Starter (parada). Reseta la Soft-Starter luego de la ocurrencia de errores;<br />
- Selecciona (conmuta) display entre número del parámetro y su valor (posición /contenido);<br />
- Incluye número del parámetro o valor del parámetro.<br />
- Disminuye número de parámetro o valor del parámetro.<br />
Nota:<br />
En la ocurrencia de errores juntamente con el uso de HMI-<strong>SSW</strong><strong>05</strong>-RS, el reset de errores debe ser siempre hecho<br />
a través de la tecla . El reset a través de la tecla presente en la parte frontal de la Soft-Starter ocasiona<br />
perdida de comunicación del HMI, resultando en E31. Para reestablecer la comunicación entre HMI y la Soft-Starter<br />
es necesario desconectar y reconectar el cable serial, o entonces desenergizar y energizar nuevamente la Soft-Starter.<br />
19.3.2 Uso del HMI:<br />
El HMI es una interfaces simples que permite la operación y programación de la Soft-Starter. El mismo presenta las<br />
siguientes funciones:<br />
- indicación del estado de operación de la Soft-Starter;<br />
- indicación de fallas;<br />
- visualización y alteración de los parámetros ajustables;<br />
- operación de la Soft-Starter (teclas y );<br />
19.3.3. Señalizaciones / Indicaciones en el Display de la HMI:<br />
Estados de la Soft-Starter:<br />
Soft-Starter lista para accionar el motor<br />
Español-47
ESPAÑOL<br />
Soft-Starter en la situación de error. El código del error aparece pestañeando . En el caso<br />
ejemplificado tenemos la indicación de E03 (falta de fase)<br />
Soft-Starter ejecutando función “Carga parámetros con standard de fábrica (P204)”<br />
Nota:<br />
El display también pestañea en las siguientes situaciones, además de la situación de error:<br />
Tentativa de alteración de un parámetro con el valor de seña incorrecta (P000 – Parámetro de acceso);<br />
Tentativa de alteración de un parámetro no permitido. Ejemplo: parámetros que no pueden ser cambiados con<br />
motor girando.<br />
19.3.4 .Visualización/ Alteración de parámetros:<br />
Todos los ajustes de la Soft-Starter pueden ser hechos a través de parámetros. Los parámetros son indicados en el<br />
display a través de la letra P seguida de un número:<br />
Ejemplo (P264):<br />
264 = n o do parámetro<br />
Cada parámetro está asociado a un valor numérico (contenido del parámetro), que corresponde a la opción seleccionada<br />
de entre las disponibles para aquel parámetro.<br />
Los valores de los parámetros definen la programación de la Soft-Starter o el valor de una variable (ej.: corriente,<br />
tensión). Para realizar la programación de la Soft-Starter debe alterarse el contenido del(os) parámetro(s).<br />
ACCIÓN DISPLAY HMI DESCRIPCIÓN<br />
Energizar la Soft-Starter<br />
Soft-Starter lista para operar<br />
Presione la tecla<br />
Use las teclas<br />
y<br />
Ubique el parámetro deseado<br />
Pressione la tecla<br />
Valor numérico asociado<br />
al parámetro (2)<br />
Use las teclas<br />
y<br />
Ajuste el novo valor deseado (2)<br />
Presione la tecla<br />
(1) (2)<br />
Nota:<br />
(1) Presionando la tecla luego del ajuste, el último valor ajustado es automáticamente grabado en la memoria<br />
no volátil de la Soft-Starter, quedando retenido hasta nueva alteración.<br />
(2) Para alterar el valor de un parámetro es necesario ajustar antes P000=5. Caso contrario solo será posible<br />
visualizar los parámetros, pero no modificarlos. Para mayores detalles ver descripción detallada de P000.<br />
Español-48
ESPAÑOL<br />
19.3.5. Instalación del HMI-<strong>SSW</strong><strong>05</strong>-RS:<br />
El HMI-<strong>SSW</strong><strong>05</strong>-RS puede ser instalado directamente en la puerta del panel (1 a 3mm), conforme los dibujos a seguir:<br />
Figura 19.5 - Instalación del HMI-<strong>SSW</strong><strong>05</strong>-RS<br />
19.3.6. Puesta en Marcha del HMI-<strong>SSW</strong><strong>05</strong>-RS:<br />
Después de tener todo instalado (incluso el cable de interconexión), energice la Soft-Starter.<br />
El HMI-<strong>SSW</strong><strong>05</strong>-RS deberá mostrar “rdy”.<br />
Para habilitar las teclas y del HMI-<strong>SSW</strong><strong>05</strong>-RS, es necesario configurar P264 ≠ 1.<br />
19.3.7. Función Copy del HMI-<strong>SSW</strong><strong>05</strong>-RS:<br />
El HMI-<strong>SSW</strong><strong>05</strong>-RS presenta aún una función adicional: la función copy. Esta función es utilizada cuando hay la<br />
necesidad de transferir la programación de una Soft-Starter para otra(s). Funciona de la siguiente manera: los<br />
parámetros de una Soft-Starter (“Soft-Starter origen”) son copiados para una memoria no volátil del HMI-<strong>SSW</strong><strong>05</strong>-RS,<br />
pudiendo entonces ser salvos en otra Soft-Starter (“Soft-Starter destino”) a partir de este HMI. Las funciones de<br />
lectura de los parámetros de la Soft-Starter y transferencia para otra son comandadas por el contenido del parámetro<br />
P215.<br />
Para mayores detalles de la función copy ver descripción detallada del parámetro P215.<br />
Español-49
ESPAÑOL<br />
20. TABLA DE PARÁMETROS (PARA COMUNICACIÓN SERIAL / HMI-<strong>SSW</strong><strong>05</strong>-RS):<br />
Parámetro Función de los Parámetros Rango de Valores Ajuste de Ajuste del (Lectura) Internos Fábrica Usuario<br />
Página<br />
P000 (2) Parámetro de acceso<br />
0 ... 4, 6... 9999 = Lectura<br />
5 = Escritura<br />
0 51<br />
P002 Indicación de la corriente del motor (%) 000,0 ... 999,9 (% In) 51<br />
P003 Indicación de la corriente del motor (A) 000,0 ... 999,9 (A) 51<br />
P023 Versión de Sotware 51<br />
P<strong>05</strong>0<br />
Indicación del estado de la 0 ... 250<br />
protección térmica del motor 250 = Error<br />
51<br />
Parámetro Función de los Parámetros Rango de Valores Ajuste de Ajuste del Página<br />
(Lectura y Escritura) Internos Fábrica Usuario<br />
P101 Tensión inicial 30 ... 80 (% UN) 30 51<br />
P102 Tiempo de rampa de aceleración 1 ... 20 (s) 10 52<br />
P104 Tiempo de rampa de deceleración 0 ... 20 (s) 0 = off 52<br />
P1<strong>05</strong> (1) Ajuste de la corriente del motor 30 ... 100 (%) 100 52<br />
P106 (1) Configuración de las protecciones 0 ... 3F Hexadecimal 1F Hex. 52<br />
0 =Sin función<br />
1 = Sin función<br />
4 = Sin función<br />
5 = Carga Weg<br />
0 = Sin función<br />
P204 (1) Carga parámetros con 2 = Sin función<br />
padrón de fábrica<br />
3 = Sin función<br />
0 55<br />
P215 (1) Función Copy<br />
1 = <strong>SSW</strong> -> HMI<br />
2 = HMI -> <strong>SSW</strong><br />
0 55<br />
Parametrización vía HMI / 0 = Trimpots y Dip Switch<br />
P220 (1) (Trimpots y Dip Switch) 1 = HMI<br />
0 56<br />
P264 (1)<br />
0 = Sin función<br />
Entrada digital programable<br />
1 = Acciona / des acciona<br />
DI 1<br />
2 = Error externo<br />
1 56<br />
P277 (1)<br />
1 =Tensión Plena<br />
Salida a relé programable<br />
2 = Error<br />
(14/23 - 24)<br />
3 = Com. Serial<br />
1 56<br />
0 = 3 A<br />
(1) (2)<br />
P295 Corriente<br />
nominal de la llave<br />
<strong>SSW</strong>-<strong>05</strong><br />
1 = 10 A<br />
2 = 16 A<br />
3 = 23 A<br />
4 = 30 A<br />
5 = 45 A<br />
6 = 60 A<br />
7 = 85 A<br />
Conforme<br />
el Modelo<br />
P308 (1) Dirección en la red 1 ... 30 1 56<br />
1 = solo Error<br />
P313<br />
4 = P264 → 1<br />
Acción de verificación de la 2 = deshabilita rampa<br />
comunicación serial<br />
3 = deshabilita general<br />
56<br />
P314<br />
Tiempo de verificación de la<br />
comunicación serial<br />
0 ... 5 (s) 0 = oFF 57<br />
(1)<br />
Parámetros alterables solamente con motor parado<br />
(2)<br />
Parámetros no alterados através de la función “carga parámetros con padrón de fábrica (P204)”<br />
56<br />
Español-50
ESPAÑOL<br />
21. CÓDIGO Y DESCRIPCIÓN DE LOS ERRORES (PARA COMUNICACIÓN SERIAL / HMI-<strong>SSW</strong><strong>05</strong>-RS):<br />
Indicación<br />
E03<br />
E<strong>05</strong><br />
E06<br />
E10<br />
E2x<br />
E22<br />
E24<br />
E25<br />
E26<br />
E27<br />
E29<br />
E31<br />
E63<br />
E64<br />
E66<br />
E67<br />
E70<br />
E71<br />
E72<br />
E73<br />
E75<br />
Significado<br />
Falta de fase<br />
Sobrecarga en la salida (función Ixt)<br />
Error externo<br />
Error de la función Copy<br />
Errores de la comunicación serial<br />
Error de paridad longitudinal (BCC)<br />
Error de programación<br />
Variable inexistente<br />
Valor fuera del rango<br />
Tentativa de escritura en variable de lectura o comando lógico deshabilitado<br />
Error de comunicación serial cíclica interrumpida<br />
Falla de conexión del HMI remoto<br />
Rotor trabado<br />
Sobrecarga en los tiristores<br />
Sobrecorriente inmediata<br />
Secuencia de fase invertida<br />
Subtensión en la alimentación de la electrónica<br />
Contacto del relé de By-pass interno abierto<br />
Sobrecorriente antes del By-pass<br />
Sobrecorriente inmediata del relé de By-pass<br />
Frecuencia fuera del rango<br />
22. DESCRIPCIÓN DETALLADA DE LOS PARÁMETROS (PARA COMUNICACIÓN SERIAL / HMI-<strong>SSW</strong><strong>05</strong>-RS):<br />
Parámetro<br />
P000<br />
Parámetro de Acceso<br />
Descripción / Notas<br />
Libera el acceso para alteración del contenido de los parámetros;<br />
El valor de la clave es 5.<br />
P002<br />
Indicación de la corirente del<br />
motor (%) de la In de la Soft-Starter<br />
Indica la corriente de salida de la Soft-Starter directamente en percentual de la<br />
Soft-Starter. (% In).<br />
P003<br />
Indicación de la corirente<br />
del motor (A)<br />
Indica la corriente de salida de la Soft-Starter directamente en ampéres.<br />
Para la correcta indicación de la corriente en ampéres, es necesario programar P295.<br />
P023<br />
Versión de Software<br />
Indica la versión de software contenida en la CPU.<br />
P<strong>05</strong>0<br />
Indicación del estado de la<br />
protección térmica del motor<br />
Indica el estado de la proteción térmica del motor en escala percentual (0 ... 250). Siendo<br />
que 250 es el punto de actuación de la proteción del motor, E<strong>05</strong>.<br />
P101<br />
Tensión Inicial (%Un)<br />
Ajusta el valor inicial de tensión (%Un) que será aplicado al motor conforme figura 22.1.<br />
Con P220=0, el contenido del parámetro indica el valor ajustado a través del trimpot. En<br />
el caso del trimpot estar ajustado en el valor máximo, el valor indicado a través del<br />
parámetro puede ser un poco menor que el esperado. Esto se debe a las variaciones de<br />
los limites mecánicos. A alteración del contenido del parámetro a través de la HMI no es<br />
posible con P220=0.<br />
Con P220=1, el contenido del parámetro indica el valor programado a través de la<br />
comunicación serial o HMI.<br />
Español-51
ESPAÑOL<br />
Parámetro<br />
Descripción / Notas<br />
UN<br />
P101<br />
t(s)<br />
P102<br />
Tiempo de la rampa de<br />
aceleración (s)<br />
P104<br />
Tiempo de la rampa de<br />
deceleración (s)<br />
P102<br />
Figura 22.1 - Rampa de Aceleración<br />
Define el tiempo de la rampa de incremento de tensión, conforme mostrado en la figura 22.1.<br />
Con P220=0, el contenido del parámetro indica el valor ajustado a través del trimpot. En<br />
el caso del trimpot estar ajustado en el valor máximo, el valor indicado a través del<br />
parámetro puede ser un poco menor que el esperado. Esto se debe a las variaciones de<br />
los limites mecánicos. A alteración del contenido del parámetro a través de la HMI no es<br />
posible con P220=0.<br />
Con P220=1, el contenido del parámetro indica el valor programado a través de la comunicación<br />
serial o HMI.<br />
Nota:<br />
En motores en vacío o con poca carga el tiempo de aceleración será menor que el tiempo<br />
programado en P102, debido la FCEM (Fuerza Contra Electromotriz) generada por el motor.<br />
Utilizado para aplicaciones con bombas.<br />
Define el tiempo de la rampa de incremento de tensión.<br />
Con P220=0, el contenido del parámetro indica el valor ajustado a través del trimpot. En<br />
el caso del trimpot estar ajustado en el valor máximo, el valor indicado a través del<br />
parámetro puede ser un poco menor que el esperado. Esto se debe a las variaciones de<br />
los limites mecánicos. A alteración del contenido del parámetro a través de la HMI no es<br />
posible con P220=0.<br />
Con P220=1, el contenido del parámetro indica el valor programado a través de la comunicación<br />
serial o HMI.<br />
Nota:<br />
Esta función es utilizada para prolongar el tiempo de desaceleración normal de una carga y no<br />
para forçar un tiempo menor que o imposto pela própria carga.<br />
P1<strong>05</strong><br />
Ajuste de la corriente<br />
del motor (%)<br />
Ajusta el valor de la corriente del motor percentualmente en relación a corirente nominal<br />
de la Soft-Starter.<br />
El valor indicado está directamente relacionado con los niveles de actuación de las<br />
seguientes protecciones del motor: Sobrecarga, Sobrecorriente y Rotor trabado.<br />
Con P220=0, el contenido del parámetro indica el valor ajustado a través del trimpot. En<br />
el caso del trimpot estar ajustado en el valor máximo, el valor indicado a través del<br />
parámetro puede ser un poco menor que el esperado. Esto se debe a las variaciones de<br />
los limites mecánicos. A alteración del contenido del parámetro a través de la HMI no es<br />
posible con P220=0.<br />
Con P220=1, el contenido del parámetro indica el valor programado a través de la comunicación<br />
serial o HMI.<br />
P106<br />
Configuración de las<br />
protecciones<br />
Con P220=0, el contenido del parámetro indica el valor ajustado a través de dip switch.<br />
En este caso la alteración del contenido del parámetro a través del HMI no es possible.<br />
Con P220=1, el contenido del parámetro indica el valor programado a través de la comunicación<br />
serial o HMI.<br />
Configura cuales protecciones están habilitadas.<br />
El valor es indicado en Hexadecimal. A seguir es presentado las protecciones y el<br />
correspondiente bit.<br />
Español-52
ESPAÑOL<br />
Parámetro<br />
Descripción / Notas<br />
LSB<br />
0<br />
1<br />
2<br />
3<br />
4<br />
5<br />
6<br />
7<br />
8<br />
9<br />
10<br />
11<br />
12<br />
13<br />
14<br />
15<br />
MSB<br />
Sobrecorriente inmediata<br />
Falta de fase<br />
Secuencia de fase invertida<br />
Rotor trabado<br />
Sobrecarga Electrónica del motor<br />
Reset automático<br />
-<br />
-<br />
-<br />
-<br />
-<br />
-<br />
-<br />
-<br />
-<br />
-<br />
Ejemplo:<br />
P106 = 13 Hex<br />
1 - Habilitado - Sobrecorriente inmediata<br />
1 - Habilitado - Falta de fase<br />
0 - Deshabilitado - Secuencia de fase invertida<br />
0 - Deshabilitado - Rotor trabado<br />
1 - Habilitado - Sobrecarga Electrónica del motor<br />
0 - Deshabilitado - Reset automático<br />
13Hex = 010011bin<br />
La tabla a seguir presenta la combinación de las protecciones habilitadas y el<br />
correspondiente valor a ser programado en P106.<br />
Configuración de la Proteción<br />
Valor Programado<br />
en P106 (hexadecimal)<br />
Reset automático<br />
Sobrecarga electrónica del<br />
motor (Overload)<br />
Rotor bloqueado<br />
(Stall)<br />
Secuencia de fase invertida<br />
(Phase sequence)<br />
Falta de fase<br />
(Phase Loss)<br />
Sobre corriente inmediata<br />
(Overcurrent)<br />
Bit 5 Bit 4 Bit 3 Bit 2 Bit 1 Bit 0<br />
1<br />
2<br />
3<br />
4<br />
5<br />
6<br />
7<br />
8<br />
9<br />
A<br />
B<br />
C<br />
D<br />
E<br />
F<br />
10<br />
11<br />
12<br />
13<br />
14<br />
15<br />
Español-53
ESPAÑOL<br />
Parámetro<br />
Descripción / Notas<br />
Configuración de la Proteción<br />
Valor Programado<br />
en P106 (hexadecimal)<br />
Reset automático<br />
Sobrecarga electrónica del<br />
motor (Overload)<br />
Rotor bloqueado<br />
(Stall)<br />
Secuencia de fase invertida<br />
(Phase sequence)<br />
Falta de fase<br />
(Phase Loss)<br />
Sobre corriente inmediata<br />
(Overcurrent)<br />
Bit 5 Bit 4 Bit 3 Bit 2 Bit 1 Bit 0<br />
= protección habilitada<br />
16<br />
17<br />
18<br />
19<br />
1A<br />
1B<br />
1C<br />
1D<br />
1E<br />
1F<br />
20<br />
21<br />
22<br />
23<br />
24<br />
25<br />
26<br />
27<br />
28<br />
29<br />
2A<br />
2B<br />
2C<br />
2D<br />
2E<br />
2F<br />
30<br />
31<br />
32<br />
33<br />
34<br />
35<br />
36<br />
37<br />
38<br />
39<br />
3A<br />
3B<br />
3C<br />
3D<br />
3E<br />
3F<br />
Español-54
ESPAÑOL<br />
Parámetro<br />
P204<br />
Carga parámetros con<br />
padrón de fábrica<br />
P215<br />
Función Copy<br />
Descripción / Notas<br />
Reprograma todos los parámetros para los valores del padrón de fábrica, haciéndose P204 = 5.<br />
Los parámetros P000 y P295 no son alterados cuando se carga los ajustes de<br />
fábrica a través de P204 = 5.<br />
La función copy es utilizada para transferir el contenido de los parámetros de una soft<br />
starter para otra(s).<br />
Nota: La función copy solamente está disponible vía HMI-<strong>SSW</strong><strong>05</strong>-RS.<br />
P215<br />
0<br />
1<br />
2<br />
Acción<br />
Sin función<br />
Copy<br />
(<strong>SSW</strong>→ HMI)<br />
Paste<br />
(HMI → <strong>SSW</strong>)<br />
Explicación<br />
-<br />
Transfiere el contenido de los parámetros<br />
actuales de la Soft-Starter para la memoria<br />
no volátil del HMI-<strong>SSW</strong><strong>05</strong>-RS (EEPROM).<br />
Los parámetros actuales de la Soft-Starter<br />
permanecen inalterados.<br />
Transfiere el contenido de la memoria no<br />
volátil del HMI-<strong>SSW</strong><strong>05</strong>-RS (EEPROM) para<br />
los parámetros actuales de la Soft-Starter.<br />
Procedimiento a ser utilizado para copiar la parametrización de la Soft-Starter A para<br />
la Soft-Starter B:<br />
1. Conectar el HMI-<strong>SSW</strong><strong>05</strong>-RS en la Soft-Starter que se quiere copiar los parámetros<br />
(Soft-Starter A – fuente).<br />
2. Hacer P215=1 (copy) para transferir los parámetros de la Soft-Starter A para el HMI-<br />
<strong>SSW</strong><strong>05</strong>-RS. Presionar la tecla . Mientras estuviere sendo realizada la función<br />
copy el display muestra<br />
. P215 volta automaticamente para<br />
0 (Inactiva) cuando la transferência estuviere concluída.<br />
3. Desconectar el HMI-<strong>SSW</strong><strong>05</strong>-RS de la Soft-Starter (A).<br />
4. Conectar este mismo HMI-<strong>SSW</strong><strong>05</strong>-RS en la Soft-Starter para la cual se desea<br />
transferir los parámetros (Soft-Starter B – destino).<br />
5. Hacer P215=2 (paste) para transferir el contenido de la memoria no volátil del HMI<br />
(EEPROM – conteniendo los parámetros de la Soft-Starter A) para la Soft-Starter B.<br />
Presionar la tecla . Mientras la HMI-<strong>SSW</strong><strong>05</strong>-RS estuviere realizando la<br />
función paste el display indica<br />
una abreviatura de paste.<br />
Cuando P215 volver para 0 y ocurrir el reset, la transferencia de los parámetros fue<br />
concluida. A partir de este momento las <strong>SSW</strong>s A y B estarán con el mismo contenido<br />
de los parámetros.<br />
Para copiar el contenido de los parámetros de la Soft-Starter A para otra(s) Soft-Starter(s)<br />
repetir los pasos 4 y 5 arriba.<br />
Soft-Starter<br />
A<br />
Soft-Starter<br />
A<br />
Parámetros<br />
Parámetros<br />
<strong>SSW</strong>→HMI (Copy)<br />
P215 = 1<br />
Press<br />
HMI→<strong>SSW</strong> (Paste)<br />
P215 = 2<br />
Press<br />
EEPROM<br />
EEPROM<br />
HMI-<strong>SSW</strong><strong>05</strong>-RS<br />
HMI-<strong>SSW</strong><strong>05</strong>-RS<br />
Figura 22.2 - Copia de la parametrización de la Soft-Starter A para la Soft-Starter B utilizando<br />
la función copy y HMI-<strong>SSW</strong><strong>05</strong>-RS<br />
Español-55
ESPAÑOL<br />
Parámetro<br />
P220<br />
Parametrización vía<br />
HMI / (Tripot y Dip Switch)<br />
Descripción / Notas<br />
Configura el modo de funcionamiento de la Soft-Starter, modo Tripot y Dip Switch o modo HMI.<br />
0- “(Tripot y Dip Switch)”, la programación de la tensión inicial, tiempos de rampas, relación<br />
de corriente y habilitación de las protecciones, son hechas a través de los tripots y dip<br />
switch. Estos valores programados a través de comunicación serial no son usados.<br />
1- “HMI”, la programación es hecha vía comunicación serial o vía HMI. Los valores ajustados<br />
en los tripots y dip switch no son utilizados.<br />
Nota:<br />
En modo HMI (P220=1) las programaciones de los tripots y dip switch son ignoradas. La<br />
tensión inicial, tiempos de rampas, relación de corriente y habilitación de las protecciones<br />
son programadas a través de los parámetros P101, P102, P104, P1<strong>05</strong> y P106.<br />
P264<br />
Entrada digital<br />
programable DI 1<br />
P277<br />
Salida a relé<br />
programable<br />
(14/23 – 24)<br />
P295<br />
Corriente nominal<br />
de la llave <strong>SSW</strong>-<strong>05</strong><br />
P308<br />
Dirección en la red<br />
Configura la entrada digital DI 1 para funcionar conforme códigos descriptos:<br />
0- “Sin función, entrada digital DI 1 deshabilitada. Los comandos de habilitación son<br />
solamente aceptos vía comunicación serial (V03) o HMI remoto.<br />
1- “Acciona / des acciona”, habilitación solamente vía entrada digital. Comandos de habilitación<br />
vía comunicación serial o HMI remoto son ignorados.<br />
2- “Error externo”, actúa cuando la entrada digital DI 1 estuviere abierta. Puede servir como<br />
protección adicional de la carga. Ejemplo: Protección térmica del motor a través de contacto<br />
seco (Libre de tensión) de un relé de protección (Termostato). Los comandos de habilitación<br />
son solamente aceptos vía comunicación serial (V03) o HMI remoto.<br />
Habilita el relé (14/23 – 24) para funcionar conforme parametrización abajo:<br />
1- “Tensión Plena”, el relé cierra el contacto solamente después de la Soft-Starter atingir<br />
100% UN (By-pass), y abre el contacto cuando la Soft-Starter recebe un comando de desconecta.<br />
2- “Error”, cierra el contacto N.A. siempre que la <strong>SSW</strong>-<strong>05</strong> estuviere sin error.<br />
3- “Comando Lógico”, abre y cierra los contatos del relé de acuerdo con el estado del BIT 4<br />
de la variable básica V03.<br />
Configura el modelo de la <strong>SSW</strong>-<strong>05</strong>.<br />
Su función es ajustar el software para que la indicación de corriente en Ampéres (P003)<br />
sea correcta.<br />
Las possibles configuraciones del modelo son:<br />
0 = 3A<br />
1 = 10A<br />
2 = 16A<br />
3 = 23A<br />
4 = 30A<br />
5 = 45A<br />
6 = 60A<br />
7 = 85A<br />
Define la direccción que la Soft-Starter irá responder en la red de comunicación entre<br />
todos los equipamientos que en ella estuvierem conectados.<br />
P313<br />
Acción de verificación de<br />
la comunicación serial<br />
Este parámetro tiene por finalidad ajustar la acción a ser tomada en conjunto con la<br />
indicación del Error.<br />
Nota:<br />
Para que este parámetro tenga función es necesario que P314 sea diferente de 0=Off.<br />
Valores de P313:<br />
1- Solamente indica Error12.<br />
2- Indica Error y deshabilita la Soft-Starter por rampa. Caso esté programado tiempo de<br />
deceleración igual a 0seg, la parada del motor accionado por la Soft-Starter será por inércia.<br />
3- Indica Error y deshabilita general laa Soft-Starter. Funciona como Emergancia.<br />
4- Indica Error y parametriza P264 con valor 1. El bit 0 de V03 es reseteado.<br />
Español-56
ESPAÑOL<br />
Parámetro<br />
P314<br />
Tiempo de verificación de<br />
la comunicación serial<br />
Descripción / Notas<br />
Este parámetro tiene como función habilitar o deshabilitar bien como ajustar el tiempo de<br />
verificación de la comunicación serial. Esta protección actúa cuando la comunicación<br />
serial entre el maestro y la Soft-Starter fuere interrumpida, ocasionando indicación y o<br />
acción conforme ajuste del parámetro P313.<br />
Nota:<br />
Habilite esta función solamente si hubiere comunicación serial cíclica con un maestro.<br />
Ajuste el tiempo de verificación conforme el tiempo entre telegramas enviados por el maestro.<br />
Español-57