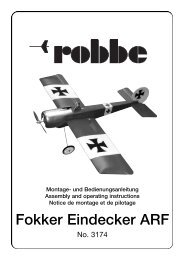
Robbe Cardinal.pdf - RCtube.eu
Robbe Cardinal.pdf - RCtube.eu
Robbe Cardinal.pdf - RCtube.eu

Create successful ePaper yourself
Turn your PDF publications into a flip-book with our unique Google optimized e-Paper software.
Baustufe 4, die Leitwerke<br />
Nr. Bezeichnung, Maße in mm Stück<br />
4.1 Bolzen, Stiftscharnier 7<br />
4.2 Auge, Stiftscharnier 7<br />
4.3 Höhenruder 1<br />
4.4 Seitenruder 1<br />
4.5 Höhenleitwerk 1<br />
4.6 Seitenleitwerk mit Formteil 1<br />
4.7 Ruderhorn 2<br />
4.8 Schraube, M 2 x 6 2<br />
4.9 Gestängekupplung 2<br />
Bild 19<br />
- Die Stiftscharniere aus den Bolzen 4.1 und den Augen<br />
4.2 zusammensetzen. Das Gelenk gegen Verkleben mit<br />
einem Tropfen Öl schützen.<br />
Bilder 20 und 21<br />
- Das Höhenruder 4.3 und das Seitenruder 4.4 mit einem<br />
scharfen Messer und einem Stahllineal nach<br />
Markierungen gerade abtrennen.<br />
- Die Schnittkanten verputzen.<br />
Bild 22<br />
- Gemäß den halbrunden Anformungen in den Leitwerken<br />
4.5 und 4.6 mit einem Stichling die Löcher für die<br />
Scharniere mittig mit Ø 2 mm vorstechen.<br />
Bild 23<br />
- Epoxy mit einem Drähtchen oder einer dicken Nadel in<br />
die Löcher träufeln.<br />
- Die Scharniere bis zum Gelenkanschlag einschieben.<br />
Scharniere nach oben drehen, um zu prüfen, daß sie<br />
rechtwinklig zur Mittellinie stehen.<br />
- Achtung: Es darf kein Kleber in die<br />
Scharnierdrehpunkte gelangen.<br />
Bauanleitung, Assembly instructions, Notice de montage<br />
<strong>Cardinal</strong><br />
Stage 4, the tail panels<br />
No. Description, size in mm No. off<br />
4.1 Point hinge, male 7<br />
4.2 Point hinge, female 7<br />
4.3 Elevator 1<br />
4.4 Rudder 1<br />
4.5 Tailplane 1<br />
4.6 Fin and strake 1<br />
4.7 Horn 2<br />
4.8 Screw, M2 x 6 2<br />
4.9 Pushrod connector 2<br />
Fig. 19<br />
- Assemble the point hinges from the male parts 4.1 and<br />
the female parts 4.2. Apply a tiny drop of oil to the pivots<br />
to prevent glue jamming them.<br />
Figs. 20 and 21<br />
- Separate the elevator 4.3 from the tailplane by cutting<br />
along the marked line using a sharp balsa knife and a<br />
steel ruler. Separate the rudder 4.4 from the fin in the<br />
same way.<br />
- Carefully clean up the cut edges.<br />
Fig. 22<br />
- Pierce 2 mm Ø holes for the point hinges in the centre<br />
of the semi-circular recesses in the tailplane 4.5 and fin<br />
4.6 using a bradawl.<br />
Fig. 23<br />
- Apply epoxy to the inside of the holes using a piece of<br />
wire or a large pin.<br />
- Push the hinges into the holes as far as the pivot. Fold<br />
the hinges upwards to check that they are at rightangles<br />
to the centreline.<br />
- Caution: take care to avoid glue getting onto the hinge<br />
pivots.<br />
13<br />
Stade 4, les empennages<br />
No.<br />
3026<br />
N° Désignation, cotes en mm Nbre de pièces<br />
4.1 axe, charnière 7<br />
4.2 œillet, charnière 7<br />
4.3 gouverne de profond<strong>eu</strong>r 1<br />
4.4 gouverne de direction 1<br />
4.5 stabilisat<strong>eu</strong>r 1<br />
4.6 dérive avec élément formé 1<br />
4.7 guignol 2<br />
4.8 vis, M 2 x 6 2<br />
4.9 accouplement de tringle 2<br />
Fig. 19<br />
- Assembler les charnière à partir des axes 4.1 et des œillets<br />
4.2. Protéger l’articulation colle le collage éventuel<br />
par une goutte d‘huile.<br />
Fig. 20 et 21<br />
- Couper avec précision la gouverne de profond<strong>eu</strong>r 4.3 et<br />
la gouverne de direction 4.4 à l’aide d’un couteau bien<br />
aiguisé et d’une règle en métal en fonction des repères.<br />
- Nettoyer les arêtes de coupe.<br />
Fig. 22<br />
- Dans les concavités semi-circulaires dans les empennages<br />
4.5 et 4.6, à l’aide d’un poinçon, prépercer les<br />
trous des charnières, au centre, avec un diamètre de 2<br />
mm environ.<br />
Fig. 23<br />
- Appliquer de la colle époxy à l’aide d’un brin métallique<br />
ou d’une grosse aiguille dans les trous.<br />
- Mettre les charnières en place jusqu’à la butée de l‘articulation.<br />
- Tourner les charnières vers le haut afin de vérifier qu’elles<br />
se trouvent parfaitement perpendiculaires à la ligne<br />
médiane. Attention : la colle ne doit en aucun cas<br />
atteindre le pivot des charnières.