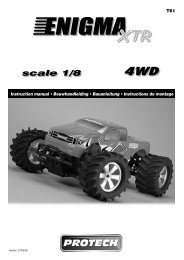
Robbe Cardinal.pdf - RCtube.eu
Robbe Cardinal.pdf - RCtube.eu
Robbe Cardinal.pdf - RCtube.eu

Create successful ePaper yourself
Turn your PDF publications into a flip-book with our unique Google optimized e-Paper software.
Trimmen auf Geradeausflug<br />
Das Modell genau beobachten. Bei seitlichem Ausbrechen in<br />
eine Richtung entsprechend durch kurzes Gegenst<strong>eu</strong>ern<br />
(kleine Ruderausschläge) korrigieren.<br />
Wenn das Modell von sich aus nach der Korrektur weiterhin<br />
eine Kurve fliegt, Kurvenrichtung merken.<br />
- Bei Kurvenflug links die Sendertrimmung nach rechts, bei<br />
Kurvenflug rechts die Trimmung nach links verschieben.<br />
- Ist ein Geradeausflug erreicht, eine weite Kurve einleiten,<br />
Modell zurückholen und mit abgeschaltetem Motor landen.<br />
- War eine Rechtstrimmung erforderlich, das Ruder nach<br />
Lösen des Schraube leicht nach rechts stellen. Bei<br />
einer Linkstrimmung das Ruder nach Lösen des<br />
Schraube leicht nach links stellen.<br />
- Die Sendertrimmung auf Mittelstellung bringen und ern<strong>eu</strong>t<br />
starten. Sollte die Trimmung am Modell nicht ausreichend<br />
sein, das Ruder in ganz kleinen Schritten nachstellen, bis<br />
ein Geradeausflug erreicht ist.<br />
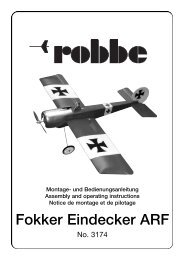
Bauanleitung, Assembly instructions, Notice de montage<br />
<strong>Cardinal</strong><br />
Trimming for straight flight<br />
Watch the model carefully. If it shows a tendency to veer to<br />
one side, apply the opposite turn control briefly to correct<br />
(only slight movements).<br />
If the model continues to turn after you have corrected its<br />
flight path, note the direction of turn.<br />
- If the model turns left, move the transmitter trim to the right.<br />
If the model turns right, move the trim to the left.<br />
- Once the model is flying straight ahead, fly a broad turn to<br />
bring the model back towards the starting point, then switch<br />
off the motor and land on the glide.<br />
- If right trim is necessary, undo the pushrod screw and<br />
offset the rudder slightly to the right. If left trim is necessary,<br />
undo the pushrod screw and offset the rudder<br />
slightly to the left.<br />
- Move the transmitter trim to centre and launch again. If the<br />
trim adjustment on the model was not sufficient, adjust the<br />
rudder in very small increments until you achieve straight<br />
flight.<br />
35<br />
Mise au point du vol en ligne droite<br />
No.<br />
3026<br />
Observez le modèle exactement, s’il décroche latéralement,<br />
contrez avec de courts mouvements au manche (Pas de<br />
débattements de gouverne).<br />
Si de lui-même le modèle à tendance à virer malgré les corrections,<br />
observez la direction du virage.<br />
- Si la tendance à virer se manifeste vers la gauche, déplacer<br />
le trim de l’émett<strong>eu</strong>r vers la droite, si la tendance à virer<br />
se manifeste vers la droite, déplacez le trim vers la gauche.<br />
- Lorsqu’on a obtenu une trajectoire parfaitement rectiligne,<br />
engager un autre virage, ramener le modèle et le faire atterrir<br />
mot<strong>eu</strong>r coupé.<br />
- Si vous avez volé avec le trim de direction à droite,<br />
repositionnez la vis sur la tringlerie en poussant la<br />
dérive légèrement vers la droite. Remettez le trim au<br />
n<strong>eu</strong>tre.<br />
- Si vous avez volé avec le trim de direction à gauche,<br />
repositionnez la vis sur la tringlerie en poussant la<br />
dérive légèrement vers la gauche. Remettez le trim au<br />
n<strong>eu</strong>tre.<br />
- Ramenez le trim au n<strong>eu</strong>tre sur l’émett<strong>eu</strong>r et décoller. Si la<br />
correction s’avérait insuffisante , retouchez le gouvernail<br />
par petites étapes jusqu’à ce qu’elle soit parfaite: Le modèle<br />
doit, de lui-même, poursuivre une trajectoire rectiligne.