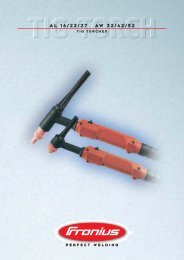
variostar 247 variostar 317, 317-2 operating instructions ... - dpiaca
variostar 247 variostar 317, 317-2 operating instructions ... - dpiaca
variostar 247 variostar 317, 317-2 operating instructions ... - dpiaca
- No tags were found...

You also want an ePaper? Increase the reach of your titles
YUMPU automatically turns print PDFs into web optimized ePapers that Google loves.
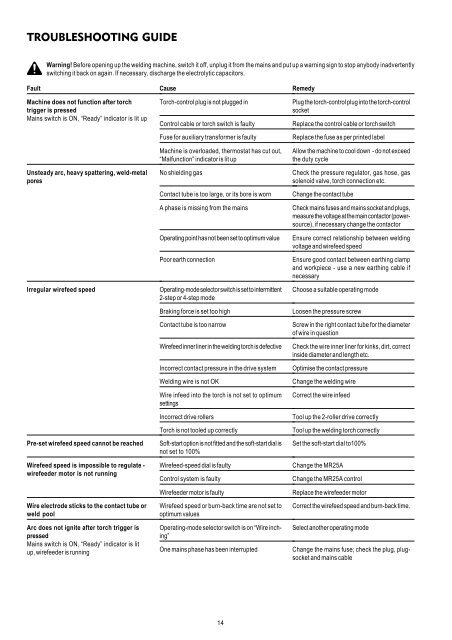
TROUBLESHOOTING GUIDEWarning! Before opening up the welding machine, switch it off, unplug it from the mains and put up a warning sign to stop anybody inadvertentlyswitching it back on again. If necessary, discharge the electrolytic capacitors.Fault Cause RemedyMachine does not function after torchtrigger is pressedMains switch is ON, “Ready” indicator is lit upUnsteady arc, heavy spattering, weld-metalporesIrregular wirefeed speedPre-set wirefeed speed cannot be reachedWirefeed speed is impossible to regulate -wirefeeder motor is not runningWire electrode sticks to the contact tube orweld poolArc does not ignite after torch trigger ispressedMains switch is ON, “Ready” indicator is litup, wirefeeder is runningTorch-control plug is not plugged inControl cable or torch switch is faultyFuse for auxiliary transformer is faultyMachine is overloaded, thermostat has cut out,“Malfunction” indicator is lit upNo shielding gasContact tube is too large, or its bore is wornA phase is missing from the mainsOperating point has not been set to optimum valuePoor earth connectionOperating-mode selector switch is set to intermittent2-step or 4-step modeBraking force is set too highContact tube is too narrowWirefeed inner liner in the welding torch is defectiveIncorrect contact pressure in the drive systemWelding wire is not OKWire infeed into the torch is not set to optimumsettingsIncorrect drive rollersTorch is not tooled up correctlySoft-start option is not fitted and the soft-start dial isnot set to 100%Wirefeed-speed dial is faultyControl system is faultyWirefeeder motor is faultyWirefeed speed or burn-back time are not set tooptimum valuesOperating-mode selector switch is on “Wire inching”One mains phase has been interruptedPlug the torch-control plug into the torch-controlsocketReplace the control cable or torch switchReplace the fuse as per printed labelAllow the machine to cool down - do not exceedthe duty cycleCheck the pressure regulator, gas hose, gassolenoid valve, torch connection etc.Change the contact tubeCheck mains fuses and mains socket and plugs,measure the voltage at the main contactor (powersource),if necessary change the contactorEnsure correct relationship between weldingvoltage and wirefeed speedEnsure good contact between earthing clampand workpiece - use a new earthing cable ifnecessaryChoose a suitable <strong>operating</strong> modeLoosen the pressure screwScrew in the right contact tube for the diameterof wire in questionCheck the wire inner liner for kinks, dirt, correctinside diameter and length etc.Optimise the contact pressureChange the welding wireCorrect the wire infeedTool up the 2-roller drive correctlyTool up the welding torch correctlySet the soft-start dial to100%Change the MR25AChange the MR25A controlReplace the wirefeeder motorCorrect the wirefeed speed and burn-back time.Select another <strong>operating</strong> modeChange the mains fuse; check the plug, plugsocketand mains cable14