DSR 5600 COV.qxd - Elektroda
DSR 5600 COV.qxd - Elektroda
DSR 5600 COV.qxd - Elektroda

Sie wollen auch ein ePaper? Erhöhen Sie die Reichweite Ihrer Titel.
YUMPU macht aus Druck-PDFs automatisch weboptimierte ePaper, die Google liebt.
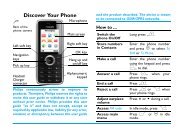
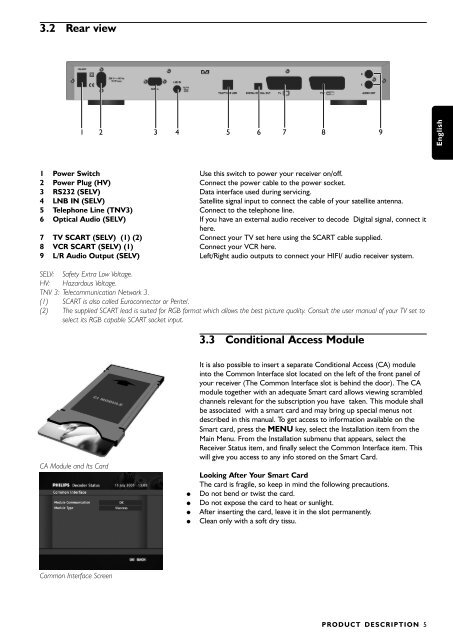
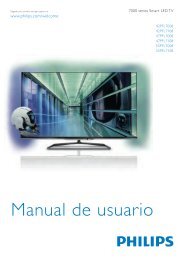
3.2 Rear view<br />
1 Power Switch Use this switch to power your receiver on/off.<br />
2 Power Plug (HV) Connect the power cable to the power socket.<br />
3 RS232 (SELV) Data interface used during servicing.<br />
4 LNB IN (SELV) Satellite signal input to connect the cable of your satellite antenna.<br />
5 Telephone Line (TNV3) Connect to the telephone line.<br />
6Optical Audio (SELV) If you have an external audio receiver to decode Digital signal, connect it<br />
here.<br />
7 TV SCART (SELV) (1) (2) Connect your TV set here using the SCART cable supplied.<br />
8 VCR SCART (SELV) (1) Connect your VCR here.<br />
9 L/R Audio Output (SELV) Left/Right audio outputs to connect your HIFI/ audio receiver system.<br />
SELV: Safety Extra Low Voltage.<br />
HV: Hazardous Voltage.<br />
TNV 3: Telecommunication Network 3.<br />
(1) SCART is also called Euroconnector or Peritel.<br />
(2) The supplied SCART lead is suited for RGB format which allows the best picture quality. Consult the user manual of your TV set to<br />
select its RGB capable SCART socket input.<br />
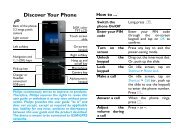
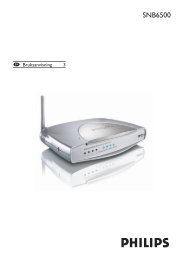
CA Module and Its Card<br />
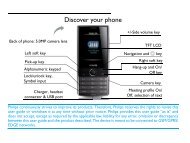
Common Interface Screen<br />
1 2 3 4 5 6<br />
7 8 9<br />
3.3 Conditional Access Module<br />
It is also possible to insert a separate Conditional Access (CA) module<br />
into the Common Interface slot located on the left of the front panel of<br />
your receiver (The Common Interface slot is behind the door). The CA<br />
module together with an adequate Smart card allows viewing scrambled<br />
channels relevant for the subscription you have taken. This module shall<br />
be associated with a smart card and may bring up special menus not<br />
described in this manual. To get access to information available on the<br />
Smart card, press the MENU key, select the Installation item from the<br />
Main Menu. From the Installation submenu that appears, select the<br />
Receiver Status item, and finally select the Common Interface item. This<br />
will give you access to any info stored on the Smart Card.<br />
Looking After Your Smart Card<br />
The card is fragile, so keep in mind the following precautions.<br />
● Do not bend or twist the card.<br />
● Do not expose the card to heat or sunlight.<br />
● After inserting the card, leave it in the slot permanently.<br />
● Clean only with a soft dry tissu.<br />
PRODUCT DESCRIPTION 5<br />
English


![03_[DE] - Philips](https://img.yumpu.com/25100096/1/184x260/03-de-philips.jpg?quality=85)