INTELLINET Gigabit SATA NAS - PCDeacitec
INTELLINET Gigabit SATA NAS - PCDeacitec
INTELLINET Gigabit SATA NAS - PCDeacitec

You also want an ePaper? Increase the reach of your titles
YUMPU automatically turns print PDFs into web optimized ePapers that Google loves.
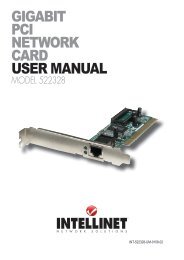
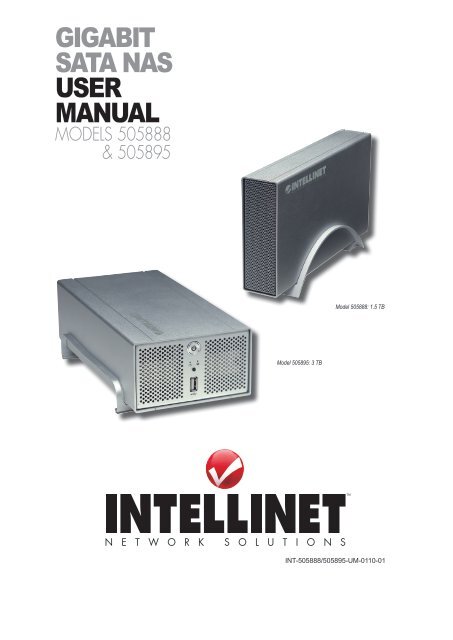
GiGabit<br />
Sata NaS<br />
uSer<br />
maNual<br />
Models 505888<br />
& 505895<br />
Model 505895: 3 TB<br />
Model 505888: 1.5 TB<br />
INT-505888/505895-UM-0110-01
Thank you for purchasing the <strong>INTELLINET</strong> NETWORK SOLUTIONS <strong>Gigabit</strong> <strong>SATA</strong><br />
<strong>NAS</strong>, Model 505888 (1.5 TB) or Model 505895 (3 TB). Either model provides an<br />
easy solution for home and office users who require the benefits of the 3 S’s:<br />
speed, streaming and abundant storage space.<br />
You can install a <strong>SATA</strong> hard drive — up to 1.5 TB for Model 505888 and up to 3 TB<br />
for Model 505895 — for extremely fast access to data storage on your network. If<br />
more space is needed, you can connect two additional USB HDDs. And with the<br />
convenient power-saving design, the <strong>SATA</strong> <strong>NAS</strong> will put the HDD to sleep if it isn’t<br />
needed — saving more than 80 percent of its power.<br />
With a <strong>Gigabit</strong> network connection, this device provides ultra-fast data throughput,<br />
making it the perfect network storage unit for smaller work groups. Plus, it allows<br />
you to stream videos and photos through the media player in your home<br />
entertainment center, and streams MP3 files to your media player via iTunes and<br />
downloads files via the BitTorrent network to the <strong>NAS</strong> without your PC being on.<br />
Detailed instructions in this user manual make installation reasonably quick and<br />
simple so you’ll soon be enjoying the benefits of all these popular features:<br />
• Holds one (Model 505888) or two (Model 505895) 3.5” <strong>SATA</strong>-I or <strong>SATA</strong>-II hard<br />
drives (up to 1.5 TB each, not included)<br />
• Model 505895 supports RAID configurations (RAID 0, 1, JBOD)<br />
• Hi-Speed USB ports to connect an additional external USB hard drive or USB<br />
printer or USB memory stick<br />
• Supported USB hard drive file systems: FAT32 and NTFS<br />
• Made from high-quality aluminum for optimized heat dissipation<br />
• Cooling fan automatically adjusts to internal temperature (Model 505895 only)<br />
• Integrated iTunes Digital Audio Access Protocol (DAAP) server delivers audio<br />
streams to any iTunes-compatible media player on the network<br />
• Built-in FTP server allowing remote users to upload and download files<br />
• BitTorrent client to download files from the BT network while having your<br />
computer turned off<br />
• Cross-platform file sharing for Windows, Linux and Mac OS<br />
• Supported file serving protocols: CIFS (Samba), FTP and NFS<br />
• Supports user groups and user accounts with quota management<br />
• User (name/password) and Sharing Level (read/write) security<br />
• Supports Self-Monitoring Analysis and Reporting Technology-enabled (SMART)<br />
hard drives<br />
• Adjustable hard drive spin-down time<br />
• Easy Web-based configuration via Web browser<br />
• Firmware update via Web browser<br />
• Two-Year Warranty<br />
2
table of coNteNtS<br />
section page section page<br />
1 HARDWARE ...........................................4<br />
1.1 Model 505888 / 1.5 TB ....................4<br />
1.1.1 System Requirements ...............4<br />
1.1.2 Front Panel ................................4<br />
1.1.3 Quick Setup ...............................4<br />
1.1.4 Hard Drive Installation ...............5<br />
1.2 Model 505895 / 3 TB .......................6<br />
1.2.1 System Requirements ...............6<br />
1.2.2 Front Panel ................................6<br />
1.2.3 Quick Setup ...............................6<br />
1.2.4 Hard Drive Installation ...............7<br />
2 Quick instAllAtion ..........................9<br />
2.1 Connections & Configuration ...........9<br />
2.2 Power On/Off Procedures ................9<br />
2.2.1 Model 505888 / 1.5 TB ..............9<br />
2.2.2 Model 505895 / 3 TB ............... 10<br />
3 sYstEM sEtuP / loGGinG in .......... 11<br />
3.1 PC Login ........................................ 11<br />
3.2 Peer to Peer Login ......................... 13<br />
3.3 Mac Login ...................................... 13<br />
3.4 Bonjour Login ............................... 14<br />
4 WEb confiGuRAtion ....................... 16<br />
4.1 Basic .............................................. 16<br />
4.1.1 Quick Setup ............................. 16<br />
4.2 Control Panel ................................. 19<br />
4.2.1 Users and Groups ................... 19<br />
4.2.2 File and Print ...........................20<br />
4.2.3 System .....................................22<br />
4.2.4 Network Service ......................25<br />
Package contents<br />
• <strong>Gigabit</strong> <strong>SATA</strong> <strong>NAS</strong><br />
• Power adapter<br />
• Quick install guide and installation CD with user manual<br />
4.2.5 Maintenance ............................27<br />
4.2.6 Log File ....................................33<br />
4.3 Personal Information ......................34<br />
4.3.1 Account ...................................34<br />
5 nEtWoRk stoRAGE .........................35<br />
5.1 File Access on a PC ......................35<br />
5.1.1 FTP ..........................................35<br />
5.1.2 Windows Explorer ....................36<br />
5.1.3 Mapping a Network Drive ........36<br />
5.1.4 Disconnecting a Network Drive...38<br />
5.2 File Access on a Mac .....................39<br />
5.2.1 SMB .........................................39<br />
5.2.2 FTP ..........................................40<br />
6 ADDitionAl fEAtuREs .................... 41<br />
6.1 UPnP ............................................. 41<br />
6.2 Bonjour and iTunes ........................ 41<br />
6.2.1 iTunes ...................................... 42<br />
6.3 USB Drive ......................................43<br />
6.3.1 Sharing a USB Drive ...............43<br />
6.3.2 The <strong>NAS</strong> as a USB Drive ........44<br />
6.4 USB Backup ..................................45<br />
6.5 USB Printer ....................................45<br />
6.5.1 Installation on a PC .................46<br />
6.5.2 Installation on a Mac ................48<br />
6.2.1 iTunes ...................................... 42<br />
6.6 BitTorrent ....................................... 51<br />
7 GlossARY ..........................................53<br />
8 fREQuEntlY AskED QuEstions ...54<br />
9 sPEcificAtions.................................56<br />
NOTE: Some screen images have been modified to fit the format of this manual.<br />
Contents<br />
3
1 hardware<br />
1.1 model 505888 / 1.5 tb<br />
1.1.1 System requirements<br />
• Computer with Internet browser and network access for setup<br />
• Switch or router with one free Ethernet port for the <strong>NAS</strong><br />
• One 3.5” <strong>SATA</strong>-I or <strong>SATA</strong>-II hard drive with 20 GB – 1.5 TB (1.5 Gbps)<br />
1.1.2 front Panel<br />
Two LEDs are positioned behind the frontpanel<br />
grille: Blue indicates power is on;<br />
red indicates data access. NOTE: This<br />
unit doesn’t feature an On/Off switch. To<br />
turn it off, simply remove the power supply;<br />
LEDs<br />
or when using the network drive, go to the<br />
Turn Off Server screen in the System section and click “Turn off.” To turn it back on,<br />
re-connect the power supply or allow about two minutes for the system to re-boot<br />
when using the network drive.<br />
1.1.3 rear Panel<br />
The buttons and jacks on<br />
the rear panel are detailed<br />
below from left to right.<br />
<strong>Gigabit</strong> Ethernet port —<br />
This RJ45 jack features<br />
two LEDs. When flashing<br />
green, the left LED indicates activity. The right LED is unlit when linked at 10<br />
Mbps; green at 100 Mbps; orange at 1000 Mbps NOTE: The device can be used<br />
as a network drive or an external USB drive, but not both at the same time. When<br />
both USB (USB device port) and Ethernet cables are connected, the device will<br />
act as a USB hard drive.<br />
Restart button — Press and release for a hardware reset of the network drive. The<br />
device will restart after you release the button.<br />
Reset button — When the network drive is powered up and ready, press and<br />
release for a software reset, or press and hold it for 5 seconds before releasing<br />
to reset all the network drive settings to factory defaults (which will erase all<br />
user accounts and groups).<br />
USB host port — This USB type-B port is the host connection to the computer<br />
when using the device as an external USB HDD.<br />
4<br />
hardware
USB device port — This USB type-A port is for connection to an external USB hard<br />
drive, USB flash drive or USB printer.<br />
Power adapter jack — For external USB devices, it’s recommended that the USB<br />
drives have their own power supply.<br />
1.1.4 hard drive installation<br />
1. Remove the 3 screws from<br />
the chassis bottom.<br />
(Disengage the unit from<br />
the stand if it’s attached.)<br />
cAution! Handle the<br />
device very carefully, as<br />
some metal edges may<br />
be sharp or rough.<br />
2. Push the inner<br />
enclosure out to<br />
separate it from<br />
the outer chassis.<br />
3. Set the hard drive in the enclosure and 4. Secure the drive using 2 screws<br />
connect the <strong>SATA</strong> and power cables. on each side.<br />
5. Reverse Steps 2 and 1, sliding the inner enclosure back into the outer chassis<br />
and replacing the 3 screws in the chassis bottom.<br />
6. If desired, align the stand with the holes in the chassis and lightly snap the stand<br />
in place.<br />
NOTE: Be careful not to damage any cables or components during the assembly,<br />
and make sure the cables are firmly connected.<br />
hardware<br />
5
1.2 model 505895 / 3 tb<br />
1.2.1 System requirements<br />
• Computer with Internet browser and network access for setup<br />
• Switch or router with one free Ethernet port for the <strong>NAS</strong><br />
• One or two 3.5” <strong>SATA</strong>-I or <strong>SATA</strong>-II hard drives (1.5 Gbps) with 20 GB – 1.5 TB per<br />
drive (3 TB total)<br />
• For RAID 0 and 1, two hard drives of identical capacity are recommended<br />
1.2.2 front Panel<br />
The buttons and jacks on<br />
the front panel are detailed<br />
below from top to bottom.<br />
Power switch — Press to<br />
turn the unit on or off; On<br />
will display a blue light.<br />
NOTE: It takes about a<br />
minute for the system to<br />
boot once the unit is on.<br />
LED status indicators — The<br />
OS (operating system) LED on the left lights green to indicate the system is on/<br />
ready; blinks to indicate the system is starting or is shutting down; and remains<br />
off to indicate the system has shut down. The HDD (activity) LED on the right<br />
lights amber to indicate an error (disk not found or a RAID error); blinks to<br />
indicate data access; and remains off to indicate there is no disk activity.<br />
USB backup button — Press and hold in for 4 seconds to back up your files.<br />
USB device port — This USB type-A port is for connection to an external USB hard<br />
drive, USB flash drive or USB printer.<br />
1.2.3 rear Panel<br />
The buttons and jacks on<br />
the rear panel are detailed<br />
below from top to bottom,<br />
left to right.<br />
Security lock slot — Lock is<br />
not included.<br />
Ventilation fan— The black<br />
jumper at J4/J5 can be<br />
re-positioned to set the<br />
mode for the fan speed.<br />
6<br />
hardware
The jumper is placed on J4 at the factory (as shown at right) so<br />
that the fan speed will automatically adjust to the temperature<br />
of the device during operation. (The thermal sensor needs to be<br />
connected — see Step 5 of section 1.2.4 below.) If you prefer,<br />
you can set the fan to run at high speed by re-positioning the<br />
jumper to J5; or you can set the fan to run at low speed by<br />
removing the jumper altogether. NOTE: Be sure to disconnect<br />
power to the device before changing any of the fan or jumper connections.<br />
<strong>Gigabit</strong> Ethernet port — This jack features multiple LEDs. When lighted green, the<br />
left LED indicates a link. The right LED flashes green to indicate activity at 10<br />
Mbps; both green and orange at 100 Mbps; and orange at 1000 Mbps.<br />
Restart button — Press and release for a hardware reset of the network drive. The<br />
device will restart after you release the button.<br />
Reset button — When the network drive is powered up and ready, press and<br />
release for a software reset, or press and hold it for 5 seconds before releasing<br />
to reset all the network drive settings to factory defaults (which will erase all<br />
user accounts and groups).<br />
USB device port — This second USB type-A port is also for connection to an<br />
external USB hard drive, USB flash drive or USB printer.<br />
Power adapter jack — For external USB devices, it’s recommended that the USB<br />
drives have their own power supply. If two bus-powered USB drives are connected<br />
at the same time, at least one of them needs to be powered by an external<br />
power supply.<br />
1.2.4 hard drive installation<br />
1. Remove the 4 screws from<br />
the chassis bottom.<br />
cAution! Handle the<br />
device very carefully, as<br />
some metal edges may<br />
be sharp or rough.<br />
fAn<br />
J5<br />
hardware<br />
fAn<br />
connEction<br />
J4 JuMPER<br />
tHERMAl sEnsoR<br />
connEction<br />
2. Push the inner<br />
enclosure out to<br />
separate it from<br />
the outer chassis.<br />
7
3. Set the first hard drive in the enclosure 4. Secure the drive using 2<br />
and connect the <strong>SATA</strong> and power cables. screws on each side.<br />
5. Using the tape provided, attach the thermal probe (black and white wire) to the<br />
first hard drive. Choose a location between the two drives so the probe won’t<br />
be damaged during the installation of the second drive.<br />
6. Set the second hard drive in the enclosure 7. Secure the drive using 2<br />
and connect the <strong>SATA</strong> and power cables. screws on each side.<br />
8. Reverse Steps 2 and 1, sliding the inner enclosure back into the outer chassis<br />
and replacing the 4 screws in the chassis bottom.<br />
NOTE: Be careful not to damage any cables or components during the assembly,<br />
and make sure the cables are firmly connected.<br />
8<br />
hardware
2 QuicK iNStallatioN<br />
2.1 Connections & Configuration<br />
Following is a quick installation procedure to get you up and running. For further<br />
details on each of the settings, refer to subsequent sections in this manual.<br />
1. Install one or two hard drives. NOTE: Without installing and formatting a drive<br />
first, the other functions of the <strong>Gigabit</strong> <strong>SATA</strong> <strong>NAS</strong> will not be available.<br />
2. Connect the Ethernet cable from your network router or switch to the device.<br />
3. Model 505888: When everything is connected, turn the <strong>Gigabit</strong> <strong>SATA</strong> <strong>NAS</strong> on<br />
by connecting the power adapter. Give it about two minutes to boot up.<br />
Model 505895: When everything is connected, turn the <strong>Gigabit</strong> <strong>SATA</strong> <strong>NAS</strong> on<br />
by pressing the Power switch. Give it about two minutes to boot up.<br />
4. On the included installation CD, run the <strong>INTELLINET</strong>_nas.exe utility. If needed,<br />
refer to Section 3: System Setup / Logging In in the manual.<br />
5. Access the Web configuration interface via your Web browser, then refer to<br />
Section 4: Web Configuration in the user manual.<br />
5. Model 505888: Go to the Maintenance menu and use the disk utility to format<br />
the drive. When only using the <strong>Gigabit</strong> <strong>SATA</strong> <strong>NAS</strong> as network drive, using EXT2<br />
is recommended; when also using it as a USB drive, NTFS or FAT32 will be<br />
more convenient, depending on your operating system.<br />
Model 505895: Go to the Maintenance menu and use the disk utility to format<br />
the drive. If two identical drives are installed, you can also go to the RAID<br />
Setting section and create your RAID array.<br />
6. Once the drive has been formatted, go to the Basic menu and follow the quick<br />
setup wizard instructions. This will help you to set up the IP configuration, add<br />
the first user and prepare file sharing, after which you’ll be ready to start sharing<br />
or downloading files. NOTE: Set the speed for your network card to auto and<br />
not full or half speed.<br />
2.2 Power on/off Procedures<br />
2.2.1 model 505888 / 1.5 tb<br />
To turn the power on, simply connect the power supply. NOTE: Always connect the<br />
power adapter to the <strong>Gigabit</strong> <strong>SATA</strong> <strong>NAS</strong> before you plug it into an AC outlet. It’ll<br />
take about two minutes for the network drive to go online and be ready.<br />
To turn off the network drive, log in via your Web browser, stop all current downloads,<br />
go to the “Turn Off Server” section in the System menu and turn the server off.<br />
Once the system has shut down, remove the power adapter from the AC outlet.<br />
QUICK InstaLLatIon<br />
9
When using <strong>Gigabit</strong> <strong>SATA</strong> <strong>NAS</strong> as a USB drive, eject the external drive from your<br />
system, then remove the power adapter from the AC outlet.<br />
2.2.2 model 505895 / 3 tb<br />
To turn the power on, first connect the power adapter to the <strong>Gigabit</strong> <strong>SATA</strong> <strong>NAS</strong>,<br />
then plug it into an AC outlet. Press the Power switch. The blue backlight LED will<br />
turn on, and the unit will start to boot up. It will take about a minute for the device<br />
to go online and be ready. During bootup, the OS LED will be blinking.<br />
To turn the power off, log in via your Web browser, stop all current downloads, go<br />
to the “Turn Off Server” section in the System menu, and turn the server off or use<br />
the Power switch. The OS LED will be blinking for about 5 seconds; the system<br />
will shut down about 20 seconds later. NOTE: If the device is not in use for a<br />
longer period of time, remove the power adapter from the AC outlet.<br />
IMPORTANT: To protect your files and help prevent the loss of your data, it’s<br />
strongly recommended that you keep two copies of your data: one copy on your<br />
<strong>Gigabit</strong> <strong>SATA</strong> <strong>NAS</strong> and a second copy either on your internal drive or another<br />
storage media, such as a CD, DVD, tape or additional external drive. Any loss or<br />
corruption of data while using this <strong>Gigabit</strong> <strong>SATA</strong> <strong>NAS</strong> is the sole responsibility of<br />
the user, and under no circumstances will <strong>INTELLINET</strong> NETWORK SOLUTIONS<br />
be held liable for compensation or the recovery of this data.<br />
10<br />
QUICK InstaLLatIon
3 SYStem SetuP / loGGiNG iN<br />
To configure your network drive, open your Web browser, enter the IP address,<br />
then use the Web configuration interface for further setup. Options for identifying<br />
your device’s IP address once it’s connected to the network are described below.<br />
3.1 Pc login<br />
Open the <strong>INTELLINET</strong>_nas.exe utility on the included CD. This will list the device<br />
automatically and allow you to access the Web configuration interface with a simple<br />
click of your mouse. You can use the same utility at a later point to map the network<br />
drive after you set up your shares.<br />
1. Turn on the <strong>NAS</strong>, ensuring it’s connected to the same network as your computer.<br />
2. Start the utility by double-clicking on the .exe file and clicking “Setup.”<br />
3. Your <strong>Gigabit</strong> <strong>SATA</strong> <strong>NAS</strong> should automatically display in the device list. If it<br />
doesn’t, make sure the utility has access to the network and search again.<br />
You may need to configure your firewall or even temporarily turn it off.<br />
4. With the utility’s Step 1: Network Storage Link(s) Have Been Found screen<br />
displayed, select your device and click “OK” to start the setup wizard.<br />
5. Before you can access the <strong>Gigabit</strong><br />
<strong>SATA</strong> <strong>NAS</strong>, you need to enter the<br />
admin password. Enter the default —<br />
“admin” — in the text field, then click<br />
“OK” to log in.<br />
sYsteM setUP / LoGGInG In<br />
11
6. When the Step 2: IP Settings screen displays, you can define the name for<br />
your device and set up the IP configuration. Selecting “Automatically obtain an<br />
IP address (DHCP)” is recommended. When set, click “Next” to continue.<br />
7. When the Step 3: Date and Time screen displays, you can set up the date and<br />
time. Select your time zone from the drop-down menu, set the date and the<br />
time, then click “Next” to continue.<br />
8. When the Step 4: Settings Configuration screen displays, you can compare<br />
your new settings with the previous configuration. If you find a mistake, click<br />
“Back” to make changes; otherwise, click “Save.”<br />
12<br />
sYsteM setUP / LoGGInG In
9. The setup wizard will remind you that the<br />
previous settings will now be updated with<br />
the new configuration. Click “OK” to finish<br />
the setup wizard.<br />
Once you’ve identified the IP address (as<br />
confirmed above on the Step 4 screen), you can simply enter that into the URL<br />
address field of your Web browser to access the Web configuration interface of<br />
your device. NOTE: This option may not work on a Mac.<br />
3.2 Peer to Peer login<br />
If you connect the <strong>Gigabit</strong> <strong>SATA</strong> <strong>NAS</strong> directly to your computer (PC or Mac) using<br />
Ethernet cable, you can access the device using its default IP: 192.168.1.1. Open<br />
the Web browser and enter 192.168.1.1 to access the Web configuration interface.<br />
NOTE: This option only works when Bonjour is disabled (see 3.4 below).<br />
3.3 mac login<br />
When the Bonjour service is disabled, the only way to access the Login screen is<br />
by using its IP address. First, you need to find out the IP address of your <strong>Gigabit</strong><br />
<strong>SATA</strong> <strong>NAS</strong>, then use the Web browser to access the Web configuration interface.<br />
1. Turn on the <strong>NAS</strong>, ensuring it’s connected to the same network as your<br />
computer.<br />
2. Open the Terminal utility, which is usually located in your Applications<br />
folder under Utilities.<br />
sYsteM setUP / LoGGInG In<br />
13
3. Enter “intellinet.” This is the default name of the <strong>Gigabit</strong> <strong>SATA</strong> <strong>NAS</strong>: If it’s been<br />
changed and you don’t know the current correct name, reset the device first to<br />
re-establish the default settings.<br />
4. After entering the previous command and pressing the key, it should<br />
return an IP address, followed by the name you just entered.<br />
5. Open your Web browser and enter the IP address from the previous step to<br />
access the Web configuration interface. The default username and password<br />
are both “admin.”<br />
NOTE: When Bonjour is disabled, you can use the Peer to Peer method to log in<br />
and set up your network drive.<br />
3.4 bonjour login<br />
When the Bonjour service on the device is enabled, all you need to do is access<br />
the Bonjour tab in your bookmarks folder and select the <strong>Gigabit</strong> <strong>SATA</strong> <strong>NAS</strong>.<br />
1. Turn on the <strong>NAS</strong>, ensuring it’s connected to the same network as your computer.<br />
2. Open your Web browser. If not already displayed, click on the bookmarks icon<br />
to show all bookmarks.<br />
14<br />
sYsteM setUP / LoGGInG In<br />
intellinet<br />
intellinet<br />
intellinet
3. Select “Bonjour” and browse for “intellinet.” Click on it to display the Login<br />
screen.<br />
intellinet<br />
4. The default login is “admin” for both username and password.<br />
sYsteM setUP / LoGGInG In<br />
15
4 web coNfiGuratioN<br />
Open your Web browser, enter the IP address of your <strong>Gigabit</strong> <strong>SATA</strong> <strong>NAS</strong> (refer to<br />
Section 3: System Setup / Logging In) and log in. The default login is “admin” for<br />
both the username and the password. The initial screen that displays presents four<br />
primary menu options: Basic, Control Panel, Personal Information and Log Out.<br />
Basic — The settings in this menu are aimed at the user who wants to quickly set<br />
up the LAN disk and share files on the local network. Only the most basic<br />
functions and settings are available, but it is ideal for someone using this<br />
device for the first time. For a more advanced setup, see 4.2: Control Panel.<br />
Control Panel — This menu includes all the settings and information the <strong>Gigabit</strong><br />
<strong>SATA</strong> <strong>NAS</strong> offers. You can access specific settings or adjust and modify<br />
everything manually.<br />
Personal Info — This menu is for the system administrator account. It includes the<br />
option to set the password and some others related to the Web interface.<br />
Log Out — This can be used to log out once all the settings have been configured.<br />
NOTE: Without installing and formatting a drive first, the other functions of the<br />
<strong>Gigabit</strong> <strong>SATA</strong> <strong>NAS</strong> will not be available. The settings options presented in this<br />
section only affect the network drive and do not apply to the USB drive.<br />
4.1 basic<br />
4.1.1 Quick Setup<br />
As mentioned above, these are basic settings. For detailed explanations, refer to<br />
4.2.1: Users and Group Management, 4.2.2: File and Print or 4.2.3: System.<br />
4.1.1.1 wizard<br />
The setup wizard can be used to configure all the basic LAN settings for your<br />
network drive.<br />
• PC users, if you’ve followed the setup wizard steps in Section 2, there’s no need<br />
to repeat the procedure unless you want to change some of the settings or you<br />
haven’t yet completed the setup.<br />
16<br />
web ConfIGUratIon
• Mac users, follow the setup wizard step below to quickly prepare your network<br />
drive for file sharing.<br />
1. Select your preferred language for the Web interface from the drop-down list.<br />
2. Set a new password for the Web configuration interface (not required, but<br />
strongly recommended).<br />
3. If you prefer a different hostname for your <strong>NAS</strong>, you can change the name here;<br />
otherwise, simply use the default name.<br />
4. It’s recommended that you set both IP Address and DNS Server to obtain the<br />
IP automatically; but, if required, you can set it manually. If you need help in<br />
manually filling in these fields, contact your network administrator.<br />
5. Set the date and time manually or select your time zone from the drop-down<br />
list and use an NTP server to synchronize the time via the Internet.<br />
6. Click “Save” to save the new settings.<br />
4.1.1.2 add user<br />
This screen lets you quickly add and configure a new user account.<br />
1. Enter the username and password for the new account. At this point, you can<br />
web ConfIGUratIon<br />
17
also create a private folder for that user and set the quota limit.<br />
2 If there are other users already set up, they can be added to the user account<br />
management.<br />
3. If desired, configure the permissions to the shared folder and add or remove<br />
other users.<br />
4.1.1.3 add Group<br />
This screen lets you quickly add a new group.<br />
1. Enter the group name.<br />
2. Configure which members will be included in this group by adding or removing<br />
them from the list.<br />
3. Configure the share permissions by adding (read only or writable) or removing<br />
them from the list.<br />
4.1.1.4 add Share<br />
This screen lets you quickly add a new share.<br />
1. Enter the share name and, if desired, a description for the share.<br />
2. Configure the Windows/FTP access permissions by adding (read only or writable)<br />
or removing members or groups from the list.<br />
3. Configure the NFS access permissions by adding unique IP addresses or a<br />
subnet.<br />
18<br />
web ConfIGUratIon
4.2 control Panel<br />
4.2.1 users and Groups<br />
In this section, the administrator can manage the users and groups for the <strong>NAS</strong>.<br />
Start by adding your users first, then create the groups and assign the members<br />
to their groups. NOTE: These settings only apply to the network drive, not when<br />
the drive is connected to the computer directly via USB.<br />
4.2.1.1 user management<br />
In this section, you can see all existing users for the <strong>NAS</strong> and manage them by<br />
adding or removing them from the list.<br />
Existing Users — Lists the current users of the <strong>Gigabit</strong> <strong>SATA</strong> <strong>NAS</strong>.<br />
Adding Users — To add a new user, clear the form by clicking “Clear Form” and<br />
fill in a username and password. The description is optional, but it’s<br />
recommended to help manage multiple users. If required, you can create a<br />
private folder for that user and set a limit for the capacity. Once done, click<br />
“Save” to create the new user. To add this user to an existing group, select the<br />
user from the existing users list and click “Groups” for further settings.<br />
Modifying Users — Select the user from the existing users list and modify the<br />
settings. Once done, click “Save” to apply the new settings.<br />
Removing Users — To remove a user, select it from the existing users list and<br />
click “Delete User.”<br />
4.2.1.2 Group management<br />
In this section, you can see all existing groups for the <strong>NAS</strong> and manage them by<br />
web ConfIGUratIon<br />
19
adding or removing them from the list. Groups are not required to grant access to<br />
the <strong>Gigabit</strong> <strong>SATA</strong> <strong>NAS</strong>, but they’ll help the administrator manage multiple users and<br />
easily share a folder among a group of people.<br />
Existing Groups — Lists the current groups of the <strong>Gigabit</strong> <strong>SATA</strong> <strong>NAS</strong>.<br />
Adding Groups — To add a new group, clear the form by clicking “Clear Form” and<br />
enter a new group name. Once done, click “Save” to create the new group. To<br />
add members to this group, select the group from the existing groups list and<br />
click “Members” for further settings.<br />
Modifying Groups — Select the group from the existing groups list and modify the<br />
members by clicking “Members” for further settings. Once done, click “Save”<br />
to apply the new settings.<br />
Removing Groups — To remove a group, select it from the existing groups list and<br />
click “Delete Group.”<br />
4.2.2 file and Print<br />
In this menu, you can configure all the settings related to the FTP, NFS and printer<br />
server in order to manage how your files and folders are shared.<br />
4.2.2.1 file Server<br />
In this section, you can modify the server settings and enable or disable a service.<br />
NOTE: After making any changes to the settings, click “Save” to apply the new<br />
configuration.<br />
Character Set — Select the language of your file names from the drop-down list.<br />
Windows Setting — In this section, you can change the workgroup the <strong>Gigabit</strong><br />
<strong>SATA</strong> <strong>NAS</strong> belongs to and modify its description. The IP for the WINS (Windows<br />
Internet name server) can be left blank unless this is required for your network.<br />
FTP Server — This can be enabled or disabled. When enabled, the default FTP<br />
port number will be set to 21, but you can change that if required.<br />
NFS Server — This can either be enabled or disabled to suit your requirements.<br />
Guest Access — To enable guest access (guest-share), enable it and, if required,<br />
20<br />
web ConfIGUratIon
set a limit for the disk space. For security reasons, the guest access can also<br />
be disabled.<br />
4.2.2.2 Share management<br />
In this section, you can manage the shares and access rights.<br />
Existing Shares — Lists the current shares on the <strong>NAS</strong>.<br />
Adding Shares — To add a new share, clear the form by clicking “Clear Form” and<br />
enter a new share name. Once done, click “Save” to create the new group.<br />
web ConfIGUratIon<br />
21
22<br />
Select the new group from the existing shares list; then, depending on how you<br />
share the files, click “Windows, FTP Access” or “NFS Access” and add the<br />
users or groups that will have access to this share. You can allow access for<br />
all users or define each user and group separately. Names with an “@” for the<br />
first letter are groups.<br />
Modifying Shares — Select the share from the existing shares list and modify the<br />
access rights by clicking “Windows, FTP Access” or “NFS Access” for further<br />
settings. Once done, click “Save” to apply the new settings.<br />
Removing Shares — To remove a share, select it from the existing shares list and<br />
click “Delete Share.”<br />
4.2.2.3 Printer Server<br />
In this section, you can enable or disable the printer server and check the details of<br />
the connected USB printer.<br />
4.2.3 System<br />
In this menu, you can configure the basic network settings for the <strong>Gigabit</strong> <strong>SATA</strong><br />
<strong>NAS</strong> and find details related to the firmware or disk usage.<br />
web ConfIGUratIon
4.2.3.1 laN Settings<br />
In this section, you can define the hostname for the <strong>NAS</strong> and set up the IP<br />
configuration. Selecting “Obtain IP/DNS address automatically” is recommended.<br />
When selecting a hostname, make sure to use a unique name and not one that<br />
has already been used on the local network.<br />
If required, you can also set the individual addresses yourself. If you need help in<br />
manually filling in these fields, contact your network administrator. NOTE: After<br />
making any changes to the settings, click “Save” to apply the new configuration.<br />
4.2.3.2 time Settings<br />
In this section, you can set the date and time manually or select your time zone<br />
from the drop-down list and use an NTP server to synchronize the time via the<br />
Internet. When setting manually, click “Save” to apply the new time and save the<br />
settings; when synchronizing via the Internet, select the NTP server and click<br />
“Update Time.”<br />
NOTE: To use the NTP function, you need to enter a valid NTP server or select one<br />
web ConfIGUratIon<br />
23
from the drop down list. If the default address at time.windows.com doesn’t work,<br />
find a new one and try again or turn off the NTP server and set the time manually.<br />
4.2.3.3 turn off Server<br />
In this section, you can restart the server or turn off the <strong>NAS</strong> via the Web browser.<br />
Make sure that nobody is accessing the device when you restart it or turn it off.<br />
Click “Restart” to restart the server. The system will restart and automatically prompt<br />
you for the login when it’s ready. Click “Turn Off” to shut down the system. The<br />
browser will prompt you to close the window after about 90 seconds (Internet<br />
Explorer only; for other browsers, close it manually).<br />
4.2.3.4 information<br />
In this section, you’ll find the product name, the current firmware and the current<br />
IP address.<br />
4.2.3.5 disk usage<br />
In this section, you’ll find a summary of the hard disk status and disk usage. Click<br />
“Refresh” to update the information.<br />
24<br />
web ConfIGUratIon
4.2.4 Network Service<br />
In this menu, you can enable or disable network services like the DHCP server,<br />
Bonjour and the BitTorrent download service.<br />
4.2.4.1 dhcP Server<br />
In this section, you can enable and set up the DHCP server. In general, there is<br />
already a DHCP server on the local network, so you don’t need to enable this; but<br />
if required, enable it and configure the addresses. Once you’ve set everything up,<br />
click “Save” to start the DHCP server and save the settings.<br />
4.2.4.2 bonjour<br />
In this section, you can enable or disable the Bonjour service. For Mac users, turn<br />
it on for easy access to the Login page via the Web browser. You can also enable<br />
iTunes so music files can be accessed. When the iTunes option is enabled, you can<br />
store MP3 music files in the “/public/music” folder and play them directly from iTunes.<br />
The <strong>Gigabit</strong> <strong>SATA</strong> <strong>NAS</strong> will automatically appear in iTunes under Shared Devices.<br />
web ConfIGUratIon<br />
25
4.2.4.3 bittorrent<br />
In this section, you can manage your torrents and add new downloads to the queue.<br />
Before you add the first job, set a limit for the download and upload speed based<br />
on your network’s bandwidth. After changing the settings, click “Save” to apply the<br />
new configuration. NOTE: If there is no hard drive installed or if the drive isn’t<br />
formatted, this menu is not available.<br />
To start downloading files, you need to download a torrent file from the Internet first,<br />
then upload it to the <strong>NAS</strong>. Once the torrent file is added, you can start downloading.<br />
The downloaded files will be stored in your “/public/btdownload” folder.<br />
The BitTorrent client on the <strong>Gigabit</strong> <strong>SATA</strong> <strong>NAS</strong> can download five files at a time,<br />
with a maximum of 40 files in the queue. Remember to start the download again<br />
if the device has been turned off or rebooted before the file has been downloaded<br />
completely. (Also see Section 6: Additional Features / BitTorrent.)<br />
NOTE: The BitTorrent client on the <strong>NAS</strong> uses the TCP protocol and the ports 6881-<br />
6889. Make sure those ports are not blocked by your router or its firewall and, if<br />
necessary, set up port forwarding so traffic for those ports is forwarded to the <strong>NAS</strong>.<br />
26<br />
web ConfIGUratIon
4.2.5 maintenance<br />
In this menu, you can format the hard drive(s), upgrade the firmware and manage<br />
the configuration settings.<br />
4.2.5.1 disk utility<br />
This utility can be used to format the hard drive(s) and view related disk information.<br />
Encryption — The <strong>Gigabit</strong> <strong>SATA</strong> <strong>NAS</strong> supports 128-bit loop-AES encryption for the<br />
EXT2 file system. When enabled, the drive needs to be formatted again, and<br />
you’ll be prompted for a password (which has to be exactly 20 characters).<br />
File System (Model 505888 / 1.5 TB) — The available file systems are EXT2, EXT3,<br />
FAT32 and NTFS. For the drive installed in the <strong>Gigabit</strong> <strong>SATA</strong> <strong>NAS</strong>, using EXT2<br />
is recommended for optimum performance and functionality when it is used as<br />
network drive only. If it’s to be connected to a PC via USB, as well, then NTFS<br />
is the preferred file system, so that it can be mounted without the need to install<br />
additional applications to read the EXT2 partition. The performance of the<br />
network drive will not be as good as with EXT2, however.<br />
File System (Model 505895 / 3 TB) — For drives not in a RAID array, there’s a<br />
choice among EXT2, EXT3 and FAT32. For drives installed in the <strong>Gigabit</strong> <strong>SATA</strong><br />
<strong>NAS</strong>, using EXT2 is recommended for optimum performance and functionality.<br />
Scandisk — Click “Scan” to check the disk integrity. If possible, any errors found<br />
will automatically be fixed. This can take awhile to finish, depending on the<br />
capacity of the drive. During any such fixes, the disk can not be used.<br />
Unmount — This function is only available for external USB drives attached to the<br />
<strong>NAS</strong>. Click “Unmount” to eject the USB drive before you disconnect it.<br />
web ConfIGUratIon<br />
27
Detail — Click “Detail” to see additional disk information. If the drive supports<br />
S.M.A.R.T, it will also report the disk’s health status.<br />
HDD Power Management — To save power and reduce heat, you can let the hard<br />
disk spin down if not used for a certain amount of time. Enter a time in minutes<br />
and click “Save” to apply the new setting. NOTE: The “disk spin down” function<br />
might not work properly for some WD hard drives due to the lack of the E3h<br />
command.<br />
4.2.5.2 raid Setting<br />
In this section (Model 505895 only), you can manage the RAID array and set up<br />
your drives. The <strong>Gigabit</strong> <strong>SATA</strong> <strong>NAS</strong> supports RAID 0 and RAID 1. Two hard drives<br />
of identical capacity and make are required. If only one drive is installed, the RAID<br />
configuration will not be available.<br />
RAID 0 — Used when speed is the primary objective, RAID Level 0 (also called<br />
“striping”) is not redundant. This form of array splits each piece of data across<br />
both of the drives in segments; since data is written without any form of parity<br />
data-checking, it allows for the fastest data transfer compared to the other<br />
setups. However, if one drive becomes damaged, the whole array can become<br />
corrupted.<br />
RAID 1 — This mode requires two identical drives for implementation. A RAID 1<br />
creates an exact copy (or mirror) of a set of data on the second drive, useful<br />
when reliability and backup are more important than data capacity. Available<br />
capacity to the user will only be as large as a single drive, but when one of the<br />
28<br />
web ConfIGUratIon
hard drives fails, it can be replaced and the data rebuilt.<br />
JBOD — Used to combine two hard drives of different capacity into a single, larger<br />
hard drive. If you’re using two identical drives, RAID 0 is recommended instead.<br />
NOTE: Creating the RAID system can take awhile, depending on drive capacity.<br />
Do not turn off power or interrupt the system in any other way during this process!<br />
The use of the EXT2 file system for optimum performance and functionality is<br />
recommended. Also, changing the RAID setup requires that you to re-format the<br />
drives. Make sure you back up all data before doing so.<br />
4.2.5.2.1 rebuilding a raid array<br />
When using RAID 1, if one of the drives fails, the faulty HDD has to be replaced<br />
and the RAID 1 array rebuilt.<br />
1. Log in and go to the RAID Setting menu to check the disk status. If there’s a<br />
problem, it will show which drive needs to be replaced.<br />
2. Turn off the power, remove the power supply from the AC outlet and replace the<br />
defective HDD with a new one.<br />
3. Turn on the power and go to the RAID Setting menu. Click “Add disk” to start<br />
rebuilding your RAID array.<br />
NOTE: On the bridge board of the <strong>Gigabit</strong> <strong>SATA</strong> <strong>NAS</strong>, the P1 connector indicates<br />
the drive at hdb, whereas P2 indicates the drive at hda. With firmware v2.6.3 or<br />
later, P1 indicates the drive at hdc and P2 the drive at hdd.<br />
web ConfIGUratIon<br />
29
4. Depending on capacity, rebuilding can take awhile. Do not turn off the power<br />
or interrupt the system in any other way. The HDD LED will be on while the<br />
RAID array is being rebuilt.<br />
30<br />
web ConfIGUratIon
5. When the procedure is complete, the HDD LED will turn off and the disk status<br />
will show that the system is ready.<br />
NOTE: Clicking “Remove system data” or “Remove raid system” will erase all data!<br />
Only use these if you need to set up a different RAID system.<br />
4.2.5.3 firmware upgrade<br />
In this section, you can check the current firmware version and upgrade if a new<br />
one is available. Download the latest firmware and store it on your computer, then<br />
browse for the *.gz file, select it and start the upgrade. The upgrade process takes<br />
about 10-20 minutes.<br />
web ConfIGUratIon<br />
31
NOTE: Never turn off your device during the firmware upgrade procedure, as this<br />
may damage it. If for any reasons (e.g., power supply failure during the firmware<br />
upgrade) the procedure fails, you may not be able to operate your device anymore.<br />
4.2.5.4 Save Configuration<br />
For backup and before every firmware upgrade, you can use this function to save<br />
the current configuration. Click “Save” and save the “config.tar” file on your computer.<br />
4.2.5.5 Restore Configuration<br />
To quickly restore previous settings or set up multiple units, you can save the<br />
configuration and then use this function to upload a previous backup. Browse for<br />
the “config.tar” file on your computer and click “Restore” to restore the previous<br />
settings.<br />
32<br />
web ConfIGUratIon
4.2.5.6 factory reset<br />
Clicking “Factory Reset” will restore all settings to their default configuration. First,<br />
however, save your current configuration in case you want to restore it again later.<br />
NOTE: When “Factory Reset” is clicked, all users, groups and other configurations<br />
will be lost. The files inside the shared folders won’t be erased, but only the<br />
administrator will have access to them via an SMB connection, unless the same<br />
share name is set up again and access is granted for new users. To completely<br />
erase the files inside the shares, use the Share Management menu to remove the<br />
shares before the reset, or use the administrator account after the reset, log in via<br />
SMB and delete the files.<br />
4.2.6 log file<br />
This menu includes all the log files of your <strong>Gigabit</strong> <strong>SATA</strong> <strong>NAS</strong>. You can find logs for<br />
the SAMBA, FTP and DHCP servers, as well as system and administration logs.<br />
NOTE: To delete old log files, click “Clean.”<br />
web ConfIGUratIon<br />
33
4.3 Personal information<br />
4.3.1 account<br />
In this menu, you can change your admin password and the menu language for the<br />
configuration interface. An overview of disk usage and a share list are also presented.<br />
34<br />
web ConfIGUratIon
5 NetworK StoraGe<br />
To access the data on the <strong>Gigabit</strong> <strong>SATA</strong> <strong>NAS</strong> via the network connection, you can<br />
use either FTP or SMB. Before you can access the shared folders, you need to<br />
set up your users, groups and shares (see Section 3).<br />
5.1 file access on a Pc<br />
5.1.1 ftP<br />
Open Windows Explorer and enter “ftp://” followed by the IP address of the <strong>Gigabit</strong><br />
<strong>SATA</strong> <strong>NAS</strong>. Add the username and password in front of the IP address with “@” in<br />
between; for example: ftp://demo:demo@192.168.11.21.<br />
After login, you can access the available folders and transfer your files. Remember<br />
that files can’t be opened directly via FTP: You always need to transfer them to<br />
your computer first.<br />
NOTE: For FTP transfers, it’s recommended that you install and use a dedicated<br />
FTP application, either a free utility or a professional shareware program.<br />
networK storaGe<br />
35
5.1.2 windows explorer<br />
Open Windows Explorer and enter “\\” followed by the IP address of the <strong>Gigabit</strong><br />
<strong>SATA</strong> <strong>NAS</strong>; for example: “\\192.168.11.21.” All available folders and shares on the<br />
<strong>NAS</strong> will display, which you can then access directly.<br />
You can copy files to the network storage as if it were a folder on your local drive.<br />
Depending on the bandwidth, you can also directly play and open the files, although<br />
transferring the data to your local drive first is recommended.<br />
5.1.3 mapping a Network drive<br />
For easy access, mapping the storage as a network drive is recommended.<br />
1. Double-click on My Computer, go to the Tools menu and select “Map Network<br />
Drive….”<br />
36<br />
networK storaGe<br />
GiGAbit sAtA nAs
2. Follow the setup wizard on-screen instructions and fill in the path to your <strong>NAS</strong>.<br />
When entering the IP address, also add the folder; for example, “\\192.168.11.21\<br />
public.” Alternatively, you can find the shares by clicking “Browse” to locate the<br />
folder.<br />
3. Once the drive’s been mapped, you can find and access it under My Computer.<br />
This link will still be there even after rebooting your operating system if you’ve<br />
selected “Reconnect at logon.”<br />
NOTE: For quick and temporary access, you can also simply go to My Network<br />
Places, view the workgroup computers and select your <strong>NAS</strong>.<br />
networK storaGe<br />
37
5.1.4 disconnecting a Network drive<br />
When you don’t need a mapped network drive anymore, disconnecting it is<br />
recommended. It is also necessary to disconnect a temporary network drive when<br />
you try to log in with a new password but have not restarted the computer first.<br />
1. Double-click on My Computer, go to the Tools menu and select “Disconnect<br />
Network Drive….”<br />
2. Select any temporary or mapped network drives you want to remove, then<br />
click “OK.”<br />
NOTE: If you experience problems with the network access, disconnect all network<br />
drives on the <strong>NAS</strong>, reboot your computer and try again.<br />
38<br />
networK storaGe
5.2 file access on a mac<br />
5.2.1 Smb<br />
To mount and access the network storage, open your Finder, click “Go” and choose<br />
“Network.” Browse for your network drive and click on it to access the folder.<br />
Or use the “Connect to Server” command.<br />
1. Click “Go” and choose “Connect to Server.”<br />
2. Enter “smb://” followed by the IP address<br />
of your <strong>Gigabit</strong> <strong>SATA</strong> <strong>NAS</strong>, or click<br />
“Browse” to locate the folder on your<br />
network. Click “Connect” once the<br />
server address has been entered.<br />
3. When prompted, choose a<br />
folder. After you enter the<br />
correct password (if<br />
passwords have been set),<br />
the folder will appear on<br />
your desktop.<br />
networK storaGe<br />
39
5.2.2 ftP<br />
The FTP utility on the Mac will be able to read the data on the network drive, but<br />
you can’t upload new data to the drive. To do that, you need to install a dedicated<br />
FTP application, which can either be a free utility or a professional shareware<br />
program.<br />
1. Click “Go” and choose “Connect to Server.”<br />
2. Enter “ftp://” followed by the IP address<br />
of your <strong>Gigabit</strong> <strong>SATA</strong> <strong>NAS</strong>. Click<br />
“Connect” once the server address has<br />
been entered.<br />
3. When prompted, choose a folder. After you enter the correct password (if<br />
passwords have been set), the folder will appear on your desktop.<br />
40<br />
networK storaGe
6 additioNal featureS<br />
6.1 uPnP<br />
The <strong>Gigabit</strong> <strong>SATA</strong> <strong>NAS</strong> supports UPnP v1.0. To access the device on a PC, go to<br />
My Network Places, where the <strong>NAS</strong> will be listed as a UPnP device. You can select<br />
it and access the configuration page. NOTE: There’s no need to configure anything:<br />
This function is turned on by default and other devices will be able to recognize it<br />
automatically.<br />
6.2 bonjour and itunes<br />
For easy access to the Web configuration interface on the Mac, a shortcut to the<br />
<strong>Gigabit</strong> <strong>SATA</strong> <strong>NAS</strong> is available in the bookmarks collection under Bonjour.<br />
addItIonaL featUres<br />
41
6.2.1 itunes<br />
When the iTunes support for Bonjour is enabled, the <strong>Gigabit</strong> <strong>SATA</strong> <strong>NAS</strong> will appear<br />
as a shared music folder in your iTunes library. Store your MP3 files in the music<br />
folder of the <strong>Gigabit</strong> <strong>SATA</strong> <strong>NAS</strong> and play them over the network.<br />
1. Make sure the support for iTunes in the Bonjour menu is enabled.<br />
2. Store your MP3 files in the music folder of the <strong>NAS</strong>. The folder’s already been<br />
created in “/public/music.”<br />
42<br />
addItIonaL featUres
3. Start iTunes and the <strong>Gigabit</strong> <strong>SATA</strong> <strong>NAS</strong> will appear as a shared device.<br />
6.3 uSb drive<br />
USB drives connected to the network drive can be shared and accessed on the<br />
network. Plus, instead of a network drive, the <strong>NAS</strong> can be used as a USB drive.<br />
6.3.1 Sharing a uSb drive<br />
A USB drive with the file system FAT32 or NTFS that is connected to the <strong>NAS</strong> can<br />
be shared and accessed over the network via SMB or FTP.<br />
addItIonaL featUres<br />
43
Connect the USB drive to the <strong>Gigabit</strong> <strong>SATA</strong> <strong>NAS</strong> and go to My Network Places.<br />
The external drive will show up as “usb1,” and you can access it to transfer files<br />
without further login. Before disconnecting it, go to the Disk Utility menu and click<br />
“Unmount” to eject the drive.<br />
NOTE: To access the USB drive via FTP, leave the “md1” directory and you’ll find<br />
the “usb1” folder in the root directory.<br />
6.3.2 the nAs as a usb Drive (Model 505888 / 1.5 tb only)<br />
When the <strong>Gigabit</strong> <strong>SATA</strong> <strong>NAS</strong> isn’t connected to the network, it can also be used<br />
as a simple USB mass storage device.<br />
1. Login via the Web browser, stop all current downloads, go to Section 3.2.3.3:<br />
System / Turn Off Server and turn the server off.<br />
2. Once the system has shut down, remove the power supply from the AC outlet<br />
and disconnect the Ethernet cable.<br />
3. Connect the USB cable to the USB device port on the <strong>NAS</strong> and the USB port<br />
on your computer.<br />
4. Turn on the <strong>NAS</strong>. The USB drive will automatically appear: in My Computer for<br />
Windows; on the desktop for Mac.<br />
IMPORTANT: Depending on the file system used to format the drive and the OS,<br />
the USB drive might not be accessible without the installation of additional software<br />
applications to mount the drive. The EXT2 file system is ideal for the network drive,<br />
but is not natively supported by Windows or Mac; so if you intend to use it as a<br />
USB drive, choosing NTFS or FAT32 might be more convenient to use (although<br />
slower for the network drive). Remember that when formatting the drive, all data<br />
will be lost, including the data related to the network drive.<br />
The user accounts and access rights used for the network drive don’t apply to the<br />
44<br />
addItIonaL featUres
USB drive. When connected directly to the computer via USB, all data can be<br />
accessed and modified!<br />
NOTE: The <strong>Gigabit</strong> <strong>SATA</strong> <strong>NAS</strong> has to be turned off to change it from acting as a<br />
USB drive to a network drive and vice versa. When both USB and Ethernet cables<br />
are connected, the USB connection has priority and the <strong>NAS</strong> will act as a USB<br />
drive until disconnected and restarted.<br />
6.4 uSb backup (model 505895 / 3 tb only)<br />
The USB backup function can be used to quickly and conveniently copy the files<br />
from an external USB drive to the internal <strong>SATA</strong> hard drives.<br />
1. Connect the USB drive to the front port of the <strong>Gigabit</strong> <strong>SATA</strong> <strong>NAS</strong>.<br />
2. Press the button just above the USB port for 4 seconds to back up your files.<br />
3. A new folder based on date and time will be created in the /public directory. All<br />
files will be copied to that folder. During the backup process, the yellow LED will<br />
blink. When finished, the LED will stop blinking and the <strong>NAS</strong> will automatically<br />
eject the drive so that you can remove the USB drive.<br />
NOTE: For external USB devices, using self-powered USB drives is recommended.<br />
Only drives formatted using FAT32 are supported! If more than one USB drive is<br />
connected, only the files from the second drive will be copied.<br />
6.5 uSb Printer<br />
The <strong>Gigabit</strong> <strong>SATA</strong> <strong>NAS</strong> is equipped with an additional USB host port (or ports) and<br />
a printer server. Connect your USB printer to the USB host port on the <strong>NAS</strong> and<br />
enable the printer server to share the printer among other workstations on the<br />
same local network.<br />
addItIonaL featUres<br />
45
Printing via the shared network printer will be slower than when the printer is<br />
connected directly to the USB port on the computer. After you click “Print,” wait for<br />
the printer to receive the data.<br />
1. Connect your USB printer to the USB host port on the <strong>Gigabit</strong> <strong>SATA</strong> <strong>NAS</strong> and<br />
turn both devices on.<br />
2. Log in to make sure the printer server is enabled and the printer has been<br />
recognized.<br />
Once these initial steps are complete, refer either to Section 6.5.1: Installation on<br />
a PC or Section 6.5.2: Installation on a Mac.<br />
6.5.1 installation on a Pc<br />
1. On your PC, go to Start and select “Printers and Faxes.”<br />
2. Go to File and select “Add Printer” to bring up the printer setup wizard.<br />
3. Click “Next” to start the setup wizard.<br />
46<br />
addItIonaL featUres
4. When the Local or Network<br />
Printer screen displays,<br />
select “A network printer…”<br />
and click “Next.”<br />
5. When the Specify a Printer<br />
screen displays, select<br />
“Connect to this printer…”<br />
and click “Next.”<br />
6. When the Browse for<br />
Printer screen displays,<br />
find the <strong>Gigabit</strong> <strong>SATA</strong> <strong>NAS</strong><br />
in the Shared Printers<br />
list, select “lp” and click<br />
“Next.”<br />
addItIonaL featUres<br />
47
7. When the next screen<br />
displays, select your printer<br />
from the list or browse for<br />
the corresponding driver<br />
on your local drive. Click<br />
“OK” to complete the<br />
procedure. Your printer is<br />
now set up.<br />
6.5.2 installation on a Mac<br />
1. Go to Applications and open the Printer Setup Utility in the Utilities folder.<br />
48<br />
addItIonaL featUres
2. When the Printer<br />
Browser screen displays,<br />
click “More Printers.”<br />
3. Use the Windows<br />
Printing and the<br />
Workgroup drop-down<br />
menus to display the<br />
<strong>Gigabit</strong> <strong>SATA</strong> <strong>NAS</strong> in<br />
the window. Select it<br />
and click “Choose.”<br />
addItIonaL featUres<br />
49
4. When prompted, enter a<br />
name and password —<br />
either as an administrator<br />
or user — and click “OK.”<br />
5. Select the lp printer from<br />
the list, then find the<br />
corresponding printer<br />
model to install the<br />
correct printer driver.<br />
Click “Add.”<br />
6. A Printer List screen<br />
should display with<br />
your selectionin the<br />
list, indicating that<br />
your printer is now<br />
set up.<br />
50<br />
addItIonaL featUres
6.6 bittorrent<br />
Used in conjunction with its built-in BitTorrent client, the <strong>Gigabit</strong> <strong>SATA</strong> <strong>NAS</strong> can be<br />
set to download media files from the Internet and have them saved directly to the<br />
internal <strong>SATA</strong> hard drive. You can then turn off your computer.<br />
The BitTorrent client on the <strong>NAS</strong> uses the TCP protocol and ports 6881-6889. Make<br />
sure those ports are not blocked by your router: If necessary, set up port forwarding<br />
so that the traffic for those ports is forwarded to your <strong>NAS</strong>.<br />
The BitTorrent client on the <strong>NAS</strong> can download five files at a time, with a maximum of<br />
40 files in the queue. Before turning off the device, stopping all current downloads<br />
first is recommended. After the device has been rebooted or turned off, the partial<br />
downloads will need to be started again to continue the download process.<br />
1. Browse the Internet for the media files you want to download, and store the<br />
torrent files on your local drive.<br />
2. Log in to the Web interface and go to the BTorrent screen in the Network<br />
Service menu (see Section 4.2.4.3).<br />
3. Click “Browse” and locate your previously downloaded torrent file. Select it and<br />
click “Add” to add the file to the download queue.<br />
4. Click “Start” to begin the download process. NOTE: If the new file doesn’t appear<br />
on the list, click “Refresh” or re-select “BTorrent” from the left-hand menu.<br />
addItIonaL featUres<br />
51
The file is now being downloaded (as indicated by the updated information in the<br />
Percentage and Download columns below) and, if you like, you can turn off your<br />
computer. Remember to start the download process again if the <strong>Gigabit</strong> <strong>SATA</strong> <strong>NAS</strong><br />
has been turned off or rebooted before the file has been downloaded completely.<br />
Once the file has been downloaded, you can delete it from the download list and<br />
access the media file on your <strong>Gigabit</strong> <strong>SATA</strong> <strong>NAS</strong>. All files will be stored in the<br />
“/public/btdownload” folder.<br />
pend<br />
52<br />
addItIonaL featUres
7 GloSSarY<br />
bittorrent — This is a peer-to-peer (P2P) file distribution client application, and<br />
also refers to its related file-sharing protocol. BitTorrent is designed to distribute<br />
large amounts of data widely without incurring the corresponding consumption<br />
in costly server and bandwidth resources.<br />
EXt2 — The ext2, or second extended, file system is a file system found mostly<br />
on Linux operating systems. This is the recommended file system for the<br />
<strong>Gigabit</strong> <strong>SATA</strong> <strong>NAS</strong> network drive.<br />
EXt3 — The ext3, or third extended, file system is a journaled file system found<br />
mostly on Linux operating systems.<br />
fAt32 — File Allocation Table (FAT) is a file system developed by Microsoft for<br />
MS-DOS. The FAT file system is considered relatively uncomplicated, and is<br />
consequently supported by virtually all existing operating systems for personal<br />
computers. The maximum size of a single file is limited to 4 GB.<br />
ftP — FTP, or File Transfer Protocol, is a commonly used protocol for exchanging<br />
files over any network that supports the TCP/IP protocol (such as the Internet<br />
or an intranet). There are two computers involved in an FTP transfer: a server<br />
(<strong>Gigabit</strong> <strong>SATA</strong> <strong>NAS</strong>) and a client (user’s computer).<br />
ntfs — NTFS, or New Technology File System, is the standard file system of<br />
Windows NT and its descendants. NTFS has several improvements over FAT,<br />
but is not compatible with other operating systems (except, perhaps, in Read<br />
Only mode).<br />
lAn — A local area network (LAN) is a computer network covering a small local<br />
area, like a home, office or small group of buildings such as a residence, office<br />
complex or college.<br />
sMb — Server Message Block (SMB) is a network application-level protocol mainly<br />
applied to share files, printers, serial ports and miscellaneous communications<br />
between nodes on a network.<br />
torrent — A torrent can mean either a torrent metadata file or all files described<br />
by it, depending on context. The torrent file contains metadata about all the<br />
files it makes downloadable, including their names and sizes and checksums<br />
of all pieces in the torrent. It also contains the address of a tracker that<br />
coordinates communication between the peers in the swarm.<br />
GLossarY<br />
53
8 freQueNtlY aSKed QueStioNS<br />
Q: Why aren’t some of the functions and menus available?<br />
A: The functions of the <strong>Gigabit</strong> <strong>SATA</strong> <strong>NAS</strong> require that a hard drive be installed.<br />
Make sure you have a hard drive installed and that it is formatted, preferably<br />
using EXT2.<br />
Q: i lost my password. What do i do?<br />
A: Press the Reset button and hold it for 5 seconds to reset the <strong>NAS</strong> to its default<br />
settings. The default login is “admin”/”admin.” Resetting the device will erase<br />
all user and group accounts, plus some other settings.<br />
Q: I can’t access the Web configuration interface. What’s the correct IP?<br />
A: See Section 3 about how to log in. If the instructions don’t help, turn on your<br />
device and wait for it to boot, then press and hold the Reset button for five<br />
seconds to reset its IP address and server name.<br />
Q: Why doesn’t ftP access on my Mac doesn’t work properly?<br />
A: The FTP utility on the Mac will be able to read the data on the network storage,<br />
but you can’t write new data to the drive. To upload files, you need to install a<br />
dedicated FTP application.<br />
Q: Why can’t i restart or turn off the server?<br />
A: Make sure there are no current file transfers in process or any other disk activity.<br />
Close any other applications that might still be accessing the <strong>NAS</strong>, then try again.<br />
Q: What port is the bittorrent client on the <strong>Gigabit</strong> sAtA nAs using?<br />
A: The BitTorrent client is using the TCP protocol and the ports 6881-6889.<br />
Q: How many files can the BitTorrent client download at the same time?<br />
A: It can download five files at a time, with another 40 in the queue.<br />
Q: Does the <strong>Gigabit</strong> sAtA nAsn support ssH or telnet access?<br />
A: No, it doesn’t support SSH, Telnet or TFTP access.<br />
Q: Why doesn’t the torrent file show up on the list after clicking “Add”?<br />
A: If the new file doesn’t show up or the page stays blank, refresh the page or<br />
re-select “BTorrent” from the left-hand menu to reload the page.<br />
Q: can i use the <strong>Gigabit</strong> sAtA nAs as a usb and network drive at the same<br />
time?<br />
A: No, it can be used either as a USB drive or as a network drive, but not both at<br />
the same time. When both cables are connected, the USB connection has<br />
priority.<br />
54<br />
faQ
Q: Which file system is recommended for the internal hard drive?<br />
A: If the device is mainly used as network drive, using the EXT2 file system is<br />
recommended. When the drive is also often used as a USB drive, the most<br />
suitable file system will depend on the operating system. NTFS is most suitable<br />
for Windows, and FAT32 offers the best compatibility.<br />
Q: Why doesn’t the connected the usb cable show up on my computer?<br />
A: If the device is currently used as a network drive, it has to be restarted first.<br />
Depending on the file system of the internal hard drive, your operating system<br />
might not natively support it, and you need to either install an additional<br />
application to mount the drive or re-format it using a different file system.<br />
faQ<br />
55
9 SPecificatioNS<br />
model 505888 / 1.5 tb<br />
standards<br />
• IEEE 802.3 (10Base-T Ethernet)<br />
• IEEE 802.3ab (Twisted Pair <strong>Gigabit</strong> Ethernet)<br />
• IEEE 802.3u (100Base-TX Fast Ethernet)<br />
General<br />
• LAN: RJ45 10/100/1000 Mbps data port<br />
• USB: one Hi-Speed USB 2.0 USB type-A port for external USB hard drive, USB<br />
flash drive or USB printer<br />
• USB: one USB type-B port for host connection to computer when using the<br />
device as an external USB HDD<br />
• Data throughput: up to 25 MBps (FTP, read)<br />
• Internal hard drive:<br />
– Design: 3.5” <strong>SATA</strong>-I or <strong>SATA</strong>-II<br />
– Maximum size: 1.5 TB<br />
• External USB hard drives:<br />
– Supported file systems: FAT32, NTFS<br />
– Maximum size: 1 TB<br />
• File serving protocols: CIFS (Samba), FTP, NFS<br />
• iTunes server:<br />
– iTunes version mt-daapd-0.2.4<br />
– Maximum connection limit: 8<br />
• FTP server max. connection limit: 8<br />
• Samba server:<br />
– Version samba-3.0.25 (supporting NTLMv2 authentication for Windows Vista)<br />
– Maximum connection limit: 8<br />
• BitTorrent client options:<br />
– Maximum upload bandwidth<br />
– Maximum download bandwidth<br />
– Status/statistics for active torrents<br />
• Certifications: FCC Class B, CE, RoHS, VCCI<br />
security / user Management / network shares<br />
• Maximum user accounts: 8<br />
• Maximum user groups: 8<br />
• Username/password-based security<br />
• Folder level security (read/write)<br />
56<br />
sPeCIfICatIons
• Disk space usage (quota) management<br />
• Supported network clients: Windows, Linux, Mac OS<br />
Environmental<br />
• Dimensions: 237 (l) x 137 (w) x 42 (h) mm (9.33 x 5.39 x 1.54 in.)<br />
• Weight: 1.65 kg (3.6 lbs.)<br />
• Operating temperature: 5 – 40°C (41 – 104°F)<br />
• Operating humidity: 5 – 90% RH, non-condensing<br />
• Storage temperature: -20 – 70°C (-4 – 158°F)<br />
Power<br />
• External power adapter: 12 V DC, 2.0 A<br />
• Power consumption:<br />
– 12.4 Watts maximum with HDD active<br />
– 1.2 Watts maximum with HDD turned off<br />
Package contents<br />
• <strong>Gigabit</strong> <strong>SATA</strong> <strong>NAS</strong> 1.5 TB<br />
• Power adapter<br />
• Installation CD with user manual<br />
• Quick install guide<br />
model 505895 / 3 tb<br />
standards<br />
• IEEE 802.3 (10Base-T Ethernet)<br />
• IEEE 802.3ab (Twisted Pair <strong>Gigabit</strong> Ethernet)<br />
• IEEE 802.3u (100Base-TX Fast Ethernet)<br />
General<br />
• LAN: RJ45 10/100/1000 Mbps data port<br />
• USB: 2 Hi-Speed USB 2.0 USB type-A ports for external USB hard drive, USB<br />
flash drive or USB printer<br />
• Data throughput: up to 25 MB/s (FTP, read)<br />
• Internal hard drive:<br />
– Design: 3.5” <strong>SATA</strong>-I or <strong>SATA</strong>-II<br />
– Maximum size: 1.5 TB<br />
– Total capacity: 3 TB (RAID 0)<br />
• External USB hard drives:<br />
– Supported file systems: FAT32, NTFS<br />
– Maximum size: 1 TB<br />
• File serving protocols: CIFS (Samba), FTP, NFS<br />
sPeCIfICatIons<br />
57
iTunes server:<br />
– iTunes version mt-daapd-0.2.4<br />
– Maximum connection limit: 8<br />
• FTP server max. connection limit: 8<br />
• Samba server:<br />
– Version samba-3.0.25 (supporting NTLMv2 authentication for Windows Vista)<br />
– Maximum connection limit: 8<br />
• BitTorrent client options:<br />
– Maximum upload bandwidth<br />
– Maximum download bandwidth<br />
– Status/statistics for active torrents<br />
• Certifications: FCC Class B, CE, RoHS, VCCI<br />
security / user Management / network shares<br />
• Maximum user accounts: 8<br />
• Maximum user groups: 8<br />
• Username/password-based security<br />
• Folder level security (read/write)<br />
• Disk space usage (quota) management<br />
• Supported network clients: Windows, Linux, Mac OS<br />
Environmental<br />
• Dimensions: 237 (l) x 137 (w) x 42 (h) mm (9.33 x 5.39 x 1.54 in.)<br />
• Weight: 1.65 kg (3.6 lbs.)<br />
• Operating temperature: 5 – 40°C (41 – 104°F)<br />
• Operating humidity: 5 – 90% RH, non-condensing<br />
• Storage temperature: -20 – 70°C (-4 – 158°F)<br />
Power<br />
• External power adapter: 12 V DC, 2.0 A<br />
• Power consumption:<br />
– 25.1 Watts maximum with HDD active<br />
– 1.8 Watts maximum with HDD turned off<br />
Package contents<br />
• <strong>Gigabit</strong> <strong>SATA</strong> <strong>NAS</strong> 3 TB<br />
• Power adapter<br />
• Installation CD with user manual<br />
• Quick install guide<br />
58<br />
sPeCIfICatIons
SafetY & comPliaNce StatemeNtS<br />
fcc Part 15<br />
This equipment has been tested and found to comply with the limits for a Class B<br />
digital device, pursuant to Part 15 of Federal Communications Commission (FCC)<br />
Rules. These limits are designed to provide reasonable protection against harmful<br />
interference in a residential installation. This equipment generates, uses and<br />
can radiate radio frequency energy and, if not installed and used in accordance<br />
with the instructions, may cause harmful interference to radio communications.<br />
However, there is no guarantee that interference will not occur in a particular<br />
installation. If this equipment does cause harmful interference to radio or television<br />
reception, which can be determined by turning the equipment off and on, the user<br />
is encouraged to try to correct the interference by one or more of the following<br />
measures:<br />
• Reorient or relocate the receiving antenna.<br />
• Increase the separation between the equipment and the receiver.<br />
• Connect the equipment to an outlet on a circuit different from the receiver.<br />
• Consult the dealer or an experienced radio/TV technician for help.<br />
eu countries intended for use<br />
The ETSI version of this device is intended for home and office use in Austria,<br />
Belgium, Denmark, Finland, France, Germany, Greece, Ireland, Italy, Luxembourg,<br />
the Netherlands, Portugal, Spain, Sweden and the United Kingdom. The ETSI<br />
version of this device is also authorized for use in EFTA member states Iceland,<br />
Liechtenstein, Norway and Switzerland. EU Countries Not Intended for Use: None.<br />
disposal of used electric and electronic equipment in Private<br />
households<br />
(applicable in the European Union and other European countries with<br />
separate collection systems)<br />
This symbol on the product — or in the manual and in the warranty, and/or on its<br />
packaging — indicates that this product shall not be treated as household waste.<br />
Instead, it should be taken to an applicable collection point for the recycling of<br />
electrical and electronic equipment. By ensuring this product is disposed of correctly,<br />
you will help prevent potential negative consequences to the environment and<br />
human health, which could otherwise be caused by inappropriate waste handling<br />
of this product. If your equipment contains easy removable batteries or accumulators,<br />
please dispose of these separately according to your local requirements. The
ecycling of materials will help to conserve natural resources. For more detailed<br />
information about recycling of this product, please contact your local city office,<br />
your household waste disposal service or the shop where you purchased this<br />
product.<br />
In countries outside of the EU: If you wish to discard this product, please contact<br />
your local authorities and ask for the correct manner of disposal.<br />
Dieses auf dem Produkt oder der Verpackung angebrachte Symbol zeigt an, dass<br />
dieses Produkt nicht mit dem Hausmüll entsorgt werden darf. In Übereinstimmung<br />
mit der Richtlinie 2002/96/EG des Europäischen Parlaments und des Rates über<br />
Elektro- und Elektronik-Altgerate (WEEE) darf dieses Elektrogerät nicht im<br />
normalen Hausmüll oder dem Gelben Sack entsorgt werden. Wenn Sie dieses<br />
Produkt entsorgen möchten, bringen Sie es bitte zur Verkaufsstelle zurück oder<br />
zum Recycling-Sammelpunkt Ihrer Gemeinde.<br />
Ce symbole sur Ie produit ou son emballage signifie que ce produit ne doit pas<br />
etre traite comme un dechet menager. Conformement à la Directive 2002/96/EC<br />
sur les dechets d’equipements electriques et electroniques (DEEE), ce produit<br />
electrique ne doit en aucun cas etre mis au rebut sous forme de dechet municipal<br />
non trie. Veuillez vous debarrasser de ce produit en Ie renvoyant à son point<br />
de vente ou au point de ramassage local dans votre municipalite, à des fins de<br />
recyclage.<br />
Questo simbolo sui prodotto o sulla relativa confezione indica che il prodotto non<br />
va trattato come un rifiuto domestico. In ottemperanza alia Direttiva UE 2002/96/EC<br />
sui rifiuti di apparecchiature elettriche ed elettroniche (RAEEI), questa prodotto<br />
elettrico non deve essere smaltito come rifiuto municipale misto. Si prega di<br />
smaltire il prodotto riportandolo al punto vendita o al punto di raccolta municipale<br />
locale per un opportuno riciclaggio.<br />
Este simbolo en el producto o su embalaje indica que el producto no debe tratarse<br />
como residuo domestico. De conformidad con la Directiva 2002/96/CE de la UE<br />
sobre residuos de aparatos electricos y electronicos (RAEEI), este producto<br />
electrico no puede desecharse con el resto de residuos no clasificados. Deshagase<br />
de este producto devolviendolo al punta de venta o a un punta de recogida<br />
municipal para su reciclaje.
INTellINeT NeTWoRK solUTIoNs offers a complete line<br />
of active and passive networking products.<br />
Ask your local computer dealer for more information or visit<br />
www.intellinet-network.com.<br />
Copyright © <strong>INTELLINET</strong> NETWORK SOLUTIONS<br />
All products mentioned are trademarks or registered trademarks of their respective owners.