

Alcatel-Lucent 400 DECT Handset Alcatel-Lucent 300
Alcatel-Lucent 400 DECT Handset Alcatel-Lucent 300
Alcatel-Lucent 400 DECT Handset Alcatel-Lucent 300

You also want an ePaper? Increase the reach of your titles
YUMPU automatically turns print PDFs into web optimized ePapers that Google loves.
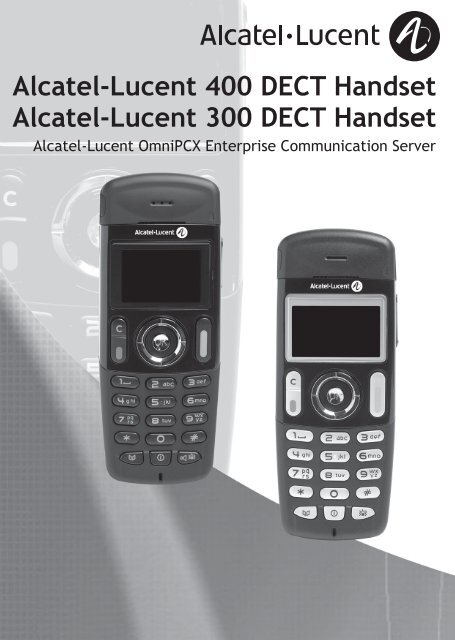
<strong>Alcatel</strong>-<strong>Lucent</strong> <strong>400</strong> <strong>DECT</strong> <strong>Handset</strong><br />
<strong>Alcatel</strong>-<strong>Lucent</strong> <strong>300</strong> <strong>DECT</strong> <strong>Handset</strong><br />
<strong>Alcatel</strong>-<strong>Lucent</strong> OmniPCX Enterprise Communication Server
how
User manual<br />
how<br />
Thank you for choosing one of the <strong>Alcatel</strong>-<strong>Lucent</strong> <strong>DECT</strong> <strong>Handset</strong> line of telephones, and for your<br />
confidence in <strong>Alcatel</strong>-<strong>Lucent</strong>. Your <strong>Alcatel</strong>-<strong>Lucent</strong> <strong>DECT</strong> <strong>Handset</strong> telephone offers you the latest<br />
design features available from a modern telecommunications system.<br />
To find out the essential features of the <strong>Alcatel</strong>-<strong>Lucent</strong> <strong>300</strong> <strong>DECT</strong> <strong>Handset</strong> or <strong>Alcatel</strong>-<br />
<strong>Lucent</strong> <strong>400</strong> <strong>DECT</strong> <strong>Lucent</strong> this guide.<br />
The availability of certain features described in this guide may depend on the version or<br />
configuration of your system.<br />
If in doubt, consult the person responsible for your system.<br />
3
4<br />
Contents<br />
Toc<br />
Precautions for use . . . . . . . . . . . . . . . . . . . . . . p.7<br />
1.<br />
Your telephone . . . . . . . . . . . . . . . . . . . . . . . . . p.10<br />
Display and corresponding icons . . . . . . . . . . . p.12<br />
1.1 Status icons . . . . . . . . . . . . . . . . . . . . . . . . . . . . . . . . . . . p.12<br />
1.2 Shortcut keys . . . . . . . . . . . . . . . . . . . . . . . . . . . . . . . . . p.13<br />
1.3 Call icons . . . . . . . . . . . . . . . . . . . . . . . . . . . . . . . . . . . . p.14<br />
2. Getting started. . . . . . . . . . . . . . . . . . . . . . . . . . p.15<br />
2.1 Installing the battery pack. . . . . . . . . . . . . . . . . . . . . . . . p.15<br />
2.2 Charging your telephone battery. . . . . . . . . . . . . . . . . . p.16<br />
2.3 Switching on your telephone . . . . . . . . . . . . . . . . . . . . . p.17<br />
2.4 Accessing the MENU and navigating . . . . . . . . . . . . . . . p.17<br />
3. Using your telephone . . . . . . . . . . . . . . . . . . . . p.18<br />
3.1 Making a call . . . . . . . . . . . . . . . . . . . . . . . . . . . . . . . . . . p.18<br />
3.2 To call from your personal directory . . . . . . . . . . . . . . p.18<br />
3.3 Calling your party by name (company directory) . . . . . p.18<br />
3.4 Answering a call . . . . . . . . . . . . . . . . . . . . . . . . . . . . . . . p.19<br />
3.5 Redial . . . . . . . . . . . . . . . . . . . . . . . . . . . . . . . . . . . . . . . p.19<br />
3.6 Requesting automatic callback if internal number is<br />
busy . . . . . . . . . . . . . . . . . . . . . . . . . . . . . . . . . . . . . . . . . p.19<br />
3.7 During a call . . . . . . . . . . . . . . . . . . . . . . . . . . . . . . . . . . p.20<br />
4. During a call . . . . . . . . . . . . . . . . . . . . . . . . . . . . p.22<br />
4.1 Making a second call . . . . . . . . . . . . . . . . . . . . . . . . . . . . p.22<br />
4.2 Answering a second call . . . . . . . . . . . . . . . . . . . . . . . . . p.22<br />
4.3 Switching between two calls (Broker call). . . . . . . . . . . p.23<br />
4.4 Transferring a call . . . . . . . . . . . . . . . . . . . . . . . . . . . . . . p.23<br />
4.5 Three-way conference with internal and/or external<br />
parties (conference) . . . . . . . . . . . . . . . . . . . . . . . . . . . . p.24<br />
4.6 Placing an outside call on hold (parking) . . . . . . . . . . . . p.24
Contents<br />
5. Sharing . . . . . . . . . . . . . . . . . . . . . . . . . . . . . . . . p.26<br />
5.1 Answering a night or a general bell . . . . . . . . . . . . . . . . p.26<br />
5.2 Individual pick-up . . . . . . . . . . . . . . . . . . . . . . . . . . . . . . p.26<br />
5.3 Password. . . . . . . . . . . . . . . . . . . . . . . . . . . . . . . . . . . . . p.27<br />
5.4 Sending a written message to an internal party. . . . . . . p.27<br />
5.5 Sending a copy of a voice message. . . . . . . . . . . . . . . . . p.28<br />
5.6 Sending a recorded message to a number/a distribution<br />
list . . . . . . . . . . . . . . . . . . . . . . . . . . . . . . . . . . . . . . . . . . p.28<br />
6. Keeping in touch . . . . . . . . . . . . . . . . . . . . . . . . p.29<br />
6.1 Immediate forwarding to your voice mailbox . . . . . . . . p.29<br />
6.2 Accessing your voice mailbox . . . . . . . . . . . . . . . . . . . . p.29<br />
6.3 Program your associate number . . . . . . . . . . . . . . . . . . p.29<br />
6.4 Define an overflow number . . . . . . . . . . . . . . . . . . . . . . p.30<br />
6.5 Diverting calls to another number<br />
(immediate forwarding) . . . . . . . . . . . . . . . . . . . . . . . . . p.30<br />
6.6 Different types of forwardings . . . . . . . . . . . . . . . . . . . . p.31<br />
6.7 Cancelling all forwardings. . . . . . . . . . . . . . . . . . . . . . . . p.32<br />
6.8 Consulting messages left while you were away. . . . . . . p.32<br />
7. Programming your telephone . . . . . . . . . . . . . p.33<br />
7.1 Initializing your voice mailbox . . . . . . . . . . . . . . . . . . . . p.33<br />
7.2 Modifying your personal code . . . . . . . . . . . . . . . . . . . . p.33<br />
7.3 Adjusting the audio features. . . . . . . . . . . . . . . . . . . . . . p.34<br />
7.4 Activating headset mode . . . . . . . . . . . . . . . . . . . . . . . . p.35<br />
7.5 Adjusting your telephone features. . . . . . . . . . . . . . . . . p.36<br />
7.6 Adjusting screen brightness . . . . . . . . . . . . . . . . . . . . . . p.36<br />
7.7 Selecting language . . . . . . . . . . . . . . . . . . . . . . . . . . . . . . p.37<br />
7.8 Programming your personal directory. . . . . . . . . . . . . . p.37<br />
7.9 Modifying a card in the personal directory . . . . . . . . . . p.38<br />
7.10 Erase a record from the personal directory . . . . . . . . . p.38<br />
7.11 Programming an appointment reminder . . . . . . . . . . . . p.39<br />
7.12 Identifying the terminal you are on . . . . . . . . . . . . . . . . p.39<br />
7.13 Locking your telephone . . . . . . . . . . . . . . . . . . . . . . . . . p.40<br />
5
6<br />
Contents<br />
8. Using the telephone in GAP mode . . . . . . . . . p.41<br />
8.1 Making a call . . . . . . . . . . . . . . . . . . . . . . . . . . . . . . . . . . p.41<br />
8.2 Answering a call . . . . . . . . . . . . . . . . . . . . . . . . . . . . . . . p.41<br />
8.3 To call from your personal directory . . . . . . . . . . . . . . p.41<br />
8.4 Redialing the last number dialed (redial) . . . . . . . . . . . . p.42<br />
8.5 Sending DTMF signals. . . . . . . . . . . . . . . . . . . . . . . . . . . p.42<br />
8.6 Sending a calibrated cut-off . . . . . . . . . . . . . . . . . . . . . . p.42<br />
8.7 Programming your personal directory. . . . . . . . . . . . . . p.42<br />
8.8 Modifying a name or number . . . . . . . . . . . . . . . . . . . . . p.43<br />
8.9 Deleting a card . . . . . . . . . . . . . . . . . . . . . . . . . . . . . . . . p.43<br />
8.10 Customizing and adjusting your telephone . . . . . . . . . . p.44<br />
8.11 Adjusting your telephone features. . . . . . . . . . . . . . . . . p.45<br />
9. Registering the telephone . . . . . . . . . . . . . . . . . p.46<br />
9.1 Registering the telephone on a system for the first<br />
time . . . . . . . . . . . . . . . . . . . . . . . . . . . . . . . . . . . . . . . . . p.46<br />
9.2 Registering the telephone on other systems . . . . . . . . . p.48<br />
10. Accessories. . . . . . . . . . . . . . . . . . . . . . . . . . . . . p.52<br />
10.1 Chargers . . . . . . . . . . . . . . . . . . . . . . . . . . . . . . . . . . . . . p.52<br />
10.2 Characteristics of the mains power adapter . . . . . . . . . p.53<br />
10.3 Presentation of the battery pack . . . . . . . . . . . . . . . . . . p.53<br />
10.4 Headphone / external microphone . . . . . . . . . . . . . . . . p.54<br />
10.5 Cleaning your telephone . . . . . . . . . . . . . . . . . . . . . . . . p.54<br />
10.6 Transporting and protecting your telephone . . . . . . . . p.54<br />
11. Glossary . . . . . . . . . . . . . . . . . . . . . . . . . . . . . . . p.55<br />
Declaration of compliance . . . . . . . . . . . . . . . . p.56
Precautions for use<br />
Reception OK (steady)<br />
howtoc<br />
The <strong>DECT</strong> features provided by your <strong>Alcatel</strong>-<strong>Lucent</strong> system allow user mobility management via<br />
<strong>DECT</strong> cordless telephones.<br />
Radio coverage of the <strong>Alcatel</strong>-<strong>Lucent</strong> system is ensured by a network of radio terminals. The<br />
coverage area of a radio terminal is called a cell.<br />
• Mobility:<br />
A user can make or receive calls in any cell.<br />
Radio transfer:<br />
This feature enables the user to move during a call and go from one cell to another. The transfer<br />
takes place automatically and has no effect on the call. In some cases, slight crackling may be audible<br />
at the moment of transition.<br />
Use of approved <strong>DECT</strong> equipment<br />
This <strong>DECT</strong> telephone is designed to be used with a private automatic branch exchange (PABX)<br />
without an <strong>Alcatel</strong>-<strong>Lucent</strong> wire.<br />
The CE symbol means that this product is compliant with current Community directives, more<br />
especially the following directives:<br />
89/336/CEE Electromagnetic Compatibility<br />
73/23/CEE (low voltage)<br />
1999/5/CE (R&TTE)<br />
Pursuant to directive 1999/5/CE (R&TTE) published in the Official Journal of the European<br />
Community of April 7, 1999, these items of equipment use the <strong>DECT</strong> harmonized frequency<br />
spectrum and can be used in all the countries of the European Community, in Switzerland and<br />
Norway.<br />
No guarantee is given concerning possible interference affecting<br />
<strong>DECT</strong> equipment, due to other authorised utilisation of the radio<br />
frequencies concerned.<br />
7
8<br />
Precautions for use<br />
Operating conditions<br />
This terminal and the supporting radio equipment have been designed for use with an <strong>Alcatel</strong>-<br />
<strong>Lucent</strong> OmniPCX system and have been officially approved for private use between wireless<br />
telephones via the associated private exchange The following conditions must be respected, notably<br />
concerning the use of radioelectric frequencies:<br />
<strong>DECT</strong> equipment can only be used to establish links between fixed points if these links are<br />
temporary and the equivalent isotropically radiated power at the antenna is less than<br />
250 mW<br />
The conditions of access to a <strong>DECT</strong> equipment telepoint network shall be stipulated by<br />
contract with the attendant of the authorized telepoint network concerned.<br />
The power outlet used must be close to the charger/holder and easily accessible, so that it<br />
can be used as a way to turn power on or off.<br />
Switch off the telephone before changing the battery.<br />
Do not expose your telephone to severe conditions (rain, sea air, dust, etc.).<br />
Correct operation of your telephone is not guaranteed at temperatures outside the range -<br />
10°C to +45°C.<br />
You must not switch on or use your telephone near gas or inflammable liquids.<br />
A volume level that is too high can cause irreparable loss of hearing. Adjust the sound<br />
volume of your handset to a reasonable level.
Status icons<br />
Call icons<br />
10<br />
Your telephone<br />
Battery charge level:<br />
Message(s) waiting (flashing)<br />
Programmed callback time<br />
(1) if the system allows this<br />
Ringer active<br />
Ringer deactivated<br />
Radio reception quality:<br />
Call forwarding activated Vibrator active<br />
Making a call<br />
Answering a call<br />
In conversation<br />
Call on hold<br />
Access the directory feature<br />
Transferring a call<br />
Switching to DTMF signals<br />
Setting up a conference<br />
Place a call on hold<br />
Parking an external<br />
communication (1)<br />
Additional options (1)<br />
123<br />
MARTIN Paul<br />
Wed 24 May 16:30<br />
Switch the screen on again<br />
Erase a character<br />
Return to previous menu<br />
Delete an entire field (long press)<br />
Hang up<br />
Return to first screen<br />
Switch off ringer<br />
Lock/unlock keypad (long press)<br />
Company directory<br />
Customizing your telephone (1) /<br />
Telephone ID (1) (long press)<br />
Microphone
Headset jack<br />
(<strong>400</strong> <strong>DECT</strong>)<br />
Back-lit screen (in colour for the <strong>400</strong> <strong>DECT</strong>)<br />
The screen switches off automatically after a few seconds of inactivity.<br />
To turn it back on, press the key .<br />
Light<br />
Green steady: handset charging<br />
Green fast flashing: outside the radio field<br />
Red slow flashing: message present<br />
Adjust audio volume<br />
C<br />
Access MENU<br />
Confirm<br />
Display next selection of a list (up, down,<br />
left, right)<br />
Lift the receiver<br />
Redial (long press)<br />
Broker call (during consultation call)<br />
Activate/deactivate loudspeaker<br />
(<strong>400</strong> <strong>DECT</strong>)<br />
Activate/Deactivate the vibrating<br />
ringer (long press)<br />
Switch on / off (long press)<br />
Rapid access to ringer adjustment<br />
11
1<br />
12<br />
Display and corresponding icons<br />
Other<br />
Your telephone display features 1 line of status icons and 3 lines of 16 alphanumeric characters.<br />
1.1 Status icons<br />
The status icons are displayed on the welcome screen and indicate the status of the telephone.<br />
Battery charge level<br />
Received messages voice mail and callback request<br />
texts and unanswered calls<br />
Programmed callback time<br />
Call forwarding activated<br />
Vibrator active<br />
Ringer active<br />
Ringer deactivated<br />
Radio reception quality<br />
You can obtain details on the status icons from the tooltips that appear on the welcome screen<br />
when you use the navigator:<br />
123<br />
Battery<br />
full power
1.2 Shortcut keys<br />
All features described here below can be accessed by a long press on specific keys (OK: )<br />
It provides access to all the features available on your system.<br />
Directories:<br />
manage your personal directory and access the company<br />
directory.<br />
Redial:<br />
Auto call back<br />
Forward:<br />
forward your calls to another number.<br />
Mailbox:<br />
consult and send voice and text messages.<br />
Call pick-up<br />
answer a call intended for another telephone.<br />
Appointment:<br />
program a callback time.<br />
System lock:<br />
prohibit outgoing calls and modification of the programming.<br />
Guide: programming, list of functions,...<br />
Adjustment:<br />
adjust the basic features of your telephone (preferences)<br />
System selection<br />
Installation<br />
Manager/secretary<br />
Supervision<br />
Choice of language<br />
Ringing setting<br />
13<br />
1<br />
Display and corresponding icons
1<br />
14<br />
Display and corresponding icons<br />
1.3 Call icons<br />
Making a call<br />
Answering a call<br />
In conversation<br />
Call on hold<br />
Access the directory feature<br />
Transferring a call<br />
Switching to DTMF signals<br />
Setting up a conference<br />
Additional options (Other call, Park, Record, Forbid<br />
Wait, etc.)<br />
Call duration and cost<br />
* In the event of a multiple call, the icons are given indices to represent the different parties
2<br />
Getting started<br />
2.1 Installing the battery pack<br />
• Installing the battery pack<br />
Position the battery<br />
'connectors' side as<br />
shown in the drawing<br />
(A).<br />
Terminate the<br />
installation of the<br />
battery in its<br />
compartment by<br />
pressing as shown in<br />
the drawing (B).<br />
• To remove it<br />
Other<br />
Replace the cover.<br />
Lift up the cover. Remove the battery<br />
from its compartment<br />
as shown in the<br />
drawing.<br />
15
2<br />
16<br />
Getting started<br />
2.2 Charging your telephone battery<br />
1<br />
OK<br />
Plug the charger into an<br />
appropriate electrical outlet<br />
and place the terminal into<br />
its charger slot. The<br />
telephone LED is green<br />
when charging.<br />
'Dual Desktop' charger:<br />
position the battery as shown<br />
in the drawing:<br />
1- place the battery in the<br />
cradle,<br />
2- press down backwards<br />
until it clicks into place<br />
Recharge your telephone battery regularly. The telephone can be on or off when recharging the<br />
battery. If the telephone is to remain unused or out of its charger for several weeks, remove the<br />
battery and store it separately.<br />
* the battery charge time is 3.5 h.<br />
The two-colour indicator lamp on the dual charger gives the following indications :<br />
Off: No backup battery.<br />
Red: Backup battery on charge.<br />
Green : Backup battery charged.<br />
Switch off the telephone before changing the battery.<br />
1<br />
2
2.3 Switching on your telephone<br />
Switch on (long<br />
press)<br />
If the display fails to light up or the battery icon is flashing, recharge the battery.<br />
If the radio reception icon doesn’t appear on the telephone display :<br />
Check that you’re in an area covered (if you’re not, move close to a radio terminal).<br />
Check that the telephone is properly installed in the system (consult the PABX manager).<br />
Switching off your telephone:<br />
Press the switch on/off key (long press).<br />
(Switch the station on or off: )<br />
2.4 Accessing the MENU and navigating<br />
All features described here below can be accessed by a long press on specific keys (OK : )<br />
123<br />
MARTIN Paul<br />
Wed 24 May 16:30<br />
Accessing the features:<br />
Wait a few seconds (about<br />
3s).<br />
Your telephone is<br />
switched on<br />
If the display indicates: 'System 1 — Auto install ?', see paragraph<br />
'Registering the telephone' or contact your installation technician.<br />
Confirm<br />
123<br />
MARTIN Paul<br />
Wed 24 May 16:30<br />
123<br />
123 123<br />
OK?<br />
Select the 'Diversion' feature You can move horizontally along the<br />
various icons within the feature<br />
123<br />
DivImmVMU<br />
17<br />
2<br />
Getting started
3<br />
18<br />
Using your telephone<br />
3.1 Making a call<br />
Dial the number<br />
required<br />
3.2 To call from your personal directory<br />
1-JOHN<br />
2-PAUL<br />
3.3 Calling your party by name (company directory)<br />
Other<br />
123<br />
John<br />
inconversation<br />
Transfer<br />
Send the call Speak Hang up<br />
To make an external call, dial the outside line access code (9) before<br />
dialing your party's number.<br />
123<br />
Select the Directory<br />
feature<br />
Select the party you wish to call Send the call<br />
Quick access Select the Directory feature<br />
123<br />
OR<br />
Personal Dir<br />
Phone Book<br />
123<br />
123<br />
Personal Dir<br />
Phone Book<br />
Validate access to the<br />
'personal directory'<br />
Select 'Company Directory' Enter the first letters of the<br />
name, name-first name or the<br />
initials of your correspondent<br />
123<br />
Name<br />
Initials<br />
LName & FName<br />
Select the type of search you<br />
Select the name from<br />
want (last name, last name and<br />
the displayed list<br />
first name* or initials*)<br />
* Name must be entered in format name/space/first name.<br />
......<br />
123<br />
123<br />
Name<br />
Send the call<br />
Confirm
3.4 Answering a call<br />
Sophie<br />
iscalling<br />
123<br />
You are answering a<br />
call<br />
Lift the<br />
receiver<br />
Disabling the ringer:<br />
Press the hang up key when your telephone rings: it is still possible to answer by pressing the<br />
unhook key.<br />
(Hang up: , Lift the receiver: )<br />
3.5 Redial<br />
• Redialing the last number dialed (redial):<br />
Long press<br />
• Call back on the last 8 number dialed:<br />
Sophie<br />
inconversation<br />
Transfer<br />
Speak Hang up<br />
The user can be informed of an incoming call in four ways:<br />
- by the ringer (when active), with different sounds for internal or<br />
external call<br />
- by the buzzer (if active)<br />
3.6 Requesting automatic callback if internal number is busy<br />
The telephone of the internal party you are trying to contact is busy, and you want the person to<br />
call you back as soon as they are free.<br />
123<br />
Sophie<br />
Pleasewait<br />
Call Back<br />
123<br />
123 123<br />
Redial Confirm<br />
1-............<br />
2-............<br />
3-............<br />
Select the No. from the last<br />
ten dialed<br />
Confirm the<br />
feature<br />
To cancel the automatic callback request, enter the 'Cancel automatic<br />
callback' feature code.<br />
Send the<br />
call<br />
19<br />
3<br />
Using your telephone
3<br />
20<br />
Using your telephone<br />
3.7 During a call<br />
During a call and without losing the connection, there are several ways to access the options<br />
offered by your system, using:<br />
the list of icons at the top of the screen<br />
the list of items at the bottom of the screen<br />
123<br />
Sophie<br />
Conversation<br />
Transfer<br />
Conference<br />
Directories<br />
Send DTMF<br />
Consultn Call<br />
Record<br />
Park<br />
Deny Camp-on<br />
Call Duration<br />
Call in progress<br />
Slot for second call<br />
(reception of a call: / call waiting: )<br />
Press to perform the transfer<br />
Call transfer<br />
Directory<br />
Supervision<br />
Voice frequency<br />
Additional options (Other call, Park, Record, Forbid Wait,<br />
etc.)
• Example: sending DTMF signals:<br />
During a call, you sometimes have to send DTMF signals, for example, for a voice message service,<br />
an automatic switchboard or when remotely consulting an answering machine:<br />
123<br />
0123456789<br />
inconversation<br />
Transfer<br />
In call Select the 'Voice frequency' icon Confirm<br />
123<br />
0123456789<br />
inconversation<br />
Consultn Call<br />
All digits dialed are then sent in<br />
DTMF<br />
123<br />
0123456789<br />
inconversation<br />
Send DTMF<br />
123<br />
0123456789<br />
inconversation<br />
Deact DTMF<br />
To disable the function, use the<br />
browser to select and activate<br />
the 'Disable Voice Frequency'<br />
function<br />
21<br />
3<br />
Using your telephone
4<br />
22<br />
During a call<br />
4.1 Making a second call<br />
123<br />
Paul<br />
inconversation<br />
Transfer<br />
Calling a second Send the call<br />
person<br />
• Press the line key with icon to recover the call on hold<br />
your telephone rings<br />
4.2 Answering a second call<br />
You are on call and a party is trying to contact you:<br />
Paul<br />
iscalling<br />
123<br />
Paul<br />
inconversation<br />
Consultn Call<br />
Other<br />
The first call is placed<br />
on hold<br />
Hang up Press the line key with icon to<br />
recover the call on hold<br />
123<br />
You can also initiate a second call by first validating the 'Other call'<br />
option and using the personal directory or the company directory.<br />
123<br />
John<br />
inconversation<br />
Transfer<br />
123<br />
Paul<br />
inconversation<br />
Transfer<br />
The caller’s name is displayed for 3 seconds, and<br />
a beep is sent<br />
Lift the receiver The first call is placed on hold<br />
Over 3 seconds, move with the navigate-left-right key to the<br />
receiving a second call icon, to see the identity of the second caller<br />
(and off-hook if necessary)<br />
OR<br />
123<br />
Paul<br />
inconversation<br />
Transfer
4.3 Switching between two calls (Broker call)<br />
During a call, to recover the party on hold:<br />
123<br />
Paul<br />
inconversation<br />
Transfer<br />
123<br />
Paul<br />
inconversation<br />
Transfer<br />
John<br />
inconversation<br />
Transfer<br />
Press the line key with icon to recover the<br />
call on hold<br />
You can establish the identity of the waiting call without taking it by<br />
using the navigate-left-right key.<br />
4.4 Transferring a call<br />
To transfer your call to another number:<br />
123<br />
0123456789<br />
inconversation<br />
Transfer<br />
123<br />
John<br />
onhold<br />
Retrieve?<br />
123<br />
Display indicates the party’s identity Press the line key with icon to<br />
recover the call on hold<br />
Select the 'transfer' function<br />
Select 'transfer'<br />
Calling a second<br />
person<br />
123<br />
John<br />
inconversation<br />
Transfer<br />
Select the 'transfer'<br />
function Select 'transfer'<br />
After dialing the destination number, you can transfer the call<br />
directly without waiting for your party's reply by validating the<br />
'Transfer’ option.You can initiate the transfer by using the icon or the<br />
'Transfer' text.The transfer between two external parties and the<br />
transfer by pressing the hang-up key depend on the system<br />
configuration.<br />
23<br />
4<br />
During acall
4<br />
24<br />
During a call<br />
4.5 Three-way conference with internal and/or external parties<br />
(conference)<br />
During a call, a second call is on hold.<br />
123<br />
Paul<br />
inconversation<br />
Transfer<br />
select the 'conference'<br />
feature<br />
Number of second<br />
party<br />
You are in conference mode<br />
cancel conference and return to first correspondant (if conference is active)<br />
123<br />
John<br />
Paul<br />
End Conference<br />
123<br />
John<br />
Paul<br />
End Conference<br />
After the conference, to leave your two parties talking together:<br />
123<br />
John, Paul<br />
Conversation<br />
Transfer<br />
4.6 Placing an outside call on hold (parking)<br />
You can park an outside party in order to take the call on another set.<br />
123<br />
0612457845<br />
inconversation<br />
Transfer<br />
You are holding an external<br />
call<br />
select the<br />
'conference'<br />
feature<br />
0612457845<br />
inconversation<br />
Park<br />
Select the 'Parking' icon Confirm Dial the number to<br />
be called<br />
Your party is parked and hears the hold melody.<br />
123<br />
If you on-hook without entering the number of a call park<br />
destination set, the call will be parked on your set.
To recover your parked call:<br />
123<br />
Fwd services<br />
DND/locking/VG<br />
Pickup Services<br />
123 123<br />
Select 'Guide' Select 'Services'<br />
Select 'Call pickup' Select 'Call Park/Retrieve' You are on call<br />
If the parked call is not recovered within a preset time (by default 1<br />
minute 30), it is directed to the attendant.<br />
123<br />
Pickup: set<br />
Pickup: UNA<br />
Park/retrieve<br />
Call<br />
My services<br />
123<br />
0612457845<br />
inconversation<br />
Transfer<br />
25<br />
4<br />
During acall
5<br />
26<br />
Sharing<br />
Other<br />
5.1 Answering a night or a general bell<br />
When the attendant is absent, incoming external calls are forwarded to a general bell. You can<br />
answer these calls:<br />
123<br />
Fwd services<br />
DND/locking/VG<br />
Pickup Services<br />
Select 'Guide' Select 'Services'<br />
Select 'Call pickup' Select 'Answer night<br />
forwarding'<br />
5.2 Individual pick-up<br />
You hear a telephone ringing in an office where no-one can answer. If authorized, you can answer<br />
the call on your own telephone.<br />
123<br />
Fwd services<br />
DND/locking/VG<br />
Pickup Services<br />
Select 'Call pickup'<br />
If the telephone ringing is not in your pick-up group:<br />
Group call pick up<br />
Individual call pick up<br />
Night service call pickup<br />
Select 'Group call pickup'<br />
123 123<br />
123<br />
Pickup: group<br />
Pickup: set<br />
Pickup: UNA<br />
Call<br />
My services<br />
123 123<br />
Call<br />
My services<br />
Select 'Guide' Select 'Services'<br />
123<br />
Pickup: group<br />
Overflow assoc<br />
Pickup: set<br />
Transfer<br />
Pickup: UNA<br />
Volume: +/-6dB<br />
Select 'Individual call pickup' Select 'Dial' Enter number of<br />
ringing telephone<br />
If the telephone ringing is in your own pick-up group:<br />
123<br />
The system can be configured to prevent call pick-up on certain<br />
telephones.<br />
123
5.3 Password<br />
Hunt group call:<br />
Some extensions can be associated to form a group. You can contact any one of them by dialing<br />
the group number.<br />
Belonging to a group does not affect the handling of speed dials. A<br />
specific telephone within a group can always be called by using its<br />
own number.<br />
Temporary exit from your hunt group:/Return into your group:<br />
123<br />
Call<br />
Record Again<br />
Suffix<br />
123 123<br />
Select 'Guide' Select 'Services'<br />
Select 'Misc. Services' Select 'Leave group' or 'Join group' Your group<br />
number<br />
5.4 Sending a written message to an internal party<br />
123<br />
0 Text mail<br />
123<br />
Interphone svc<br />
Hunt grp: enter<br />
Hunt grp: exit<br />
OR<br />
123<br />
Interphone svc<br />
Hunt grp: enter<br />
Hunt grp: exit<br />
Select the 'Mail' feature Confirm<br />
Select the 'Text mails' icon Confirm<br />
123<br />
Activate<br />
Activate<br />
Activate<br />
Dial the number of your correspondent<br />
(dial, directories, last numbers dialled...)<br />
123<br />
123<br />
Fixed Messages<br />
Prg Messages<br />
New Message<br />
Select the type of message to send<br />
123<br />
My services<br />
123<br />
Activate<br />
Sophie<br />
Confirm<br />
Call<br />
My services<br />
follow informations displayed<br />
on the screen<br />
27<br />
5<br />
Sharing
5<br />
28<br />
Sharing<br />
If selected message has to be completed:<br />
123<br />
CALL BACK<br />
XXXXXXXX<br />
OK?<br />
Confirm access to the message<br />
to be completed<br />
Complete the message Confirm<br />
When editing a message to be completed you can use the delete key<br />
to delete any characters key ined. (delete :<br />
move the cursor in an input field.<br />
). The browser lets you<br />
5.5 Sending a copy of a voice message<br />
123<br />
CALL BACK<br />
. . . . . . .<br />
OK?<br />
OK?<br />
Select the 'Mail' feature; To access the voice mailbox<br />
Personal code Confirm<br />
123 123<br />
5.6 Sending a recorded message to a number/a distribution list<br />
Personal code Confirm<br />
C<br />
1 voice mail<br />
Listen to the message to send and follow<br />
the voice guide instructions<br />
123 123<br />
OK?<br />
Select the 'Mail' feature Confirm access to the voice<br />
mail<br />
follow the instructions of the voice guide
6<br />
Keeping in touch<br />
6.1 Immediate forwarding to your voice mailbox<br />
123<br />
Fwd Immediate<br />
Voice Mail<br />
Select the 'Diverting to your voice<br />
mailbox' icon<br />
6.2 Accessing your voice mailbox<br />
When you have received a message, the voice mailbox icon flashes on the display.<br />
(Message : ) The red LED on your telephone flashes to indicate there is a message.<br />
123<br />
1 New message OR<br />
123<br />
1 voice mail<br />
123<br />
123<br />
Other<br />
Select the 'Diversion' feature<br />
Confirm<br />
To access the voice mailbox Personal code<br />
Select the 'Diversion' feature<br />
follow the instructions of<br />
the voice guide<br />
6.3 Program your associate number<br />
The associated number can be a phone set number, the voice mail number or the pager number. It<br />
can be used as overflow number.<br />
123<br />
Associate<br />
Cancel<br />
123<br />
123<br />
123 123<br />
Call<br />
Associate<br />
Overflow<br />
Password<br />
Select 'Guide' Select 'Associate'<br />
123<br />
Associate<br />
Modify<br />
Back<br />
Confirm Select 'Edit'<br />
29
6<br />
30<br />
Keeping in touch<br />
123<br />
Associate<br />
Dial a Number<br />
Personal Dir<br />
Phone Book<br />
Dial the number of your correspondent (dial,<br />
directories, last numbers dialled...)<br />
Confirm<br />
6.4 Define an overflow number<br />
When your set is not available, outside the coverage area or not working, calls to your set will be<br />
automatically forwarded to this number if it has been defined.<br />
123<br />
Overflow<br />
Ovflw undefined<br />
123 123<br />
Call<br />
Associate<br />
Overflow<br />
Password<br />
Select 'Guide' Select 'Overflow'<br />
123<br />
Overflow<br />
Modify<br />
Back<br />
Confirm Select 'Edit'<br />
123<br />
Overflow<br />
Dial a Number<br />
Personal Dir<br />
Phone Book<br />
Dial the number of your correspondent (dial,<br />
directories, last numbers dialled...)<br />
Confirm<br />
6.5 Diverting calls to another number (immediate forwarding)<br />
The number can be your home, cell or mobile, voice message, or an internal extension (attendant,<br />
etc.).<br />
123<br />
Fwd Immediate<br />
Activate Fwd<br />
Modify Fwd<br />
Back<br />
123<br />
123 123<br />
Fwd Immediate<br />
Deactivated<br />
Select the 'Diversion' feature Confirm access to immediate<br />
forwarding<br />
123<br />
Fwd Immediate<br />
Dial a Number<br />
Personal Dir<br />
Phone Book<br />
select 'modify' dial the number of your correspondent<br />
Confirm<br />
(dial, directories, last numbers dialled...)<br />
You can continue to make calls while your telephone is forwarded.<br />
General remark concerning forwardings: you can only activate a<br />
single forwarding on your telephone. Programming a new<br />
forwarding will cancel the previous one.
6.6 Different types of forwardings Example of forwarding on<br />
busy<br />
• Different types of forwardings<br />
You can initiate different types of forwarding from the call forward list.<br />
(call forward list : )<br />
• Example of forwarding on busy:<br />
Confirm access to<br />
forwarding on<br />
busy<br />
123<br />
Fwd On Busy<br />
Fwd On No Answ<br />
Fwd Bsy/NoAnsw<br />
123<br />
Fwd On Busy<br />
Fwd On No Answ<br />
Fwd Bsy/NoAnsw<br />
123<br />
Fwd On Busy<br />
Fwd On No Answ<br />
Fwd Bsy/NoAnsw<br />
123<br />
Fwd On Busy<br />
Fwd Bsy/NoAnsw<br />
Remote Forward<br />
When you are on call, all your calls are<br />
forwarded to the number you choose.<br />
When you are absent, all your calls are<br />
forwarded to the number of your choice<br />
(delayed forwarding on no answer)<br />
When you are absent or already in<br />
communication, all your calls are forwarded to<br />
the number of your choice (delayed forwarding<br />
on no answer or busy)<br />
Program the forwarding of a set from another<br />
set (immediate remote forwarding)<br />
123<br />
123 123<br />
Fwd On Busy<br />
Fwd On No Answ<br />
Fwd Bsy/NoAnsw<br />
Select the 'Diversion' feature Select the 'List of forwardings'<br />
icon<br />
123<br />
Fwd Immediate<br />
Dial a Number<br />
Personal Dir<br />
Phone Book<br />
Dial the number of your correspondent<br />
(dial, directories, last numbers dialled...)<br />
Confirm<br />
31<br />
6<br />
Keeping in touch
6<br />
32<br />
Keeping in touch<br />
6.7 Cancelling all forwardings<br />
Select the 'Diversion<br />
cancellation' icon<br />
123<br />
Deact Forward<br />
Deact FollowMe<br />
Deact Rem Fwd<br />
123<br />
123<br />
Select the 'Diversion' feature<br />
Confirm<br />
6.8 Consulting messages left while you were away<br />
When you have received a message, the voice mailbox icon flashes on the display<br />
(Message: ). The red LED on your telephone flashes to indicate there is a message.<br />
123<br />
1 New message OR<br />
Select the 'Mail' feature<br />
123<br />
123<br />
2 Text mail<br />
John<br />
20 May 16:30 2/4<br />
OK?<br />
Select the 'Text mails' icon Select the desired message<br />
Confirm to read it Read the message<br />
Confirm access to<br />
'Options'<br />
Malvei<br />
123<br />
from the options menu, you can erase the<br />
message, callback the message sender, answer<br />
the message or read the next message<br />
123
7<br />
Programming your telephone<br />
7.1 Initializing your voice mailbox<br />
You can use the Message icon on the welcome screen to initialize your voice mailbox.<br />
(Message: )<br />
123<br />
1 New message OR<br />
Confirm access to the voice<br />
mail<br />
record your name<br />
7.2 Modifying your personal code<br />
Your personal code is used to access your voice mailbox and to lock your telephone.<br />
123<br />
Backspace<br />
. . .<br />
123<br />
Other<br />
Enter your<br />
temporary<br />
password<br />
End recording<br />
Select the 'Customizing your telephone'<br />
feature<br />
Enter the old password Enter the new password<br />
(twice)<br />
123<br />
Select the 'Mail' feature<br />
Enter your new<br />
password<br />
follow the instructions of the<br />
voice guide<br />
123 123<br />
Capital<br />
. . .<br />
123<br />
Associate<br />
Overflow<br />
Password<br />
Select 'Password'<br />
Confirm<br />
As long as your voice mailbox has not been initialized, password is<br />
your extension number or 0000.<br />
Each digit of the code is symbolized by an asterisk.<br />
33
7<br />
34<br />
Programming your telephone<br />
7.3 Adjusting the audio features<br />
You can select the ring tone for your telephone (6 choices) and adjust its volume (4 levels).<br />
Select 'Ring tone' Select the melody of your<br />
choice<br />
• Choose the tune:<br />
Melody1<br />
Melody2<br />
Melody3<br />
Select the melody of your<br />
choice<br />
• Adjusting the ringer volume:<br />
Level1<br />
Level2<br />
Level3<br />
123<br />
123<br />
123<br />
Confirm<br />
Select the 'Volume' icon Select the volume of your<br />
choice<br />
• Activate the buzzer or the ringer:<br />
123<br />
MARTIN Paul<br />
Wed 24 May 16:30<br />
Level1<br />
Level2<br />
Level3<br />
Melody1<br />
Melody2<br />
Melody3<br />
Confirm<br />
Long<br />
Vibrator activated and ringer<br />
Long<br />
Vibrator disabled and ringer<br />
press<br />
disabled<br />
press<br />
activated<br />
This key can be used to switch rapidly from the ringer to the vibrator and vice-versa.<br />
123<br />
123<br />
123<br />
MARTIN Paul<br />
Wed 24 May 16:30<br />
Confirm
• Choosing the ringer melody:<br />
You can choose from 5 different melodies for your terminal ringer.(Switch the station on or off<br />
: , OK : )<br />
123<br />
Switch off the<br />
set?<br />
Switch off the telephone<br />
Activate/disable the vibrator<br />
Activate/disable the ringer<br />
Activate/disable meeting mode (progressive ringing)<br />
Lock/Unlock keypad<br />
Press the OK key to confirm (OK : )<br />
7.4 Activating headset mode<br />
This mode allows you to answer calls automatically (without doing anything) and to direct the call<br />
to the external headset.<br />
Select the 'Adjustment' feature<br />
123<br />
Call<br />
My services<br />
My services<br />
Position the cursor on<br />
'headset'<br />
123<br />
Activating headset<br />
mode<br />
35<br />
7<br />
Programming your telephone
7<br />
36<br />
Programming your telephone<br />
7.5 Adjusting your telephone features<br />
123<br />
Ringing<br />
Keypad beep<br />
Warning beep<br />
Select the 'Adjustment' feature<br />
Select the feature* you want to<br />
activate or disable<br />
Activate / disable Return to idle<br />
*You can activate or disable the following features:<br />
Lighting<br />
The telephone lights up when you press a key<br />
Bell The telephone rings when a call is received<br />
Buzzer The buzzer goes off when a call is received<br />
Keypad bleep The phone bleeps each time you press a key<br />
Error bleep The phone will bleep each time it detects an error<br />
Outside area The phone bleeps if the radio link can no longer be<br />
bleep<br />
detected<br />
Standby screen Screen proposed after an idle period<br />
Headset activating or deactivating headset mode<br />
7.6 Adjusting screen brightness<br />
123<br />
Contrast: 3/5<br />
123<br />
Select the 'Adjustment' feature<br />
Select the 'Contrast' icon Increase or decrease the<br />
contrast<br />
123<br />
Return to idle
7.7 Selecting language<br />
Deutsch<br />
Français<br />
English<br />
Select the 'Language' feature Select the language of your<br />
choice<br />
The initial language selection is made automatically by the system.<br />
7.8 Programming your personal directory<br />
Your personal directory may contain up to 10 numbers.<br />
1-JOHN<br />
2-PAUL<br />
123<br />
Position the cursor on an<br />
existing record<br />
123<br />
Name?<br />
MARTIN<br />
123<br />
123<br />
Confirm<br />
Select the Directory feature Validate access to the 'personal<br />
directory'<br />
123<br />
Paul<br />
Call<br />
Modify<br />
Create<br />
Confirm Select the option 'create'<br />
123<br />
Number?<br />
0123456789<br />
Enter the name Confirm Enter the number Confirm<br />
T key in the name: the keys in the keypad include letters that you can display by pressing them<br />
successively.<br />
Example: press '8' twice to display the letter 'U'.<br />
123<br />
123<br />
Personal Dir<br />
Phone Book<br />
37<br />
7<br />
Programming your telephone
7<br />
38<br />
Programming your telephone<br />
7.9 Modifying a card in the personal directory<br />
1-JOHN<br />
2-PAUL<br />
123<br />
Select the Directory feature Validate access to the 'personal<br />
directory'<br />
Select the card to be modified Confirm Select 'modify' Confirm<br />
123<br />
Name?<br />
MARTIN<br />
Modify the name Confirm Modify the number Confirm<br />
Use the browser to position on the character or digit to modify.<br />
To delete a character, briefly press the delete key.<br />
( delete : ). to erase a field full of characters, hold down the erase<br />
key (long press).<br />
7.10 Erase a record from the personal directory<br />
1-JOHN<br />
2-PAUL<br />
123<br />
C<br />
123<br />
123<br />
123<br />
Paul<br />
Call<br />
My services<br />
My services<br />
123<br />
Number?<br />
0123456789<br />
123<br />
Personal Dir<br />
Phone Book<br />
Select the Directory feature Validate access to the 'personal<br />
directory'<br />
123<br />
Paul<br />
Call<br />
My services<br />
My services<br />
Select the record to erase Confirm Confirm confirm<br />
123<br />
Personal Dir<br />
Phone Book
7.11 Programming an appointment reminder<br />
123<br />
. . . : . . .<br />
Enter the time of the<br />
appointment<br />
Select the 'Appointment' feature Confirm<br />
Confirm Where appropriate, dial<br />
the number of the<br />
destination set<br />
To cancel your appointment callback request:<br />
7.12 Identifying the terminal you are on<br />
Confirm<br />
At the programmed time, your telephone rings:<br />
press the On-hook key to accept the appointment (Hang up : ).<br />
If you do not validate the answer to the first call-back, a second callback<br />
will be made. After a second call-back with no answer, the callback<br />
request will be cancelled. If your line is forwarded to another<br />
set, the appointment reminder will not follow the forwarding<br />
Where appropriate, dial the<br />
number of the destination set<br />
(long press)<br />
123 123<br />
Select the 'Appointment' feature Confirm;<br />
Confirm<br />
Displays your telephone number.<br />
Set appointment<br />
Cancel appointm<br />
123 123<br />
IncmpIntCall<br />
IncmpIntCall<br />
39<br />
7<br />
Programming your telephone
7<br />
40<br />
Programming your telephone<br />
7.13 Locking your telephone<br />
• Locking your terminal:<br />
This service enables you to prohibit outside calls and any programming changes on your telephone:<br />
123<br />
Lock/unlock?<br />
Confirm<br />
• Unlock your terminal:<br />
123<br />
Unlock the set?<br />
Select the 'Lock' feature<br />
Select the 'Lock' feature<br />
confirm Personal code<br />
• Lock/unlock keypad:<br />
123<br />
123<br />
123<br />
Set is locked<br />
123<br />
Press and release Select the 'Lock' icon Confirm To unlock the keypad<br />
123<br />
Suomea
8<br />
Using the telephone in GAP mode<br />
Other<br />
Your telephone complies with the GAP standard and can be used in simplified mode on another<br />
<strong>DECT</strong>/GAP system (other PABX or indoor relay unit).<br />
Unless otherwise specified, the features described below are available on your telephone in<br />
combination with the mandatory features provided by your fixed GAP system.<br />
Automatic transfer between radio cells:<br />
This telephone feature enables you to move around between radio relay units, without any break<br />
in communications. However, this facility depends on the inherent limitations of the fixed system,<br />
notably its ability to manage several radio relays.<br />
Display feature:<br />
When a call is made from the telephone, the digits dialed are displayed. When you receive a call,<br />
the display indicates the caller’s number or name, if this feature is provided by the fixed system.<br />
8.1 Making a call<br />
Dial the number<br />
required<br />
8.2 Answering a call<br />
Sophie<br />
123<br />
You are answering a<br />
call<br />
This utilisation may involve featureal restrictions outside the<br />
coverage of our guarantee.<br />
Send<br />
the call<br />
Speak Hang up<br />
8.3 To call from your personal directory<br />
1-MARTIN<br />
2-SOPHIE<br />
3-<br />
123<br />
Lift<br />
the receiver<br />
John<br />
Sophie<br />
123<br />
123<br />
Select the Directory feature<br />
Speak Hang up<br />
Select the party you wish to call Send the call<br />
123<br />
41
8<br />
42<br />
Using the telephone in GAP mode<br />
8.4 Redialing the last number dialed (redial)<br />
Press the unhook key (hold down for a few seconds). (Lift the receiver : )<br />
8.5 Sending DTMF signals<br />
During a call, you sometimes have to send DTMF signals, for example, for a voice message service,<br />
an automatic switchboard or when remotely consulting an answering machine. To do this:<br />
Press the star key (hold down for a few seconds). ( star : )<br />
8.6 Sending a calibrated cut-off<br />
The calibrated cut-off activates features such as transfer to another telephone set.<br />
To make a calibrated cut-off:<br />
Press the 0 key (hold down for a few seconds).<br />
8.7 Programming your personal directory<br />
Your directory can contain up to 12 numbers.<br />
123<br />
Select the Directory feature Select the desired position<br />
1-Edit<br />
2-Delete<br />
3-Call<br />
Confirm Confirm Enter the name (10 characters<br />
maximum)<br />
123<br />
Number?<br />
0123456789<br />
Confirm Enter the number Confirm Return to idle<br />
123<br />
1-............<br />
2-............<br />
3-............<br />
To key in the name : the keys in the numeric keypad include letters<br />
that you can display by pressing them successively. Example: press<br />
twice in succession on 8 to display the letter 'U'.<br />
To insert a pause in a number, press the 1 (hold down for a few<br />
seconds).<br />
To insert a measured break, press 0 (hold down for a few seconds).<br />
123<br />
123<br />
Name?<br />
MARTIN
8.8 Modifying a name or number<br />
1-MARTIN<br />
2-SOPHIE<br />
3-<br />
Select the Directory feature Select the card to be modified<br />
1-Edit<br />
2-Delete<br />
3-Call<br />
MARTIN<br />
Confirm Select 'Edit' Confirm Move onto the letter to be<br />
modified<br />
Modify the name Confirm Move to the digit to be modified<br />
Modify the digit Confirm<br />
To delete a character, use the delete key. ( delete : )<br />
8.9 Deleting a card<br />
1-MARTIN<br />
2-SOPHIE<br />
3-<br />
123<br />
123<br />
123<br />
123 123<br />
Select the Directory feature<br />
123<br />
Number?<br />
0123456789<br />
1-Edit<br />
2-Delete<br />
3-Call<br />
123 Name?<br />
Select the card to be deleted Confirm Select 'Delete' Confirm<br />
123<br />
C<br />
43<br />
8<br />
Using the telephone in GAP mode
8<br />
44<br />
Using the telephone in GAP mode<br />
8.10 Customizing and adjusting your telephone<br />
Choosing your melody:<br />
Adjusting the ringer volume:<br />
Selecting language:<br />
Select the 'Ringer' feature Select the melody of your<br />
choice<br />
Confirm Return to idle<br />
Increase / reduce the<br />
volume<br />
Select the 'Ringer' feature Select the 'Volume' icon<br />
Return to idle<br />
Select the 'Language' feature Select the language of your choice<br />
Confirm Return to idle<br />
123<br />
123<br />
123<br />
Melody1<br />
Melody2<br />
Melody3<br />
123<br />
Volume: 3/4<br />
123<br />
123<br />
Français 1<br />
Deutsch 2<br />
English 3
Adjusting screen contrast:<br />
Select the 'Adjustment' feature Select the 'Contrast' icon<br />
Increase / reduce the<br />
contrast<br />
123 123<br />
Return to idle<br />
8.11 Adjusting your telephone features<br />
Contrast: 3/5<br />
Select the 'Adjustment' feature Select the feature* you want to activate or<br />
disable<br />
Activate / disable Return to idle<br />
123 123<br />
Ringing<br />
Keypad beep<br />
Warning beep<br />
*You can activate or disable the following features:<br />
Lighting The telephone lights up when you press a key<br />
Bell The telephone rings when a call is received<br />
Buzzer The buzzer goes off when a call is received<br />
Keypad bleep You will hear a bleep each time you press a key<br />
Error bleep You will hear a bleep each time an error is detected<br />
Outside area bleep The phone bleeps when the radio link can no longer be detected<br />
Standby screen Screen proposed after an idle period<br />
45<br />
8<br />
Using the telephone in GAP mode
9<br />
46<br />
Registering the telephone<br />
Other<br />
9.1 Registering the telephone on a system for the first time<br />
For the mobile telephone to feature, it must be registered on at least one <strong>Alcatel</strong>-<strong>Lucent</strong> or GAP<br />
system (registration operation).<br />
If when first switched on the display indicates: 'System 1 — Auto install ?' your telephone has<br />
not been registered on any system; consult your installation technician or proceed as follows:<br />
1. Prepare your system for registration (see system installation guide).<br />
2. When the system is ready, the station always displays the starting screen:<br />
123<br />
SYSTEM 1<br />
Auto install?<br />
Confirm to install the<br />
telephone<br />
3. You have two subscription possibilities:<br />
a- If the system does not use an AC code<br />
Launch subscription<br />
b- If the system uses an AC (authentication code)<br />
Registration can begin<br />
. . . . . . .<br />
Configure<br />
AC code ?<br />
Select 'AC' Confirm Enter the code Confirm<br />
123<br />
123<br />
Launch<br />
Subscription?<br />
123<br />
Subscription<br />
Running…<br />
1-............<br />
2-............<br />
2-............<br />
Launch subscription Select the region corresponding<br />
to your country *<br />
123<br />
123<br />
Launch<br />
Subscription?<br />
123 AC Code<br />
123<br />
Subscription<br />
Running…
The <strong>DECT</strong> set can be programmed and can address the 4 specified frequency bands. On installation,<br />
the user of a <strong>DECT</strong> set must declare the set in the appropriate frequency band according to the<br />
country in which the user finds himself:<br />
Region 1<br />
Region 2<br />
Region 3<br />
Region 1<br />
Region 2<br />
Region 3<br />
Region 1<br />
Region 2<br />
Region 3<br />
Region 2<br />
Region 3<br />
Region 4<br />
123<br />
Europe band: 1880 MHz - 1900 MHz<br />
US/Canada band: 1920 MHz - 1930 MHz<br />
South America band: 1910 MHz - 1930 MHz<br />
Asia band: 1900 MHz - 1920 MHz<br />
Before installing your <strong>DECT</strong> set, please contact your administrator to know which frequency band<br />
you need to declare.<br />
The registration operation can last up to 2 minutes.<br />
If the operation has been done correctly (subscription accepted), the telephone is ready to<br />
be used and the radio reception quality icon is displayed. ( Radio reception quality:<br />
: )<br />
If the registration operation has not been successful, the station proposes launching the<br />
subscription again.<br />
123<br />
123<br />
123<br />
123<br />
Launch<br />
Subscription?<br />
Utilization of the telephone in GAP mode can lead to featureal<br />
limitations for which no claims will be considered under the terms of<br />
the warranty.<br />
47<br />
9<br />
Registering the telephone
9<br />
48<br />
Registering the telephone<br />
9.2 Registering the telephone on other systems<br />
The telephone can be declared on several systems (maximum of 5).<br />
Note: the input is usually reserved for use with your main <strong>Alcatel</strong>-<strong>Lucent</strong> system. You can select<br />
the other inputs to register the telephone under another system (<strong>Alcatel</strong>-<strong>Lucent</strong> or other system).<br />
To make a new registration, when the telephone has already been registered on one<br />
or more systems, proceed as follows:<br />
1. Prepare your system for registration (see the system installation manual or consult your<br />
installation manager).<br />
2. When the system is ready:<br />
123 123<br />
Password?<br />
. . . .<br />
Select the 'Installation' feature Enter the installation password<br />
(314987)<br />
123<br />
123<br />
SYSTEM 2<br />
SYSTEM 1<br />
Install<br />
SYSTEM 2<br />
SYSTEM 3<br />
Edit name<br />
Confirm Select a system Confirm Select 'Install'<br />
123<br />
Launch<br />
Subscription?<br />
1-............<br />
2-............<br />
2-............<br />
Confirm Select the region corresponding<br />
to your country *<br />
123
The <strong>DECT</strong> set can be programmed and can address the 4 specified frequency bands. On installation,<br />
the user of a <strong>DECT</strong> set must declare the set in the appropriate frequency band according to the<br />
country in which the user finds himself:<br />
Region 1<br />
Region 2<br />
Region 3<br />
Region 1<br />
Region 2<br />
Region 3<br />
Region 1<br />
Region 2<br />
Region 3<br />
Region 2<br />
Region 3<br />
Region 4<br />
123<br />
123<br />
123<br />
123<br />
Europe band: 1880 MHz - 1900 MHz<br />
US/Canada band: 1920 MHz - 1930 MHz<br />
South America band: 1910 MHz - 1930 MHz<br />
Asia band: 1900 MHz - 1920 MHz<br />
Before installing your <strong>DECT</strong> set, please contact your administrator to know which frequency band<br />
you need to declare.<br />
49<br />
9<br />
Registering the telephone
9<br />
50<br />
Registering the telephone<br />
3. You have two subscription possibilities:<br />
a- If the system does not use an AC code<br />
Launch subscription<br />
b- If the system uses an AC (authentication code)<br />
123<br />
123<br />
Subscription<br />
Running…<br />
Launch<br />
Subscription?<br />
Select 'AC' Confirm<br />
123<br />
Launch<br />
Subscription?<br />
Confirm Launch subscription;<br />
123<br />
AC Code<br />
. . . . . . .<br />
If the registration operation runs correctly (Subscription accepted), the telephone is ready<br />
for use, and the radio coverage icon appears.<br />
If the registration operation has not been successful, the station proposes launching the<br />
subscription again.<br />
123<br />
Launch<br />
Subscription?<br />
Depending on the type of system concerned, registration may require one or more<br />
additional operations on the system.<br />
123<br />
Subscription<br />
Running…
Selecting your telephone system:<br />
your telephone can be programmed to feature on 5 different <strong>DECT</strong> systems (<strong>Alcatel</strong>-<strong>Lucent</strong> or<br />
GAP).<br />
Select the 'System' feature<br />
Select the desired input (the chosen option is<br />
indicated by the radio button with a central dot)<br />
123<br />
SYSTEM 1<br />
SYSTEM 2<br />
Lock to any<br />
123<br />
Confirm<br />
The selection is retained even after switching the telephone on/off.<br />
The selection of a specific system (SYSTEM...) forces operation on a<br />
specific system. This selection must be changed if one wishes to<br />
change system. Selecting 'Lock to any' enables the telephone to<br />
connect automatically when it enters a system coverage zone. If the<br />
systems programmed in the telephone have common coverage zones,<br />
the telephone selects the first system found.<br />
51<br />
9<br />
Registering the telephone
10<br />
52<br />
Accessories<br />
10.1 Chargers<br />
• Fixing a charger on a vertical surface<br />
• Assembling two chargers<br />
Other<br />
The 'Basic Desktop' charger includes:<br />
1. a telephone support,<br />
2. a mains cable,<br />
via an AC/DC adaptor.<br />
The 'Dual Desktop' charger includes:<br />
1. a support with :<br />
- a place for the telephone,<br />
- a place for an<br />
additional battery,<br />
- a charge indicator light for the<br />
additional battery.<br />
2. a mains cable via a<br />
AC/DC adaptor.<br />
The metal shielding plate under the chargers can be<br />
dismounted, enabling you to fix the charger on a<br />
vertical surface (see figure), contact your installer.<br />
The metal shielding plate under the chargers can be<br />
dismounted and may be used to assemble two<br />
chargers together (see figure). This assembly can also<br />
be fixed on a vertical surface, contact your installer.
10.2 Characteristics of the mains power adapter<br />
Input: 100/240 V - 50/60 Hz<br />
Output: 7.5 V - 0.38 A<br />
10.3 Presentation of the battery pack<br />
Initial charge:<br />
The power outlet used must be close to the charger/holder and easily<br />
accessible, so that it can be used as a way to turn power on or off.<br />
Autonomy of your telephone <strong>300</strong> <strong>DECT</strong> <strong>400</strong> <strong>DECT</strong><br />
On standby in the radio coverage zone 233 hours 233 hours<br />
In continuous call 20,6 hours 19,4 hours<br />
OK OK<br />
Place the<br />
telephone in<br />
the charging<br />
holder<br />
Battery<br />
icon<br />
flashing<br />
On charge<br />
(minimum 3<br />
or 5 hours)<br />
Battery is<br />
fully<br />
charged<br />
(steady)<br />
Maximum battery performance is only reached after around 10<br />
charge/discharge cycles.<br />
These batteries contain polluting substances: do not dispose of them<br />
in a dustbin - take them to a specialized collection point.<br />
OK OK<br />
53
10<br />
54<br />
Accessories<br />
10.4 Headphone / external microphone<br />
The side of the telephone features a headphone / external microphone socket. Contact your<br />
retailer to find out the characteristics of the various headphone models.<br />
10.5 Cleaning your telephone<br />
Your telephone does not require any particular servicing. However, it may be cleaned using a soft,<br />
damp cloth.<br />
Do not use soap or detergent that would risk altering the colours or<br />
damaging the surface of the telephone.<br />
10.6 Transporting and protecting your telephone<br />
To avoid losing your telephone, get into the habit of clipping it onto your belt. Your telephone can<br />
also be carried in a protective case.<br />
Various models of carrying case are available. Ask your installation<br />
technician for information. It is vital to use the special protective<br />
carrying case if your telephone is to be used in an industrial<br />
environment (presence of dust, filings, vapours of diverse origins<br />
and risk of being dropped). If the telephone is used with a carrying<br />
case, the belt clip must be removed.
11<br />
Glossary<br />
Other<br />
Broker call:<br />
Function enabling the user to switch back and forth between several simultaneous calls.<br />
Call transfer:<br />
Function enabling a call to be transferred to another telephone within the system.<br />
Common directory:<br />
This directory contains all the speed-dial numbers accessible to the users of the <strong>Alcatel</strong>-<strong>Lucent</strong><br />
system.<br />
Conference:<br />
The conference feature allows the user, in contact with two parties, to set up a three-way<br />
conference.<br />
<strong>DECT</strong>:<br />
European cordless telephone standard: Digital Enhanced Cordless Telecommunication.<br />
<strong>DECT</strong> telephone: cordless telephone complying with the <strong>DECT</strong> standard.<br />
GAP (Generic Access Profile):<br />
Specific operating mode defined in the European <strong>DECT</strong> standard. The telephone GAP mode is a<br />
basic and simplified form of operation compatible with other <strong>DECT</strong> GAP systems (other PBX or<br />
indoor relay).<br />
Hunting groups:<br />
Several telephones grouped under one directory number. A call to this number is directed to one<br />
of the free telephones within the group.<br />
Intrusion:<br />
Function allowing intrusion into a call between two parties.<br />
Personal assistant:<br />
This facility enables the caller to avoid having to leave a message in the voice mailbox and directs<br />
him/her to an extension number, an outside number, a mobile or the switchboard.<br />
Parking:<br />
This feature places an outside call on hold, for subsequent recovery on another “authorised”<br />
extension within the system.<br />
Password<br />
This password controls access to the programming and terminal locking features by the user<br />
(default password: 1515).<br />
Personal directory:<br />
This directory contains the personal numbers of the user of a terminal.<br />
Pick-up group:<br />
This feature enables you to answer a call ringing on another terminal. Calls can only be picked up<br />
within the pick-up group.<br />
Broker call<br />
During a call, DTMF codes are sometimes required. These codes are used when a user wants to<br />
consult a voice server, access a PABX or remotely consult an answering machine.<br />
55
56<br />
Declaration of compliance<br />
MU60370USAAed01-E800ed01-2606<br />
howtoc<br />
We, <strong>Alcatel</strong>-<strong>Lucent</strong> Enterprise, hereby declare that we assume the <strong>Alcatel</strong>-<strong>Lucent</strong> <strong>300</strong> <strong>DECT</strong><br />
<strong>Handset</strong> and <strong>Alcatel</strong>-<strong>Lucent</strong> <strong>400</strong> <strong>DECT</strong> <strong>Handset</strong> to be compliant with the essential<br />
requirements of Directive 1999/5/CE of the European Parliament and Council.<br />
This equipment uses the <strong>DECT</strong> harmonised frequency spectrum and can be used in all the countries<br />
of the European Community, Switzerland and Norway.No guarantee is given concerning possible<br />
interference affecting <strong>DECT</strong> equipment, due to other authorised utilisation of the radio frequencies<br />
concerned.<br />
This device has been designed and manufactured not to exceed the SAR (Specific Absorption Rate)<br />
radio frequency power transmission limits established by the different countries concerned. The<br />
SAR value measured is equal to 0.061 W/kg (the globally accepted maximum limit being 1.6 W/kg).<br />
Consumption in standby: 20 mW.<br />
The labels and icons presented in this document are not contractually binding and may be modified<br />
without prior warning.<br />
The labels and icons displayed on your phone depend on the system to which you are connected<br />
and may differ from those specified in this document.<br />
Any unauthorised modification to the product shall render this declaration of compliance null and<br />
void. A copy of the original of this declaration of compliance can be obtained by post from :<br />
<strong>Alcatel</strong>-<strong>Lucent</strong> Enterprise - Technical Services - Approvals Manager<br />
1, route du Dr. Albert Schweitzer -<br />
F 67408 Illkirch Cedex - France<br />
Information relative to the environment<br />
This symbol indicates that at the end of its life, this product should be subject to<br />
special collection and disposal in member countries of the European Union, as well<br />
as in Norway and Switzerland. By ensuring this product is disposed of correctly, you<br />
will help to conserve natural resources and help prevent potential negative<br />
consequences to the environment and human health which could otherwise be<br />
caused by inappropriate disposal of this product. For further details about recycling<br />
this product, please contact the supplier who sold you the product.<br />
<strong>Alcatel</strong>, <strong>Lucent</strong>, <strong>Alcatel</strong>-<strong>Lucent</strong> and the <strong>Alcatel</strong>-<strong>Lucent</strong> logo are trademarks of <strong>Alcatel</strong>-<strong>Lucent</strong>. All<br />
other trademarks are the property of their respective owners.<br />
The information presented is subject to change without notice.<br />
<strong>Alcatel</strong>-<strong>Lucent</strong> assumes no responsibility for inaccuracies contained herein.<br />
Copyright © 2007 <strong>Alcatel</strong>-<strong>Lucent</strong>. All rights reserved