


Create successful ePaper yourself
Turn your PDF publications into a flip-book with our unique Google optimized e-Paper software.
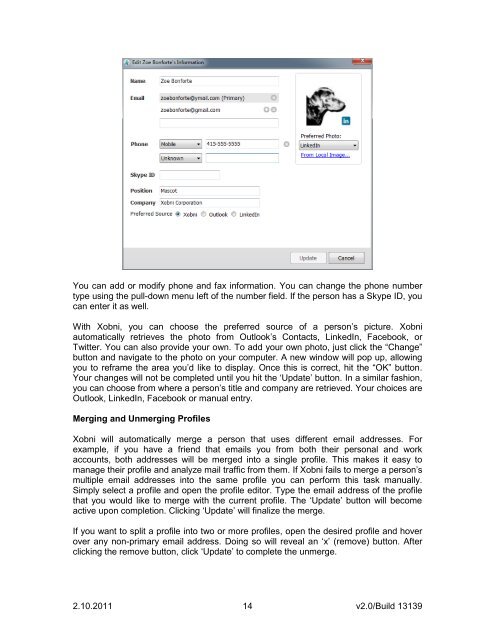
You can add or modify phone and fax information. You can change the phone number<br />
type using the pull-down menu left of the number field. If the person has a Skype ID, you<br />
can enter it as well.<br />
With <strong>Xobni</strong>, you can choose the preferred source of a person‟s picture. <strong>Xobni</strong><br />
automatically retrieves the photo from Outlook‟s Contacts, LinkedIn, Facebook, or<br />
Twitter. You can also provide your own. To add your own photo, just click the “Change”<br />
button and navigate to the photo on your computer. A new window will pop up, allowing<br />
you to reframe the area you‟d like to display. Once this is correct, hit the “OK” button.<br />
Your changes will not be completed until you hit the „Update‟ button. In a similar fashion,<br />
you can choose from where a person‟s title and company are retrieved. Your choices are<br />
Outlook, LinkedIn, Facebook or manual entry.<br />
Merging and Unmerging Profiles<br />
<strong>Xobni</strong> will automatically merge a person that uses different email addresses. For<br />
example, if you have a friend that emails you from both their personal and work<br />
accounts, both addresses will be merged into a single profile. This makes it easy to<br />
manage their profile and analyze mail traffic from them. If <strong>Xobni</strong> fails to merge a person‟s<br />
multiple email addresses into the same profile you can perform this task manually.<br />
Simply select a profile and open the profile editor. Type the email address of the profile<br />
that you would like to merge with the current profile. The „Update‟ button will become<br />
active upon completion. Clicking „Update‟ will finalize the merge.<br />
If you want to split a profile into two or more profiles, open the desired profile and hover<br />
over any non-primary email address. Doing so will reveal an „x‟ (remove) button. After<br />
clicking the remove button, click „Update‟ to complete the unmerge.<br />
2.10.2011 14<br />
v2.0/Build 13139