

Cutler-Hammer - Eaton Canada
Cutler-Hammer - Eaton Canada
Cutler-Hammer - Eaton Canada

You also want an ePaper? Increase the reach of your titles
YUMPU automatically turns print PDFs into web optimized ePapers that Google loves.
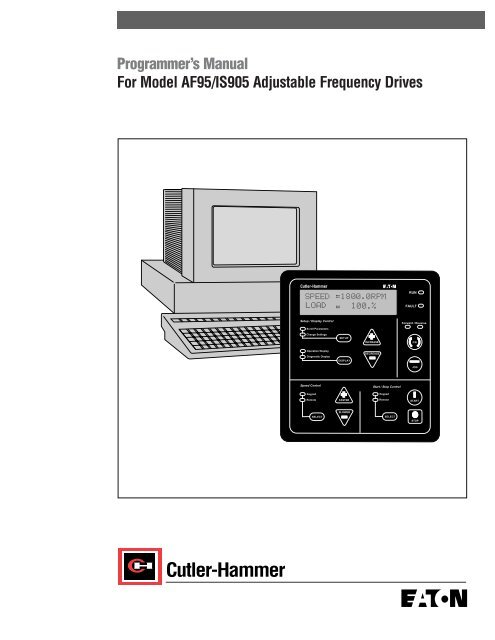
Programmer’s Manual<br />
For Model AF95/IS905 Adjustable Frequency Drives<br />
<strong>Cutler</strong>-<strong>Hammer</strong><br />
<strong>Cutler</strong>-<strong>Hammer</strong><br />
Setup / Display Control<br />
Scroll Parameters<br />
Change Settings<br />
Operation Display<br />
Diagnostic Display<br />
Speed Control<br />
Keypad<br />
Remote<br />
SELECT<br />
SETUP<br />
DISPLAY<br />
FASTER<br />
SLOWER<br />
INCREASE<br />
DECREASE<br />
Start / Stop Control<br />
Keypad<br />
Remote<br />
SELECT<br />
RUN<br />
FAULT<br />
Forward / Reverse<br />
F/R<br />
JOG<br />
START<br />
STOP
Copyright © 1997 by <strong>Cutler</strong>-<strong>Hammer</strong> Inc.<br />
All Rights Reserved<br />
The computer program, referenced in this manual, is protected by United States<br />
copyright law and international treaties. You may not disassemble, decompile or<br />
modify the software. Unauthorized reproduction or distribution of this program, or<br />
any portion of it, may result in civil and criminal penalties<br />
This program is provided “as is” without warranty of any kind. <strong>Cutler</strong>-<strong>Hammer</strong> Inc.<br />
disclaims all warranties including, but not limited to, the implied warranties<br />
of merchantability and fitness for a particular purpose. <strong>Cutler</strong>-<strong>Hammer</strong> does<br />
not warrant that the functions contained in the program will meet your requirements<br />
or that the operation of the program will be uninterrupted or error free. In no event<br />
shall <strong>Cutler</strong>-<strong>Hammer</strong> Inc. or its agents be liable to you or third parties for any<br />
direct, indirect, consequential, special or incidental damages arising out of<br />
the use of the software, even if advised of the possibility of such damages.
Table of Contents<br />
Page<br />
Introduction......................................................................<br />
1-1<br />
About This Manual ...................................................... 1-1<br />
Programmer Software On-line Help........................ 1-1<br />
Special Rules For Programmer Software Help....... 1-1<br />
Installation........................................................................<br />
2-1<br />
System Requirements.................................................. 2-2<br />
Installing the Software.................................................. 2-2<br />
Interconnections........................................................... 2-3<br />
Main Screen ................................................................. 2-3<br />
Initial Power Up ............................................................ 2-5<br />
Summary of Steps .................................................. 2-5<br />
Explanation of Steps............................................... 2-5<br />
Using Your Programmer Software.................................<br />
3-1<br />
File Menu...................................................................... 3-2<br />
Communication Menu .................................................. 3-4<br />
Interface Menu ............................................................. 3-6<br />
Setup Menu.................................................................. 3-9<br />
Advanced Menu ......................................................... 3-15<br />
Diagnostics Menu....................................................... 3-24<br />
Appendix ..........................................................................A-1<br />
Analog Inputs - Table 1 ................................................A-2<br />
Analog Outputs - Table 2 ..................................... A-3, A-4<br />
Digital Inputs - Table 3 ......................................... A-5, A-6<br />
Digital Outputs - Table 4...............................................A-7<br />
Programmer Software Tree..........................................A-8<br />
Commands, Parameters, and Settings ........................A-9<br />
Index .................................................................................. I-1<br />
AF95/IS905 Programmer’s Manual<br />
i
Table of Contents<br />
AF95/IS905 Programmer’s Manual<br />
ii
About This Manual<br />
SECTION 1<br />
Introduction<br />
The Programmer’s Manual is a comprehensive guide for setting up and<br />
programming your AF95/IS905 adjustable frequency drive. This manual<br />
takes the user through installation of the AF95/IS905 Programmer & Help<br />
System for Windows software (hereafter called Programmer Software) and<br />
explains various screens available for advanced programming. A general<br />
knowledge of drives and motor characteristics is helpful. For a review of<br />
drive and motor basics refer to <strong>Cutler</strong>-<strong>Hammer</strong>’s Adjustable Frequency<br />
Drive Application Guide.<br />
Programmer Software On-line Help<br />
Throughout the Programmer Software you will find help screens with information<br />
on using the software. Additionally there is a Help file available<br />
from a pulldown menu that allows the user to either review the entire help<br />
document or search for information within the help file.<br />
For general information on using a help program, or on using a mouse or<br />
keyboard to navigate through the help program, press the F1 key on your<br />
keyboard.<br />
Special Rules For Programmer Software Help<br />
If the text is green and single underlined, a topic screen is available that<br />
describes the subject matter for the highlighted text in detail. As you move<br />
the cursor over the green, underlined text, the cursor changes to a “hand”.<br />
Click on the green text with the left button on your mouse (or use the Tab<br />
key on your keyboard and press Enter when the text is selected) to see<br />
the topic screen.<br />
When you are finished examining the topic, click on the Back button (or<br />
press the Alt key on your keyboard and “ B”<br />
at the same time) at the top of<br />
the topic screen to return you to the previous screen.<br />
AF95/IS905 Programmer’s Manual<br />
1-1
Introduction<br />
SECTION 1<br />
AF95/IS905 Programmer’s Manual<br />
1-2<br />
If the text is green and dotted underlined, a small pop-up is available to<br />
define the terminology of the highlighted text.<br />
As you move the cursor over the green, dotted underlined text, it changes<br />
to a “hand”. Click on the green text with the left button on your mouse (or<br />
use the Tab key on the keyboard and press Enter when the text is<br />
selected) to see the pop-up.<br />
If the text is blue (or bold with no underline on monochrome monitors), it<br />
means that the information is important.
SECTION 2<br />
Installation<br />
This section of the AF95/IS905 Programmer’s Manual provides guidelines<br />
for the proper installation of Programmer Software:<br />
• Installing the software.<br />
• Interconnections between the PC and the drive.<br />
• Initial power up of the Programmer Software.<br />
AF95/IS905 Programmer’s Manual<br />
2-1
Installation<br />
SECTION 2<br />
AF95/IS905 Programmer’s Manual<br />
2-2<br />
System Requirements<br />
• Microsoft Windows version 3.xx or Windows 95<br />
• PC with 80386 processor or higher<br />
• Minimum of 4 megabytes of hard disk space.<br />
Installing the Software<br />
Attention<br />
Custom configurations can only be retrieved<br />
from your AF95/IS905 with the same version<br />
of Programmer Software used to create them.<br />
You can, however, retrieve from disk, custom<br />
configurations created by other versions of<br />
Programmer Software. Make sure you save<br />
your custom configurations to disk using the<br />
appropriate version of Programmer Software<br />
prior to installing any other versions of Programmer<br />
Software on your computer. Failure<br />
to do so could result in permanent loss of your<br />
custom configurations.<br />
To install the Programmer Software on your PC hard drive:<br />
1. Insert disk #1 into a floppy drive.<br />
2. If you have a Microsoft Windows version 3.xx PC:<br />
a. Go to Program Manager and select File menu.<br />
b. Choose Run,<br />
type A:\setup and press Enter.<br />
3. If you have a Microsoft Windows 95 PC:<br />
a. Go to the Menu bar,<br />
select Start.<br />
b. Select Run, type A:\setup and press<br />
c.<br />
Attention<br />
Enter.<br />
Make sure the Com port you select is not<br />
being used by your mouse or the mouse will<br />
not operate after you start the program. Follow<br />
the directions for changing the port the drive is<br />
connected to if your mouse will not operate.
Installation<br />
SECTION 2<br />
4. At this point, follow the instructions as they appear on the screen. During<br />
installation, a serial Com port must be selected for communication.<br />
The AF95/IS905 can be connected to Com port 1 or 2.<br />
5. Upon completion of the installation, the <strong>Cutler</strong>-<strong>Hammer</strong> logo will<br />
appear as an icon in your Program Manager (“Programs” menu on<br />
Windows 95 Menu Bar) in the program group AF95 Programmer.<br />
Another icon will be present for the help file.<br />
6. To run the program, simply double click on the <strong>Cutler</strong>-<strong>Hammer</strong> logo<br />
icon located in the AF95 Programmer program group and the program<br />
will run.<br />
7. If you cannot operate your mouse after the program starts you can<br />
select a different Com port:<br />
a. Press Enter when each license window appears.<br />
b. When the Main screen appears, press the Alt key on your keyboard<br />
and “C” at the same time.<br />
c. Use the arrow keys to select “ Port connected to drive... ” and<br />
press Enter.<br />
d. Press “ 1”<br />
or “ 2”<br />
to change Com port to the one that is not used by<br />
the mouse.<br />
e. Press the Alt key on your keyboard and “ K”<br />
at the same time.<br />
f. You should be able to use your mouse now. Make sure you save<br />
the configuration by going to the File menu and selecting “ Save... ”.<br />
Interconnections<br />
To connect your AF95/IS905 Adjustable Frequency drive to your PC use a<br />
null modem cable with RXD, TXD and ground conductors. Use <strong>Cutler</strong>-<br />
<strong>Hammer</strong> part number 20-275-4 or Radio Shack cable P/N 26-117 plus null<br />
modem adapter 26-264. If the computer has a 25 pin serial port connector,<br />
a 25 pin female/9 pin male port adapter Radio Shack P/N 26-287 is<br />
required.<br />
Note the keypad may not be physically located at the drive chassis or you<br />
may have more than one keypad. In the event of multiple keypads, your<br />
PC can be connected to any of the keypads connected to your drive. Note:<br />
It is critical that the correct cable be used to connect your AF95/IS905 keypad<br />
to your computer. Use of an improper cable will prevent operation.<br />
Main Screen<br />
The Main screen includes the topic screen titles (such as Advanced)<br />
across the top and the status bar on the bottom. The sub-topic screens are<br />
displayed across the middle of the screen. This allows access to any topic<br />
screen even if another topic screen is displayed. The Appendix in this<br />
manual contains a file tree showing all of the major topics available.<br />
AF95/IS905 Programmer’s Manual<br />
2-3
Installation<br />
SECTION 2<br />
AF95/IS905 Programmer’s Manual<br />
2-4<br />
Note: If you switch from one topic screen to another, the program<br />
automatically enters an OK for any changes you<br />
made to the previous topic screen.<br />
When you select a topic screen title, a drop-down list box opens that displays<br />
the titles (such as Speeds and PID) of all of its sub-topic screens.<br />
When you select one of these sub-topic screen titles, its screen is displayed.<br />
Some sub-topic screens contain a set of their own sub-topic<br />
screen titles (such as Man/Auto ramps). The illustration below shows an<br />
example of the Main screen with the sub-topic screen titles for Setup and<br />
the sub-topic screen titles for Speeds.
Initial Power Up<br />
Installation<br />
SECTION 2<br />
The first time you power up your drive, it will be programmed with one of<br />
19 predefined configurations. One of these will probably closely meet your<br />
specific needs, however you may still need to specify some custom parameters.<br />
The following steps will take you through the basics of a configuration.<br />
This assumes that your drive is powered up, the configuration<br />
software is running and your computer is connected to the drive. If you are<br />
working without a drive connected, the programmer will load a default configuration<br />
into the program.<br />
Summary of Steps<br />
Step 1: Select the desired configuration from the keypad.<br />
Step 2: Upload the configuration from the drive.<br />
Step 3: Setup the motor related parameters.<br />
Step 4: Setup the inputs.<br />
Step 5: Save the configuration off-line.<br />
Step 6: Download the configuration to the drive.<br />
Explanation of Steps<br />
Step 1: Select the desired configuration from the keypad.<br />
Refer to the AF95 or IS905 Operator’s Manual to choose the standard<br />
configuration that best suits your application. Each standard configuration<br />
contains the necessary parameters and interface to perform specific<br />
functions. Follow the instructions in the AF95 or IS905 Operator’s Manual<br />
to set the drive for the desired configuration.<br />
Step 2: Upload the configuration from the drive.<br />
Now that the desired standard configuration is in the drive, you are ready<br />
to upload it to your PC. Select the Communications menu from the<br />
Main screen of the Programmer. From this pull down list, select the<br />
Upload from drive option. Choose yes when you are asked to verify<br />
this operation.<br />
Step 3: Setup the motor related parameters.<br />
Select the Setup menu from the Main screen of the Programmer. From<br />
this pulldown list, select the Motor parameters option. When the screen<br />
changes, you will be able to enter any motor specific parameters such as<br />
horsepower, full load amps, and the number of motor poles. Certain<br />
parameters such as horsepower and motor amps will be limited to the<br />
values specified in the drive frame ID.<br />
There is an option to describe the motor overload profile. This may be<br />
advantageous if the motor cooling is not related to the motor speed,<br />
such as with an external blower. If the motor is self cooled, the overload<br />
curve must compensate for the reduced cooling effect at low speeds.<br />
AF95/IS905 Programmer’s Manual<br />
2-5
Installation<br />
SECTION 2<br />
AF95/IS905 Programmer’s Manual<br />
2-6<br />
For fan or pump applications, the Volts/Hz profile may be changed.<br />
Reducing the Volts/Hz at low speeds can provide increased energy savings<br />
and reduce motor noise.<br />
Step 4: Setup the inputs.<br />
If you are using any analog inputs to control your drive, they will need to<br />
be configured. Select the Interface menu from the Main screen of the<br />
Programmer. From this pulldown list, select the Analog input option.<br />
Any of the listed drive parameters can assigned as analog inputs and<br />
then scaled for proper value on this screen.<br />
For start, stop and other control functions dry contacts or Opto22 output<br />
may be wired to the drive’s digital input. To program these digital<br />
inputs, select the Interface menu from the Main screen of the Programmer.<br />
From this pulldown list, select the Digital input option. This screen<br />
will allow you to assign a specific function to each of the eight digital<br />
inputs. Not all of the eight inputs have to be used and there are some<br />
requirements regarding certain inputs. For example, if a start command<br />
is selected, the programmer will remind you that a stop input must also<br />
be selected.<br />
Step 5: Save the configuration off-line.<br />
After you have determined your new configuration, you will want to save<br />
the configuration to a file. It is strongly advised that the file be backed up<br />
to a disk. To backup a file, select the File menu from the Main screen of<br />
the Programmer. From this pulldown list, select the Save as option.<br />
Name the file and select the directory where you want the file stored.<br />
Also in the File menu is Summary Info. This can be used to include<br />
notes or information regarding a specific file, to help you identify that file<br />
later on.<br />
If a file is not saved the following warning will appear:<br />
Attention<br />
All drive programming, including drive configuration,<br />
terminal block assignments and parameter<br />
values, is cleared as part of logic software<br />
installation. Custom configurations are erased<br />
and cannot be retrieved from the drive after<br />
logic software installation. Make sure you<br />
save your custom configuration to disk using<br />
the appropriate version of Programmer Software<br />
prior to downloading logic software. Failure<br />
to do so will result in permanent loss of<br />
your custom configuration.
Step 6: Download the configuration to the drive.<br />
Installation<br />
SECTION 2<br />
When you are satisfied with your drive configuration, the data must be<br />
downloaded to the drive. Select the Communications menu from the<br />
Main screen of the Programmer. From this pulldown list, select the Send<br />
to drive option. Choose yes when prompted if you want to send the data<br />
to the drive. The configuration will be checked for any errors. If no errors<br />
are found, the drive will be programmed with your new configuration.<br />
Note: A warning or error message will pop up if an input is missing<br />
or a value is out of range. If this occurs follow the<br />
directions on the screen to reenter a required value or<br />
input.<br />
Note: After you have selected “Send to drive” the following<br />
warning message will be displayed. If this message is not<br />
understood in any way please contact your local <strong>Cutler</strong>-<br />
<strong>Hammer</strong> representative before proceeding with the program.<br />
Attention<br />
This computer program is capable of changing<br />
the behavior and configuration of your drive.<br />
FAILURE TO VERIFY PROPER OPERATION<br />
AFTER CONFIGURATION CHANGE COULD<br />
CAUSE EQUIPMENT DAMAGE OR PER-<br />
SONAL INJURY.<br />
Make sure you understand the interconnection<br />
and operational requirements of your drive<br />
and the operating limitations and specifications<br />
of connected equipment. Refer to all<br />
appropriate manufacturer’s manuals and/or<br />
operating literature for details.<br />
Insure that all necessary safety requirements<br />
are met and that you generate complete documentation<br />
for any changes you make before<br />
proceeding with operation of the drive and<br />
connected equipment.<br />
AF95/IS905 Programmer’s Manual<br />
2-7
Installation<br />
SECTION 2<br />
AF95/IS905 Programmer’s Manual<br />
2-8
SECTION 3<br />
Using Your<br />
Programmer Software<br />
This section of the AF95/IS905 Programmer’s Manual provides guidelines<br />
for the proper use of your Programmer Software. This section explains the<br />
following menus on the Main screen:<br />
• File Menu<br />
• Communications Menu<br />
• Interface Menu<br />
• Setup Menu<br />
• Advanced Menu<br />
• Diagnostics Menu<br />
• Help Menu<br />
AF95/IS905 Programmer’s Manual<br />
3-1
Using Your Programmer Software<br />
SECTION 3<br />
AF95/IS905 Programmer’s Manual<br />
3-2<br />
File Menu<br />
The File menu contains the necessary commands to open new or saved<br />
files, to save a current file, and to provide file information<br />
New - is used to start a new file or program configuration.
Using Your Programmer Software<br />
SECTION 3<br />
Open - is selected to bring up an existing file that has been stored on the<br />
hard drive or on a floppy disk. All saved files will use the extension .CFG to<br />
identify that file as a program configuration.<br />
When a configuration file is opened its name will appear at the bottom of<br />
the screen on the status bar.<br />
Save - will save the current file to its original name and destination. If the<br />
file is new and has not yet been named, the programmer will switch to the<br />
save as box. This command can be used anytime while a file is open to<br />
ensure your work is not lost in the event of a problem with your computer.<br />
Save as - will allow you to save the existing file under a specific name and<br />
location. When this command is selected, the Programmer will first take<br />
you to the summary box to enter specific information concerning the configuration<br />
being saved.<br />
AF95/IS905 Programmer’s Manual<br />
3-3
Using Your Programmer Software<br />
SECTION 3<br />
AF95/IS905 Programmer’s Manual<br />
3-4<br />
Summary info - provides basic information about a selected file. Each<br />
time a custom configuration is made, the Programmer will generate a different<br />
number specific for that configuration. Also in the summary is a part<br />
number, file name, customer/project name, engineer’s name, date, reference<br />
configuration that was modified, and a note section. This allows a<br />
user to identify a custom configuration to a specific drive or application.<br />
Print - allows the user to send to a printer terminal block configuration,<br />
serial port configuration, keypad configurations, or software operation<br />
parameters and nameplate data.<br />
Printer setup - designates the printer used and various options associated<br />
with the specified printer.<br />
Exit - will leave the program and return you to Windows. Prior to closing,<br />
the Programmer will remind you to save the present configuration.<br />
Communication Menu<br />
Provides a means to establish communications with the drive and to send<br />
and retrieve data. This is also used to select the Com port used by your<br />
PC.
Using Your Programmer Software<br />
SECTION 3<br />
Port connected - refers to the serial communications port to which the<br />
drive is connected. This will be either COM1 or COM2. The default is<br />
COM1. This was initially selected during installation of the Programmer<br />
Software and does not need to be changed unless your system operation<br />
has changed. If you have a serial mouse connection you may have a port<br />
conflict causing the mouse to cease operation. In this case use the keyboard<br />
to change the selected Com port.<br />
Check drive - is used to establish communications with the drive and<br />
reads frame ID related drive parameters such as horsepower, maximum<br />
switching frequency, etc. Any problems with cables or hardware would be<br />
detected at this time and an error message displayed. This should be the<br />
first step in communicating with the drive. When communications are<br />
established “yes” will be indicated on the status bar at the bottom of the<br />
screen.<br />
Upload from drive - allows you to load the connected drive's configuration<br />
into the configuration program. When you select the “Yes, Upload” button,<br />
the program will establish a communication link with the drive that is<br />
currently attached to the PC and uploads its configuration data. The configuration<br />
data from the drive replaces the current data used by the configuration<br />
program.<br />
Send to drive - permits the user to send a configuration to a specific drive.<br />
When you select the “OK, Send” button, the program will establish a communication<br />
link with the drive and load the identity. If the frame ID is different<br />
than the programmer’s value, a message will be displayed as to the<br />
next desired action. It will then validate the current configuration data<br />
against the identity. If there are no errors, the configuration data will be<br />
sent from the PC to the drive. The configuration data from the PC replaces<br />
the current data stored in the drive. Before you send configuration data to<br />
the drive, save the current drive configuration program data off-line. If you<br />
select the “Cancel, Don't Send” button, you will return to the Main screen.<br />
AF95/IS905 Programmer’s Manual<br />
3-5
Using Your Programmer Software<br />
SECTION 3<br />
AF95/IS905 Programmer’s Manual<br />
3-6<br />
Interface Menu<br />
This menu is used to configure the keypad, the parameters in the keypad<br />
and the input and output control functions on the terminal strip.<br />
Device configuration - If you have already uploaded a configuration from<br />
the drive your configuration device will be listed. If not, you can add a<br />
device by selecting “Add Device”. In most cases that device will be a keypad.<br />
Under “Device” is a button labeled “I/O #0”, press this button to select<br />
the type of device and the ARCNET address for this particular device.<br />
The ARCNET address will correspond to the digital address position set<br />
on the keypad. When using multiple keypads with a drive, each keypad will<br />
have an individual address and will be set up with unique parameters and<br />
interface.<br />
Keypad selection - allows the Programmer to choose the type of keypad<br />
to be used. Also allows the user to select, from a list, the parameters that<br />
will appear on the keypad in the parameter and display modes. This allows<br />
the Programmer to customize an individual keypad to meet the specific
Using Your Programmer Software<br />
SECTION 3<br />
needs of the application or user. Values for parameters can be selected<br />
and downloaded into the drive even if that parameter is not found on the<br />
keypad. When multiple keypads are used, each one can be configured<br />
separately or the “copy” function can be utilized to make each keypad the<br />
same.<br />
Digital input - is used to designate some or all of the control inputs available<br />
on the keypad terminal strip.<br />
Note: If more than one keypad is used each terminal strip is configured<br />
separately.<br />
AF95/IS905 Programmer’s Manual<br />
3-7
Using Your Programmer Software<br />
SECTION 3<br />
AF95/IS905 Programmer’s Manual<br />
3-8<br />
The digital inputs are selected using the drop down list box. Each input<br />
can also be named in this screen under “User Name”. This user name will<br />
appear on the printout of that terminal block. Digital inputs are listed by<br />
name and the terminal block pin number. All digital inputs are a dry type<br />
contact or Opto22 and referenced to terminal 10 (common). If you have<br />
selected a standard configuration from the keypad, these terminals will<br />
already be designated, depending on the configuration which was<br />
selected, and now can be modified. Normally, these inputs are used for<br />
“Start/Stop”, “Run Enable”, “Manual/Auto”, or other control commands.<br />
Digital inputs may be a maintained contact or a momentary such as a<br />
push-button. For a complete list of inputs and description see Table 3 in<br />
the Appendix.<br />
After selecting the digital inputs, the program will review the<br />
selections to look for omissions or conflicts between commands. For<br />
example, if a run input is selected, the programmer would remind you that<br />
a stop input is also necessary.<br />
Caution<br />
When a digital input is changed the control<br />
wiring functionality must also be considered,<br />
or improper/inadvertent operation may result.<br />
Digital output - is used to assign the relay outputs which are programmed<br />
through a drop down menu. These outputs will then change state when the<br />
selected output has occurred. Some menu items require additional programming<br />
to define their change in condition, such as Window comparators.<br />
Programming of the Window comparator function is covered under<br />
the “Advanced” programming features. Other digital outputs typically<br />
would be “run”, “fault”, “ready” or “at speed”. A complete list of digital outputs<br />
is available on Table 4 in the Appendix.<br />
Analog input - is used to select the type of analog input to the drive and<br />
how it is used. A drop down menu lists the available options. An additional<br />
screen provides scaling of the input analog value so that the drive can<br />
accept any voltage range between 0 and 10 volts or any milliamp signal<br />
between 4 and 20 milliamps. The “Loss of Ref/Filter” key takes you to a<br />
screen to set up conditions to detect a loss of the analog input signal, and<br />
to select the proper response to that loss of signal. Typical inputs would<br />
include speed reference, PID feedback, or jog speed. When the analog<br />
input is lost and that loss detected, the drive may be programmed to trip<br />
on a loss of reference fault, run at a preset fixed speed, or to run at the last<br />
valid speed until the reference signal returns. A complete list of Analog<br />
inputs can be found in Table 1 in the Appendix.<br />
Analog output - provides similar functions as analog input with the ability<br />
to select and scale the output signal. These would generally be metering<br />
type signals such as Motor Speed, Load, or Motor Voltage. A complete list<br />
of available analog outputs can be found in Table 2 in the Appendix.
Using Your Programmer Software<br />
SECTION 3<br />
Setup Menu<br />
These functions are used to program the motor characteristics and parameters,<br />
speed references, and start and stop modes. Each of the following<br />
functions will have additional information in the help file associated with<br />
that function.<br />
Motor parameters - provides the parameters to tune the drive for your<br />
specific motor and load.<br />
Motor nameplate data - selects the motor horsepower, number of motor<br />
poles, rated voltage, rated current, and rated frequency. This information<br />
should be taken directly from the motor nameplate. These values will be<br />
limited to the range of the connected drive. If you do not have a drive connected<br />
to your computer these parameters will be limited by the Nameplate<br />
values which can be found under the Advanced menu.<br />
AF95/IS905 Programmer’s Manual<br />
3-9
Using Your Programmer Software<br />
SECTION 3<br />
AF95/IS905 Programmer’s Manual<br />
3-10<br />
Voltage boost, IR comp, slip comp, current limit and negative current limit<br />
can be set to meet the specific needs of the application. To change a value<br />
simply “click” on the box and enter the correct value. Following is a brief<br />
description of each of these parameters.<br />
Voltage boost - adjusts the motor voltage above the constant volts per<br />
hertz level. Voltage boost can be used to help develop full torque at low<br />
speeds. This parameter, like several others, is set by trial and error to<br />
achieve optimum motor performance under actual operating conditions. If<br />
the voltage boost is not high enough, the motor may not develop enough<br />
torque to start the motor. If it is too high, the motor winding will saturate<br />
and damage may occur.<br />
IR comp<br />
- acts similar to voltage boost, except it adds to the motor voltage<br />
at a level proportional to motor load. For example, if the value is set for 50<br />
volts, it will add that value at 100% load and proportional values at lower<br />
loads.
Using Your Programmer Software<br />
SECTION 3<br />
Slip comp - provides an increase in output frequency to make up for motor<br />
slip.<br />
Motor overload profile - allows the Programmer to select either class 10 or<br />
20 overload protection. Standard motor overload protection is determined<br />
by the parameters entered under motor nameplate. Additionally, a predefined<br />
profile may be selected or a custom profile may be defined. Careful<br />
consideration should be given when selecting other than standard<br />
overload protection, as this modifies protection for your motor.<br />
Volts/Hz profile - is used to select a predefined Volts/Hz profile or to customize<br />
a Volts/Hz profile. Each of these provides a unique motor voltage to<br />
output frequency ratio. The Volts/Hz will have a major effect on the torque<br />
the motor produces as well as its efficiency.<br />
Speed units/limits - permits the selection of the minimum and maximum<br />
speed for the drive. Units can be either Hertz, RPM or user defined speed<br />
units.<br />
AF95/IS905 Programmer’s Manual<br />
3-11
Using Your Programmer Software<br />
SECTION 3<br />
AF95/IS905 Programmer’s Manual<br />
3-12<br />
User defined speed units are used to define the range of the user units<br />
and permit the Programmer to name the units. This name will be displayed<br />
on the keypad. As an example, a conveyor speed of 240 feet per minute<br />
corresponds to 60 hertz. When these numbers are entered into the user<br />
profile, the keypad will display 240 FPM when the drive is operating at 60<br />
hertz. Whichever units are selected, those units will be carried throughout<br />
the program wherever speed units are used.<br />
Speeds - set the various preset speeds and acceleration and deceleration<br />
(accel/decel) rates.<br />
Man/auto ramps - sets the acceleration and deceleration rates and determines<br />
the type of ramp that will be used. After the type and rate are<br />
selected, the values are graphically displayed. The ramps will be viewed in<br />
the speed units previously selected. Values for “accel/decel 1” and “2” may<br />
be set here, as well as the type of ramp (“Linear” or “S Curve”).<br />
Jog speed<br />
- determines the speed reference and accel/decel rates for “Jog<br />
1” and “Jog 2”.
Using Your Programmer Software<br />
SECTION 3<br />
Additionally, the direction of each jog can be determined. As an example,<br />
Jog 1 can be set for 450 RPM in the forward direction and accelerate to<br />
that speed in 4 seconds. Jog 2 may run at 300 RPM in the reverse direction<br />
with an acceleration of 4 seconds.<br />
Digital pot - sometimes referred to as a motorized or electronic pot, is used<br />
with two digital inputs. Ramp up and Ramp down must both be selected as<br />
digital inputs when the digital pot is used. Ramp up and down are maintained<br />
inputs that change the speed setpoint, and when opened, the ramp<br />
hold maintains the drive at the current motor speed. If both inputs are<br />
closed at the same time the current speed will also be held. Accel and<br />
decel times determine how quickly the reference changes when a ramp up<br />
or ramp down command is given. The mode selection for stop is used to<br />
either reset the reference to zero or hold at last value.<br />
Preset speeds - are used to set a value of each of the 32 available preset<br />
speeds. These preset speeds can be controlled with a digital input<br />
selected under the Interface menu. Any of the preset speeds can also be<br />
set as an analog input. If this is the case, the value for that preset will be<br />
grayed out and the word “analog” will appear in the value box.<br />
Speed jump - adjustments are used to avoid operating at speeds that<br />
cause difficulty with the driven machine due to mechanical resonance. A<br />
low and a high point selects the band individually for each of the 5 available<br />
jump speeds. Once selected these values are graphically displayed to<br />
ensure the entire band is covered.<br />
Speed override - consists of speed “override 1” and “2”. Speed override 1<br />
provides the speed reference to the drive if Smoke purge of the Machine<br />
control functions is used. Speed override 2 is used when PM setback is<br />
selected as the Machine control function.<br />
Start mode - is used to select either a dwell or bumpless start. With dwell<br />
selected a dwell speed and dwell time must be entered. Dwell causes the<br />
drive to pause at the beginning of acceleration ramp when the drive is<br />
started to permit flux to build up in the motor. Bumpless is used when it is<br />
expected that the drive will be started into a spinning motor. The drive will<br />
start at the frequency or speed specified and then search frequencies<br />
below the initial frequency until the matched is achieved. The search rate<br />
is modified by the bumpless timer.<br />
AF95/IS905 Programmer’s Manual<br />
3-13
Using Your Programmer Software<br />
SECTION 3<br />
AF95/IS905 Programmer’s Manual<br />
3-14<br />
Stop mode - can be either ramp down using the decel time or coast mode<br />
that allows the motor to coast based on the load.<br />
Fast stop mode - selects either coast or a fast decel rate. If fast decel is<br />
selected, a rate is entered and the result is graphically displayed. Note that<br />
while the ramp down time or fast stop time is programmable, the actual<br />
stopping time will depend on the load inertia and the available braking<br />
torque. After a fast stop the drive must be reset with a normal stop command.<br />
Stopping timeout - sets amaximum amount of time to allow for stopping<br />
the drive. If this time expires, the drive immediately halts the gating pulses<br />
to the output IGBTs and opens the output contactor if one is used.<br />
DC braking - adjusts the amount of time during which the DC braking is<br />
turned on. Another parameter sets the speed that the braking initiates. DC<br />
braking can be used to assist in stopping a motor from a slow speed.<br />
Selecting zero for DC brake speed will disable the DC braking function.
Using Your Programmer Software<br />
SECTION 3<br />
Advanced Menu<br />
This menu provides the ability to program the advanced functions and<br />
capabilities of the basic drive.<br />
Command batches - are a sequential list of commands and/or parameter<br />
changes. There are 16 different batches available and each batch is capable<br />
of executing up to 16 commands and/or parameter changes. A batch<br />
may be executed as a command on the keypad or via a digital input. A<br />
batch command may be used to implement several parameters and commands<br />
with a single command. The single batch command might, for<br />
example set the accel and decel, provide a preset speed value and then<br />
issue reverse and run commands.<br />
AF95/IS905 Programmer’s Manual<br />
3-15
Using Your Programmer Software<br />
SECTION 3<br />
AF95/IS905 Programmer’s Manual<br />
3-16<br />
Window comparators - provides the ability to monitor a drive variable and<br />
select a point at which to trigger a digital output.<br />
A drop down menu provides a list of variables that may be used with the<br />
Window comparator function. There are four different graph shapes that<br />
may be selected. The graph shape determines the type of response, such<br />
as off→on, on→off, off→on→off, or on→off→on. After the parameter and<br />
shape are selected the values for a lower breakpoint and upper breakpoints<br />
can be entered. For example, if Motor current is selected, and a<br />
value of 6.8 amps for the lower breakpoint and Window comparator #1 was<br />
selected as a digital output, the relay would be energized at 6.8 amps and<br />
remain on until load is reduced such that motor current drops below 6.8<br />
amps. A hysteresis value may be entered to provide a differential between<br />
the trigger and reset points. There are a total of four (4) window comparators<br />
available.
Using Your Programmer Software<br />
SECTION 3<br />
Control functions - provide access to the 6 standard and 10 factory program<br />
machine control functions. The standard control functions consist of<br />
any combination of External interlock, Smoke purge, and PM setback.<br />
Each function has an associated digital input to control that function after it<br />
has been selected.<br />
Smoke purge - is used to supply a specific speed reference and run command<br />
when enabled. The speed reference is determined by the value of<br />
Speed override 1. Speed override 1 is set from the keypad, an analog<br />
input or under speeds in setup. The run command will be accepted providing<br />
the drive is in “remote” and all other required conditions are met.<br />
PM setback - is available to override the speed reference and uses Speed<br />
override 2. The value of Speed override 2 is determined from the keypad,<br />
an analog input, or under speeds in setup. PM setback does not effect the<br />
run status of the drive.<br />
External interlock - monitors the status of an external interlock and permits<br />
operation of the drive while this input is present. If this interlock is interrupted<br />
the drive will stop. If a run command is maintained, the drive will<br />
restart when this interlock is met.<br />
Digital Input Function<br />
MC input 1/2 External Interlock<br />
MC input 3/4 Smoke Purge<br />
MC input 5/6 PM Setback<br />
As an example, if a digital input is selected for MC input 1/2, the external<br />
interlock requirement would be met when the contact for that digital input<br />
is closed. If two momentary inputs were used and programmed as MC<br />
input 1 and MC input 2, the external interlock requirement would be met<br />
when MC input 2 closes and would be removed when MC input 1 is<br />
closed.<br />
Machine control functions 7 through 16 are definable functions which<br />
require factory development and programming.<br />
AF95/IS905 Programmer’s Manual<br />
3-17
Using Your Programmer Software<br />
SECTION 3<br />
AF95/IS905 Programmer’s Manual<br />
3-18<br />
PID - is a closed loop control system consisting of a setpoint, a process<br />
variable, and an error signal which together can be used to control the output<br />
speed of the drive in response to an external process.<br />
Typical applications include wet well level control, temperature control,<br />
flow rate control, or pressure control. The PID screen contains all necessary<br />
parameters to setup the PID loop. The parameters on this screen may<br />
also be placed on the keypad for adjustment. The PID regulator utilizes a<br />
setpoint input from a potentiometer or keypad parameter, and a feedback<br />
from an analog input. The PID regulator produces a speed reference to the<br />
drive to automatically cause the feedback to be equal to the reference.<br />
The regulator output is the sum of a term proportional to the difference<br />
between reference and feedback (known as the error), a term proportional<br />
to the integral of the error and a term proportional to the derivative of the<br />
error. The AF95/IS905 PID regulator also makes provisions for a term proportional<br />
to the reference to allow for open loop or feed forward control of<br />
speed in instances where the speed necessary to obtain the proper value
Using Your Programmer Software<br />
SECTION 3<br />
of feedback is known; a filter on the derivative signal to reduce noise or<br />
speed jitter; a ramp to allow rate limiting of the reference signal, and an<br />
inverting switch for those applications where a change in feedback<br />
requires an opposite change in speed. The reference and feedback signals<br />
are scaled either in arbitrary unitless values, or in user units such as<br />
PSI, GPM, or Cookies Per Hour.<br />
Speed Source - is used to select the speed setpoint in auto and manual<br />
modes. “Auto mode select” is used to designate the function used when<br />
auto mode is commanded. Auto source may be set for “PID output” or<br />
“Auto Ref”. When “PID output” is selected, and the drive is commanded to<br />
the Auto mode, the drive will use PID control. If “Auto Ref” is selected and<br />
the drive is commanded to auto, then follower reference is used to control<br />
speed.<br />
If there is no Manual/Auto input for the drive, “Reference source” can be<br />
used to select either Manual or Auto. Once one of these is selected the<br />
drive will remain in that mode whenever speed control is in remote.<br />
“Speed control” and “Start/Stop control” are used to designate which<br />
source the drive will use when the configuration is downloaded. Either item<br />
can be selected to Keypad or Remote. After downloading, speed control<br />
and start/stop control can still be changed using the select keys on the<br />
keypad.<br />
AF95/IS905 Programmer’s Manual<br />
3-19
Using Your Programmer Software<br />
SECTION 3<br />
AF95/IS905 Programmer’s Manual<br />
3-20<br />
Auto Restart - provides the ability to have the drive restart after an interruption<br />
of power or after the drive has experienced a fault condition.<br />
“Restart on power up”, when enabled, causes the drive to start when<br />
power is applied, provided a run contact is maintained and all other interlock<br />
requirements are met. “Pwr Restart Dly” sets the amount of time<br />
before the drive starts after power has been applied. “Restart on Fault”<br />
causes the drive to restart after a fault and after the fault condition has<br />
cleared, providing that a run contact is maintained and all other interlocks<br />
are satisfied.<br />
Fault restart has a time delay parameter which sets a period of time after<br />
the fault before the drive starts back up. Additionally, there are parameters<br />
which limit the number of restart attempts, and which reset the fault<br />
counter if the specified time has elapsed since the last fault.
Using Your Programmer Software<br />
SECTION 3<br />
Power Loss Ridethrough - selects a period of time (0.0 to 10.0 seconds)<br />
during which the drive will attempt to ride through a power loss. When the<br />
line voltage falls below its operating range, the drive will enter a power loss<br />
condition. It will disable any dynamic braking and start to decelerate in a<br />
zero current limit mode. If the motor is heavily loaded, the drive will trip<br />
after only a few cycles of outage. If lightly loaded, the drive can operate for<br />
longer periods of time. Note that a time of zero disables the ridethrough,<br />
and should be used when the process cannot accept speed variations during<br />
the outage.<br />
Drive Nameplate - contains information for the drive being configured<br />
including Drive ID, drive horsepower, and max current limit. This is useful<br />
for off-line programming of a drive. When a drive is connected an “Upload<br />
from drive” or a Check drive command will supply these values. The<br />
ranges and limits of motor parameters are determined by the values set<br />
here.<br />
Clock - sets the correct date and time. The drive is sent from the factory<br />
with the current date and Eastern time. Changes can be made as necessary.<br />
Events and faults are date and timestamped to provide an accurate<br />
record. This function can not be accessed off-line.<br />
Kilowatt-hour - This function can only be utilized on-line. The kilowatthours<br />
monitoring feature in the drive can provide an indication of the<br />
energy consumed by the drive and motor. To keep track of the process's<br />
energy consumption, this value will need to be periodically reset. When<br />
selected the programmer will monitor the drive to determine current accumulated<br />
kilowatt-hours and offer a button to reset the kilowatt and megawatt<br />
hours to zero.<br />
AF95/IS905 Programmer’s Manual<br />
3-21
Using Your Programmer Software<br />
SECTION 3<br />
AF95/IS905 Programmer’s Manual<br />
3-22<br />
Miscellaneous - contains overtemperature action, fault reset, motor direction,<br />
reverse enable, and switching frequency.<br />
Overtemperature action - can be set to trip the drive, foldback current limit,<br />
or foldback carrier frequency. During operation, the drive monitors the temperature<br />
of the heatsink, dc filter capacitors, and its internal ambient.<br />
When one of these has exceeded its limit, a protective action will occur to<br />
prevent damage to the drive. If “Trip” is selected, the drive will immediately<br />
fault and display which area caused the fault. If “Fold Back Current” is<br />
selected, the drive will reduce the operating current limit to try to reduce<br />
the temperature. When “Fold Back Carrier Frequency” is selected, the<br />
drive maintains full speed and current capabilities while it reduces the<br />
switching frequency (or carrier frequency) at which the drive is operating.<br />
Fault Reset - can be selected for a “Clear Fault Command” or as a “Stop<br />
Command”. With “Clear Fault Command” is selected, a digital input or a<br />
keypad command parameter must be programmed to perform this function.<br />
When Stop Command is used, any form of a stop command will reset<br />
the fault. In either mode, cycling power will clear faults.
Using Your Programmer Software<br />
SECTION 3<br />
Contactor Interlock - provides the following contactor options;<br />
“No Contactor” - Used where interlock is neither desired or required.<br />
“Fixed” - The driver will issue a contactor driver command then wait a predetermined<br />
amount of time before starting.<br />
“Interlocked” - The drive will issue a contactor driver command and will not<br />
start until an interlock signal is present. If, after several seconds the contactor<br />
has not pulled in, the drive will issue a Contactor Pull In fault.<br />
Motor Direction - provides a means of selecting direction of motor rotation<br />
from the programmer. After downloading to the drive, direction can still be<br />
changed using the forward/reverse key on the keypad.<br />
Reverse Enable - can be used to disable the reverse function. If reverse is<br />
not enabled, the drive will not respond to a reverse command from the<br />
keypad or the terminal strip.<br />
Switching Frequency - (or carrier frequency) is factory set at 6 KHz, for<br />
drives 100 horsepower and below, and is adjustable from 3 KHz to 12<br />
KHz. Above 100 horsepower all drives are set at 3 KHz switching frequency<br />
which is not adjustable. The use of fast switching IGBTs has<br />
brought about the ability to switch at very high speeds. A higher switching<br />
frequency can significantly reduce audible noise from low and medium<br />
horsepower motors. The AF95/IS905 is rated for nameplate power at factory<br />
settings.<br />
AF95/IS905 Programmer’s Manual<br />
3-23
Using Your Programmer Software<br />
SECTION 3<br />
AF95/IS905 Programmer’s Manual<br />
3-24<br />
Diagnostics Menu<br />
This menu can be used to read from the drive faults, warnings, or events<br />
that have occurred. They provide timestamped diagnostic information to<br />
assist an operator or technician.<br />
Fault History displays the first fault and last 15 faults that have occurred<br />
since the last time the histories were cleared. This fault log can be printed<br />
or saved to a disk. Diagnostic information is available to offer troubleshooting<br />
advice. “Trend Buffers” capture dynamic graphically displayed<br />
operating information from the drive. “Trend Buffers” contain 7 metering<br />
parameters for up to 1 second prior to the individual fault.
Using Your Programmer Software<br />
SECTION 3<br />
Use the Fault History Screen to review the fault history from the drive. The<br />
history must be uploaded from the drive, or from a previously saved file,<br />
before the Fault History screen is available.<br />
To use Diagnostics:<br />
1. Select the “Diagnostics” topic screen title on the Main screen.<br />
2. Select the “Fault History” sub-topic screen title. The “Fault History”<br />
screen appears<br />
3. Review the list of faults in the main portion of the screen. The most<br />
recent fault appears at the top of the screen followed by the next most<br />
recent fault and so on.<br />
4. Select the fault you want more information about by clicking on it with<br />
your mouse or moving the highlight bar with the Up or Down arrow<br />
key. A more detailed description of the particular fault and diagnostic<br />
information appears on the bottom of the screen.<br />
AF95/IS905 Programmer’s Manual<br />
3-25
Using Your Programmer Software<br />
SECTION 3<br />
AF95/IS905 Programmer’s Manual<br />
3-26<br />
5. Select the “Trend Buffers” button to view the trend buffers of one of the<br />
four most recent faults (Trend Buffers have three asterisks in the column<br />
to their left).These trend buffers store critical operating information<br />
in the second prior to the fault.<br />
6. Select the “Clear Faults” button to clear out all of the faults stored in the<br />
drive.<br />
“Trend Buffers” allow review of the time history of the drive's operating<br />
parameters and variables, such as bus current and speed, in the last 1000<br />
ms before the fault occurred. “Trend Buffers” are stored for the last four<br />
faults that occurred prior to upload, and for the first fault in memory. Up to<br />
four parameters may be displayed on the graph.
Using Your Programmer Software<br />
SECTION 3<br />
Interpreting the Graph<br />
1. Select the parameters you want to view from the four drop-down list<br />
boxes that are under the heading “Buffer Parameter”. If you do not<br />
want to view one of the parameters, select “None” from the drop-down<br />
list box. Each of the four parameters will have its own color coded<br />
trend graph, its own identification (Axis 1, 2, 3, and 4) and its own color<br />
coded y-axis (vertical axis) scale. The y-axis for the graph has four<br />
scales, one for each parameter. The parameter chosen from the first<br />
(top) drop-down list will be identified as Axis 1 and its trend graph will<br />
have a blue color. The parameter chosen from the second drop-down<br />
list will be identified as Axis 2 and its trend graph will have a red color.<br />
The parameter chosen from the third drop-down list will be identified<br />
as Axis 3 and its trend graph will have a green color. The parameter<br />
chosen from the fourth drop-down list will be identified as Axis 4 and its<br />
trend graph will have a purple color. The x-axis (horizontal axis) is the<br />
time scale for all four trend graphs. The first event for a particular axis<br />
recorded on the left (-1000 ms) and the last event recorded on the right<br />
(0 ms).<br />
2. To give you a more accurate look at the buffer values, a vertical time<br />
cursor appears on the display at the time indicated in the “Value at x<br />
Time” edit box where “x” is a value between -1000 ms and 0 ms. With<br />
Fixed scaling, the Y axes all cover a predefined range, no matter what<br />
the actual range of values. With Automatic scaling, each Y axis uses<br />
only the range actually covered by buffer values.<br />
Event History - captures the last 10 events that have occurred. Typical<br />
events used are Start command, Stop command, Direction change, manual<br />
and auto, or changes to parameters.<br />
Warning History - records those events that did not cause a fault but that<br />
indicate the drive is operating at or near a limit. Review the list of warnings<br />
on the main portion of the screen. The most recent warning is the top of<br />
the screen. Select the desired by clicking on it or moving the highlight bar<br />
with the Up or Down arrow key. A more detailed description of the particular<br />
warning appears on the bottom of the screen. Warnings can be saved<br />
to a file or printed.<br />
All diagnostic information can be saved to a file and sent to the <strong>Cutler</strong>-<br />
<strong>Hammer</strong> service department for review.<br />
Help Menu<br />
This is available while using the programmer. Help can be accessed at any<br />
point in the program with the “Help” button or by pressing F1. Each screen<br />
has context sensitive help. The Help file contains Configuration Contents,<br />
Troubleshooting contents, and How To Use Help topics. Windows Help<br />
offers a quick way to find information, on various topics.<br />
Within a Help topic, there may be one or more jumps, which you can click<br />
on (or select and press Enter) to display a new Help topic.<br />
AF95/IS905 Programmer’s Manual<br />
3-27
Using Your Programmer Software<br />
SECTION 3<br />
AF95/IS905 Programmer’s Manual<br />
3-28
Appendix<br />
This section of the AF95/IS905 Programmer’s Manual provides the following<br />
helpful reference information:<br />
• Analog Inputs - Table 1<br />
• Analog Outputs - Table 2<br />
• Digital Inputs - Table 3<br />
• Digital Outputs - Table 4<br />
• Commands, Parameters and Selections<br />
AF95/IS905 Programmer’s Manual<br />
A-1
Tables<br />
APPENDIX<br />
Analog Inputs - Table 1<br />
Analog Input Name Description<br />
Follower Speed Sets the follower signal for the drive<br />
Ramp Up Time Sets acceleration time for Digital Pot function<br />
Ramp Down Time Sets deceleration time for Digital Pot function<br />
Dwell Speed Sets starting Dwell Speed<br />
Dwell Time Sets duration Starting Dwell Speed<br />
Fast Decel Time Sets deceleration time for Fast Decel<br />
Accel Time The time it takes to go from zero to max speed for ramp 1<br />
Accel 2 Time The time it takes to go from zero to max speed for ramp 2<br />
Decel Time The time to go from max speed to zero for ramp 1<br />
Decel 2 Time The time to go from max speed to zero for ramp 2<br />
Max Accel 1 Sets maximum acceleration limit for Accel<br />
Max Accel 2 Sets maximum acceleration limit for Accel 2<br />
Preset n (n=0-31) Sets speed for preset speed 1 to 31<br />
Spd Override 1 Sets speed for speed override 1<br />
Spd Override 2 Sets speed for speed override 2<br />
Jog Speed 1 Speed reference for Jog 1<br />
Jog Speed 2 Speed reference for Jog 2<br />
Jog Accel The acceleration time used by jog<br />
Jog Decel Deceleration time used by jog<br />
Max Jog Accel Sets limit for jog acceleration time<br />
DC Brake Speed Sets speed at which DC braking comes on<br />
DC Brake Time Sets the duration time of DC braking<br />
Current Limit + Adjusts the positive current limit<br />
Current Limit - Adjusts the negative current limit<br />
Slip Comp Adjusts amount of Slip Compensation<br />
IR Compensation Adjusts amount of IR Compensation<br />
PID Setpoint Sets the setpoint for the PID<br />
PID Feedback Value of the feedback to PID<br />
Control Item n (n=1-16) Sets value for the Machine Control Input<br />
AF95/IS905 Programmer’s Manual<br />
A-2
Analog Outputs - Table 2<br />
(Sheet 1 of 2)<br />
Analog Output Name Description<br />
Speed Setpoint Speed Reference based on frequency<br />
Clamped Spdset Speed setpoint (clamped by maximum speed)<br />
Output Speed Speed based on frequency<br />
Motor Speed Speed based on frequency less calculated motor slip<br />
Follower Speed Follower Speed<br />
Ramp Up Time Acceleration time for Digital Pot<br />
Ramp Down Time Deceleration time for Digital Pot<br />
Ramp Hold Speed Digital Pot speed reference<br />
Dwell Speed Speed at which the drive goes into dwell<br />
Dwell Time Time the drive spends in dwell during start<br />
Fast Decel Time Deceleration time for Fast Decel<br />
Accel Time Acceleration time<br />
Accel 2 Time Acceleration 2 time<br />
Decel Time Deceleration time<br />
Decel 2 Time Deceleration 2 time<br />
Preset n (n=0-31) Value for preset speeds<br />
Max Accel 1 Limit for acceleration<br />
Max Accel 2 Limit for acceleration 2<br />
Spd Override 1 Speed reference for Spd Override 1<br />
Spd Override 2 Speed reference for Spd Override 2<br />
Jog Speed 1 Speed reference for Jog 1<br />
Jog Speed 2 Speed reference for Jog 2<br />
Jog Accel Time of jog acceleration<br />
Jog Decel Time of jog deceleration<br />
Max Jog Accel Limit for jog acceleration<br />
DC Brake Speed DC braking speed<br />
DC Brake Time DC braking time<br />
Current limit + Proportional to positive current limit<br />
Current Limit - Proportional to negative current limit<br />
Tables<br />
APPENDIX<br />
AF95/IS905 Programmer’s Manual<br />
A-3
Tables<br />
APPENDIX<br />
Analog Outputs - Table 2<br />
(Sheet 2 of 2)<br />
Analog Output Name Description<br />
Slip comp Amount of slip compensation<br />
IR Compensation Amount of IR compensation<br />
Load Proportional to output load<br />
Input Kilowatt Calculated Kilowatt level<br />
Line Voltage Proportional to AC line voltage<br />
Bus Voltage Proportional to DC bus voltage<br />
Mtr volts Proportional to AC motor volts<br />
Bus Current Proportional to DC bus current<br />
Motor Current Proportional to motor amps<br />
Actual Sw Freq Proportional to switching frequency<br />
PID Setpoint Value of setpoint to PID setpoint controller<br />
PID Feedback Value of feedback to PID setpoint controller<br />
PID Speed Output of PID control<br />
PID Error Value of error signal in PID loop<br />
Operating V/Hz Actual V/Hz<br />
Control Item n (n=1-16) Proportional to control item 1 - 16<br />
Ambient Temp Proportional to internal drive ambient temperature<br />
DB Temp Proportional to dymanic braking resistor temperature<br />
Heatsink Temp Proportional to drive heatsink temperature<br />
Capacitor Temp Proportional to dc filter capacitor temperature<br />
AF95/IS905 Programmer’s Manual<br />
A-4
Digital Inputs - Table 3<br />
(Sheet 1 of 2)<br />
Digital Input Name Description<br />
Start/Stop Maintained Start/Stop control<br />
Start Momentary Start<br />
Run Enable/Stop Maintained close to run opens to stop<br />
Run Enable/Fast Stop Maintained to run open to Fast Stop<br />
Remote Jog 1 Maintained for remote Jog 1<br />
Remote Jog 2 Maintained for remote Jog 2<br />
Forward Momentary input Forward Command<br />
Reverse Momentary input Reverse Command<br />
Manual/Auto Ref Maintained contact open for Man close for Auto<br />
Auto Reference Momentary input Auto Command<br />
Manual Reference Momentary input Manual Command<br />
Accel Rate Maintained input for Accel Rate<br />
Load Preset n Momentary input to initiate the Preset Speed 0 - 16<br />
Binary Preset n Maintained input for Preset Speed<br />
Preset Strobe Momentary input command<br />
Ramp 1/Ramp 2 Maintained input selects Ramp 1 or 2<br />
Ramp Up Maintained input for use with Digital Pot<br />
Ramp Down Maintained input for use with Digital Pot<br />
Ramp 1 Momentary input select Ramp 1<br />
Ramp 2 Momentary input select Ramp 2<br />
Execute Batch n Momentary input to initiate Batch Command<br />
Binary Batch n Maintained input to select Batch number<br />
Batch Strobe Momentary input to initiate Batch command<br />
MC Input n/n Maintained input to Machine control 1/2 - 15/16<br />
MC Input n Momentary input for Machine Control 1 - 16<br />
PLC Start/Stop Maintained input commanded start and stop<br />
Reset Fault Momentary input to reset fault<br />
Clear Fault Log Momentary input to clear fault log<br />
Clear KW Hours Momentary input to set Kilowatt hours to 0<br />
Tables<br />
APPENDIX<br />
AF95/IS905 Programmer’s Manual<br />
A-5
Tables<br />
APPENDIX<br />
Digital Inputs - Table 3<br />
(Sheet 2 of 2)<br />
AF95/IS905 Programmer’s Manual<br />
A-6<br />
Digital Input Name Description<br />
Ext Cont Closed Maintained input indicating contactor closed<br />
Ext Cont Open Maintained input indicating contactor open<br />
Fast Stop Momentary input commanding use of fast decel<br />
Forward Command Momentary input commanding forward<br />
Jog Stop Maintained input commanding jog to stop<br />
Speed Src Keypad Momentary selects keypad as speed source<br />
Speed Src Remote Momentary selects remote as speed source<br />
Start Src Keypad Momentary selects keypad as start source<br />
Start Src Remote Momentary selects remote as start source<br />
Override 1 Maintained selects override 1<br />
Override 1 On Momentary input for Speed override 1<br />
Override 1 Off Momentary input for Speed override 1<br />
Override 2 Maintained selects override 2<br />
Override 2 On Momentary input for Speed override 2<br />
Override 2 Off Momentary input for Speed override 2<br />
Contactor Interlock Maintained input for output contactor<br />
Fault Maintained N/C input open for fault<br />
Fault n Maintained N/C input open for fault 1, 2, or 3<br />
Keypad Start Keypad start mode select<br />
Forward/Reverse Direction selection<br />
Follower/PID Mode Follower and PID mode select toggle<br />
Follower Mode Momentary input for follower mode<br />
PID Mode Momentary input for PID mode
Digital Outputs - Table 4<br />
Digital Output Name Description<br />
Run Drive is in run<br />
Stopped Drive has completed Decel<br />
At Speed Drive is running at selected speed<br />
Fault Drive has faulted<br />
Ready Drive has power, no fault and not running<br />
Jog Drive is being jogged<br />
Auto Reference Auto reference in use<br />
Manual Reference Manual reference used<br />
Loss of Reference Drive has lost an analog input<br />
+ ILim Drive has reached positive current limit<br />
- ILim Drive has reached negative current limit<br />
+/- ILim Drive has reached positive or negative current limit<br />
Running Forward Forward command is received<br />
Running Reverse Reverse command received<br />
Window Compare n Window comparator 1-4 is picked up<br />
Contactor Output Drive is commanding contactor to pull in<br />
Stopping Drive told to stop and is decelerating<br />
Fast Stopping Drive stopping using fast decel<br />
In Restart Drive is in auto restart<br />
Speed Src Keypad Speed source is selected to keypad<br />
Start Src Keypad Start source is selected to keypad<br />
In Override 1 Drive is using override speed 1<br />
In Override 2 Drive is using override speed 2<br />
Dwell + Bumpless Drive is in dwell or bumpless<br />
Bumpless Drive is in bumpless start prior to achieving set speed<br />
Rev/For command Drive has received a command to change direction<br />
In Accel Drive is accelerating<br />
In Decel Drive is decelerating<br />
In Ridethrough Drive is in ridethrough due to low line voltage<br />
DC Braking Drive is applying DC Braking voltage<br />
MC # n Machine Control function 1 - 7<br />
Tables<br />
APPENDIX<br />
AF95/IS905 Programmer’s Manual<br />
A-7
Tables<br />
APPENDIX<br />
Programmer Software Tree<br />
Advanced<br />
Analog Input<br />
Auto Ref<br />
Auto Restart<br />
Batch command<br />
Batch Number<br />
Voltage<br />
Boost<br />
Trend Buffers<br />
Bumpless<br />
Overtemperature<br />
Action<br />
Analog Output<br />
Check drive<br />
Clear Faults<br />
Clock<br />
Communication<br />
IRcomp<br />
Slip Comp<br />
Window<br />
Comparators<br />
Device Configuration<br />
Contactor<br />
Interlock<br />
Control<br />
Functions<br />
Current<br />
Limit<br />
Motor<br />
Nameplate<br />
Data<br />
Diagnose<br />
Diagnostics<br />
Digital Input<br />
Digital Output<br />
Digital Pot<br />
Direction<br />
Disk<br />
Display<br />
Upload<br />
From Drive<br />
Drive Nameplate<br />
Port Connected<br />
To<br />
Drive<br />
Read From<br />
Drive<br />
Send To<br />
Drive<br />
Dwell<br />
Reverse<br />
Enable<br />
Event History<br />
Warning<br />
History<br />
Current<br />
Event<br />
Exit<br />
Fast Stop<br />
Fault<br />
AF95/IS905 Programmer’s Manual<br />
A-8<br />
PROGRAMMER SOFTWARE<br />
Help<br />
Diagnostics<br />
Advanced<br />
Interface Setup<br />
Communications<br />
File<br />
Configuration Contents<br />
Fault history<br />
Command Batches<br />
Motor parameters<br />
Device configuration<br />
Port connected to drive<br />
New<br />
How to use help<br />
Upload from drive<br />
Open<br />
Print/Save<br />
Batch Number<br />
Nameplate Data<br />
I/O Device selection<br />
About the Programmer<br />
Send to drive<br />
Save<br />
Diagnose<br />
User Selections<br />
Motor overload profile<br />
Keypad Assembly<br />
Check drive<br />
Save as<br />
Trend Buffers<br />
Window Comparators<br />
Volts/Hz Profile<br />
Keypad<br />
Summary Info<br />
Event History<br />
Control Functions<br />
Voltage Boost<br />
Print<br />
Clear Faults<br />
PID<br />
IR Comp/Slip Comp<br />
IS 905 Keypad<br />
Printer Setup<br />
Warning history<br />
Speed source<br />
Pos/Neg Current Limit<br />
AF 95 Keypad<br />
Exit<br />
Speed Units/limits<br />
Parameter List<br />
Diagnose<br />
PID Output<br />
Operation Display<br />
Current Event<br />
Auto Ref<br />
Max Speed<br />
Serial port<br />
Auto restart<br />
Min Speed<br />
Print/save<br />
Digital input<br />
Speed Units<br />
Read From Drive<br />
Power up<br />
Speeds<br />
Assignment<br />
Read From Disk<br />
Fault<br />
Digital output<br />
Save to Disk<br />
Power loss<br />
Man/auto ramps<br />
Jog Speed<br />
Assignment<br />
Ridethrough Time<br />
Digital Pot<br />
Analog input<br />
Drive nameplate<br />
Preset Speeds<br />
Clock<br />
Parameter assignment<br />
Jump speeds<br />
Kilowatt-hour Reset<br />
Scale<br />
Speed Overrides<br />
Miscellaneous<br />
Analog output<br />
Start mode<br />
Overtemperature Action<br />
Parameter assignment<br />
Bumpless<br />
Motor Direction<br />
Scale<br />
Dwell<br />
Fault Reset<br />
Stop Mode<br />
Contactor Interlock<br />
Reverse enable<br />
Normal Stop<br />
Switching Frequency<br />
Fast Stop<br />
Fault History<br />
Fault Reset<br />
File<br />
Switching<br />
Frequency<br />
Help<br />
How To<br />
Use Help<br />
I/O Device<br />
Selection<br />
Summary<br />
Info<br />
Interface<br />
Jog Speed<br />
Jump<br />
Speeds<br />
Speeds<br />
Kilowatthour<br />
Reset<br />
Power Loss<br />
Man/auto<br />
Ramps<br />
Max Speed<br />
Min Speed<br />
Miscellaneous<br />
Stop Mode<br />
Start Mode<br />
Motor<br />
Direction<br />
Motor Overload<br />
Motor<br />
Parameters<br />
Nameplate<br />
Data<br />
Normal<br />
Stop<br />
Open<br />
Operation<br />
Display<br />
PID Output<br />
Override<br />
Speed<br />
Speed<br />
Override<br />
PID<br />
Serial Port<br />
Pos/Neg<br />
Current<br />
Limit<br />
Power Up<br />
Preset<br />
Speed<br />
Print<br />
Printer<br />
Setup<br />
Motor Overload<br />
Profile<br />
Volts/Hz<br />
Profile<br />
About The<br />
Programmer<br />
Read From<br />
Disk<br />
Scale<br />
Save<br />
Ridethrough<br />
Time<br />
Speed<br />
Source<br />
Speed<br />
units/limits<br />
Speed Units<br />
Max Speed<br />
Min Speed<br />
Preset<br />
Speeds<br />
Normal<br />
Stop<br />
User Selections<br />
Volts/hertz
Commands, Parameters, and Settings<br />
APPENDIX<br />
Commands, Parameters, and Settings<br />
This section of the AF95/IS905 Programmer’s Manual Appendix lists the<br />
characteristics of AF95/IS905 commands, parameters, and settings. The<br />
following is a guide to using this valuable reference.<br />
Setup Display: The nomenclature for the command, parameter, or setting<br />
that appears your LCD display when the Scroll Parameters indicator is lit<br />
or Programmer Software screens when you are inserting them or modifying<br />
their characteristics.<br />
Operation Display: The nomenclature for the command, parameter, or<br />
setting that appears your LCD display when the Operation Display indicator<br />
is lit or Programmer Software screens when you are inserting operation<br />
displays.<br />
Type: Indicates whether the item is a command, parameter or setting.<br />
Stop Protection: If “Yes” is indicated, you cannot change the settings of<br />
the item while the drive is running. If “No” is indicated, you can change the<br />
settings of the item while the drive is running.<br />
Item ID: An internal identification number assigned by the Programmer<br />
Software to each item.<br />
Maximum Setting: The maximum setting allowed by the item when you<br />
set it up using the Programmer Software or change the settings from the<br />
keypad.<br />
Minimum Setting: The minimum setting allowed by the item when you set<br />
it up using the Programmer Software or change the settings from the keypad.<br />
Menu Path: This describes the sequence of screens, sub-screens, and<br />
commands you need to use to modify or use the item. Each different path<br />
is separated by the word “and”.<br />
Overview: Describes details on using the item.<br />
AF95/IS905 Programmer’s Manual<br />
A-9
Commands, Parameters, and Settings<br />
APPENDIX<br />
# OF MOTOR POLES<br />
Setup Display: # of Motor Poles<br />
Operation Display: NA<br />
Type: Parameter<br />
Stop Protection: No<br />
Item ID: 124<br />
Maximum Setting: 12<br />
Minimum Setting: 2<br />
Menu Path:<br />
and<br />
AF95/IS905 Programmer’s Manual<br />
A-10<br />
Interface ⇒ Keypad ⇒ Parameter<br />
List ⇒ Insert<br />
Setup ⇒ Motor Parameters ⇒ Nameplate Data<br />
and<br />
Advanced ⇒ Command Batches ⇒ Batch # ⇒<br />
User Selection ⇒ Set Parameter<br />
Overview: In order to establish a relationship<br />
between the drive’s output frequency and the<br />
motor speed, the number of motor poles must be<br />
known. After inputting the number of motor poles,<br />
the program performs a calculation which multiplies<br />
the frequency by 120 and then divides by the<br />
number of poles to determine the equivalent synchronous<br />
motor speed in rpm.<br />
# OF RESTARTS<br />
Setup Display: # of Restarts<br />
Operation Display: NA<br />
Type: Parameter<br />
Stop Protection: No<br />
Item ID: 261<br />
Maximum Setting: 15<br />
Minimum Setting: 0<br />
Menu Path:<br />
and<br />
Interface ⇒ Keypad ⇒ Parameter<br />
List ⇒ Insert<br />
Advanced ⇒ Auto Restart ⇒ Enable Restart on<br />
Fault<br />
and<br />
Advanced ⇒ Command Batches ⇒ Batch # ⇒<br />
User Selection ⇒ Set Parameter<br />
Overview: This parameter determines the number<br />
of times the drive will reset a fault and attempt<br />
to restart. If the number of resets is exceeded,<br />
the fault condition which prevented reset will be<br />
displayed and no further resets will be<br />
attempted. If a successful restart is made and no<br />
additional faults occur for 10 minutes after the<br />
successful restart, the number of restarts allowed<br />
will be returned to the set level.<br />
For additional related information see:<br />
Fault Restart Retry Clear Time<br />
FLT Restart Delay Power Up Restart<br />
Fault Reset Mode<br />
ACCEL TIME<br />
Setup Display: Accel Time<br />
Operation Display: Accel<br />
Type: Parameter<br />
Stop Protection: No<br />
Item ID: 24<br />
Maximum Setting: 1000 seconds<br />
Minimum Setting: 0.3 seconds<br />
Menu Path: Setup ⇒ Speeds ⇒ Man/Auto<br />
Ramps ⇒ Accel/Decel 1 ⇒<br />
Accel Time<br />
and<br />
Interface ⇒ Keypad ⇒ Parameter List (or Operation<br />
Display List) ⇒ Insert<br />
and<br />
Interface ⇒ Analog input ⇒ Parameter Assignment<br />
⇒ Accel Time<br />
and<br />
Interface ⇒ Analog output ⇒ Parameter Assignment<br />
⇒ Accel Time<br />
and<br />
Advanced ⇒ Command Batches ⇒ Batch # ⇒<br />
User Selection ⇒ Set Parameter
Commands, Parameters, and Settings<br />
APPENDIX<br />
Overview: This command governs acceleration<br />
ramp 1. It defines the time it takes the drive to go<br />
from zero speed to the speed indicated by the<br />
maximum speed parameter. During acceleration<br />
the drive torque level will not exceed the value set<br />
by the Current Limit + parameter. If need be, the<br />
acceleration time will be extended. If the start<br />
mode is set to dwell, the zero speed time point<br />
begins after dwell time has expired.<br />
For additional related information see:<br />
Ramp 1 Accel 2 Time<br />
Ramp 1 Mode Decel 2 Time<br />
Decel Time<br />
ACCEL 2 TIME<br />
Setup Display: Accel 2 Time<br />
Operation Display: Accel 2<br />
Type: Parameter<br />
Stop Protection: No<br />
Item ID: 439<br />
Maximum Setting: 1000 seconds<br />
Minimum Setting: 0.3 seconds<br />
Menu Path: Setup ⇒ Speeds ⇒ Man/Auto<br />
Ramps ⇒ Accel/Decel 2 ⇒<br />
Accel 2 Time<br />
and<br />
Interface ⇒ Keypad ⇒ Parameter List (or Operation<br />
Display List) ⇒ Insert<br />
and<br />
Interface ⇒ Analog input ⇒ Parameter Assignment<br />
⇒ Accel 2 Time<br />
and<br />
Interface ⇒ Analog output ⇒ Parameter Assignment<br />
⇒ Accel 2 Time<br />
and<br />
Advanced ⇒ Command Batches ⇒ Batch # ⇒<br />
User Selection ⇒ Set Parameter<br />
Overview: This command governs acceleration<br />
ramp 2. It defines the time it takes the drive to go<br />
from zero speed to the speed indicated by the<br />
maximum speed parameter. During acceleration<br />
the drive torque level will not exceed the value set<br />
by the Current Limit + parameter. If need be, the<br />
acceleration time will be extended. If the start<br />
mode is set to dwell, the zero speed time point<br />
begins after dwell time has expired.<br />
For additional related information see:<br />
Ramp 2 Accel Time<br />
Ramp 2 Mode Decel Time<br />
Decel Time<br />
ACTIVE CONFIG #<br />
Setup Display: Active Config #<br />
Operation Display: Config<br />
Type: Selection<br />
Stop Protection: NA<br />
Item ID: 522<br />
Maximum Setting: NA<br />
Minimum Setting: NA<br />
Menu Path: Interface ⇒ Keypad ⇒ Parameter<br />
List (or Operation Display List) ⇒<br />
Insert<br />
Overview: The addition of this parameter to the<br />
menu or metering list provides the ability to<br />
observe at the keypad, what terminal block or keypad<br />
configuration elements are currently loaded.<br />
Configurations 1 to 10 and 2a to 10a are standard<br />
preprogrammed setups. Configuration -1 indicates<br />
that a customized setup is in use.<br />
For additional related information see:<br />
Chng Std Config<br />
Load Config n<br />
AF95/IS905 Programmer’s Manual<br />
A-11
Commands, Parameters, and Settings<br />
APPENDIX<br />
ACTUAL SW FREQ<br />
Setup Display: Actual Sw Freq<br />
Operation Display: SwFreq<br />
Type: Parameter<br />
Stop Protection: NA<br />
Item ID: 387<br />
Maximum Setting: NA<br />
Minimum Setting: NA<br />
Menu Path: Interface ⇒ Keypad ⇒ Parameter<br />
List (or Operation Display List) ⇒<br />
Insert<br />
and<br />
Interface ⇒ Analog output ⇒ Parameter Assignment<br />
⇒ Actual Sw Freq<br />
and<br />
Advanced ⇒ Window comparators ⇒ Parameter<br />
⇒ Actual Sw Freq<br />
Overview: The addition of this parameter to the<br />
menu or metering list provides the ability to<br />
observe at the keypad, the present drive carrier<br />
switching frequency. The switching frequency is<br />
dependent upon the drive operating frequency,<br />
the drive load, and the Switching Freq and Heatsink<br />
Fldbk parameters. The window comparator<br />
output may be used to indicate a particular switching<br />
frequency level.<br />
For additional related information see:<br />
Switching Freq<br />
Heatsink Fldbk<br />
AF95/IS905 Programmer’s Manual<br />
A-12<br />
AMBIENT TEMP<br />
Setup Display: Ambient Temp<br />
Operation Display: AmbTmp<br />
Type: Parameter<br />
Stop Protection: NA<br />
Item ID: 532<br />
Maximum Setting: NA<br />
Minimum Setting: NA<br />
Menu Path: Keypad ⇒ Parameter List<br />
(or Operation Display List) ⇒<br />
Insert<br />
and<br />
Interface ⇒ Analog output ⇒ Parameter Assignment<br />
⇒ Ambient Temp<br />
and<br />
Advanced ⇒ Window comparators ⇒ Parameter<br />
⇒ Ambient Temp<br />
Overview: This parameter indicates the temperature<br />
of the drive’s internal ambient air. The window<br />
comparator output may be used to indicate a particular<br />
temperature level.<br />
For additional related information see:<br />
Capacitor Temp Heatsink Temp<br />
DB Temp
Commands, Parameters, and Settings<br />
APPENDIX<br />
ANALOG n FOUND<br />
Setup Display: Analog n Found (where n=1 or 2)<br />
Operation Display: NA<br />
Type: Command<br />
Stop Protection: NA<br />
Item ID: 304 (n=1) and 306 (n=2)<br />
Maximum Setting: NA<br />
Minimum Setting: NA<br />
Menu Path: Advanced ⇒ Command Batches<br />
⇒ Batch # ⇒ User Selection<br />
and<br />
Interface ⇒ Analog Input ⇒ Channel n ⇒ Scale<br />
⇒ Loss of Ref./Filter... ⇒ Loss Begin Command &<br />
Loss End Command<br />
Overview: This command is generated after an<br />
analog signal level rises above the level set as the<br />
lost signal level. It would normally be used in conjunction<br />
with the Analog n Lost command. The<br />
command can also be executed from a batch program<br />
independent of the analog signal level it normally<br />
relates to. A digital output can be<br />
configured to indicate the status of the Loss of<br />
Reference.<br />
For additional related information see:<br />
Analog n Lost<br />
ANALOG n LOST<br />
Setup Display: Analog n Lost (where n=1 or 2)<br />
Operation Display: NA<br />
Type: Command<br />
Stop Protection: NA<br />
Item ID: 303 (n=1) and 305 (n=2)<br />
Maximum Setting: NA<br />
Minimum Setting: NA<br />
Menu Path: Advanced ⇒ Command Batches<br />
⇒ Batch # ⇒ User Selection<br />
and<br />
Interface ⇒ Analog Input ⇒ Channel n ⇒ Scale<br />
⇒ Loss of Ref./Filter... ⇒ Loss Begin Command &<br />
Loss End Command<br />
Overview: This command is generated after an<br />
analog signal level goes below the level set as the<br />
lost signal level. It would normally be used in conjunction<br />
with the Analog n Found command. The<br />
command can also be executed from a batch program<br />
independent of the analog signal level it normally<br />
relates to. A digital output can be<br />
configured to indicate the status of the Loss of<br />
Reference.<br />
For additional related information see:<br />
Analog n Found<br />
AF95/IS905 Programmer’s Manual<br />
A-13
Commands, Parameters, and Settings<br />
APPENDIX<br />
ARCNET COUNT #n<br />
Setup Display: ARCNET Count #n<br />
(where n=1 to 3)<br />
Operation Display: ARC n<br />
Type: Parameter<br />
Stop Protection: NA<br />
Item ID: 230 (n=1), 375 (n=2), and 376 (n=3)<br />
Maximum Setting: NA<br />
Minimum Setting: NA<br />
Menu Path: Interface ⇒ Keypad ⇒ Parameter<br />
List (or Operation Display List) ⇒<br />
Insert<br />
Overview: This parameter provides information<br />
on the usage and quality of the ARCNET connection.<br />
Count #1 indicates the number of reconfigurations<br />
since power up.<br />
Count #2 indicates the number of NAKS since<br />
power up.<br />
Count #3 indicates the number of TX failures<br />
since power up.<br />
AUTO MODE SELECT<br />
Setup Display: Auto Mode Select<br />
Operation Display: NA<br />
Type: Selection<br />
Stop Protection: Yes<br />
Item ID: 191<br />
Maximum Setting: NA<br />
Minimum Setting: NA<br />
Menu Path: Advanced ⇒ Speed Source ⇒<br />
Auto Mode Select<br />
and<br />
Interface ⇒ Keypad ⇒ Parameter List ⇒ Insert<br />
Overview: This selection determines whether the<br />
auto source input is configured as the PID feedback<br />
input or the speed follower input register.<br />
For additional related information see:<br />
Auto Reference Follower Mode<br />
PID Follower Speed<br />
PID Mode<br />
AF95/IS905 Programmer’s Manual<br />
A-14<br />
AUTO REFERENCE<br />
Setup Display: Auto Reference<br />
Operation Display: NA<br />
Type: Command<br />
Stop Protection: No<br />
Item ID: 77<br />
Maximum Setting: NA<br />
Minimum Setting: NA<br />
Menu Path: Interface ⇒ Keypad ⇒ Parameter<br />
List ⇒ Insert<br />
and<br />
Interface ⇒ Digital Input ⇒ Pin # ⇒ Auto Reference<br />
and<br />
Advanced ⇒ Speed source ⇒ Reference Source<br />
⇒ Auto<br />
and<br />
Advanced ⇒ Command Batches ⇒ Batch # ⇒<br />
User Selection<br />
and<br />
Interface ⇒ Analog Input ⇒ Channel n ⇒ Scale<br />
⇒ Loss of Ref./Filter... ⇒ Loss Begin Command &<br />
Loss End Command<br />
Overview: This command puts the drive into the<br />
auto mode. The reference input will be from either<br />
the PID or follower (depending on where the Auto<br />
Mode Select is set). If the selection is set to follower,<br />
it will come from the follower register. The<br />
follower register may be tied to an analog input or<br />
it may be left as a parameter which can be placed<br />
on the keypad.<br />
For additional related information see:<br />
Auto Mode Select Follower Speed<br />
PID Manual Reference
Commands, Parameters, and Settings<br />
APPENDIX<br />
BUMPLESS SPEED<br />
Setup Display: Bumpless Speed<br />
Operation Display: NA<br />
Type: Parameter<br />
Stop Protection: Yes<br />
Item ID: 436<br />
Maximum Setting: Maximum drive frequency in<br />
hertz, RPM, or user defined units<br />
Minimum Setting: Minimum drive frequency in<br />
hertz, RPM, or user defined units<br />
Menu Path: Interface ⇒ Keypad ⇒ Parameter<br />
List ⇒ Insert<br />
and<br />
Setup ⇒ Start mode ⇒ Bumpless Parameters ⇒<br />
Speed<br />
and<br />
Advanced ⇒ Command Batches ⇒ Batch # ⇒<br />
User Selection ⇒ Set Parameter<br />
Overview: If the bumpless start mode has been<br />
selected, this parameter sets the point at which<br />
the drive begins its search for the spinning motor<br />
upon start. This initial start speed point should be<br />
set higher than the maximum anticipated motor<br />
coast speed for proper operation. The drive will<br />
attempt to find the motor, match its frequency to<br />
the motor speed, and then accelerate or decelerate<br />
on the normal ramp to the setpoint speed. At<br />
very low speeds, under about 350 rpm, the motor<br />
may stop and then reaccelerate. Use of this function<br />
assumes that the motor is rotating in the<br />
same direction that the drive will be starting. If the<br />
motor is spinning backwards, it will be plugged to<br />
zero speed and then accelerated to the set speed.<br />
For additional related information see:<br />
Bumpless Timer<br />
Start Mode<br />
BUMPLESS TIMER<br />
Setup Display: Bumpless Timer<br />
Operation Display: NA<br />
Type: Parameter<br />
Stop Protection: Yes<br />
Item ID: 359<br />
Maximum Setting: 10 seconds<br />
Minimum Setting: 0.5 seconds<br />
Menu Path: Setup ⇒ Start Mode ⇒<br />
Bumpless Parameters ⇒ Time<br />
and<br />
Interface ⇒ Keypad ⇒ Parameter List ⇒ Insert<br />
and<br />
Advanced ⇒ Command Batches ⇒ Batch # ⇒<br />
User Selection ⇒ Set Parameter<br />
Overview: If the bumpless start mode has been<br />
selected, this parameter sets the amount of time<br />
the drive will search for the spinning motor upon<br />
start. If the motor is not found within this time<br />
limit, the drive will default to its nominal low start<br />
frequency to attempt to start the motor.<br />
For additional related information see:<br />
Bumpless Speed<br />
Start Mode<br />
AF95/IS905 Programmer’s Manual<br />
A-15
Commands, Parameters, and Settings<br />
APPENDIX<br />
BUS CURRENT<br />
Setup Display: Bus Current<br />
Operation Display: BusI<br />
Type: Parameter<br />
Stop Protection: NA<br />
Item ID: 369<br />
Maximum Setting: NA<br />
Minimum Setting: NA<br />
Menu Path: Interface ⇒ Keypad ⇒ Parameter<br />
List (or Operation Display List) ⇒<br />
Insert<br />
and<br />
Advanced ⇒ Window comparators ⇒ Parameter<br />
⇒ Bus Current<br />
and<br />
Interface ⇒ Analog Output ⇒ Channel n ⇒ Bus<br />
Current<br />
Overview: This parameter provides an indication<br />
of the drive dc bus current in amperes. Bus current<br />
may also be provided as an analog output following<br />
the third menu path noted above. The<br />
window comparator output may be used to indicate<br />
a particular current level.<br />
BUS VOLTAGE<br />
Setup Display: Bus Voltage<br />
Operation Display: BusV<br />
Type: Parameter<br />
Stop Protection: NA<br />
Item ID: 22<br />
Maximum Setting: NA<br />
Minimum Setting: NA<br />
Menu Path: Interface ⇒ Keypad ⇒ Parameter<br />
List (or Operation Display List) ⇒<br />
Insert<br />
and<br />
Advanced ⇒ Window comparators ⇒ Parameter<br />
⇒ Bus Voltage<br />
and<br />
AF95/IS905 Programmer’s Manual<br />
A-16<br />
Interface ⇒ Analog Output ⇒ Channel n ⇒ Bus<br />
Voltage<br />
Overview: This parameter provides an indication<br />
of the drive dc bus voltage. Bus voltage may also<br />
be provided as an analog output following the third<br />
menu path noted above. The window comparator<br />
output may be used to indicate a particular voltage<br />
level.<br />
CAPACITOR TEMP<br />
Setup Display: Capacitor Temp<br />
Operation Display: CapTmp<br />
Type: Parameter<br />
Stop Protection: NA<br />
Item ID: 533<br />
Maximum Setting: NA<br />
Minimum Setting: NA<br />
Menu Path: Keypad ⇒ Parameter List<br />
(or Operation Display List) ⇒<br />
Insert<br />
and<br />
Interface ⇒ Analog output ⇒ Parameter Assignment<br />
⇒ Capacitor Temp<br />
and<br />
Advanced ⇒ Window comparators ⇒ Parameter<br />
⇒ Capacitor Temp<br />
Overview: This parameter indicates the temperature<br />
of the dc filter capacitors within the drive. The<br />
window comparator output may be used to indicate<br />
a particular temperature level.<br />
For additional related information see:<br />
Ambient Temp Heatsink Temp<br />
DB Temp
Commands, Parameters, and Settings<br />
APPENDIX<br />
CHNG STD CONFIG<br />
Setup Display: Chng Std Config<br />
Operation Display: NA<br />
Type: Command<br />
Stop Protection: Yes<br />
Item ID: 244<br />
Maximum Setting: NA<br />
Minimum Setting: NA<br />
Menu Path: Interface ⇒ Keypad ⇒ Parameter<br />
List ⇒ Insert<br />
Overview: The addition of this command to the<br />
menu list provides the ability to change the I/O<br />
device configuration from that currently loaded.<br />
Configurations 1 to 10 and 2a to 10a are standard<br />
preprogrammed setups. Configuration -1 indicates<br />
a customized setup.<br />
For additional related information see:<br />
Active Config #<br />
Load Config n<br />
CLAMPED SPDSET<br />
Setup Display: Clamped Spdset<br />
Operation Display: SpdSet<br />
Type: Parameter<br />
Stop Protection: No<br />
Item ID: 358<br />
Maximum Setting: NA<br />
Minimum Setting: NA<br />
Menu Path: Interface ⇒ Keypad ⇒ Parameter<br />
List (or Operation Display List) ⇒<br />
Insert<br />
and<br />
Advanced ⇒ Window comparators ⇒ Parameter<br />
⇒ Clamped Spdset<br />
and<br />
Interface ⇒ Analog Output ⇒ Channel n ⇒<br />
Clamped Spdset<br />
Overview: This parameter indicates the speed<br />
setpoint clamped to the maximum speed. The<br />
window comparator output may be used to indicate<br />
a particular speed clamp level.<br />
For additional related information see:<br />
Maximum Frequency<br />
Maximum Speed<br />
CLEAR FAULT LOG<br />
Setup Display: Clear Fault Log<br />
Operation Display: NA<br />
Type: Command<br />
Stop Protection: No<br />
Item ID: 302<br />
Maximum Setting: NA<br />
Minimum Setting: NA<br />
Menu Path: Interface ⇒ Keypad ⇒ Parameter<br />
List ⇒ Insert<br />
and<br />
Interface ⇒ Digital input ⇒ Pin # ⇒ Clear Fault<br />
Log<br />
and<br />
Advanced ⇒ Command Batches ⇒ Batch # ⇒<br />
User Selections ⇒ Clear Fault Log<br />
Overview: This function clears all fault history,<br />
warning history and trend buffers from the drive.<br />
For additional related information see:<br />
Fault Flt Restart Dly<br />
Fault Reset Mode Reset Fault<br />
Fault Restart<br />
AF95/IS905 Programmer’s Manual<br />
A-17
Commands, Parameters, and Settings<br />
APPENDIX<br />
CLEAR KW HOURS<br />
Setup Display: Clear KW Hours<br />
Operation Display: NA<br />
Type: Command<br />
Stop Protection: No<br />
Item ID: 372<br />
Maximum Setting: NA<br />
Minimum Setting: NA<br />
Menu Path: Interface ⇒ Keypad ⇒ Parameter<br />
List ⇒ Insert<br />
and<br />
Interface ⇒ Digital input ⇒ Pin # ⇒ Clear KW<br />
Hours<br />
and<br />
Advanced ⇒ Command Batches ⇒ Batch # ⇒<br />
User Selections ⇒ Clear KW Hours<br />
Overview: This function resets the kilowatt hours<br />
and megawatt hours displays to zero.<br />
For additional related information see:<br />
Kilowatt Hours<br />
Megawatt Hours<br />
CONTROL ITEM n<br />
Setup Display: Control Item n (where n=1 to 16)<br />
Operation Display: MC# n (where n=1 to 16)<br />
Type: Parameter<br />
Stop Protection: No<br />
Item ID: 40 through 55<br />
Maximum Setting: NA<br />
Minimum Setting: NA<br />
Menu Path: Interface ⇒ Keypad ⇒ Parameter<br />
List (or Operation Display List) ⇒<br />
Insert<br />
and<br />
Interface ⇒ Analog Output ⇒ Channel n ⇒ Control<br />
Item n<br />
and<br />
Advanced ⇒ Window comparators ⇒ Parameter<br />
⇒ Control Item n<br />
AF95/IS905 Programmer’s Manual<br />
A-18<br />
and<br />
Advanced ⇒ Command Batches ⇒ Batch # ⇒<br />
User Selection ⇒ Set Parameter<br />
Overview: This parameter specifies a value<br />
which is used for a machine control function.<br />
Machine control functions are factory preprogrammed.<br />
The window comparator output may be<br />
used to indicate a particular analog level.<br />
For additional related information see:<br />
MC Input n<br />
CURRENT LIMIT +<br />
Setup Display: Current Limit +<br />
Operation Display: +ILim<br />
Type: Parameter<br />
Stop Protection: No<br />
Item ID: 26<br />
Maximum Setting: 110 percent VT models (150<br />
percent CT models) of the drive’s load rating<br />
Minimum Setting: 0.0 percent of the drive’s load<br />
rating<br />
Menu Path: Interface ⇒ Keypad ⇒ Parameter<br />
List (or Operation Display List) ⇒<br />
Insert<br />
and<br />
Interface ⇒ Analog Input ⇒ Channel n ⇒ Current<br />
Limit +<br />
and<br />
Interface ⇒ Analog Output ⇒ Channel n ⇒ Current<br />
Limit +<br />
and<br />
Setup ⇒ Motor parameters ⇒ Current Limit<br />
and<br />
Advanced ⇒ Command Batches ⇒ Batch # ⇒<br />
User Selection ⇒ Set Parameter<br />
and<br />
Advanced ⇒ Window comparators ⇒ Parameter<br />
⇒ Current Limit +
Commands, Parameters, and Settings<br />
APPENDIX<br />
Overview: This parameter sets the positive load<br />
limit for the drive. If the output load reaches the<br />
set level, while the drive is ramping up to the<br />
speed setpoint, the drive will go into foldback to<br />
find a speed where the load limit will not be<br />
exceeded. A high current limit setting might<br />
cause a motor overload trip. The window comparator<br />
output may be used to indicate a particular<br />
current level.<br />
For additional related information see:<br />
Current Limit -<br />
CURRENT LIMIT -<br />
Setup Display: Current Limit -<br />
Operation Display: -ILim<br />
Type: Parameter<br />
Stop Protection: No<br />
Item ID: 290<br />
Maximum Setting: 0.0 percent of the drive’s load<br />
rating<br />
Minimum Setting: -450 percent of the drive’s<br />
load rating<br />
Menu Path: Interface ⇒ Keypad ⇒ Parameter<br />
List (or Operation Display List) ⇒<br />
Insert<br />
and<br />
Interface ⇒ Analog Input ⇒ Channel n ⇒ Current<br />
Limit -<br />
and<br />
Interface ⇒ Analog Output ⇒ Channel n ⇒ Current<br />
Limit -<br />
and<br />
Setup ⇒ Motor parameters ⇒ Negative Current<br />
Limit<br />
and<br />
Advanced ⇒ Command Batches ⇒ Batch # ⇒<br />
User Selection ⇒ Set Parameter<br />
and<br />
Advanced ⇒ Window comparators ⇒ Parameter<br />
⇒ Current Limit -<br />
Overview: This parameter sets the negative load<br />
limit for the drive when it is equipped with dynamic<br />
braking. The limit may be modified by the regenerative<br />
override function or by the dynamic braking<br />
circuit temperature foldback in order to<br />
maintain operation within circuit limits. The window<br />
comparator output may be used to indicate a<br />
particular current level.<br />
For additional related information see:<br />
Current Limit +<br />
DATE - TIME<br />
Setup Display: Date - Time<br />
Operation Display: NA<br />
Type: TOD<br />
Stop Protection: No<br />
Item ID: 57<br />
Maximum Setting: NA<br />
Minimum Setting: NA<br />
Menu Path: Interface ⇒ Keypad ⇒ Parameter<br />
List ⇒ Insert<br />
and<br />
Advanced ⇒ Clock (Note that the drive must be<br />
connected to observe this path)<br />
Overview: This function allows the current date<br />
and time to be modified.<br />
For additional related information see:<br />
Time 24 Hour Today’s Date<br />
Time AM/PM<br />
AF95/IS905 Programmer’s Manual<br />
A-19
Commands, Parameters, and Settings<br />
APPENDIX<br />
DB TEMP<br />
Setup Display: DB Temp<br />
Operation Display: DBTmp<br />
Type: Parameter<br />
Stop Protection: NA<br />
Item ID: 534<br />
Maximum Setting: NA<br />
Minimum Setting: NA<br />
Menu Path: Interface ⇒ Keypad ⇒ Parameter<br />
List (or Operation Display List) ⇒<br />
Insert<br />
and<br />
Interface ⇒ Analog output ⇒ Parameter Assignment<br />
⇒ DB Temp<br />
and<br />
Advanced ⇒ Window comparators ⇒ Parameter<br />
⇒ DB Temp<br />
Overview: This parameter indicates the temperature<br />
of the dynamic braking resistors connected to<br />
the drive. The window comparator output may be<br />
used to indicate a particular temperature level.<br />
For additional related information see:<br />
Ambient Temp Heatsink Temp<br />
Capacitor Temp<br />
DC BRAKE SPEED<br />
Setup Display: DC Brake Speed<br />
Operation Display: BrkSpd<br />
Type: Parameter<br />
Stop Protection: Yes<br />
Item ID: 339<br />
Maximum Setting: 6 hertz, or the equivalent in<br />
RPM, or user defined units<br />
Minimum Setting: 0 hertz, or the equivalent in<br />
RPM, or user defined units<br />
Menu Path: Interface ⇒ Keypad ⇒ Parameter<br />
List (or Operation Display List) ⇒<br />
Insert<br />
and<br />
Interface ⇒ Analog Output ⇒ Channel n ⇒ DC<br />
Brake Speed<br />
and<br />
AF95/IS905 Programmer’s Manual<br />
A-20<br />
Advanced ⇒ Command Batches ⇒ Batch # ⇒<br />
User Selection ⇒ Set Parameter<br />
and<br />
Advanced ⇒ Window comparators ⇒ Parameter<br />
⇒ DC Brake Speed<br />
Overview: This function sets the frequency/<br />
speed at which dc injection braking begins when<br />
the motor is being stopped. The window comparator<br />
output may be used to indicate a particular dc<br />
brake speed level. Selecting 0 disables the dc<br />
brake.<br />
For additional related information see:<br />
DC Brake Time<br />
DC BRAKE TIME<br />
Setup Display: DC Brake Time<br />
Operation Display: BrkTim<br />
Type: Parameter<br />
Stop Protection: No<br />
Item ID: 343<br />
Maximum Setting: 10 seconds<br />
Minimum Setting: 0.1 seconds<br />
Menu Path: Interface ⇒ Keypad ⇒ Parameter<br />
List (or Operation Display List) ⇒<br />
Insert<br />
and<br />
Interface ⇒ Analog Output ⇒ Channel n ⇒ DC<br />
Brake Time<br />
and<br />
Advanced ⇒ Command Batches ⇒ Batch # ⇒<br />
User Selection ⇒ Set Parameter<br />
and<br />
Advanced ⇒ Window comparators ⇒ Parameter<br />
⇒ DC Brake Time<br />
Overview: This function sets the amount of time<br />
for which dc injection braking will occur upon its<br />
initiation. The window comparator output may be<br />
used to indicate a particular level.<br />
For additional related information see:<br />
DC Brake Speed
Commands, Parameters, and Settings<br />
APPENDIX<br />
DECEL 2 TIME<br />
Setup Display: Decel 2 Time<br />
Operation Display: Decel2<br />
Type: Parameter<br />
Stop Protection: No<br />
Item ID: 440<br />
Maximum Setting: 1000 seconds<br />
Minimum Setting: 0.3 seconds<br />
Menu Path: Setup ⇒ Speeds ⇒ Man/Auto<br />
Ramps ⇒ Accel/Decel 2 ⇒<br />
Decel 2 Time<br />
and<br />
Interface ⇒ Keypad ⇒ Parameter List (or Operation<br />
Display List) ⇒ Insert<br />
and<br />
Interface ⇒ Analog Input ⇒ Channel n ⇒ Decel 2<br />
Time<br />
and<br />
Advanced ⇒ Command Batches ⇒ Batch # ⇒<br />
User Selection ⇒ Set Parameter<br />
and<br />
Interface ⇒ Analog Output ⇒ Channel n ⇒ Decel<br />
2 Time<br />
Overview: This command governs deceleration<br />
ramp 2. It defines the time it takes the drive to go<br />
to zero speed from the speed indicated by the<br />
maximum speed parameter. During deceleration<br />
the drive deceleration time may be exceeded if the<br />
regenerative override circuit comes into operation<br />
to prevent excessive dc bus voltage due to a high<br />
inertia, low friction load.<br />
For additional related information see:<br />
Decel Time Ramp 2<br />
Accel Time Ramp 2 Mode<br />
Accel 2Time<br />
DECEL TIME<br />
Setup Display: Decel Time<br />
Operation Display: Decel<br />
Type: Parameter<br />
Stop Protection: No<br />
Item ID: 25<br />
Maximum Setting: 1000 seconds<br />
Minimum Setting: 0.3 seconds<br />
Menu Path: Setup ⇒ Speeds ⇒ Man/Auto<br />
Ramps ⇒ Accel/Decel 1 ⇒<br />
Decel Time<br />
and<br />
Interface ⇒ Keypad ⇒ Parameter List (or Operation<br />
Display List) ⇒ Insert<br />
and<br />
Interface ⇒ Analog Input ⇒ Channel n ⇒ Decel<br />
Time<br />
and<br />
Advanced ⇒ Command Batches ⇒ Batch # ⇒<br />
User Selection ⇒ Set Parameter<br />
and<br />
Interface ⇒ Analog Output ⇒ Channel n ⇒ Decel<br />
Time<br />
Overview: This command governs deceleration<br />
ramp 1. It defines the time it takes the drive to go<br />
to zero speed from the speed indicated by the<br />
maximum speed parameter. During deceleration<br />
the drive deceleration time may be exceeded if the<br />
regen override circuit comes into operation to prevent<br />
excessive dc bus voltage due to a high inertia,<br />
low friction load.<br />
For additional related information see:<br />
Decel 2 Time Ramp 1<br />
Accel Time Ramp 1 Mode<br />
Accel 2Time<br />
AF95/IS905 Programmer’s Manual<br />
A-21
Commands, Parameters, and Settings<br />
APPENDIX<br />
DIGITAL POT MODE<br />
Setup Display: Digital Pot Mode<br />
Operation Display: NA<br />
Type: Selection<br />
Stop Protection: NA<br />
Item ID: 531<br />
Maximum Setting: NA<br />
Minimum Setting: NA<br />
Menu Path: Interface ⇒ Keypad ⇒ Parameter<br />
List ⇒ Insert<br />
and<br />
Setup ⇒ Speeds ⇒ Digital Pot ⇒ Digital Potentiometer<br />
Mode<br />
Overview: This selection determines the mode of<br />
operation of the digital speed pot when the drive is<br />
turned off. If Hold Reference is selected, the last<br />
reference set point will be maintained when the<br />
drive is turned on. If Reset to 0 is selected, the<br />
reference set point will be set to 0 when the drive<br />
is turned on.<br />
For additional related information see:<br />
Ramp Down Ramp Up<br />
Ramp Down Time Ramp Up Time<br />
DRIVE STATUS<br />
Setup Display: Drive Status<br />
Operation Display: Status<br />
Type: Selection<br />
Stop Protection: NA<br />
Item ID: 197<br />
Maximum Setting: NA<br />
Minimum Setting: NA<br />
Menu Path: Interface ⇒ Keypad ⇒ Parameter<br />
List (or Operation Display List) ⇒<br />
Insert<br />
Overview: This function provides an indication of<br />
the drive operating status such as running, stopping,<br />
stopped, in current limit, etc.<br />
AF95/IS905 Programmer’s Manual<br />
A-22<br />
DWELL SPEED<br />
Setup Display: Dwell Speed<br />
Operation Display: DwlSpd<br />
Type: Parameter<br />
Stop Protection: Yes<br />
Item ID: 364<br />
Maximum Setting: 6 Hertz, or the equivalent in<br />
RPM, or user defined units<br />
Minimum Setting: 1 Hertz, or the equivalent in<br />
RPM, or user defined units<br />
Menu Path: Interface ⇒ Keypad ⇒ Parameter<br />
List (or Operation Display List) ⇒<br />
Insert<br />
and<br />
Setup ⇒ Start Mode ⇒ Dwell Parameters ⇒<br />
Dwell Speed<br />
and<br />
Interface ⇒ Analog Input ⇒ Channel n ⇒ Dwell<br />
Speed<br />
and<br />
Advanced ⇒ Command Batches ⇒ Batch # ⇒<br />
User Selection ⇒ Set Parameter<br />
and<br />
Interface ⇒ Analog Output ⇒ Channel n ⇒ Dwell<br />
Speed<br />
Overview: This sets the frequency/speed at<br />
which the drive momentarily pauses during a start<br />
sequence to allow motor field stabilization if the<br />
start mode is set to dwell. After the dwell time has<br />
expired the drive will accelerate to the desired<br />
operating set speed.<br />
For additional related information see:<br />
Dwell Time<br />
Start Mode
Commands, Parameters, and Settings<br />
APPENDIX<br />
DWELL TIME<br />
Setup Display: Dwell Time<br />
Operation Display: DwlTim<br />
Type: Parameter<br />
Stop Protection: No<br />
Item ID: 342<br />
Maximum Setting: 5 seconds<br />
Minimum Setting: 0.15 seconds<br />
Menu Path: Interface ⇒ Keypad ⇒ Parameter<br />
List (or Operation Display List) ⇒<br />
Insert<br />
and<br />
Setup ⇒ Start Mode ⇒ Dwell Parameters ⇒<br />
Dwell Time<br />
and<br />
Interface ⇒ Analog Input ⇒ Channel n⇒ Dwell<br />
Time<br />
and<br />
Advanced ⇒ Command Batches ⇒ Batch # ⇒<br />
User Selection ⇒ Set Parameter<br />
and<br />
Interface ⇒ Analog Output ⇒ Channel n ⇒ Dwell<br />
Time<br />
Overview: This sets the time for which the drive<br />
momentarily pauses during a start sequence to<br />
allow motor field stabilization if the start mode is<br />
set to dwell. After this time has expired the drive<br />
will accelerate to the desired operating set speed.<br />
For additional related information see:<br />
Dwell Speed<br />
Start Mode<br />
ELAPSED HOURS<br />
Setup Display: NA<br />
Operation Display: ETM<br />
Type: String<br />
Stop Protection: NA<br />
Item ID: 313<br />
Maximum Setting: NA<br />
Minimum Setting: NA<br />
Menu Path: Interface ⇒ Keypad ⇒ Operation<br />
Display List ⇒ Insert<br />
Overview: This function indicates the number of<br />
hours that the drive has had power on since shipment<br />
from the factory.<br />
For additional related information see:<br />
Running Hours<br />
EXECUTE BATCH N<br />
Setup Display: Execute Batch n (where n = 1<br />
through 16)<br />
Operation Display: NA<br />
Type: Command<br />
Stop Protection: No<br />
Item ID: 452 through 467<br />
Maximum Setting: NA<br />
Minimum Setting: NA<br />
Menu Path: Interface ⇒ Keypad ⇒ Parameter<br />
List ⇒ Insert<br />
and<br />
Interface ⇒ Digital Input ⇒ Pin # ⇒ Assignment<br />
and<br />
Interface ⇒ Analog Input ⇒ Channel n ⇒ Scale<br />
⇒ Loss of Ref./Filter... ⇒ Loss Begin Command &<br />
Loss End Command<br />
Overview: This function executes a batch program.<br />
AF95/IS905 Programmer’s Manual<br />
A-23
Commands, Parameters, and Settings<br />
APPENDIX<br />
EXT CONT CLOSE<br />
Setup Display: Ext Cont Close<br />
Operation Display: NA<br />
Type: Command<br />
Stop Protection: No<br />
Item ID: 36<br />
Maximum Setting: NA<br />
Minimum Setting: NA<br />
Menu Path: Interface ⇒ Digital Input ⇒ Pin # ⇒<br />
Contactor Interlock<br />
Overview: This function indicates to the drive<br />
that the output contactor has been closed. The<br />
input is based on the leading edge of the signal<br />
received on the input terminal designated Contactor<br />
Interlock.<br />
For additional related information see:<br />
Ext Cont Open<br />
EXT CONT OPEN<br />
Setup Display: Ext Cont Open<br />
Operation Display: NA<br />
Type: Command<br />
Stop Protection: No<br />
Item ID: 37<br />
Maximum Setting: NA<br />
Minimum Setting: NA<br />
Menu Path: Interface ⇒ Digital Input ⇒ Pin # ⇒<br />
Contactor Interlock<br />
Overview: This function indicates to the drive<br />
that the output contactor has opened. The input is<br />
based on the trailing edge of the signal received<br />
on the input terminal designated Contactor Interlock.<br />
For additional related information see:<br />
Ext Cont Close<br />
AF95/IS905 Programmer’s Manual<br />
A-24<br />
FAST DECEL TIME<br />
Setup Display: Fast Decel Time<br />
Operation Display: DecFst<br />
Type: Parameter<br />
Stop Protection: No<br />
Item ID: 432<br />
Maximum Setting: 1000 seconds<br />
Minimum Setting: 0.3 seconds<br />
Menu Path: Interface ⇒ Keypad ⇒ Parameter<br />
List (or Operation Display List) ⇒<br />
Insert<br />
and<br />
Interface ⇒ Analog Input ⇒ Channel n ⇒ Fast<br />
Decel Time<br />
and<br />
Advanced ⇒ Command Batches ⇒ Batch # ⇒<br />
User Selection ⇒ Set Parameter<br />
and<br />
Interface ⇒ Analog Output ⇒ Channel n ⇒ Fast<br />
Decel Time<br />
and<br />
Setup ⇒ Stop Mode ⇒ Fast Stop Mode ⇒ Use<br />
Fast Decel Time ⇒ Fast Decel Time<br />
Overview: This parameter sets the fast decel<br />
ramp rate, which will apply when the fast decel<br />
stop is requested. Note that because of the time<br />
over which this rate is adjustable, it is possible to<br />
set it longer than the normal decel ramp rate.<br />
For additional related information see:<br />
Fast Stop<br />
Fast Stop Mode
Commands, Parameters, and Settings<br />
APPENDIX<br />
FAST STOP<br />
Setup Display: Fast Stop<br />
Operation Display: NA<br />
Type: Command<br />
Stop Protection: No<br />
Item ID: 11<br />
Maximum Setting: NA<br />
Minimum Setting: NA<br />
Menu Path: Interface ⇒ Digital Input ⇒<br />
Pin # ⇒ Run Enable/Fast Stop<br />
and<br />
Advanced ⇒ Command Batches ⇒ Batch # ⇒<br />
User Selection ⇒ Fast Stop<br />
and<br />
Interface ⇒ Analog Input ⇒ Channel n ⇒ Scale<br />
⇒ Loss of Ref./Filter... ⇒ Loss Begin Command &<br />
Loss End Command<br />
Overview: This parameter sets a digital input as<br />
the run enable/fast stop input. Closing this input<br />
and the run enable/stop input and any other interlocks<br />
enables the drive start. Upon opening this<br />
input the type of stop which results is dependent<br />
upon the selected fast stop mode and fast decel<br />
time setting. A fast stop must be reset by opening<br />
and reclosing the normal run enable/stop input or<br />
by removing and restoring power to the drive.<br />
For additional related information see:<br />
Fast Decel Time<br />
Fast Stop Mode<br />
FAST STOP MODE<br />
Setup Display: Fast Stop Mode<br />
Operation Display: NA<br />
Type: Selection<br />
Stop Protection: Yes<br />
Item ID: 433<br />
Maximum Setting: NA<br />
Minimum Setting: NA<br />
Menu Path: Setup ⇒ Stop Mode ⇒ Fast Stop<br />
Mode ⇒ Coast or Use Fast Decel<br />
Time<br />
and<br />
Interface ⇒ Keypad ⇒ Parameter ⇒ Insert<br />
Overview: This parameter determines the mode<br />
of stop after a fast stop has been selected. The<br />
stop mode will either be a coast down of the motor<br />
from the speed at which the drive was stopped or<br />
a controlled ramp down at the fast decel ramp<br />
rate. Note that the rampdown time is dependent<br />
upon the inertia of the load and the braking torque<br />
available and may not be as fast as that determined<br />
by the ramp rate alone.<br />
For additional related information see:<br />
Fast Decel Time<br />
Fast Stop<br />
FAULT<br />
Setup Display: Fault<br />
Operation Display: NA<br />
Type: Command<br />
Stop Protection: No<br />
Item ID: 14<br />
Maximum Setting: NA<br />
Minimum Setting: NA<br />
Menu Path: Interface ⇒ Digital Input ⇒<br />
Pin # ⇒ Fault<br />
and<br />
Interface ⇒ Keypad ⇒ Parameter List ⇒ Insert<br />
and<br />
Advanced ⇒ Command Batches ⇒ Batch # ⇒<br />
User Selection ⇒ Fault<br />
and<br />
Interface ⇒ Analog Input ⇒ Channel n ⇒ Scale<br />
⇒ Loss of Ref./Filter... ⇒ Loss Begin Command &<br />
Loss End Command<br />
Overview: This function assigns a programmed<br />
function or an external customer contact connected<br />
to a digital input, to initiate an external fault<br />
condition. Upon exercising this function the drive<br />
will trip out and a fault will be indicated. The drive<br />
can be reset even if the fault is still present.<br />
For additional related information see:<br />
Fault n<br />
AF95/IS905 Programmer’s Manual<br />
A-25
Commands, Parameters, and Settings<br />
APPENDIX<br />
FAULT n<br />
Setup Display: Fault n (where n = 1, 2, or 3)<br />
Operation Display: NA<br />
Type: Command<br />
Stop Protection: No<br />
Item ID: 496, 497, 498<br />
Maximum Setting: NA<br />
Minimum Setting: NA<br />
Menu Path: Interface ⇒ Digital Input ⇒ Pin # ⇒<br />
Fault n<br />
and<br />
Interface ⇒ Keypad ⇒ Parameter List ⇒ Insert<br />
and<br />
Advanced ⇒ Command Batches ⇒ Batch # ⇒<br />
User Selection ⇒ Fault n<br />
and<br />
Interface ⇒ Analog Input ⇒ Channel n ⇒ Scale<br />
⇒ Loss of Ref./Filter... ⇒ Loss Begin Command &<br />
Loss End Command<br />
Overview: This function assigns a programmed<br />
function or an external customer contact connected<br />
to a digital input, to initiate an external fault<br />
condition. Upon exercising this function the drive<br />
will trip out and a fault will be indicated. The drive<br />
can be reset even though the fault is still present.<br />
For additional related information see:<br />
Fault<br />
FAULT RESET MODE<br />
Setup Display: Fault Reset Mode<br />
Operation Display: NA<br />
Type: Selection<br />
Stop Protection: NA<br />
Item ID: 15<br />
Maximum Setting: NA<br />
Minimum Setting: NA<br />
Menu Path: Interface ⇒ Keypad ⇒ Parameter<br />
⇒ Insert<br />
and<br />
AF95/IS905 Programmer’s Manual<br />
A-26<br />
Advanced ⇒ Miscellaneous ⇒ Fault Reset ⇒<br />
Fault Reset Mode<br />
Overview: This selection determines the means<br />
for resetting drive faults. The two choices are to<br />
reset the fault through a specific fault reset command.<br />
The second choice is to reset the fault via<br />
any stop command.<br />
For additional related information see:<br />
Clear Fault Log Reset Fault<br />
Fault Warning History<br />
FAULT RESTART<br />
Setup Display: Fault Restart<br />
Operation Display: NA<br />
Type: Selection<br />
Stop Protection: Yes<br />
Item ID: 257<br />
Maximum Setting: NA<br />
Minimum Setting: NA<br />
Menu Path: Interface ⇒ Keypad ⇒ Parameter<br />
⇒ Insert<br />
and<br />
Advanced ⇒ Auto Restart ⇒ Enable Restart on<br />
Fault<br />
Overview: This parameter causes the drive to<br />
restart after the condition causing a fault tripped<br />
has been cleared, providing that a maintained run<br />
contact exists and all other required interlocks are<br />
satisfied.<br />
For additional related information see:<br />
Clear Fault Log Fault Reset Mode<br />
Fault Flt Restart Dly<br />
Fault History Reset Fault
Commands, Parameters, and Settings<br />
APPENDIX<br />
FLT RESTART DLY<br />
Setup Display: FLT Restart DLY<br />
Operation Display: NA<br />
Type: Parameter<br />
Stop Protection: No<br />
Item ID: 259<br />
Maximum Setting: 1000 seconds<br />
Minimum Setting: 0.1 second<br />
Menu Path: Interface ⇒ Keypad ⇒ Parameter<br />
⇒ Insert<br />
and<br />
Advanced ⇒ Auto Restart ⇒ Fault Restart ⇒<br />
FLT Restart DLY<br />
and<br />
Advanced ⇒ Command Batches ⇒ Batch # ⇒<br />
User Selection ⇒ Set Parameter<br />
Overview: This parameter sets the delay time<br />
between a fault occurrence and the restart<br />
attempt.<br />
For additional related information see:<br />
Clear Fault Log Fault Reset Mode<br />
Fault Fault Restart<br />
Fault History Reset Fault<br />
FOLLOWER MODE<br />
Setup Display: Follower Mode<br />
Operation Display: NA<br />
Type: Command<br />
Stop Protection: No<br />
Item ID: 526<br />
Maximum Setting: NA<br />
Minimum Setting: NA<br />
Menu Path: Advanced ⇒ Speed Source ⇒<br />
Auto Ref<br />
and<br />
Interface ⇒ Digital Input ⇒ Pin # ⇒ Follower<br />
Mode or Follower/PID Mode<br />
and<br />
Advanced ⇒ Command Batches ⇒ Batch # ⇒<br />
User Selection ⇒ Follower Mode<br />
Overview: This command places the drive’s<br />
auto/manual selection to follower mode vs the<br />
alternative PID mode.<br />
For additional related information see:<br />
Auto Reference PID Mode<br />
Auto Reference Select Follower Speed<br />
PID Auto Mode Select<br />
FOLLOWER SPEED<br />
Setup Display: Follower Speed<br />
Operation Display: FolSpd<br />
Type: Parameter<br />
Stop Protection: No<br />
Item ID: 158<br />
Maximum Setting: Maximum drive frequency in<br />
hertz, RPM, or user defined units<br />
Minimum Setting: Minimum drive frequency in<br />
hertz, RPM, or user defined units<br />
Menu Path: Interface ⇒ Keypad ⇒ Parameter<br />
List (or Operation Display List) ⇒<br />
Insert<br />
and<br />
Interface ⇒ Analog Input ⇒ Channel n ⇒ Parameter<br />
Assignment ⇒ Follower Speed ⇒ Scale<br />
and<br />
Interface ⇒ Analog Output ⇒ Channel n ⇒<br />
Parameter Assignment ⇒ Follower Speed ⇒<br />
Scale<br />
and<br />
Advanced ⇒ Command Batches ⇒ Batch # ⇒<br />
User Selection ⇒ Set Parameter<br />
and<br />
Advanced ⇒ Window comparators ⇒ Parameter<br />
⇒ Follower Speed<br />
AF95/IS905 Programmer’s Manual<br />
A-27
Commands, Parameters, and Settings<br />
APPENDIX<br />
Overview: This parameter provides for the setting<br />
of the speed follower input as a display or element<br />
for use in a window comparator. The speed<br />
follower can be scaled in hertz, rpm or user<br />
defined units. The window comparator output may<br />
be used to indicate a particular speed level.<br />
For additional related information see:<br />
Auto Mode Select PID<br />
Auto Reference<br />
FORWARD/REVERSE<br />
Setup Display: Forward/Reverse<br />
Operation Display: NA<br />
Type: Command<br />
Stop Protection: No<br />
Item ID: 494 and 499<br />
Maximum Setting: NA<br />
Minimum Setting: NA<br />
Menu Path: Interface ⇒ Digital Input ⇒ Pin # ⇒<br />
Forward/Reverse<br />
Overview: When in the remote mode this designates<br />
a digital input as a remote input for toggling<br />
the selection of the forward or reverse direction.<br />
For additional related information see:<br />
Remote Forward Reverse Enable<br />
Remote Reverse<br />
HEATSINK FLDBK<br />
Setup Display: Heatsink Fldbk<br />
Operation Display: NA<br />
Type: Selection<br />
Stop Protection: No<br />
Item ID: 434<br />
Maximum Setting: NA<br />
Minimum Setting: NA<br />
Menu Path: Interface ⇒ Keypad ⇒ Parameter<br />
List ⇒ Insert<br />
and<br />
Advanced ⇒ Miscellaneous ⇒ Drive Overtemperature<br />
Action ⇒ Trip or Fold Back Current or Fold<br />
Back Carrier Frequency<br />
AF95/IS905 Programmer’s Manual<br />
A-28<br />
Overview: This selection determines the drives<br />
response to a heatsink overtemperature condition.<br />
It can be set to trip the drive or to reduce the<br />
current output or reduce the output carrier frequency.<br />
HEATSINK TEMP<br />
Setup Display: Heatsink Temp<br />
Operation Display: HS Temp<br />
Type: Parameter<br />
Stop Protection: No<br />
Item ID: 535<br />
Maximum Setting: NA<br />
Minimum Setting: NA<br />
Menu Path: Interface ⇒ Keypad ⇒ Parameter<br />
List (or Operation Display List) ⇒<br />
Insert<br />
and<br />
Interface ⇒ Analog Output ⇒ Channel n ⇒<br />
Parameter Assignment ⇒ Heatsink Temperature<br />
and<br />
Advanced ⇒ Window comparators ⇒ Parameter<br />
⇒ Heatsink Temperature<br />
Overview: This parameter provides an indication<br />
of the temperature of the drive’s heatsink. The<br />
window comparator output may be used to indicate<br />
a particular temperature level.<br />
HIGH SPEED FLA<br />
Setup Display: High Speed FLA<br />
Operation Display: NA<br />
Type: Parameter<br />
Stop Protection: Yes<br />
Item ID: 232<br />
Maximum Setting: Motor full load amp setting<br />
Minimum Setting: 0<br />
Menu Path: Interface ⇒ Keypad ⇒ Parameter<br />
List ⇒ Insert<br />
and<br />
Setup ⇒ Motor Parameters ⇒ Motor Overload<br />
Profile ⇒ High Range Current
Commands, Parameters, and Settings<br />
APPENDIX<br />
and<br />
Advanced ⇒ Command Batches ⇒ Batch # ⇒<br />
User Selection ⇒ Set Parameter<br />
Overview: This designates the upper breakpoint<br />
current for a customized motor overload curve.<br />
For additional related information see:<br />
Low Speed FLA Lo Spd FLA Frq %<br />
Low Speed FLA % Hi Spd FLA Freq<br />
Lo Speed FLA Freq High Speed FLA %<br />
HI SPD FLA FREQ<br />
Setup Display: Hi Spd FLA Freq<br />
Operation Display: NA<br />
Type: Parameter<br />
Stop Protection: Yes<br />
Item ID: 361<br />
Maximum Setting: Maximum drive speed<br />
Minimum Setting: 0.0 Hertz<br />
Menu Path: Interface ⇒ Keypad ⇒ Parameter<br />
List ⇒ Insert<br />
and<br />
Setup ⇒ Motor Parameters ⇒ Motor Overload<br />
Profile ⇒ High Speed Breakpoint<br />
and<br />
Advanced ⇒ Command Batches ⇒ Batch # ⇒<br />
User Selection ⇒ Set Parameter<br />
Overview: This designates the upper breakpoint<br />
frequency for a customized motor overload curve.<br />
For additional related information see:<br />
Low Speed FLA High Speed FLA<br />
Low Speed FLA % High Speed FLA %<br />
Lo Spd FLA Freq Hi Spd FLA Frq %<br />
Lo Spd FLA Frq %<br />
HI SPD FLA FRQ %<br />
Setup Display: Hi Spd FLA Frq %<br />
Operation Display: NA<br />
Type: Parameter<br />
Stop Protection: Yes<br />
Item ID: 508<br />
Maximum Setting: 100 Percent<br />
Minimum Setting: 0.0 Percent<br />
Menu Path: Interface ⇒ Keypad ⇒ Parameter<br />
List ⇒ Insert<br />
and<br />
Advanced ⇒ Command Batches ⇒ Batch # ⇒<br />
User Selection ⇒ Set Parameter<br />
Overview: This designates the upper breakpoint<br />
frequency for a customized motor overload curve<br />
in percent.<br />
For additional related information see:<br />
Low Speed FLA High Speed FLA<br />
Low Speed FLA % High Speed FLA %<br />
Lo Spd FLA Freq Hi Spd FLA Freq<br />
Lo Spd FLA Frq %<br />
HIGH SPEED FLA %<br />
Setup Display: High Speed FLA %<br />
Operation Display: NA<br />
Type: Parameter<br />
Stop Protection: Yes<br />
Item ID: 506<br />
Maximum Setting: 125 Percent<br />
Minimum Setting: 0.0 Percent<br />
Menu Path: Interface ⇒ Keypad ⇒ Parameter<br />
List ⇒ Insert<br />
and<br />
Advanced ⇒ Command Batches ⇒ Batch # ⇒<br />
User Selection ⇒ Set Parameter<br />
Overview: This designates the upper breakpoint<br />
current for a customized motor overload curve in<br />
percent.<br />
For additional related information see:<br />
Low Speed FLA High Speed FLA<br />
Low Speed FLA % Hi Spd FLA Freq<br />
Lo Spd FLA Freq Hi Spd FLA Frq %<br />
Lo Spd FLA Frq %<br />
AF95/IS905 Programmer’s Manual<br />
A-29
Commands, Parameters, and Settings<br />
APPENDIX<br />
INPUT KILOWATTS<br />
Setup Display: Input Kilowatts<br />
Operation Display: KW<br />
Type: Parameter<br />
Stop Protection: No<br />
Item ID: 340<br />
Maximum Setting: Drive dependent<br />
Minimum Setting: 0.0 Kilowatts<br />
Menu Path: Interface ⇒ Keypad ⇒ Parameter<br />
List (or Operation Display List) ⇒<br />
Insert<br />
and<br />
Interface ⇒ Analog Output ⇒ Channel n ⇒<br />
Parameter Assignment ⇒ Input Kilowatts ⇒ Scale<br />
and<br />
Advanced ⇒ Window comparators ⇒ Parameter<br />
⇒ Input Kilowatts<br />
Overview: This parameter provides an indication<br />
of the input kilowatts to the drive as a metering<br />
display or an analog output. The window comparator<br />
output may be used to indicate a particular<br />
input kilowatt level has been reached.<br />
INVERSE ROTATION<br />
Setup Display: Inverse Rotation<br />
Operation Display: NA<br />
Type: Selection<br />
Stop Protection: Yes<br />
Item ID: 495<br />
Maximum Setting: NA<br />
Minimum Setting: NA<br />
Menu Path: Interface ⇒ Keypad ⇒ Parameter<br />
List ⇒ Insert<br />
and<br />
Setup ⇒ Motor parameters ⇒ Inverse Rotation<br />
AF95/IS905 Programmer’s Manual<br />
A-30<br />
Overview: This parameter provides the ability to<br />
change the output phase rotation of the drive.<br />
This allows motor rotation in a particular direction<br />
to be equivalent to a forward display indication at<br />
the drive. It is the electronic equivalent of rotating<br />
the motor leads to change direction.<br />
IR COMPENSATION<br />
Setup Display: IR Compensation<br />
Operation Display: IRcomp<br />
Type: Parameter<br />
Stop Protection: No<br />
Item ID: 228<br />
Maximum Setting: 50 volts at 100 % load<br />
Minimum Setting: 0.0 volts at 100 % load<br />
Menu Path: Interface ⇒ Keypad ⇒ Parameter<br />
List (or Operation Display List) ⇒<br />
Insert<br />
and<br />
Interface ⇒ Analog Input ⇒ Channel n ⇒ Parameter<br />
Assignment ⇒ IR Compensation ⇒ Scale<br />
and<br />
Interface ⇒ Analog Output ⇒ Channel n ⇒<br />
Parameter Assignment ⇒ IR Compensation ⇒<br />
Scale<br />
and<br />
Setup ⇒ Motor parameters ⇒ IR Compensation<br />
and<br />
Advanced ⇒ Command Batches ⇒ Batch # ⇒<br />
User Selection ⇒ Set Parameter<br />
Overview: This parameter provides a voltage<br />
boost to the motor based on the actual load, compensating<br />
for the voltage drop in the cable due to<br />
the load current. It is adjustable over a range of 0<br />
to 50 volts at 100 percent load current.
Commands, Parameters, and Settings<br />
APPENDIX<br />
JERK RATE n<br />
Setup Display: Jerk Rate n (n = 1 or 2)<br />
Operation Display: None<br />
Type: Parameter<br />
Stop Protection: No<br />
Item ID: 438 and 442<br />
Maximum Setting: 100 Hertz/second2<br />
Minimum Setting: 0.01 Hertz/second2<br />
Menu Path: Interface ⇒ Keypad ⇒ Parameter<br />
List ⇒ Insert<br />
and<br />
Setup ⇒ Speeds ⇒ Man/Auto Ramps ⇒<br />
Ramp Selection ⇒ Curve Type ⇒ S-Curve ⇒<br />
Jerk Rate n<br />
and<br />
Advanced ⇒ Command Batches ⇒ Batch # ⇒<br />
User Selection ⇒ Set Parameter<br />
Overview: Jerk rate is used to define s curve<br />
acceleration/deceleration curve. It provides the<br />
ability to modify the shape of the curve by establishing<br />
the rate of change of the ramp rate.<br />
For additional related information see:<br />
Ramp n Mode Max Accel n<br />
JERK RATE JOG<br />
Setup Display: Jerk Rate Jog<br />
Operation Display: None<br />
Type: Parameter<br />
Stop Protection: No<br />
Item ID: 446<br />
Maximum Setting: 100 Hertz/second2<br />
Minimum Setting: 0.01 Hertz/second2<br />
Menu Path: Interface ⇒ Keypad ⇒ Parameter<br />
List ⇒ Insert<br />
and<br />
Setup ⇒ Speeds ⇒ Jog Speed ⇒ Jog Curve Type<br />
⇒ S-Curve ⇒ Jerk Rate<br />
and<br />
Advanced ⇒ Command Batches ⇒ Batch # ⇒<br />
User Selection ⇒ Set Parameter<br />
Overview: Jerk rate jog is used to define s curve<br />
acceleration/deceleration curve for jogging. It provides<br />
the ability to modify the shape of the curve<br />
by establishing the rate of change of the ramp rate<br />
For additional related information see:<br />
Jerk Rate n<br />
Jog Mode<br />
Max Jog Accel<br />
JOG n DIRECTION<br />
Setup Display: Jog n Direction (n = 1 or 2)<br />
Operation Display: None<br />
Type: Selection<br />
Stop Protection: No<br />
Item ID: 188 and 189<br />
Maximum Setting: NA<br />
Minimum Setting: NA<br />
Menu Path: Interface ⇒ Keypad ⇒ Parameter<br />
List ⇒ Insert<br />
and<br />
Setup ⇒ Speeds ⇒ Jog Speed ⇒ Jog n Direction<br />
Overview: This selection determines the direction<br />
that the drive will operate when Jog 1 or 2 is chosen.<br />
The three choices are forward, reverse or<br />
normal. Choosing normal causes the drive to<br />
operate in the direction chosen by the keypad F/R<br />
button or an external direction digital input, dependent<br />
upon which is active. The direction chosen<br />
for Jog 1 applies also to the keypad Jog button.<br />
Note that even with the Reverse Enable disabled,<br />
it is possible to jog in reverse by selecting the Jog<br />
n Direction as reverse.<br />
For additional related information see:<br />
Forward Forward/Reverse<br />
Reverse<br />
AF95/IS905 Programmer’s Manual<br />
A-31
Commands, Parameters, and Settings<br />
APPENDIX<br />
JOG ACCEL<br />
Setup Display: Jog Accel<br />
Operation Display: AccelJ<br />
Type: Parameter<br />
Stop Protection: No<br />
Item ID: 443<br />
Maximum Setting: 1000 seconds<br />
Minimum Setting: 0.3 seconds<br />
Menu Path: Interface ⇒ Keypad ⇒ Parameter<br />
List (or Operation Display List) ⇒<br />
Insert<br />
and<br />
Setup ⇒ Speeds ⇒ Jog Speed ⇒ Jog Accel<br />
and<br />
Advanced ⇒ Command Batches ⇒ Batch # ⇒<br />
User Selection ⇒ Set Parameter<br />
and<br />
Interface ⇒ Analog Input ⇒ Channel n ⇒ Parameter<br />
Assignment ⇒ Jog Accel<br />
and<br />
Interface ⇒ Analog Output ⇒ Channel n ⇒<br />
Parameter Assignment ⇒ Jog Accel<br />
Overview: This parameter sets the jog acceleration<br />
time from zero speed to the drive maximum<br />
speed.<br />
For additional related information see:<br />
Accel Time Decel 2 Time<br />
Accel 2 Time Jog Decel<br />
Decel Time<br />
AF95/IS905 Programmer’s Manual<br />
A-32<br />
JOG DECEL<br />
Setup Display: Jog Decel<br />
Operation Display: DecelJ<br />
Type: Parameter<br />
Stop Protection: No<br />
Item ID: 444<br />
Maximum Setting: 1000 seconds<br />
Minimum Setting: 0.3 seconds<br />
Menu Path: Interface ⇒ Keypad ⇒ Parameter<br />
List (or Operation Display List) ⇒<br />
Insert<br />
and<br />
Setup ⇒ Speeds ⇒ Jog Speed ⇒ Jog Decel<br />
and<br />
Advanced ⇒ Command Batches ⇒ Batch # ⇒<br />
User Selection ⇒ Set Parameter<br />
and<br />
Interface ⇒ Analog Input ⇒ Channel n ⇒ Parameter<br />
Assignment ⇒ Jog Accel<br />
and<br />
Interface ⇒ Analog Output ⇒ Channel n ⇒<br />
Parameter Assignment ⇒ Jog Accel<br />
Overview: This parameter sets the jog deceleration<br />
time from the drive maximum speed to zero<br />
speed.<br />
For additional related information see:<br />
Accel Time Decel 2 Time<br />
Accel 2 Time Jog Accel<br />
Decel Time
Commands, Parameters, and Settings<br />
APPENDIX<br />
JOG MODE<br />
Setup Display: Jog Mode<br />
Operation Display: None<br />
Type: Selection<br />
Stop Protection: No<br />
Item ID: 449<br />
Maximum Setting: NA<br />
Minimum Setting: NA<br />
Menu Path: Interface ⇒ Keypad ⇒ Parameter<br />
List ⇒ Insert<br />
and<br />
Setup ⇒ Speeds ⇒ Jog Speed ⇒ Jog Mode<br />
Overview: This selection determines whether the<br />
jog ramp will be linear or an s-curve.<br />
For additional related information see:<br />
Jog Accel Jerk Rate Jog<br />
Jog Decel Max Jog Accel<br />
JOG SPEED n<br />
Setup Display: Jog Speed n (n = 1 or 2)<br />
Operation Display: Jspd n<br />
Type: Parameter<br />
Stop Protection: No<br />
Item ID: 162 and 163<br />
Maximum Setting: Maximum drive frequency in<br />
hertz, RPM, or user defined units<br />
Minimum Setting: 1 hertz, or the equivalent in<br />
RPM, or user defined units<br />
Menu Path: Interface ⇒ Keypad ⇒ Parameter<br />
List (or Operation Display List) ⇒<br />
Insert<br />
and<br />
Setup ⇒ Speeds ⇒ Jog Speed ⇒ Jog Speed n<br />
and<br />
Advanced ⇒ Command Batches ⇒ Batch # ⇒<br />
User Selection ⇒ Set Parameter<br />
and<br />
Advanced ⇒ Window comparators ⇒ Parameter<br />
⇒ Jog Speed n<br />
and<br />
Interface ⇒ Analog Input ⇒ Channel n ⇒ Parameter<br />
Assignment ⇒ Jog Speed n<br />
and<br />
Interface ⇒ Analog Output ⇒ Channel n ⇒<br />
Parameter Assignment ⇒ Jog Speed n<br />
Overview: This parameter sets the jog speed or<br />
displays the jog speed reference. The window<br />
comparator output may be used to indicate a particular<br />
jog speed is within the specified window.<br />
For additional related information see:<br />
Jog Accel Max Jog Accel<br />
Jog Decel Jog Mode<br />
Jerk Rate Jog<br />
JUMP SPDn HIGH<br />
Setup Display: Jump Spdn High (n = 1 to 5)<br />
Operation Display: None<br />
Type: Parameter<br />
Stop Protection: No<br />
Item ID: 344, 377, 379, 381, 383<br />
Maximum Setting: Maximum drive frequency in<br />
hertz, RPM, or user defined units<br />
Minimum Setting: 0.0 hertz, or the equivalent in<br />
RPM, or user defined units<br />
Menu Path: Interface ⇒ Keypad ⇒ Parameter<br />
List ⇒ Insert<br />
and<br />
Setup ⇒ Speeds ⇒ Speed Jumps ⇒ Jump Spdn<br />
High<br />
and<br />
Advanced ⇒ Command Batches ⇒ Batch # ⇒<br />
User Selection ⇒ Set Parameter<br />
Overview: This parameter sets thehigh speed<br />
end of the speed avoidance feature. In combination<br />
with the low speed end, one to five speed<br />
ranges can be selected to be avoided during operation.<br />
The operating speed point will always be<br />
outside of the selected range(s) even if the set<br />
speed is within a range, since the drive will accelerate<br />
through the range.<br />
For additional related information see:<br />
Jump Spdn Low<br />
AF95/IS905 Programmer’s Manual<br />
A-33
Commands, Parameters, and Settings<br />
APPENDIX<br />
JUMP SPDn LOW<br />
Setup Display: Jump SPDn Low (n = 1 to 5)<br />
Operation Display: None<br />
Type: Parameter<br />
Stop Protection: No<br />
Item ID: 345, 378, 380, 382, 384<br />
Maximum Setting: Maximum drive frequency in<br />
hertz, RPM, or user defined units<br />
Minimum Setting: 0.0 hertz, or the equivalent in<br />
RPM, or user defined units<br />
Menu Path: Interface ⇒ Keypad ⇒ Parameter<br />
List ⇒ Insert<br />
and<br />
Setup ⇒ Speeds ⇒ Speed Jumps ⇒ Jump Spdn<br />
Low<br />
and<br />
Advanced ⇒ Command Batches ⇒ Batch # ⇒<br />
User Selection ⇒ Set Parameter<br />
Overview: This parameter sets the low speed end<br />
of the speed avoidance feature. In combination<br />
with the high speed end, one to five speed ranges<br />
can be selected to be avoided during operation.<br />
The operating speed point will always be outside<br />
of the selected range(s) even if the set speed is<br />
within a range, since the drive will decelerate<br />
through the range.<br />
For additional related information see:<br />
Jump Spdn High<br />
KEYPAD FORWARD<br />
Setup Display: Keypad Forward<br />
Operation Display: NA<br />
Type: Command<br />
Stop Protection: No<br />
Item ID: 500<br />
Maximum Setting: NA<br />
Minimum Setting: NA<br />
Menu Path: Interface ⇒ Keypad ⇒ Parameter<br />
List ⇒ Insert<br />
and<br />
AF95/IS905 Programmer’s Manual<br />
A-34<br />
Advanced ⇒ Command Batches ⇒ Batch # ⇒<br />
User Selection ⇒ Keypad Forward<br />
and<br />
Advanced ⇒ Miscellaneous ⇒ Motor Direction ⇒<br />
Forward<br />
Overview: If the direction indication is reverse,<br />
depressing the keypad Forward/Reverse button<br />
results in this command being issued to change<br />
the direction of the output phase rotation of the<br />
drive and thus the rotational direction of the connected<br />
motor from reverse to forward.<br />
For additional related information see:<br />
Keypad Reverse Remote Reverse<br />
Remote Forward Reverse Enable<br />
KEYPAD REVERSE<br />
Setup Display: Keypad Reverse<br />
Operation Display: NA<br />
Type: Command<br />
Stop Protection: No<br />
Item ID: 501<br />
Maximum Setting: NA<br />
Minimum Setting: NA<br />
Menu Path: Interface ⇒ Keypad ⇒ Parameter<br />
List ⇒ Insert<br />
and<br />
Advanced ⇒ Command Batches ⇒ Batch # ⇒<br />
User Selection ⇒ Keypad Reverse<br />
and<br />
Advanced ⇒ Miscellaneous ⇒ Motor Direction ⇒<br />
Reverse<br />
Overview: If the direction indication is forward,<br />
depressing the keypad Forward/Reverse button<br />
results in this command being issued to change<br />
the direction of the output phase rotation of the<br />
drive and thus the rotational direction of the connected<br />
motor from forward to reverse. This command<br />
may be disabled by use of the Reverse<br />
Enable selection.<br />
For additional related information see:<br />
Keypad Forward Remote Reverse<br />
Remote Forward Reverse Enable
Commands, Parameters, and Settings<br />
APPENDIX<br />
KEYPAD SPEED<br />
Setup Display: Keypad Speed<br />
Operation Display: KpdSpd<br />
Type: Parameter<br />
Stop Protection: No<br />
Item ID: 159<br />
Maximum Setting: Maximum Speed<br />
Minimum Setting: Minimum Speed<br />
Menu Path: Interface ⇒ Keypad ⇒ Parameter<br />
List (or Operation Display List) ⇒<br />
Insert<br />
and<br />
Advanced ⇒ Command Batches ⇒ Batch # ⇒<br />
User Selection ⇒ Set Parameter<br />
and<br />
Advanced ⇒ Window comparators ⇒ Parameter<br />
⇒ Keypad Speed<br />
Overview: This parameter is the speed at which<br />
the drive will operate when in the keypad mode. It<br />
can be adjusted by the Faster or Slower buttons<br />
in the Speed section of the keypad or by changing<br />
the parameter setting if it is an available parameter.<br />
The window comparator output may be used<br />
to indicate that a particular speed is within the<br />
specified window.<br />
For additional related information see:<br />
Maximum Speed<br />
Minimum Speed<br />
KILOWATT HOURS<br />
Setup Display: Kilowatt Hours<br />
Operation Display: KW Hrs<br />
Type: Parameter<br />
Stop Protection: NA<br />
Item ID: 370<br />
Maximum Setting: 9,999 kilowatt hours<br />
Minimum Setting: 0 kilowatt hours<br />
Menu Path: Interface ⇒ Keypad ⇒ Parameter<br />
List (or Operation Display List) ⇒<br />
Insert<br />
and<br />
Advanced ⇒ Window comparators ⇒ Parameter<br />
⇒ Kilowatt Hours<br />
Overview: This parameter provides for the display<br />
of kilowatt hours. The maximum value displayable<br />
is 9,999 after which the display roles over to 0 at<br />
10,000 kilowatt hours. For larger drives it is suggested<br />
that the Megawatt Hours display be used.<br />
The window comparator output may be used to<br />
indicate that a particular kilowatt hour level is<br />
within the specified window.<br />
For additional related information see:<br />
Megawatt Hours<br />
Clear KW Hours<br />
LINE VOLTAGE<br />
Setup Display: Line Voltage<br />
Operation Display: LineV<br />
Type: Parameter<br />
Stop Protection: NA<br />
Item ID: 20<br />
Maximum Setting: 1,004<br />
Minimum Setting: 0<br />
Menu Path: Interface ⇒ Keypad ⇒ Parameter<br />
List (or Operation Display List) ⇒<br />
Insert<br />
and<br />
Interface ⇒ Analog Output ⇒ Channel n ⇒<br />
Parameter Assignment ⇒ Line Voltage<br />
and<br />
Advanced ⇒ Window comparators ⇒ Parameter<br />
⇒ Line Voltage<br />
Overview: This parameter provides for the display<br />
of the input line voltage to the drive and for the<br />
external indication of such with an analog output.<br />
The window comparator output may be used to<br />
indicate that a particular line voltage level is within<br />
the specified window.<br />
AF95/IS905 Programmer’s Manual<br />
A-35
Commands, Parameters, and Settings<br />
APPENDIX<br />
LO SPD FLA FREQ<br />
Setup Display: Lo SPD FLA Freq<br />
Operation Display: NA<br />
Type: Parameter<br />
Stop Protection: Yes<br />
Item ID: 363<br />
Maximum Setting: Maximum drive frequency<br />
Minimum Setting: 0.0 Hertz<br />
Menu Path: Interface ⇒ Keypad ⇒ Parameter<br />
List ⇒ Insert<br />
and<br />
Setup ⇒ Motor Parameters ⇒ Motor Overload<br />
Profile ⇒ Low Speed Breakpoint<br />
and<br />
Advanced ⇒ Command Batches ⇒ Batch # ⇒<br />
User Selection ⇒ Set Parameter<br />
Overview: This designates the low breakpoint<br />
frequency for the motor full load current overload<br />
curve.<br />
For additional related information see:<br />
Low Speed FLA Hi Speed FLA %<br />
Low Speed FLA % Hi Spd FLA Freq<br />
Lo Spd FLA Frq % Hi Spd FLA Frq %<br />
Hi Speed FLA<br />
LO SPD FLA FRQ %<br />
Setup Display: Lo SPD FLA Frq %<br />
Operation Display: NA<br />
Type: Parameter<br />
Stop Protection: Yes<br />
Item ID: 509<br />
Maximum Setting: 100 percent<br />
Minimum Setting: 0 percent<br />
Menu Path: Interface ⇒ Keypad ⇒ Parameter<br />
List ⇒ Insert<br />
and<br />
AF95/IS905 Programmer’s Manual<br />
A-36<br />
Advanced ⇒ Command Batches ⇒ Batch # ⇒<br />
User Selection ⇒ Set Parameter<br />
Overview: This designates the low breakpoint<br />
frequency for the motor full load current overload<br />
curve in percent.<br />
For additional related information see:<br />
Low Speed FLA Hi Speed FLA %<br />
Low Speed FLA % Hi Spd FLA Freq<br />
Lo Spd FLA Freq Hi Spd FLA Frq %<br />
Hi Speed FLA<br />
LOAD<br />
Setup Display: Load<br />
Operation Display: Load<br />
Type: Parameter<br />
Stop Protection: NA<br />
Item ID: 19<br />
Maximum Setting: 450%<br />
Minimum Setting: -5% (- 450% with dynamic<br />
braking)<br />
Menu Path: Interface ⇒ Keypad ⇒ Parameter<br />
List (or Operation Display List) ⇒<br />
Insert<br />
and<br />
Interface ⇒ Analog Output ⇒ Channel n ⇒<br />
Parameter Assignment ⇒ Load ⇒ Scale<br />
and<br />
Advanced ⇒ Window comparators ⇒ Parameter<br />
⇒ Load<br />
Overview: This parameter shows the load<br />
present in percent based on user horsepower.<br />
The analog output can be modified so that the 0 to<br />
10 volt output can correspond to the user selected<br />
scale values.
Commands, Parameters, and Settings<br />
APPENDIX<br />
LOAD CONFIG n<br />
Setup Display: Load Config n (n = 1 to 10 and 2a<br />
to 10a)<br />
Operation Display: NA<br />
Type: Command<br />
Stop Protection: Yes<br />
Item ID: 245 through 254 and 513 through 521<br />
Maximum Setting: NA<br />
Minimum Setting: NA<br />
Menu Path: Interface ⇒ Keypad ⇒ Parameter<br />
List ⇒ Insert<br />
Overview: The addition of this command to the<br />
menu list provides the ability to change the I/O<br />
device configuration from that currently loaded to<br />
any of the configurations in the Scroll Parameter<br />
list. Configurations 1 to 10 and 2a to 10a are<br />
standard preprogrammed setups.<br />
For additional related information see:<br />
Active Config #<br />
Chng Std Config<br />
LOAD PRESET n<br />
Setup Display: Load Preset n (n = 00 to 31)<br />
Operation Display: NA<br />
Type: Command<br />
Stop Protection: No<br />
Item ID: 78 through 109<br />
Maximum Setting: NA<br />
Minimum Setting: NA<br />
Menu Path: Interface ⇒ Keypad ⇒ Parameter<br />
List ⇒ Insert<br />
and<br />
Interface ⇒ Digital Input ⇒ Pin # ⇒ Individual<br />
Preset n<br />
and<br />
Advanced ⇒ Speed Source ⇒ Load Preset<br />
and<br />
Advanced ⇒ Command Batches ⇒ Batch # ⇒<br />
User Selection ⇒ Load Preset n<br />
Overview: This command loads a preset speed,<br />
which can then become the operating speed setpoint<br />
when in manual mode. The preset speed<br />
can also be loaded by energizing the preprogrammed<br />
digital input corresponding to the<br />
desired speed or by using the binary encoded<br />
inputs. Preset 00 defaults to the speed potentiometer<br />
input terminals in all of the standard preprogrammed<br />
configurations except for 1, 10 and<br />
10a.<br />
For additional related information see:<br />
Preset n<br />
LOW SPEED FLA<br />
Setup Display: Low Speed FLA<br />
Operation Display: NA<br />
Type: Parameter<br />
Stop Protection: Yes<br />
Item ID: 362<br />
Maximum Setting: Motor full load amp setting<br />
Minimum Setting: 0<br />
Menu Path: Interface ⇒ Keypad ⇒ Parameter<br />
List ⇒ Insert<br />
and<br />
Setup ⇒ Motor Parameters ⇒ Motor Overload<br />
Profile ⇒ Low Range Current<br />
and<br />
Advanced ⇒ Command Batches ⇒ Batch # ⇒<br />
User Selection ⇒ Set Parameter<br />
Overview: This designates the lower breakpoint<br />
current for a customized motor overload curve.<br />
For additional related information see:<br />
Low Speed FLA % Hi Speed FLA %<br />
Lo Spd FLA Freq Hi Spd FLA Freq<br />
Lo Spd FLA Frq % Hi Spd FLA Frq %<br />
Hi Speed FLA<br />
AF95/IS905 Programmer’s Manual<br />
A-37
Commands, Parameters, and Settings<br />
APPENDIX<br />
LOW SPEED FLA %<br />
Setup Display: Low Speed FLA %<br />
Operation Display: NA<br />
Type: Parameter<br />
Stop Protection: Yes<br />
Item ID: 507<br />
Maximum Setting: 125 Percent<br />
Minimum Setting: 0.0 Percent<br />
Menu Path: Interface ⇒ Keypad ⇒ Parameter<br />
List ⇒ Insert<br />
and<br />
Advanced ⇒ Command batches ⇒ Batch # ⇒<br />
User Selection ⇒ Set Parameter<br />
Overview: This designates the lower breakpoint<br />
current for a customized motor overload curve in<br />
percent.<br />
For additional related information see:<br />
Low Speed FLA Hi Speed FLA %<br />
Lo Spd FLA Freq Hi Spd FLA Freq<br />
Lo Spd FLA Frq % Hi Spd FLA Frq %<br />
Hi Speed FLA<br />
MANUAL REFERENCE<br />
Setup Display: Manual Reference<br />
Operation Display: NA<br />
Type: Command<br />
Stop Protection: No<br />
Item ID: 76<br />
Maximum Setting: NA<br />
Minimum Setting: NA<br />
Menu Path: Interface ⇒ Keypad ⇒ Parameter<br />
List ⇒ Insert<br />
and<br />
Interface ⇒ Digital Input ⇒ Pin # ⇒ Manual Reference<br />
and<br />
AF95/IS905 Programmer’s Manual<br />
A-38<br />
Advanced ⇒ Command batches ⇒ Batch # ⇒<br />
User Selection ⇒ Manual Reference<br />
and<br />
Advanced ⇒ Speed source ⇒ Reference source<br />
⇒ Manual<br />
and<br />
Interface ⇒ Digital Output ⇒ Pin # ⇒ Manual<br />
Reference<br />
Overview: This command puts the drive into the<br />
manual mode. The reference input will be from<br />
one of the preset speed inputs when selected.<br />
For additional related information see:<br />
Auto Mode Select PID<br />
Auto Reference Follower Speed<br />
MAX ACCEL n<br />
Setup Display: Max Accel n (n = 1 or 2)<br />
Operation Display: AccMxn (n = 1 or 2)<br />
Type: Parameter<br />
Stop Protection: No<br />
Item ID: 437 and 441<br />
Maximum Setting: 200 Hertz/second<br />
Minimum Setting: 0.1 Hertz/second<br />
Menu Path: Interface ⇒ Keypad ⇒ Parameter<br />
List (or Operation Display List) ⇒<br />
Insert<br />
and<br />
Setup ⇒ Speeds ⇒ Man/auto ramps ⇒ S-Curve<br />
⇒ Max Accel n<br />
and<br />
Interface ⇒ Analog Input ⇒ Channel n ⇒ Parameter<br />
Assignment ⇒ Max Accel n<br />
and<br />
Interface ⇒ Analog Output ⇒ Channel n ⇒<br />
Parameter Assignment ⇒ Max Accel n
Commands, Parameters, and Settings<br />
APPENDIX<br />
and<br />
Advanced ⇒ Command batches ⇒ Batch # ⇒<br />
User Selections ⇒ Set Parameter<br />
Overview: When using an s acceleration curve,<br />
the acceleration rate is limited to this set value of<br />
Hz/sec.<br />
For additional related information see:<br />
Max Jog Accel Ramp n Mode<br />
Accel Time Decel Time<br />
Accel 2 Time Decel 2 Time<br />
Ramp n Jerk Rate n<br />
MAX JOG ACCEL<br />
Setup Display: Max Jog Accel<br />
Operation Display: AccMxJ<br />
Type: Parameter<br />
Stop Protection: No<br />
Item ID: 445<br />
Maximum Setting: 200 Hertz/second<br />
Minimum Setting: 0.1 Hertz/second<br />
Menu Path: Interface ⇒ Keypad ⇒ Parameter<br />
List (or Operation Display List) ⇒<br />
Insert<br />
and<br />
Setup ⇒ Speeds ⇒ Jog Speed ⇒ Jog Curve Type<br />
⇒ S-Curve ⇒ Max Jog Accel<br />
and<br />
Interface ⇒ Analog Input ⇒ Channel n ⇒ Parameter<br />
Assignment ⇒ Max Jog Accel<br />
and<br />
Interface ⇒ Analog Output ⇒ Channel n ⇒<br />
Parameter Assignment ⇒ Max Jog Accel<br />
and<br />
Advanced ⇒ Command batches ⇒ Batch # ⇒<br />
User Selections ⇒ Set Parameter<br />
Overview: When using an s acceleration curve<br />
for jogging, the acceleration rate is limited to this<br />
set value of Hz/sec.<br />
For additional related information see:<br />
Max Accel n Ramp n Mode<br />
Accel Time Decel Time<br />
Accel 2 Time Decel 2 Time<br />
Ramp n<br />
MAX V/HZ FREQ<br />
Setup Display: Max V/Hz Freq<br />
Operation Display: NA<br />
Type: Parameter<br />
Stop Protection: Yes<br />
Item ID: 411<br />
Maximum Setting: 133 Hertz<br />
Minimum Setting: 0.0 Hertz<br />
Menu Path: Interface ⇒ Keypad ⇒ Parameter<br />
List ⇒ Insert<br />
and<br />
Setup ⇒ Motor Parameters ⇒ Volts/Hz Profile ⇒<br />
High Speed Breakpoint<br />
and<br />
Advanced ⇒ Command batches ⇒ Batch # ⇒<br />
User Selections ⇒ Set Parameter<br />
Overview: This parameter sets the high speed<br />
breakpoint for a customized volts per hertz profile.<br />
For additional related information see:<br />
Maximum V/Hz Accel 2 Time<br />
Min V/Hz Freq Minimum V/Hz<br />
AF95/IS905 Programmer’s Manual<br />
A-39
Commands, Parameters, and Settings<br />
APPENDIX<br />
MAX V/HZ FREQ%<br />
Setup Display: Max V/Hz Freq%<br />
Operation Display: NA<br />
Type: Parameter<br />
Stop Protection: Yes<br />
Item ID: 502<br />
Maximum Setting: 400 percent<br />
Minimum Setting: 0.0 percent<br />
Menu Path: Interface ⇒ Keypad ⇒ Parameter<br />
List ⇒ Insert<br />
and<br />
Advanced ⇒ Command batches ⇒ Batch # ⇒<br />
User Selections ⇒ Set Parameter<br />
Overview: This parameter sets the high speed<br />
breakpoint for a customized volts per hertz profile<br />
as a percentage of the motor nameplate frequency.<br />
For additional related information see:<br />
Maximum VHz Accel 2 Time<br />
Min V/Hz Freq Minimum VHz<br />
MAXIMUM ILIMIT<br />
Setup Display: Maximum ILimit<br />
Operation Display: NA<br />
Type: Parameter<br />
Stop Protection: No<br />
Item ID: 276<br />
Maximum Setting: 200%<br />
Minimum Setting: 0.0%<br />
Menu Path: Advanced ⇒ Nameplate ⇒<br />
Maximum ILimit<br />
Overview: This parameter sets the maximum<br />
level of the current limit adjustment. It is used for<br />
setting the drive configuration off-line. It does not<br />
provide for a user set current limit level.<br />
For additional related information see:<br />
Current Limit +<br />
Current Limit -<br />
AF95/IS905 Programmer’s Manual<br />
A-40<br />
MAXIMUM SPEED<br />
Setup Display: Maximum Speed<br />
Operation Display: MaxSpd<br />
Type: Parameter<br />
Stop Protection: Yes<br />
Item ID: 115<br />
Maximum Setting: 133 Hertz, or the equivalent<br />
in RPM, or user defined units<br />
Minimum Setting: 1 Hertz, or the equivalent in<br />
RPM, or user defined units<br />
Menu Path: Interface ⇒ Keypad ⇒ Parameter<br />
List (or Operation Display List) ⇒<br />
Insert<br />
and<br />
Setup ⇒ Speed units/limits ⇒ Drive Speed Limits<br />
⇒ Maximum Drive Speed<br />
and<br />
Advanced ⇒ Command batches ⇒ Batch # ⇒<br />
User Selections ⇒ Set Parameter<br />
Overview: This parameter sets the maximum<br />
drive speed limit. It may be set in hertz, RPM, or<br />
user selected unit scaled to frequency.<br />
For additional related information see:<br />
Minimum Speed<br />
Spd Unit Select<br />
MAXIMUM V/HZ<br />
Setup Display: Maximum V/Hz<br />
Operation Display: NA<br />
Type: Parameter<br />
Stop Protection: Yes<br />
Item ID: 413<br />
Maximum Setting: 15 volts/hertz<br />
Minimum Setting: 0.0 volts/hertz<br />
Menu Path: Interface ⇒ Keypad ⇒ Parameter<br />
List ⇒ Insert<br />
and<br />
Setup ⇒ Motor parameters ⇒ Volts/Hz Profile ⇒<br />
High Speed V/Hz
Commands, Parameters, and Settings<br />
APPENDIX<br />
and<br />
Advanced ⇒ Command batches ⇒ Batch # ⇒<br />
User Selections ⇒ Set Parameter<br />
Overview: This parameter sets the maximum<br />
drive volts/hertz level for a customized volts/hertz<br />
curve.<br />
For additional related information see:<br />
Minimum V/Hz Max V/Hz Freq<br />
Minimum V/Hz % Max V/Hz Freq%<br />
Minimum V/Hz Freq<br />
MAXIMUM V/HZ%<br />
Setup Display: Maximum V/Hz%<br />
Operation Display: NA<br />
Type: Parameter<br />
Stop Protection: Yes<br />
Item ID: 504<br />
Maximum Setting: 500 percent<br />
Minimum Setting: 0.0 percent<br />
Menu Path: Interface ⇒ Keypad ⇒ Parameter<br />
List ⇒ Insert<br />
and<br />
Advanced ⇒ Command batches ⇒ Batch # ⇒<br />
User Selections ⇒ Set Parameter<br />
Overview: This parameter sets the maximum<br />
drive volts/hertz level as a percentage of the<br />
nameplate volts/hertz.<br />
For additional related information see:<br />
Minimum V/Hz Max V/Hz Freq<br />
Minimum V/Hz % Max V/Hz Freq<br />
Minimum V/Hz Freq<br />
MC INPUT n<br />
Setup Display: MC Input n (where n=1 to 16)<br />
Operation Display: NA<br />
Type: Command<br />
Stop Protection: No<br />
Item ID: 320 through 335<br />
Maximum Setting: NA<br />
Minimum Setting: NA<br />
Menu Path: Interface ⇒ Keypad ⇒ Parameter<br />
List ⇒ Insert<br />
and<br />
Interface ⇒ Digital Input ⇒ Pin # ⇒ MC Input n/n<br />
and<br />
Interface ⇒ Digital Input ⇒ Pin # ⇒ MC Input n<br />
and<br />
Advanced ⇒ Command batches ⇒ Batch # ⇒<br />
User Selections ⇒ MC Input n<br />
Overview: This command is used to initiate a<br />
machine control function as part of the selections<br />
available for use in programming inputs and outputs<br />
as well as from the keypad.<br />
For additional related information see:<br />
Control Item n<br />
MEGAWATT HOURS<br />
Setup Display: Megawatt Hours<br />
Operation Display: MWH<br />
Type: Parameter<br />
Stop Protection: No<br />
Item ID: 486<br />
Maximum Setting: 9,999 megawatt hours<br />
Minimum Setting: 0 megawatt hours<br />
Menu Path: Interface ⇒ Keypad ⇒ Parameter<br />
List (or Operation Display List) ⇒<br />
Insert<br />
and<br />
Advanced ⇒ Window comparators ⇒ Parameter<br />
⇒ Megawatt Hours<br />
Overview: This parameter provides for the display<br />
of megawatt hours. The maximum value displayable<br />
is 9,999 after which the display roles over to<br />
0 at 10,000 megawatt hours.<br />
For additional related information see:<br />
Kilowatt Hours<br />
Clear KW Hours<br />
AF95/IS905 Programmer’s Manual<br />
A-41
Commands, Parameters, and Settings<br />
APPENDIX<br />
MIN V/HZ FREQ<br />
Setup Display: Min V/Hz Freq<br />
Operation Display: NA<br />
Type: Parameter<br />
Stop Protection: Yes<br />
Item ID: 412<br />
Maximum Setting: 133 Hertz<br />
Minimum Setting: 0.0 Hertz<br />
Menu Path: Interface ⇒ Keypad ⇒ Parameter<br />
List ⇒ Insert<br />
and<br />
Setup ⇒ Motor Parameters ⇒ Volts/Hz Profile ⇒<br />
Low Speed Breakpoint<br />
and<br />
Advanced ⇒ Command batches ⇒ Batch # ⇒<br />
User Selections ⇒ Set Parameter<br />
Overview: This parameter sets the low speed<br />
breakpoint for a customized volts per hertz profile.<br />
For additional related information see:<br />
Maximum V/Hz Minimum V/Hz<br />
Max V/Hz Freq Min V/Hz Freq %<br />
Accel 2 Time<br />
MIN V/HZ FREQ %<br />
Setup Display: Min V/Hz Freq %<br />
Operation Display: NA<br />
Type: Parameter<br />
Stop Protection: Yes<br />
Item ID: 503<br />
Maximum Setting: 400 percent<br />
Minimum Setting: 0.0 percent<br />
Menu Path: Interface ⇒ Keypad ⇒ Parameter<br />
List ⇒ Insert<br />
and<br />
AF95/IS905 Programmer’s Manual<br />
A-42<br />
Advanced ⇒ Command batches ⇒ Batch # ⇒<br />
User Selections ⇒ Set Parameter<br />
Overview: This parameter sets the low speed<br />
breakpoint for a customized volts per hertz profile<br />
in percent.<br />
For additional related information see:<br />
Maximum V/Hz Minimum V/Hz<br />
Max V/Hz Freq Min V/Hz Freq<br />
Accel 2 Time<br />
MINIMUM SPEED<br />
Setup Display: Minimum Speed<br />
Operation Display: MinSpd<br />
Type: Parameter<br />
Stop Protection: Yes<br />
Item ID: 114<br />
Maximum Setting: 133 Hertz, or the equivalent<br />
in RPM, or user defined units<br />
Minimum Setting: 1 Hertz, or the equivalent in<br />
RPM, or user defined units<br />
Menu Path: Interface ⇒ Keypad ⇒ Parameter<br />
List (or Operation Display List) ⇒<br />
Insert<br />
and<br />
Setup ⇒ Speed units/limits ⇒ Drive Speed Limits<br />
⇒ Minimum Drive Speed<br />
and<br />
Advanced ⇒ Command batches ⇒ Batch # ⇒<br />
User Selections ⇒ Set Parameter<br />
Overview: This parameter sets minimum drive<br />
speed limit. It may be set in hertz, RPM, or user<br />
selected unit scaled to frequency.<br />
For additional related information see:<br />
Maximum Speed<br />
Spd Unit Select
Commands, Parameters, and Settings<br />
APPENDIX<br />
MINIMUM V/HZ<br />
Setup Display: Minimum V/Hz<br />
Operation Display: NA<br />
Type: Parameter<br />
Stop Protection: Yes<br />
Item ID: 414<br />
Maximum Setting: 15 volts/hertz<br />
Minimum Setting: 0.0 volts/hertz<br />
Menu Path: Interface ⇒ Keypad ⇒ Parameter<br />
List ⇒ Insert<br />
and<br />
Setup ⇒ Motor parameters ⇒ Volts/Hz Profile ⇒<br />
Low Speed V/Hz<br />
and<br />
Advanced ⇒ Command batches ⇒ Batch # ⇒<br />
User Selections ⇒ Set Parameter<br />
Overview: This parameter sets the minimum<br />
drive volts/hertz level for a custom volts/hertz<br />
curve.<br />
For additional related information see:<br />
Maximum V/Hz Max V/Hz Freq%<br />
Minimum V/Hz Freq Minimum V/Hz %<br />
Max V/Hz Freq<br />
MINIMUM V/HZ %<br />
Setup Display: Minimum V/Hz %<br />
Operation Display: NA<br />
Type: Parameter<br />
Stop Protection: Yes<br />
Item ID: 505<br />
Maximum Setting: 500 percent<br />
Minimum Setting: 0.0 percent<br />
Menu Path: Interface ⇒ Keypad ⇒ Parameter<br />
List ⇒ Insert<br />
and<br />
Advanced ⇒ Command batches ⇒ Batch # ⇒<br />
User Selections ⇒ Set Parameter<br />
Overview: This parameter sets the minimum<br />
drive volts/hertz level for a custom volts/hertz<br />
curve in percent.<br />
For additional related information see:<br />
Maximum Vhz Max V/Hz Freq<br />
Minimum V/Hz Max V/Hz Freq %<br />
Minimum V/Hz Freq<br />
MOTOR CURRENT<br />
Setup Display: Motor Current<br />
Operation Display: MotorI<br />
Type: Parameter<br />
Stop Protection: NA<br />
Item ID: 21<br />
Maximum Setting: NA<br />
Minimum Setting: NA<br />
Menu Path: Interface ⇒ Keypad ⇒ Parameter<br />
List (or Operation Display List) ⇒<br />
Insert<br />
and<br />
Interface ⇒ Analog Output ⇒ Channel n ⇒<br />
Parameter Assignment ⇒ Motor Current<br />
and<br />
Advanced ⇒ Window comparators ⇒ Parameter<br />
⇒ Motor Current<br />
Overview: This parameter provides for an indication<br />
of the motor current during operation. In addition<br />
a window comparator can be used to indicate<br />
that the current is within a specified range.<br />
For additional related information see:<br />
Motor Voltage<br />
Motor Speed<br />
AF95/IS905 Programmer’s Manual<br />
A-43
Commands, Parameters, and Settings<br />
APPENDIX<br />
MOTOR HORSEPOWER<br />
Setup Display: Motor Horsepower<br />
Operation Display: NA<br />
Type: Parameter<br />
Stop Protection: Yes<br />
Item ID: 353<br />
Maximum Setting: Drive horsepower rating<br />
Minimum Setting: Rating of smallest motor<br />
allowed<br />
Menu Path: Interface ⇒ Keypad ⇒ Parameter<br />
List ⇒ Insert<br />
and<br />
Setup ⇒ Motor parameters ⇒ Motor Nameplate<br />
Data ⇒ Horsepower<br />
Overview: This parameter allows the setting of<br />
the horsepower rating of the motor connected to<br />
the drive. This setting affects the load display and<br />
current limit. It does not affect the motor current<br />
or drive overload rating.<br />
For additional related information see:<br />
Motor Nameplate Is Motor Nameplate V<br />
Motor Nameplate F<br />
MOTOR NAMEPLATE F<br />
Setup Display: Motor Nameplate Frequency<br />
Operation Display: NA<br />
Type: Parameter<br />
Stop Protection: Yes<br />
Item ID: 487<br />
Maximum Setting: NA<br />
Minimum Setting: NA<br />
Menu Path: Interface ⇒ Keypad ⇒ Parameter<br />
List ⇒ Insert<br />
and<br />
Setup ⇒ Motor parameters ⇒ Motor Nameplate<br />
Data ⇒ Frequency<br />
and<br />
AF95/IS905 Programmer’s Manual<br />
A-44<br />
Advanced ⇒ Command batches ⇒ Batch # ⇒<br />
User Selections ⇒ Set Parameter<br />
Overview: This parameter allows the setting of<br />
the nameplate frequency rating of the motor connected<br />
to the drive. This parameter must be set<br />
properly since it will affect the volts/hertz and<br />
motor overload profiles.<br />
For additional related information see:<br />
Motor Horsepower Motor Nameplate V<br />
Motor Nameplate I<br />
MOTOR NAMEPLATE I<br />
Setup Display: Motor Nameplate Amps<br />
Operation Display: NA<br />
Type: Parameter<br />
Stop Protection: Yes<br />
Item ID: 510<br />
Maximum Setting: NA<br />
Minimum Setting: NA<br />
Menu Path: Interface ⇒ Keypad ⇒ Parameter<br />
List ⇒ Insert<br />
and<br />
Setup ⇒ Motor parameters ⇒ Motor Nameplate<br />
Data ⇒ Current<br />
and<br />
Advanced ⇒ Command batches ⇒ Batch # ⇒<br />
User Selections ⇒ Set Parameter<br />
Overview: This parameter allows the setting of<br />
the nameplate ampere rating of the motor connected<br />
to the drive. This parameter must be set<br />
properly since it will affect motor overload profiles.<br />
This is especially true for application of a motor<br />
sized smaller than the drive rating.<br />
For additional related information see:<br />
Motor Horsepower Motor Nameplate V<br />
Motor Nameplate F
Commands, Parameters, and Settings<br />
APPENDIX<br />
MOTOR NAMEPLATE V<br />
Setup Display: Motor Nameplate Voltage<br />
Operation Display: NA<br />
Type: Parameter<br />
Stop Protection: Yes<br />
Item ID: 488<br />
Maximum Setting: NA<br />
Minimum Setting: NA<br />
Menu Path: Interface ⇒ Keypad ⇒ Parameter<br />
List ⇒ Insert<br />
and<br />
Setup ⇒ Motor parameters ⇒ Motor Nameplate<br />
Data ⇒ Voltage<br />
and<br />
Advanced ⇒ Command batches ⇒ Batch # ⇒<br />
User Selections ⇒ Set Parameter<br />
Overview: This parameter allows the setting of<br />
the nameplate voltage rating of the motor connected<br />
to the drive. This parameter must be set<br />
properly since it will affect the volts/hertz profile.<br />
For additional related information see:<br />
Motor Horsepower Motor Nameplate F<br />
Motor Nameplate I<br />
MOTOR OVLD FLDBK<br />
Setup Display: Motor Ovld Fldbk<br />
Operation Display: NA<br />
Type: Selection<br />
Stop Protection: No<br />
Item ID: 435<br />
Maximum Setting: NA<br />
Minimum Setting: NA<br />
Menu Path: Interface ⇒ Keypad ⇒ Parameter<br />
List ⇒ Insert<br />
and<br />
Setup ⇒ Motor parameters ⇒ Motor Overload<br />
Action ⇒ Foldback<br />
Overview: This selection sets up the drive’s<br />
action upon an overload condition. The action can<br />
be to trip the drive off line or to cause the speed to<br />
be decreased in an attempt to reduce the load to<br />
a point that it will be within normal levels. If the<br />
overload persists, a trip will occur.<br />
For additional related information see:<br />
Overload Class<br />
MOTOR SPEED<br />
Setup Display: Motor Speed<br />
Operation Display: Speed<br />
Type: Parameter<br />
Stop Protection: NA<br />
Item ID: 368<br />
Maximum Setting: NA<br />
Minimum Setting: NA<br />
Menu Path: Interface ⇒ Keypad ⇒ Parameter<br />
List (or Operation Display List) ⇒<br />
Insert<br />
and<br />
Interface ⇒ Analog Output ⇒ Channel n ⇒<br />
Parameter Assignment ⇒ Motor Speed<br />
and<br />
Advanced ⇒ Window comparators ⇒ Parameter<br />
⇒ Motor Speed<br />
Overview: This parameter provides an indication<br />
of the motor shaft speed in the selected speed<br />
units. This display is based on the setting of the<br />
slip compensation (slip comp) function and the<br />
load level. In addition a window comparator can<br />
be used to indicate that the speed is within a<br />
specified range.<br />
For additional related information see:<br />
Motor Current Output Speed<br />
Motor Voltage<br />
AF95/IS905 Programmer’s Manual<br />
A-45
Commands, Parameters, and Settings<br />
APPENDIX<br />
MOTOR VOLTAGE<br />
Setup Display: Motor Voltage<br />
Operation Display: MotorV<br />
Type: Parameter<br />
Stop Protection: NA<br />
Item ID: 18<br />
Maximum Setting: NA<br />
Minimum Setting: NA<br />
Menu Path: Interface ⇒ Keypad ⇒ Parameter<br />
List (or Operation Display List) ⇒<br />
Insert<br />
and<br />
Interface ⇒ Analog Output ⇒ Channel n ⇒<br />
Parameter Assignment ⇒ Motor Voltage<br />
and<br />
Advanced ⇒ Window comparators ⇒ Parameter<br />
⇒ Motor Voltage<br />
Overview: This parameter allows the viewing of<br />
the estimated voltage being applied to the motor<br />
terminals. In addition a window comparator can<br />
be used to indicate that the voltage is within a<br />
specified range.<br />
For additional related information see:<br />
Motor Current<br />
Motor Speed<br />
OPERATING V/HZ<br />
Setup Display: Operating V/Hz<br />
Operation Display: NA<br />
Type: Parameter<br />
Stop Protection: No<br />
Item ID: 488<br />
Maximum Setting: 15 volts/hertz<br />
Minimum Setting: 0.0 volts/hertz<br />
Menu Path: Interface ⇒ Keypad ⇒ Parameter<br />
List (or Operation Display List) ⇒<br />
Insert<br />
and<br />
Interface ⇒ Analog Output ⇒ Channel n ⇒<br />
Parameter Assignment ⇒ Operating V/Hz<br />
AF95/IS905 Programmer’s Manual<br />
A-46<br />
and<br />
Advanced ⇒ Window comparators ⇒ Parameter<br />
⇒ Operating V/Hz<br />
Overview: This parameter provides a view of the<br />
volts per hertz setpoint for the frequency of operation.<br />
In addition a window comparator can be used<br />
to indicate that the operating volts per hertz is<br />
within a specified range.<br />
For additional related information see:<br />
Maximum V/Hz<br />
Minimum V/Hz<br />
OUTPUT SPEED<br />
Setup Display: Output Speed<br />
Operation Display: Speed<br />
Type: Parameter<br />
Stop Protection: NA<br />
Item ID: 17<br />
Maximum Setting: Maximum speed setting, displayed<br />
in rpm, hertz or user speed units<br />
Minimum Setting: Minimum speed setting, displayed<br />
in rpm, hertz or user speed units<br />
Menu Path: Interface ⇒ Keypad ⇒ Parameter<br />
List (or Operation Display List) ⇒<br />
Insert<br />
and<br />
Interface ⇒ Analog Output ⇒ Channel n ⇒<br />
Parameter Assignment ⇒ Output Speed<br />
and<br />
Advanced ⇒ Window comparators ⇒ Parameter<br />
⇒ Output Speed<br />
Overview: This parameter provides a view of the<br />
synchronous speed of the motor displayed in the<br />
selected speed units. In addition a window comparator<br />
can be used to indicate that the output<br />
speed is within a specified range.<br />
For additional related information see:<br />
Motor Speed
Commands, Parameters, and Settings<br />
APPENDIX<br />
OVERLOAD CLASS<br />
Setup Display: Overload Class<br />
Operation Display: NA<br />
Type: Parameter<br />
Stop Protection: Yes<br />
Item ID: 491<br />
Maximum Setting: 20<br />
Minimum Setting: 10<br />
Menu Path: Setup ⇒ Motor Parameters ⇒<br />
Motor Overload Profile ⇒ Class<br />
Overview: This parameter provides a means of<br />
adjusting the motor overload function for class 10<br />
or class 20 operation.<br />
For additional related information see:<br />
Motor Ovld Fldbk<br />
OVERRIDE n<br />
Setup Display: Override n (n = 1 or 2)<br />
Operation Display: NA<br />
Type: Command<br />
Stop Protection: No<br />
Item ID: 70-71 and 72-73<br />
Maximum Setting: NA<br />
Minimum Setting: NA<br />
Menu Path: Interface ⇒ Digital Input ⇒<br />
Pin # ⇒ Override n<br />
and<br />
Setup ⇒ Speeds ⇒ Speed Override ⇒ Speed<br />
Override n<br />
Overview: This maintained command overrides<br />
the normal speed command and sets the speed to<br />
the value corresponding to the Spd Override 1 or<br />
2 setting. Opening the contact returns the drive to<br />
its normal speed setting. If the override is set on<br />
by use of the programmer’s software, the override<br />
can only be made inactive by toggling a digital<br />
override input, a keypad parameter, or a batch file<br />
as setup through the programmer’s software.<br />
Override 1 will override Override 2, but not vice<br />
versa.<br />
For additional related information see:<br />
Override n Off Spd Override n<br />
Override n On<br />
OVERRIDE n OFF<br />
Setup Display: Override n Off (n = 1 or 2)<br />
Operation Display: NA<br />
Type: Command<br />
Stop Protection: No<br />
Item ID: 71 and 73<br />
Maximum Setting: NA<br />
Minimum Setting: NA<br />
Menu Path: Interface ⇒ Digital Input ⇒<br />
Pin # ⇒ Override n Off<br />
and<br />
Advanced ⇒ Command batches ⇒ Batch # ⇒<br />
User Selections ⇒ Override n Off<br />
and<br />
Interface ⇒ Analog Input ⇒ Channel n ⇒ Scale<br />
⇒ Loss of Ref./Filter... ⇒ Loss Begin Command &<br />
Loss End Command<br />
Overview: This command removes the Override<br />
n On command and returns the drive to its normal<br />
set speed.<br />
For additional related information see:<br />
Override n Spd Override n<br />
Override n On<br />
OVERRIDE n ON<br />
Setup Display: Override n On (n = 1 or 2)<br />
Operation Display: NA<br />
Type: Command<br />
Stop Protection: No<br />
Item ID: 70 and 72<br />
Maximum Setting: NA<br />
Minimum Setting: NA<br />
Menu Path: Interface ⇒ Digital Input ⇒<br />
Pin # ⇒ Override n On<br />
and<br />
Advanced ⇒ Command batches ⇒ Batch # ⇒<br />
User Selections ⇒ Override n On<br />
and<br />
AF95/IS905 Programmer’s Manual<br />
A-47
Commands, Parameters, and Settings<br />
APPENDIX<br />
Interface ⇒ Analog Input ⇒ Channel n ⇒ Scale<br />
⇒ Loss of Ref./Filter... ⇒ Loss Begin Command &<br />
Loss End Command<br />
Overview: This momentary command overrides<br />
the drive’s normal set speed. Override 1 On will<br />
override Override 2 On, but not vice versa. The<br />
override speed is set by the Spd Override n. This<br />
command is negated by the Override n Off command.<br />
For additional related information see:<br />
Override n Spd Override n<br />
Override n Off<br />
PID ACCEL TIME<br />
Setup Display: PID Accel Time<br />
Operation Display: PIDacl<br />
Type: Parameter<br />
Stop Protection: No<br />
Item ID: 172<br />
Maximum Setting: 1000 seconds<br />
Minimum Setting: 0.3 seconds<br />
Menu Path: Interface ⇒ Keypad ⇒ Parameter<br />
List (or Operation Display List) ⇒<br />
Insert<br />
and<br />
Advanced ⇒ PID ⇒ Ramp ⇒ Acceleration Time<br />
and<br />
Advanced ⇒ Command batches ⇒ Batch # ⇒<br />
User Selections ⇒ Set Parameter<br />
Overview: This parameter sets the acceleration<br />
ramp time for the PID loop speed setpoint.<br />
For additional related information see:<br />
PID Action PID INT Gain<br />
PID Decel Time PID INT Limit<br />
PID DER Cutoff PID Integrator<br />
PID DER Gain PID PROP Gain<br />
PID Error PID Reference<br />
PID FD Fwd Gain PID Setpoint<br />
PID Feedback PID Speed<br />
AF95/IS905 Programmer’s Manual<br />
A-48<br />
PID ACTION<br />
Setup Display: PID Action<br />
Operation Display: NA<br />
Type: Selection<br />
Stop Protection: No<br />
Item ID: 174<br />
Maximum Setting: Direct<br />
Minimum Setting: Invert<br />
Menu Path: Interface ⇒ Keypad ⇒ Parameter<br />
List ⇒ Insert<br />
and<br />
Advanced ⇒ PID ⇒ PID Action ⇒ Direct/Invert<br />
Overview: This selection sets the action of the<br />
PID loop as either direct acting or inverted which<br />
determines whether the drive speed will increase<br />
or decrease with increased feedback.<br />
For additional related information see:<br />
PID Accel Time PID INT Gain<br />
PID Decel Time PID INT Limit<br />
PID DER Cutoff PID Integrator<br />
PID DER Gain PID PROP Gain<br />
PID Error PID Reference<br />
PID FD Fwd Gain PID Setpoint<br />
PID Feedback PID Speed<br />
PID DECEL TIME<br />
Setup Display: PID Decel Time<br />
Operation Display: PIDdcl<br />
Type: Parameter<br />
Stop Protection: No<br />
Item ID: 173<br />
Maximum Setting: 1000 seconds<br />
Minimum Setting: 0.3 seconds<br />
Menu Path: Interface ⇒ Keypad ⇒ Parameter<br />
List (or Operation Display List) ⇒<br />
Insert<br />
and<br />
Advanced ⇒ PID ⇒ Ramp ⇒ Deceleration Time<br />
and<br />
Advanced ⇒ Command batches ⇒ Batch # ⇒<br />
User Selections ⇒ Set Parameter
Commands, Parameters, and Settings<br />
APPENDIX<br />
Overview: This parameter sets the deceleration<br />
ramp time for the PID loop speed setpoint.<br />
For additional related information see:<br />
PID Action PID INT Gain<br />
PID Accel Time PID INT Limit<br />
PID DER Cutoff PID Integrator<br />
PID DER Gain PID PROP Gain<br />
PID Error PID Reference<br />
PID FD Fwd Gain PID Setpoint<br />
PID Feedback PID Speed<br />
PID DER CUTOFF<br />
Setup Display: PID DER Cutoff<br />
Operation Display: PIDcut<br />
Type: Parameter<br />
Stop Protection: No<br />
Item ID: 175<br />
Maximum Setting: 10 hertz<br />
Minimum Setting: 0.0 hertz<br />
Menu Path: Interface ⇒ Keypad ⇒ Parameter<br />
List (or Operation Display List) ⇒<br />
Insert<br />
and<br />
Advanced ⇒ PID ⇒ Filter<br />
and<br />
Advanced ⇒ Command batches ⇒ Batch # ⇒<br />
User Selections ⇒ Set Parameter<br />
Overview: This parameter sets the cutoff frequency<br />
for the lowpass filter in the derivative path<br />
of the PID loop.<br />
For additional related information see:<br />
PID Action PID INT Gain<br />
PID Accel Time PID INT Limit<br />
PID Decel Time PID Integrator<br />
PID DER Gain PID PROP Gain<br />
PID Error PID Reference<br />
PID FD Fwd Gain PID Setpoint<br />
PID Feedback PID Speed<br />
PID DER GAIN<br />
Setup Display: PID DER Gain<br />
Operation Display: PIDdg<br />
Type: Parameter<br />
Stop Protection: No<br />
Item ID: 176<br />
Maximum Setting: 32 expressed in Keypad units<br />
but depends on user PID units selected<br />
Minimum Setting: 0.0<br />
Menu Path: Interface ⇒ Keypad ⇒ Parameter<br />
List (or Operation Display List) ⇒<br />
Insert<br />
and<br />
Advanced ⇒ PID ⇒ Derivative<br />
and<br />
Advanced ⇒ Command batches ⇒ Batch # ⇒<br />
User Selections ⇒ Set Parameter<br />
Overview: This parameter sets the derivative<br />
gain of the PID loop.<br />
For additional related information see:<br />
PID Action PID INT Gain<br />
PID Accel Time PID INT Limit<br />
PID Decel Time PID Integrator<br />
PID DER Cutoff PID PROP Gain<br />
PID Error PID Reference<br />
PID FD Fwd Gain PID Setpoint<br />
PID Feedback PID Speed<br />
PID ERROR<br />
Setup Display: PID Error<br />
Operation Display: PIDerr<br />
Type: Parameter<br />
Stop Protection: No<br />
Item ID: 171<br />
Maximum Setting: NA<br />
Minimum Setting: NA<br />
Menu Path: Interface ⇒ Keypad ⇒ Parameter<br />
List (or Operation Display List) ⇒<br />
Insert<br />
AF95/IS905 Programmer’s Manual<br />
A-49
Commands, Parameters, and Settings<br />
APPENDIX<br />
and<br />
Interface ⇒ Analog Output ⇒ Channel n ⇒<br />
Parameter Assignment ⇒ PID Error<br />
and<br />
Advanced ⇒ Window comparators ⇒ Parameter<br />
⇒ PID Error<br />
Overview: This parameter provides an indication<br />
of the value of the Error term of the PID loop. In<br />
addition a window comparator can be used to indicate<br />
that the PID Error is within a specified range.<br />
For additional related information see:<br />
PID Action PID INT Gain<br />
PID Accel Time PID INT Limit<br />
PID Decel Time PID Integrator<br />
PID DER Cutoff PID PROP Gain<br />
PID Error PID Reference<br />
PID FD Fwd Gain PID Setpoint<br />
PID Feedback PID Speed<br />
PID FD FWD GAIN<br />
Setup Display: PID FD FWD Gain<br />
Operation Display: PIDffg<br />
Type: Parameter<br />
Stop Protection: No<br />
Item ID: 177<br />
Maximum Setting: 32 expressed in Keypad units<br />
but depends on user PID units selected<br />
Minimum Setting: 0.0<br />
Menu Path: Interface ⇒ Keypad ⇒ Parameter<br />
List (or Operation Display List) ⇒<br />
Insert<br />
and<br />
Advanced ⇒ PID ⇒ Feed Forward<br />
and<br />
Advanced ⇒ Command batches ⇒ Batch # ⇒<br />
User Selections ⇒ Set Parameter<br />
Overview: This parameter allows setting of the<br />
value of the feed forward gain of the PID loop<br />
which is directly fed to the output without being<br />
summed with the feedback.<br />
AF95/IS905 Programmer’s Manual<br />
A-50<br />
For additional related information see:<br />
PID Action PID INT Gain<br />
PID Accel Time PID INT Limit<br />
PID Decel Time PID Integrator<br />
PID DER Cutoff PID PROP Gain<br />
PID DER Gain PID Reference<br />
PID Error PID Setpoint<br />
PID Feedback PID Speed<br />
PID FEEDBACK<br />
Setup Display: PID Feedback<br />
Operation Display: PIDfdk<br />
Type: Parameter<br />
Stop Protection: No<br />
Item ID: 169<br />
Maximum Setting: NA<br />
Minimum Setting: NA<br />
Menu Path: Interface ⇒ Keypad ⇒ Parameter<br />
List (or Operation Display List) ⇒<br />
Insert<br />
and<br />
Interface ⇒ Analog Input ⇒ Channel n ⇒ Parameter<br />
Assignment ⇒ PID Feedback<br />
and<br />
Interface ⇒ Analog Output ⇒ Channel n ⇒<br />
Parameter Assignment ⇒ PID Feedback<br />
and<br />
Advanced ⇒ PID ⇒ Feedback<br />
and<br />
Advanced ⇒ Command batches ⇒ Batch # ⇒<br />
User Selections ⇒ Set Parameter<br />
and<br />
Advanced ⇒ Window comparators ⇒ Parameter<br />
⇒ PID Feedback<br />
Overview: This parameter provides the feedback<br />
source to the PID loop, and an indication at the<br />
keypad and/or an analog output of the feedback<br />
value. A feedback value can also be programmed<br />
in, if an actual feedback value is not present. Typically<br />
the PID feedback will be an alalog input. In
Commands, Parameters, and Settings<br />
APPENDIX<br />
addition a window comparator can be used to indicate<br />
that the PID Feedback is within a specified<br />
range.<br />
For additional related information see:<br />
PID Action PID INT Gain<br />
PID Accel Time PID INT Limit<br />
PID Decel Time PID Integrator<br />
PID DER Cutoff PID PROP Gain<br />
PID DER Gain PID Reference<br />
PID Error PID Setpoint<br />
PID Feedback PID Speed<br />
PID INT GAIN<br />
Setup Display: PID INT Gain<br />
Operation Display: PIDig<br />
Type: Parameter<br />
Stop Protection: No<br />
Item ID: 178<br />
Maximum Setting: 32 expressed in Keypad units<br />
but depends on user PID units selected<br />
Minimum Setting: 0.0<br />
Menu Path: Interface ⇒ Keypad ⇒ Parameter<br />
List (or Operation Display List) ⇒<br />
Insert<br />
and<br />
Advanced ⇒ PID ⇒ Integral<br />
and<br />
Advanced ⇒ Command batches ⇒ Batch # ⇒<br />
User Selections ⇒ Set Parameter<br />
Overview: This parameter sets and displays the<br />
Integral gain of the PID loop.<br />
For additional related information see:<br />
PID Action PID INT Gain<br />
PID Accel Time PID INT Limit<br />
PID Decel Time PID Integrator<br />
PID DER Cutoff PID PROP Gain<br />
PID DER Gain PID Reference<br />
PID Error PID Setpoint<br />
PID Feedback PID Speed<br />
PID INT LIMIT<br />
Setup Display: PID INT Limit<br />
Operation Display: PIDlmt<br />
Type: Parameter<br />
Stop Protection: No<br />
Item ID: 183<br />
Maximum Setting: NA<br />
Minimum Setting: NA<br />
Menu Path: Interface ⇒ Keypad ⇒ Parameter<br />
List (or Operation Display List) ⇒<br />
Insert<br />
and<br />
Advanced ⇒ PID ⇒ Integral Limit<br />
and<br />
Advanced ⇒ Command batches ⇒ Batch # ⇒<br />
User Selections ⇒ Set Parameter<br />
Overview: This parameter sets the clamp level<br />
for the integrator portion of the PID loop.<br />
For additional related information see:<br />
PID Action PID INT Gain<br />
PID Accel Time PID INT Limit<br />
PID Decel Time PID Integrator<br />
PID DER Cutoff PID PROP Gain<br />
PID DER Gain PID Reference<br />
PID Error PID Setpoint<br />
PID Feedback PID Speed<br />
PID INTEGRATOR<br />
Setup Display: PID Integrator<br />
Operation Display: NA<br />
Type: Parameter<br />
Stop Protection: No<br />
Item ID: 167<br />
Maximum Setting: NA<br />
Minimum Setting: NA<br />
Menu Path: Interface ⇒ Keypad ⇒ Parameter<br />
List (or Operation Display List) ⇒<br />
Insert<br />
Overview: This parameter displays the integrator<br />
level in the PID loop.<br />
AF95/IS905 Programmer’s Manual<br />
A-51
Commands, Parameters, and Settings<br />
APPENDIX<br />
For additional related information see:<br />
PID Action PID INT Gain<br />
PID Accel Time PID INT Limit<br />
PID Decel Time PID Integrator<br />
PID DER Cutoff PID PROP Gain<br />
PID DER Gain PID Reference<br />
PID Error PID Setpoint<br />
PID Feedback PID Speed<br />
PID MODE<br />
Setup Display: PID Mode<br />
Operation Display: NA<br />
Type: Command<br />
Stop Protection: No<br />
Item ID: 525<br />
Maximum Setting: NA<br />
Minimum Setting: NA<br />
Menu Path: Advanced ⇒ Speed Source ⇒ PID<br />
Output<br />
and<br />
Interface ⇒ Digital Input ⇒ Pin # ⇒ PID Mode or<br />
Follower/PID Mode<br />
and<br />
Advanced ⇒ Command Batches ⇒ Batch # ⇒<br />
User Selection ⇒ PID Mode<br />
and<br />
Interface ⇒ Analog Input ⇒ Channel n ⇒ Scale<br />
⇒ Loss of Ref./Filter... ⇒ Loss Begin Command &<br />
Loss End Command<br />
Overview: This places the drive’s auto mode<br />
select into the PID mode vs the alternative speed<br />
follower mode.<br />
For additional related information see:<br />
Auto Reference PID Mode<br />
Auto Reference Select Follower Speed<br />
PID Auto Mode Select<br />
AF95/IS905 Programmer’s Manual<br />
A-52<br />
PID PROP GAIN<br />
Setup Display: PID PROP Gain<br />
Operation Display: PIDpg<br />
Type: Parameter<br />
Stop Protection: No<br />
Item ID: 179<br />
Maximum Setting: 32 expressed in Keypad units<br />
but depends on user PID units selected<br />
Minimum Setting: 0.0<br />
Menu Path: Interface ⇒ Keypad ⇒ Parameter<br />
List (or Operation Display List) ⇒<br />
Insert<br />
and<br />
Advanced ⇒ PID ⇒ Proportional<br />
and<br />
Advanced ⇒ Command batches ⇒ Batch # ⇒<br />
User Selections ⇒ Set Parameter<br />
Overview: This parameter sets and displays the<br />
Proportional gain of the PID loop.<br />
For additional related information see:<br />
PID Action PID INT Gain<br />
PID Accel Time PID INT Limit<br />
PID Decel Time PID Integrator<br />
PID DER Cutoff PID PROP Gain<br />
PID DER Gain PID Reference<br />
PID Error PID Setpoint<br />
PID Feedback PID Speed<br />
PID REFERENCE<br />
Setup Display: PID Reference<br />
Operation Display: PIDref<br />
Type: Parameter<br />
Stop Protection: No<br />
Item ID: 170<br />
Maximum Setting: NA<br />
Minimum Setting: NA<br />
Menu Path: Interface ⇒ Keypad ⇒ Parameter<br />
List (or Operation Display List) ⇒<br />
Insert
Commands, Parameters, and Settings<br />
APPENDIX<br />
Overview: This parameter indicates the internal<br />
reference level of the PID setpoint after the signal<br />
has gone through the PID ramp function. This is<br />
the value acted upon by the remainder of the PID<br />
loop.<br />
For additional related information see:<br />
PID Action PID INT Gain<br />
PID Accel Time PID INT Limit<br />
PID Decel Time PID Integrator<br />
PID DER Cutoff PID PROP Gain<br />
PID DER Gain PID Reference<br />
PID Error PID Setpoint<br />
PID Feedback PID Speed<br />
PID SETPOINT<br />
Setup Display: PID Setpoint<br />
Operation Display: PIDset<br />
Type: Parameter<br />
Stop Protection: No<br />
Item ID: 168<br />
Maximum Setting: NA<br />
Minimum Setting: NA<br />
Menu Path: Interface ⇒ Keypad ⇒ Parameter<br />
List (or Operation Display List) ⇒<br />
Insert<br />
and<br />
Interface ⇒ Analog Input ⇒ Channel n ⇒ Parameter<br />
Assignment ⇒ PID setpoint<br />
and<br />
Interface ⇒ Analog Output ⇒ Channel n ⇒<br />
Parameter Assignment ⇒ PID Setpoint<br />
and<br />
Advanced ⇒ PID ⇒ Setpoint<br />
and<br />
Advanced ⇒ Command batches ⇒ Batch # ⇒<br />
User Selections ⇒ Set Parameter<br />
and<br />
Advanced ⇒ Window comparators ⇒ Parameter<br />
⇒ PID Setpoint<br />
Overview: This parameter provides for a setpoint<br />
pre PID ramp input for the PID block. It can be set<br />
from the keypad, an analog input or from the programmer.<br />
In addition a window comparator can<br />
be used to indicate that the PID Setpoint is within<br />
a specified range.<br />
For additional related information see:<br />
PID Action PID INT Gain<br />
PID Accel Time PID INT Limit<br />
PID Decel Time PID Integrator<br />
PID DER Cutoff PID PROP Gain<br />
PID DER Gain PID Reference<br />
PID Error PID Setpoint<br />
PID Feedback PID Speed<br />
PID SPEED<br />
Setup Display: PID Speed<br />
Operation Display: PIDSpd<br />
Type: Parameter<br />
Stop Protection: No<br />
Item ID: 180<br />
Maximum Setting: NA<br />
Minimum Setting: NA<br />
Menu Path: Interface ⇒ Keypad ⇒ Parameter<br />
List (or Operation Display List) ⇒<br />
Insert<br />
and<br />
Interface ⇒ Analog Output ⇒ Channel n ⇒<br />
Parameter Assignment ⇒ PID Speed<br />
and<br />
Advanced ⇒ PID ⇒ Speed Setpoint<br />
and<br />
Advanced ⇒ Window comparators ⇒ Parameter<br />
⇒ PID Speed<br />
Overview: This parameter indicates the output of<br />
the PID loop, which becomes the speed reference<br />
for the drive. In addition a window comparator can<br />
be used to indicate that the PID Speed is within a<br />
specified range.<br />
AF95/IS905 Programmer’s Manual<br />
A-53
Commands, Parameters, and Settings<br />
APPENDIX<br />
For additional related information see:<br />
PID Action PID INT Gain<br />
PID Accel Time PID INT Limit<br />
PID Decel Time PID Integrator<br />
PID DER Cutoff PID PROP Gain<br />
PID DER Gain PID Reference<br />
PID Error PID Setpoint<br />
PID Feedback PID Speed<br />
PLC START<br />
Setup Display: PLC Start<br />
Operation Display: NA<br />
Type: Command<br />
Stop Protection: No<br />
Item ID: 12<br />
Maximum Setting: NA<br />
Minimum Setting: NA<br />
Menu Path: Interface ⇒ Digital Input ⇒<br />
Assignment ⇒ PLC Start/Stop<br />
and<br />
Advanced ⇒ Command batches ⇒ Batch # ⇒<br />
User Selections ⇒ Set Parameter<br />
and<br />
Interface ⇒ Analog Input ⇒ Channel n ⇒ Scale<br />
⇒ Loss of Ref./Filter... ⇒ Loss Begin Command &<br />
Loss End Command<br />
Overview: This command designates a digital<br />
input as a plc or other remote control source start/<br />
stop input. While the input is connected to terminal<br />
10 of the terminal block assembly the drive will<br />
run. When this input is disconnected the drive will<br />
stop. This is an edge triggered signal. If the drive<br />
is switched from Keypad to Remote mode, and<br />
the PLC input is closed, the drive will run. The<br />
PLC start signal may also be programmed into a<br />
batch file.<br />
For additional related information see:<br />
PLC Stop Start<br />
Run Enable/Stop Start/Stop<br />
AF95/IS905 Programmer’s Manual<br />
A-54<br />
PLC STOP<br />
Setup Display: PLC Stop<br />
Operation Display: NA<br />
Type: Command<br />
Stop Protection: No<br />
Item ID: 13<br />
Maximum Setting: NA<br />
Minimum Setting: NA<br />
Menu Path: Interface ⇒ Digital Input ⇒<br />
Assignment ⇒ PLC Start/Stop<br />
and<br />
Advanced ⇒ Command batches ⇒ Batch # ⇒<br />
User Selections ⇒ Set Parameter<br />
and<br />
Interface ⇒ Analog Input ⇒ Channel n ⇒ Scale<br />
⇒ Loss of Ref./Filter... ⇒ Loss Begin Command &<br />
Loss End Command<br />
Overview: This command designates a digital<br />
input as a plc or other remote control source start/<br />
stop input. While the input is connected to terminal<br />
10 of the terminal block assembly the drive will<br />
run. When this input is disconnected the drive will<br />
stop. This is an edge triggered signal. If the drive<br />
is switched from Keypad to Remote mode, and<br />
the PLC input is closed, the drive will run. The<br />
PLC stop signal may also be programmed into a<br />
batch file.<br />
For additional related information see:<br />
PLC Start Start<br />
Run Enable/Stop Start/Stop
Commands, Parameters, and Settings<br />
APPENDIX<br />
POWER UP RESTART<br />
Setup Display: Power Up Restart<br />
Operation Display: NA<br />
Type: Selection<br />
Stop Protection: Yes<br />
Item ID: 258<br />
Maximum Setting: NA<br />
Minimum Setting: NA<br />
Menu Path: Interface ⇒ Keypad ⇒ Parameter<br />
List ⇒ Insert<br />
and<br />
Advanced ⇒ Auto Restart ⇒ Enable Restart on<br />
Power Up<br />
Overview: This selection will cause the drive to<br />
attempt a restart upon the return of power after an<br />
outage. This requires that a maintained closed<br />
PLC Run or Start/Stop contact be present and the<br />
drive be in the Remote Start source.<br />
For additional related information see:<br />
Pwr Restart Dly PLC Run<br />
Ridethrough Time<br />
PRESET n<br />
Setup Display: Preset n (n = 00 to 31)<br />
Operation Display: Set n<br />
Type: Parameter<br />
Stop Protection: No<br />
Item ID: 126 to 157<br />
Maximum Setting: NA<br />
Minimum Setting: NA<br />
Menu Path: Interface ⇒ Keypad ⇒ Parameter<br />
List (or Operation Display List) ⇒<br />
Insert<br />
and<br />
Interface ⇒ Analog Input ⇒ Channel n ⇒ Parameter<br />
Assignment ⇒ Preset n<br />
and<br />
Interface ⇒ Analog Output ⇒ Channel n ⇒<br />
Parameter Assignment ⇒ Preset n<br />
and<br />
Advanced ⇒ Command batches ⇒ Batch # ⇒<br />
User Selections ⇒ Set Parameter<br />
and<br />
Advanced ⇒ Window comparators ⇒ Parameter<br />
⇒ Preset n<br />
and<br />
Setup ⇒ Speeds ⇒ Preset speeds ⇒ Preset n<br />
Overview: This parameter allows the value of a<br />
preset speed to be set through the keypad, an<br />
analog input or the programmer’s software. The<br />
preset speed is then chosen by energizing the<br />
digital input, selecting the keypad parameter, or<br />
running a batch command corresponding to the<br />
preset speed number. The preset can be outputted<br />
to an external control system via an analog<br />
output. The preset speed is only available in the<br />
manual mode.<br />
For additional related information see:<br />
Load Preset<br />
PWR RESTART DLY<br />
Setup Display: Pwr Restart Dly<br />
Operation Display: NA<br />
Type: Parameter<br />
Stop Protection: No<br />
Item ID: 260<br />
Maximum Setting: 1000 seconds<br />
Minimum Setting: 1 second<br />
Menu Path: Interface ⇒ Keypad ⇒ Parameter<br />
List ⇒ Insert<br />
and<br />
Advanced ⇒ Command batches ⇒ Batch # ⇒<br />
User Selections ⇒ Set Parameter<br />
and<br />
Advanced ⇒ Auto restart ⇒ Time Delay Before<br />
PU Restart<br />
AF95/IS905 Programmer’s Manual<br />
A-55
Commands, Parameters, and Settings<br />
APPENDIX<br />
Overview: This parameter sets the length of time<br />
the drive will wait after a power outage, before a<br />
restart will be attempted. Requires that Power Up<br />
Restart be enabled, a maintained closed PLC Run<br />
or Start/Stop contact is present and that the drive<br />
be in Remote.<br />
For additional related information see:<br />
Power Up Restart<br />
PLC Run<br />
PREVIOUS CONFIG<br />
Setup Display: Previous Config<br />
Operation Display: NA<br />
Type: Selection<br />
Stop Protection: No<br />
Item ID: 308<br />
Maximum Setting: NA<br />
Minimum Setting: NA<br />
Menu Path: Interface ⇒ Keypad ⇒ Parameter<br />
List ⇒ Insert<br />
Overview: This item displays the identification of<br />
the last keypad configuration which was loaded.<br />
RAMP n<br />
Setup Display: Ramp n (n = 1 or 2)<br />
Operation Display: NA<br />
Type: Command<br />
Stop Protection: No<br />
Item ID: 450 or 451<br />
Maximum Setting: NA<br />
Minimum Setting: NA<br />
Menu Path: Interface ⇒ Keypad ⇒ Parameter<br />
List ⇒ Insert<br />
and<br />
Interface ⇒ Digital Input ⇒ Assignment ⇒<br />
Ramp n<br />
and<br />
Setup ⇒ Speeds ⇒ Man/auto ramps ⇒ Ramp<br />
Selection ⇒ Accel/Decel n<br />
and<br />
Advanced ⇒ Command batches ⇒ Batch # ⇒<br />
User Selections ⇒ Ramp n<br />
AF95/IS905 Programmer’s Manual<br />
A-56<br />
Overview: This command selects which accel/<br />
decel ramp will be followed with the selection<br />
being made via momentary contact through the<br />
keypad, digital input, batch command or by use of<br />
the Programmer’s Software.<br />
For additional related information see:<br />
Ramp1/Ramp2 Accel 2 Time<br />
Ramp n Mode Decel Time<br />
Accel Time Decel 2 Time<br />
RAMP1/RAMP2<br />
Setup Display: Ramp1/Ramp2<br />
Operation Display: NA<br />
Type: Command<br />
Stop Protection: No<br />
Item ID: 450 and 451<br />
Maximum Setting: NA<br />
Minimum Setting: NA<br />
Menu Path: Interface ⇒ Digital Input ⇒<br />
Assignment ⇒ Ramp1/Ramp2<br />
Overview: This command selects which accel/<br />
decel ramp will be followed with the selection<br />
being made via a digital input.<br />
For additional related information see:<br />
Ramp n Accel 2 Time<br />
Ramp n Mode Decel Time<br />
Accel Time Decel 2 Time<br />
RAMP n Mode<br />
Setup Display: Ramp n Mode (n = 1 or 2)<br />
Operation Display: NA<br />
Type: Selection<br />
Stop Protection: Yes<br />
Item ID: 447 or 448<br />
Maximum Setting: NA<br />
Minimum Setting: NA<br />
Menu Path: Interface ⇒ Keypad ⇒ Parameter<br />
List ⇒ Insert<br />
and<br />
Setup ⇒ Speeds ⇒ Man/auto ramps ⇒ Ramp<br />
Selection ⇒ Accel/Decel n ⇒ Curve Type
Commands, Parameters, and Settings<br />
APPENDIX<br />
Overview: This selection is used to determine<br />
the type of ramp to be followed, linear or s-curve.<br />
For additional related information see:<br />
Ramp n Accel 2 Time<br />
Ramp n Mode Decel Time<br />
Accel Time Decel 2 Time<br />
Max Accel n Jerk Rate n<br />
RAMP DOWN<br />
Setup Display: Ramp Down<br />
Operation Display: NA<br />
Type: Command<br />
Stop Protection: No<br />
Item ID: 111<br />
Maximum Setting: NA<br />
Minimum Setting: NA<br />
Menu Path: Interface ⇒ Digital Input ⇒<br />
Assignment ⇒ Ramp Down<br />
Overview: This command, in conjunction with<br />
Ramp Up, provides a means of changing the drive<br />
speed by closing a set of external contacts in the<br />
manual mode. By energizing the digital input corresponding<br />
to this command with a contact closure,<br />
the drive speed will be reduced, as long as<br />
the contact is maintained closed and minimum<br />
speed is not reached. If Ramp Up is also closed,<br />
the current value of speed will be held. When this<br />
contact is opened, the current speed will be held.<br />
For additional related information see:<br />
Ramp n Accel 2 Time<br />
Ramp n Mode Decel Time<br />
Accel Time Decel 2 Time<br />
RAMP DOWN TIME<br />
Setup Display: Ramp Down Time<br />
Operation Display: DnTime<br />
Type: Parameter<br />
Stop Protection: No<br />
Item ID: 165<br />
Maximum Setting: 1000 seconds<br />
Minimum Setting: 0.3 seconds<br />
Menu Path: Interface ⇒ Keypad ⇒ Parameter<br />
List (or Operation Display List) ⇒<br />
Insert<br />
and<br />
Interface ⇒ Analog Input ⇒ Channel n ⇒ Parameter<br />
Assignment ⇒ Ramp Down Time<br />
and<br />
Interface ⇒ Analog Output ⇒ Channel n ⇒<br />
Parameter Assignment ⇒ Ramp Down Time<br />
and<br />
Advanced ⇒ Command batches ⇒ Batch # ⇒<br />
User Selections ⇒ Set Parameter<br />
and<br />
Setup ⇒ Speeds ⇒ Digital pot ⇒ Ramp Down<br />
Overview: This parameter sets the ramp time<br />
from maximum set speed to minimum set speed<br />
when the Ramp Down input is used for drive<br />
speed reduction.<br />
For additional related information see:<br />
Ramp n Accel 2 Time<br />
Ramp n Mode Decel Time<br />
Accel Time Decel 2 Time<br />
RAMP HOLD SPEED<br />
Setup Display: Ramp Hold Speed<br />
Operation Display: HldSpd<br />
Type: Parameter<br />
Stop Protection: No<br />
Item ID: 166<br />
Maximum Setting: NA<br />
Minimum Setting: NA<br />
Menu Path: Interface ⇒ Keypad ⇒ Parameter<br />
List (or Operation Display List) ⇒<br />
Insert<br />
and<br />
Interface ⇒ Analog Output ⇒ Channel n ⇒<br />
Parameter Assignment ⇒ Ramp Hold Speed<br />
and<br />
Advanced ⇒ Window comparators ⇒ Parameter<br />
⇒ Ramp Hold Speed<br />
AF95/IS905 Programmer’s Manual<br />
A-57
Commands, Parameters, and Settings<br />
APPENDIX<br />
Overview: When the Ramp Up and Ramp Down<br />
digital inputs are used for speed control and both<br />
contacts are open or closed, this parameter indicates<br />
the current speed.<br />
For additional related information see:<br />
Ramp n Accel 2 Time<br />
Ramp n Mode Decel Time<br />
Accel Time Decel 2 Time<br />
RAMP UP<br />
Setup Display: Ramp Up<br />
Operation Display: NA<br />
Type: Command<br />
Stop Protection: No<br />
Item ID: 110<br />
Maximum Setting: NA<br />
Minimum Setting: NA<br />
Menu Path: Interface ⇒ Digital Input ⇒<br />
Assignment ⇒ Ramp Up<br />
Overview: This command, in conjunction with<br />
Ramp Down, provides a means of changing the<br />
drive speed by closing an external contact. By<br />
energizing the digital input corresponding to this<br />
command with a contact closure, the drive speed<br />
will be increased, as long as the contact is maintained<br />
closed. If Ramp Down is also closed, the<br />
current value of speed will be held. When this contact<br />
is opened, the current speed will be held.<br />
For additional related information see:<br />
Ramp n Accel 2 Time<br />
Ramp n Mode Decel Time<br />
Accel Time Decel 2 Time<br />
RAMP UP TIME<br />
Setup Display: Ramp Up Time<br />
Operation Display: UpTime<br />
Type: Parameter<br />
Stop Protection: No<br />
Item ID: 164<br />
Maximum Setting: 1000 seconds<br />
Minimum Setting: 0.3 seconds<br />
Menu Path: Interface ⇒ Keypad ⇒ Parameter<br />
List (or Operation Display List) ⇒<br />
Insert<br />
AF95/IS905 Programmer’s Manual<br />
A-58<br />
and<br />
Interface ⇒ Analog Input ⇒ Channel n ⇒ Parameter<br />
Assignment ⇒ Ramp Up Time<br />
and<br />
Interface ⇒ Analog Output ⇒ Channel n ⇒<br />
Parameter Assignment ⇒ Ramp Up Time<br />
and<br />
Advanced ⇒ Command batches ⇒ Batch # ⇒<br />
User Selections ⇒ Set Parameter<br />
and<br />
Setup ⇒ Speeds ⇒ Digital pot ⇒ Ramp Up Time<br />
Overview: This parameter sets the ramp time<br />
from minimum set speed to maximum set speed<br />
when the Ramp Up input is used for drive speed<br />
reduction.<br />
For additional related information see:<br />
Ramp n Accel 2 Time<br />
Ramp n Mode Decel Time<br />
Accel Time Decel 2 Time<br />
REMOTE FORWARD<br />
Setup Display: Forward<br />
Operation Display: NA<br />
Type: Command<br />
Stop Protection: No<br />
Item ID: 494<br />
Maximum Setting: NA<br />
Minimum Setting: NA<br />
Menu Path: Interface ⇒ Digital Input ⇒ Pin # ⇒<br />
Forward<br />
and<br />
Advanced ⇒ Command batches ⇒ Batch # ⇒<br />
User Selections ⇒ Remote Forward<br />
Overview: When in the remote mode this designates<br />
a digital input as a remote input or a batch<br />
command for selecting the forward direction.<br />
Momentarily closing the digital input or running<br />
the batch will cause a direction change from<br />
reverse to forward.
Commands, Parameters, and Settings<br />
APPENDIX<br />
For additional related information see:<br />
Forward/Reverse Reverse Enable<br />
Remote Reverse<br />
REM JOG n<br />
Setup Display: REM Jog n (n = 1 or 2)<br />
Operation Display: NA<br />
Type: Command<br />
Stop Protection: No<br />
Item ID: 7 or 8<br />
Maximum Setting: NA<br />
Minimum Setting: NA<br />
Menu Path: Interface ⇒ Digital Input ⇒<br />
Assignment ⇒ Rem Jog n<br />
Overview: When in the remote mode this command<br />
places the drive in jog mode when a remote<br />
contact closure occurs at a preprogrammed digital<br />
input. The jog speed corresponds to the number<br />
of the Rem Jog function energized.<br />
For additional related information see:<br />
Jog Speed n<br />
REMOTE REVERSE<br />
Setup Display: Reverse<br />
Operation Display: NA<br />
Type: Command<br />
Stop Protection: No<br />
Item ID: 499<br />
Maximum Setting: NA<br />
Minimum Setting: NA<br />
Menu Path: Interface ⇒ Digital Input ⇒<br />
Pin # ⇒ Reverse<br />
and<br />
Advanced ⇒ Command batches ⇒ Batch # ⇒<br />
User Selections ⇒ Remote Reverse<br />
Overview: When in the remote mode this designates<br />
a digital input as a remote input or a batch<br />
command for selecting the reverse direction.<br />
Momentarily closing the digital input or running<br />
the batch will cause a direction change from forward<br />
to reverse.<br />
For additional related information see:<br />
Forward/Reverse Reverse Enable<br />
Remote Reverse<br />
RESET FAULT<br />
Setup Display: Reset Fault<br />
Operation Display: NA<br />
Type: Command<br />
Stop Protection: No<br />
Item ID: 16<br />
Maximum Setting: NA<br />
Minimum Setting: NA<br />
Menu Path: Interface ⇒ Keypad ⇒ Parameter<br />
List ⇒ Insert<br />
and<br />
Interface ⇒ Digital Input ⇒ Assignment ⇒ Reset<br />
Fault<br />
and<br />
Advanced ⇒ Command Batches ⇒ Batch # ⇒<br />
User Selections ⇒ Reset Fault<br />
Overview: This function issues a reset fault command<br />
resetting the drive for operation.<br />
For additional related information see:<br />
Clear Fault Log Fault Reset Mode<br />
Fault Fault Restart<br />
Fault History Flt Restart Dly<br />
RETRY CLEAR TIME<br />
Setup Display: Restart Clear Time<br />
Operation Display: NA<br />
Type: Parameter<br />
Stop Protection: No<br />
Item ID: 262<br />
Maximum Setting: 1000 minutes<br />
Minimum Setting: 1 minute<br />
Menu Path: Interface ⇒ Keypad ⇒ Parameter<br />
List ⇒ Insert<br />
and<br />
Advanced ⇒ Command Batches ⇒ Batch # ⇒<br />
User Selections ⇒ Retry Clear Time<br />
and<br />
AF95/IS905 Programmer’s Manual<br />
A-59
Commands, Parameters, and Settings<br />
APPENDIX<br />
Advanced ⇒ Auto Restart ⇒ Enable Restart on<br />
Fault ⇒ Count Reset Timer<br />
Overview: This parameter sets the continuous<br />
run time required to reset the fault counter to zero.<br />
For additional related information see:<br />
# Of Restarts Flt Restart Dly<br />
Fault Restart<br />
REVERSE ENABLE<br />
Setup Display: Reverse Enable<br />
Operation Display: NA<br />
Type: Selection<br />
Stop Protection: Yes<br />
Item ID: 190<br />
Maximum Setting: NA<br />
Minimum Setting: NA<br />
Menu Path: Interface ⇒ Keypad ⇒ Parameter<br />
List ⇒ Insert<br />
and<br />
Advanced ⇒ Miscellaneous ⇒ Other Operation<br />
Settings ⇒ Reverse Enable<br />
Overview: This selection determines if the<br />
reverse operation capability of the drive is available<br />
for run conditions. This selection does not<br />
override the jog direction chosen.<br />
For additional related information see:<br />
Forward Command Reverse Command<br />
Forward/Reverse<br />
RIDETHROUGH TIME<br />
Setup Display: Ridethrough Time<br />
Operation Display: NA<br />
Type: Parameter<br />
Stop Protection: No<br />
Item ID: 356<br />
Maximum Setting: 10 seconds<br />
Minimum Setting: 0 seconds<br />
Menu Path: Interface ⇒ Keypad⇒ Parameter<br />
List ⇒ Insert<br />
and<br />
AF95/IS905 Programmer’s Manual<br />
A-60<br />
Advanced ⇒ Command Batches ⇒ Batch # ⇒<br />
User Selections ⇒ Set Parameter<br />
and<br />
Advanced ⇒ Power Loss ⇒ Power Loss Ridethrough<br />
⇒ Ridethrough Time<br />
Overview: This parameter sets the time after a<br />
power outage that a low line fault will be generated.<br />
This allows the drive to ridethrough the<br />
power outage by using the load’s stored inertial<br />
energy. If zero speed is reached before the time<br />
expires, a low line fault will occur, since not<br />
enough energy was stored in the load to provide<br />
the time set.<br />
For additional related information see:<br />
Pwr Up Restart<br />
Pwr Restart Dly<br />
RUNNING HOURS<br />
Setup Display: NA<br />
Operation Display: RunHrs<br />
Type: String<br />
Stop Protection: NA<br />
Item ID: 312<br />
Maximum Setting: NA<br />
Minimum Setting: NA<br />
Menu Path: Interface ⇒ Keypad ⇒ Operation<br />
Display ⇒ Insert<br />
Overview: This function indicates the number of<br />
hours that the drive has been running since shipment<br />
from the factory.<br />
For additional related information see:<br />
Elapsed Hours
Commands, Parameters, and Settings<br />
APPENDIX<br />
SETPOINT SOURCE<br />
Setup Display: Setpoint Source<br />
Operation Display: SetSrc<br />
Type: Selection<br />
Stop Protection: NA<br />
Item ID: 299<br />
Maximum Setting: NA<br />
Minimum Setting: NA<br />
Menu Path: Interface ⇒ Keypad ⇒ Parameter<br />
List (or Operation Display List) ⇒<br />
Insert<br />
Overview: This function indicates the specific<br />
speed setpoint source in use - keypad, preset n,<br />
PID, etc.<br />
For additional related information see:<br />
Speed Source Keypad<br />
Speed Source Remote<br />
SLIP COMP<br />
Setup Display: Slip Comp<br />
Operation Display: SLcomp<br />
Type: Parameter<br />
Stop Protection: No<br />
Item ID: 234<br />
Maximum Setting: 10 hertz, or the equivalent in<br />
RPM, or user defined units<br />
Minimum Setting: 0.0 hertz, or the equivalent in<br />
RPM, or user defined units<br />
Menu Path: Interface ⇒ Keypad ⇒ Parameter<br />
List (or Operation Display List) ⇒<br />
Insert<br />
and<br />
Interface ⇒ Analog Input ⇒ Channel n ⇒ Parameter<br />
Assignment ⇒ Slip Comp<br />
and<br />
Interface ⇒ Analog Output ⇒ Channel n ⇒<br />
Parameter Assignment ⇒ Slip Comp<br />
and<br />
Setup ⇒ Motor parameters ⇒ Motor-Related<br />
Parameters ⇒ Slip Compensation<br />
and<br />
Advanced ⇒ Command Batches ⇒ Batch # ⇒<br />
User Selections ⇒ Set Parameter<br />
Overview: This function allows the setting of the<br />
amount of slip compensation to be applied to the<br />
motor at full load, and the viewing of this value.<br />
SPD OVERRIDE n<br />
Setup Display: Spd Override n (n = 1 or 2)<br />
Operation Display: SpdOvn<br />
Type: Parameter<br />
Stop Protection: No<br />
Item ID: 160 or 161<br />
Maximum Setting: Maximum setpoint frequency<br />
Minimum Setting: Minimum setpoint frequency<br />
Menu Path: Interface ⇒ Keypad ⇒ Parameter<br />
List (or Operation Display List) ⇒<br />
Insert<br />
and<br />
Interface ⇒ Analog Input ⇒ Channel n ⇒ Parameter<br />
Assignment ⇒ Spd Override n<br />
and<br />
Interface ⇒ Analog Output ⇒ Channel n ⇒<br />
Parameter Assignment ⇒ Spd Override n<br />
and<br />
Setup ⇒ Speeds ⇒ Speed override ⇒ Speed<br />
Override n<br />
and<br />
Advanced ⇒ Command Batches ⇒ Batch # ⇒<br />
User Selections ⇒ Set Parameter<br />
and<br />
Advanced ⇒ Window comparators ⇒ Parameter<br />
⇒ Speed Override n<br />
Overview: This function allows the setting of the<br />
value of the two override speeds, used for example<br />
as smoke purge and PM setback.<br />
For additional related information see:<br />
Override n Override n Off<br />
Override n On<br />
AF95/IS905 Programmer’s Manual<br />
A-61
Commands, Parameters, and Settings<br />
APPENDIX<br />
SPD UNIT SELECT<br />
Setup Display: Spd Unit Select<br />
Operation Display: NA<br />
Type: Selection<br />
Stop Protection: No<br />
Item ID: 125<br />
Maximum Setting: NA<br />
Minimum Setting: NA<br />
Menu Path: Interface ⇒ Keypad ⇒ Parameter<br />
List ⇒ Insert<br />
and<br />
Setup ⇒ Speed units/limits ⇒ Units in Which to<br />
Display Speed ⇒ Spd Unit Select<br />
Overview: This function allows the selection of<br />
the units in which speed will be displayed. The<br />
choices are hertz, rpm, or user defined units.<br />
SPEED SETPOINT<br />
Setup Display: Speed Setpoint<br />
Operation Display: SpdSet<br />
Type: Parameter<br />
Stop Protection: No<br />
Item ID: 187<br />
Maximum Setting: NA<br />
Minimum Setting: NA<br />
Menu Path: Interface ⇒ Keypad ⇒ Parameter<br />
List (or Operation Display List) ⇒<br />
Insert<br />
and<br />
Interface ⇒ Analog Output ⇒ Channel n ⇒<br />
Parameter Assignment ⇒ Speed Setpoint<br />
and<br />
Advanced ⇒ Window comparators ⇒ Parameter<br />
⇒ Speed Setpoint<br />
Overview: This parameter provides a display of<br />
the current speed setpoint. The window comparator<br />
output may be used to indicate a particular<br />
speed setpoint level.<br />
AF95/IS905 Programmer’s Manual<br />
A-62<br />
SPEED SRC KEYPAD<br />
Setup Display: Speed Src Keypad<br />
Operation Display: NA<br />
Type: Command<br />
Stop Protection: No<br />
Item ID: 75<br />
Maximum Setting: NA<br />
Minimum Setting: NA<br />
Menu Path: Interface ⇒ Digital Input ⇒ Pin # ⇒<br />
Speed Src Keypad<br />
and<br />
Interface ⇒ Digital Output ⇒ Pin # ⇒ Speed Src<br />
Keypad<br />
and<br />
Advanced ⇒ Command Batches ⇒ Batch # ⇒<br />
User Selections ⇒ Speed Src Keypad<br />
and<br />
Advanced ⇒ Speed source ⇒ Speed Control ⇒<br />
Keypad<br />
Overview: This command sets the speed input to<br />
the keypad register which is modified by the<br />
Faster/Slower keys on the keypad. This is functionally<br />
the same as toggling the Select key in the<br />
Speed Control section of the keypad to the Keypad<br />
position. The speed source is maintained<br />
until toggled by a Speed Src Remote digital input<br />
or by the keypad Select key.<br />
For additional related information see:<br />
Speed Src Remote<br />
SPEED SRC REMOTE<br />
Setup Display: Speed Src Remote<br />
Operation Display: NA<br />
Type: Command<br />
Stop Protection: No<br />
Item ID: 74<br />
Maximum Setting: NA<br />
Minimum Setting: NA<br />
Menu Path: Interface ⇒ Digital Input ⇒<br />
Pin # ⇒ Speed Src Remote
Commands, Parameters, and Settings<br />
APPENDIX<br />
and<br />
Advanced ⇒ Command Batches ⇒ Batch # ⇒<br />
User Selections ⇒ Speed Src Remote<br />
and<br />
Advanced ⇒ Speed source ⇒ Speed Control ⇒<br />
Remote<br />
Overview: This command sets the speed input to<br />
be from a remote source, such as PID/follower,<br />
preset speeds, or the ramp up/ramp down function.<br />
This is the same as toggling the Select key in<br />
the Speed Control section of the keypad to the<br />
Remote position. The speed source is maintained<br />
until toggled by a Speed Src Keypad digital input<br />
or by the keypad Select key.<br />
For additional related information see:<br />
Speed Src Keypad<br />
START<br />
Setup Display: Start<br />
Operation Display: NA<br />
Type: Command<br />
Stop Protection: No<br />
Item ID: 6<br />
Maximum Setting: NA<br />
Minimum Setting: NA<br />
Menu Path: Interface ⇒ Digital Input ⇒<br />
Pin # ⇒ Start<br />
and<br />
Advanced ⇒ Command batches ⇒ User Selections<br />
⇒ 3-Wire Start<br />
Overview: This command is used in conjunction<br />
with the Run Enable/Stop command to provide<br />
three wire start/stop control Two digital inputs are<br />
required, one for the stop input and the other for<br />
the start input. The stop input must be initially<br />
closed to enable three wire control. Upon<br />
momentary closure of the start input the drive will<br />
run. To stop the drive a momentary opening of the<br />
stop input is required.<br />
For additional related information see:<br />
Run Enable/Stop Stop<br />
Start Mode Stop Mode<br />
START MODE<br />
Setup Display: Start Mode<br />
Operation Display: NA<br />
Type: Selection<br />
Stop Protection: Yes<br />
Item ID: 357<br />
Maximum Setting: NA<br />
Minimum Setting: NA<br />
Menu Path: Interface ⇒ Keypad ⇒ Parameter<br />
List ⇒ Insert<br />
and<br />
Setup ⇒ Start mode ⇒ Select Start Mode ⇒<br />
Bumpless/Dwell<br />
Overview: This parameter sets the mode the<br />
drive will start in, either bumpless - where the<br />
drive searches for a spinning motor, catches it and<br />
then goes to the set speed; or dwell - where the<br />
drive starts at the programmed dwell speed for the<br />
dwell time regardless of the fact that the motor<br />
may be turning and accelerates to set speed after<br />
a short time delay.<br />
For additional related information see:<br />
Bumpless Speed Stop<br />
Bumpless Timer Start<br />
Dwell Speed Stop<br />
Dwell Time Stop Mode<br />
START SRC KEYPAD<br />
Setup Display: Start Src Keypad<br />
Operation Display: NA<br />
Type: Command<br />
Stop Protection: No<br />
Item ID: 1<br />
Maximum Setting: NA<br />
Minimum Setting: NA<br />
Menu Path: Interface ⇒ Digital Input ⇒<br />
Pin # ⇒ Start Src Keypad<br />
and<br />
Advanced ⇒ Command batches ⇒ User Selections<br />
⇒ Start Src Keypad<br />
and<br />
Interface ⇒ Digital Output ⇒ Pin # ⇒ Start Src<br />
Keypad<br />
AF95/IS905 Programmer’s Manual<br />
A-63
Commands, Parameters, and Settings<br />
APPENDIX<br />
and<br />
Advanced ⇒ Speed source ⇒ Start/Stop Control<br />
⇒ Keypad<br />
Overview: This command sets the start input to<br />
be Start/Stop keys on the keypad. This is functionally<br />
the same as toggling the Select key in the<br />
Start/Stop Control section of the keypad to the<br />
Keypad position. The start/stop source is maintained<br />
until toggled by a Start Src Remote digital<br />
input, a batch command or by the keypad Select<br />
key. Note that the Stop key is always functional<br />
and is independent of the Start/Stop source<br />
selected.<br />
For additional related information see:<br />
Start Src Remote<br />
START SRC REMOTE<br />
Setup Display: Start Src Remote<br />
Operation Display: NA<br />
Type: Command<br />
Stop Protection: No<br />
Item ID: 5<br />
Maximum Setting: NA<br />
Minimum Setting: NA<br />
Menu Path: Interface ⇒ Digital Input ⇒<br />
Pin # ⇒ Start Src Remote<br />
and<br />
Advanced ⇒ Command batches ⇒ User Selections<br />
⇒ Start Src Remote<br />
and<br />
Advanced ⇒ Speed source ⇒ Start/Stop Control<br />
⇒ Remote<br />
Overview: This command sets start to be a digital<br />
input. This is functionally the same as toggling<br />
the Select key in the Start/Stop Control section of<br />
the keypad to the Remote position. The start/stop<br />
source is maintained until toggled by a Start Src<br />
Keypad digital input, a batch command, or by the<br />
keypad Select key. Note that the Stop key is<br />
always functional and is independent of the Start/<br />
Stop source selected.<br />
For additional related information see:<br />
Start Src Keypad<br />
AF95/IS905 Programmer’s Manual<br />
A-64<br />
START/STOP<br />
Setup Display: Start/Stop<br />
Operation Display: NA<br />
Type: Command<br />
Stop Protection: No<br />
Item ID: 365<br />
Maximum Setting: NA<br />
Minimum Setting: NA<br />
Menu Path: Interface ⇒ Digital Input ⇒<br />
Assignment ⇒ Start/Stop<br />
Overview: This function is identical to the PLC<br />
Start/PLC Stop functions with one exception.<br />
When the contact is open the drive cannot be<br />
started from other remote commands when the<br />
Keypad Start/Stop Control is in the remote position,<br />
or from the Keypad when the Keypad Start/<br />
Stop Control is in the Keypad position.<br />
For additional related information see:<br />
PLC Start Start<br />
Run Enable/Stop<br />
STOP<br />
Setup Display: Start/Stop and Run Enable/Stop<br />
Operation Display: NA<br />
Type: Command<br />
Stop Protection: No<br />
Item ID: 9<br />
Maximum Setting: NA<br />
Minimum Setting: NA<br />
Menu Path: Interface ⇒ Digital Input ⇒<br />
Assignment ⇒ Run Enable/Stop<br />
Overview: This command is used in conjunction<br />
with the Start command to provide three wire<br />
start/stop control. Two digital inputs are required,<br />
one for the stop input and the other for the start<br />
input. The stop input must be connected initially<br />
to digital common (terminal 10) to enable three<br />
wire control. Upon momentary closure of the start<br />
input to terminal 10 the drive will run. To stop the<br />
drive a momentary opening of the stop input is<br />
required. This input also performs the function of<br />
a run enable. Until it is closed the drive is not<br />
enabled for start.
Commands, Parameters, and Settings<br />
APPENDIX<br />
For additional related information see:<br />
Start Stop Mode<br />
Start Mode<br />
STOP MODE<br />
Setup Display: Stop Mode<br />
Operation Display: NA<br />
Type: Selection<br />
Stop Protection: Yes<br />
Item ID: 346<br />
Maximum Setting: NA<br />
Minimum Setting: NA<br />
Menu Path: Interface ⇒ Keypad ⇒ Parameter<br />
List ⇒ Insert<br />
and<br />
Setup ⇒ Stop mode ⇒ Normal Stop Mode<br />
Parameter ⇒ Stop Mode ⇒ Coast/Use Normal<br />
Decel Time<br />
Overview: This parameter sets the mode the<br />
drive will stop in, either Coast - where the drive<br />
output is turned off and the motor coasts to a stop;<br />
or Normal Decel Time - where the drive decelerates<br />
at the preset deceleration ramp or as determined<br />
by load inertia, and then turns off at<br />
approximately 1.5 hertz.<br />
For additional related information see:<br />
Start Mode Stop<br />
Start<br />
STOPPING TIMEOUT<br />
Setup Display: Stopping Timeout<br />
Operation Display: NA<br />
Type: Parameter<br />
Stop Protection: No<br />
Item ID: 431<br />
Maximum Setting: 50 seconds<br />
Minimum Setting: 0.0 seconds<br />
Menu Path: Interface ⇒ Keypad ⇒ Parameter<br />
List ⇒ Insert<br />
and<br />
Setup ⇒ Stop mode ⇒ Stopping Time Parameter<br />
⇒ Stopping Time Out<br />
Overview: When a stop is initiated, the drive<br />
speed ramp descends to zero. Upon reaching<br />
zero this timer begins. If the drive has not<br />
stopped in that time, a STPPING TIME OUT fault<br />
trip will occur. This trip would normally only occur<br />
if the deceleration ramp has been set too short for<br />
a high inertia load, or if the load is overhauling.<br />
For additional related information see:<br />
Decel 2 Time<br />
Decel Time<br />
SWITCHING FREQ<br />
Setup Display: Switching Freq<br />
Operation Display: NA<br />
Type: Parameter<br />
Stop Protection: No<br />
Item ID: 30<br />
Maximum Setting: 12000 hertz through100 hp,<br />
and 3000 hertz for 125 hp and above<br />
Minimum Setting: 3000 hertz<br />
Menu Path: Interface ⇒ Keypad ⇒ Parameter<br />
List ⇒ Insert<br />
and<br />
Advanced ⇒ Command batches ⇒ User Selections<br />
⇒ Set Parameter<br />
and<br />
Advanced ⇒ Miscellaneous ⇒ Other Operation<br />
Settings ⇒ Switching Frequency<br />
Overview: This parameter allows the switching<br />
frequency of the drive’s carrier to be changed to a<br />
value different than the factory default. Lower<br />
switching frequencies will result in lower power<br />
losses in the drive, but may result in slightly higher<br />
motor generated audible noise. The drive rating is<br />
based on a switching frequency of 12,000 hertz<br />
through 20 hp, 6000 Hz from 25 to 100 hp, and<br />
3000 hertz for 125 hp and above.<br />
For additional related information see:<br />
Actual Sw Freq<br />
AF95/IS905 Programmer’s Manual<br />
A-65
Commands, Parameters, and Settings<br />
APPENDIX<br />
TIME 24 HOUR<br />
Setup Display: Time 24 Hour<br />
Operation Display: Time<br />
Type: String<br />
Stop Protection: No<br />
Item ID: 192<br />
Maximum Setting: NA<br />
Minimum Setting: NA<br />
Menu Path: Interface ⇒ Keypad ⇒ Operation<br />
Display List ⇒ Insert<br />
and<br />
Advanced ⇒ Clock ⇒ Set Clock ⇒ 24-Hour<br />
Overview: This display presents the time in 24<br />
hour format.<br />
For additional related information see:<br />
Date - Time Time AM/PM<br />
Time 24 Hour<br />
TIME AM/PM<br />
Setup Display: Time AM/PM<br />
Operation Display: Time<br />
Type: String<br />
Stop Protection: No<br />
Item ID: 193<br />
Maximum Setting: NA<br />
Minimum Setting: NA<br />
Menu Path: Interface ⇒ Keypad ⇒ Operation<br />
Display List ⇒ Insert<br />
and<br />
Advanced ⇒ Clock ⇒ Set Clock ⇒ A.M. or P.M.<br />
Overview: This display presents the time in 12<br />
hour format, with AM and PM indication.<br />
For additional related information see:<br />
Date - Time Time AM/PM<br />
Time 24 Hour<br />
AF95/IS905 Programmer’s Manual<br />
A-66<br />
TODAY’S DATE<br />
Setup Display: Today’s Date<br />
Operation Display: Date<br />
Type: String<br />
Stop Protection: No<br />
Item ID: 311<br />
Maximum Setting: NA<br />
Minimum Setting: NA<br />
Menu Path: Interface ⇒ Keypad ⇒ Operation<br />
Display List ⇒ Insert<br />
and<br />
Advanced ⇒ Clock ⇒ Set Clock ⇒ Year/Month/<br />
Day<br />
Overview: This display presents the present<br />
date.<br />
For additional related information see:<br />
Date - Time Time AM/PM<br />
Time 24 Hour<br />
USER PID DP<br />
Setup Display: User PID DP<br />
Operation Display: NA<br />
Type: Parameter<br />
Stop Protection: No<br />
Item ID: 182<br />
Maximum Setting: 3<br />
Minimum Setting: 0<br />
Menu Path: Advanced ⇒ PID ⇒ PID Units ⇒<br />
Decimal Points in Display<br />
Overview: This parameter allows for the selection<br />
of the number of characters which will be displayed<br />
after the decimal point in the PID unit<br />
displays. The display size is limited to a maximum<br />
of five numbers, not counting the decimal point.<br />
For additional related information see:<br />
User PID L_Units User PID Minimum<br />
User PID Maximum User PID S_Units
Commands, Parameters, and Settings<br />
APPENDIX<br />
USER PID L_UNITS<br />
Setup Display: User PID L_Units<br />
Operation Display: NA<br />
Type: String<br />
Stop Protection: No<br />
Item ID: 184<br />
Maximum Setting: NA<br />
Minimum Setting: NA<br />
Menu Path: Advanced ⇒ PID ⇒ PID Units ⇒<br />
PID Units ⇒ Long Label<br />
Overview: This function allows the user to define<br />
the long label name for the user defined PID units.<br />
This will appear in the PID error, reference, feedback<br />
and setpoint Scroll Parameter displays.<br />
For additional related information see:<br />
User PID DP User PID Minimum<br />
User PID Maximum User PID S_Units<br />
USER PID MAXIMUM<br />
Setup Display: User PID Maximum<br />
Operation Display: NA<br />
Type: Parameter<br />
Stop Protection: No<br />
Item ID: 484<br />
Maximum Setting: Dependent upon user<br />
defined PID units<br />
Minimum Setting: Dependent upon user defined<br />
PID units<br />
Menu Path: Advanced ⇒ PID ⇒ PID Units ⇒<br />
PID Limits ⇒ Maximum PID Value<br />
Overview: This parameter defines the maximum<br />
value allowed for the PID units and defines the<br />
scaling and range of the PID units.<br />
For additional related information see:<br />
User PID DP User PID Minimum<br />
User PID L_Units User PID S_Units<br />
USER PID MINIMUM<br />
Setup Display: User PID Minimum<br />
Operation Display: NA<br />
Type: Parameter<br />
Stop Protection: No<br />
Item ID: 485<br />
Maximum Setting: Dependent upon user<br />
defined PID units<br />
Minimum Setting: Dependent upon user defined<br />
PID units<br />
Menu Path: Advanced ⇒ PID ⇒ PID Units ⇒<br />
PID Limits ⇒ Minimum PID Value<br />
Overview: This parameter defines the minimum<br />
value allowed for the PID units.<br />
For additional related information see:<br />
User PID DP User PID Maximum<br />
User PID L_Units User PID S_Units<br />
USER PID S_UNITS<br />
Setup Display: User PID S_Units<br />
Operation Display: NA<br />
Type: String<br />
Stop Protection: No<br />
Item ID: 185<br />
Maximum Setting: NA<br />
Minimum Setting: NA<br />
Menu Path: Advanced ⇒ PID ⇒ PID Units ⇒<br />
PID Units ⇒ Short Label<br />
Overview: This function allows the user to define<br />
the short label name for the user defined PID<br />
units. This will appear in the PID error, reference,<br />
feedback and setpoint Operation displays.<br />
For additional related information see:<br />
User PID DP User PID Maximum<br />
User PID L_Units User PID Minimum<br />
AF95/IS905 Programmer’s Manual<br />
A-67
Commands, Parameters, and Settings<br />
APPENDIX<br />
USER SPD L_UNITS<br />
Setup Display: User SPD L_Units<br />
Operation Display: NA<br />
Type: String<br />
Stop Protection: No<br />
Item ID: 122<br />
Maximum Setting: NA<br />
Minimum Setting: NA<br />
Menu Path: Setup ⇒ Speed Units/limits ⇒<br />
Units in Which to Display Speed ⇒<br />
User ⇒ Long Label<br />
Overview: This function allows the user to define<br />
the long label name for the user’s defined speed<br />
units. These units will be used for speed displays<br />
in the Scroll Parameter’s section of the keypad.<br />
For additional related information see:<br />
User SPD S_Units User Speed Scale<br />
User Speed DP<br />
USER SPD S_UNITS<br />
Setup Display: User SPD S_Units<br />
Operation Display: NA<br />
Type: String<br />
Stop Protection: No<br />
Item ID: 123<br />
Maximum Setting: NA<br />
Minimum Setting: NA<br />
Menu Path: Setup ⇒ Speed Units/limits ⇒<br />
Units in Which to Display Speed ⇒<br />
User ⇒ Short Label<br />
Overview: This function allows the user to define<br />
the short label name for the user’s defined speed<br />
units. These units will be used for speed displays<br />
in the Operation Display section of the keypad.<br />
For additional related information see:<br />
User SPD L_Units User Speed Scale<br />
User Speed DP<br />
AF95/IS905 Programmer’s Manual<br />
A-68<br />
USER SPEED DP<br />
Setup Display: User Speed DP<br />
Operation Display: NA<br />
Type: Parameter<br />
Stop Protection: No<br />
Item ID: 121<br />
Maximum Setting: 4<br />
Minimum Setting: 0<br />
Menu Path: Setup ⇒ Speed Units/limits ⇒<br />
Decimal Points in Display<br />
Overview: This parameter allows for the selection<br />
of the number of characters which will be displayed<br />
after the decimal point in the speed unit<br />
displays. The display size is limited to a maximum<br />
of five numbers, not counting the decimal point.<br />
For additional related information see:<br />
User SPD L_Units User Speed Scale<br />
User SPD S_Units<br />
USER SPEED SCALE<br />
Setup Display: User Speed Scale<br />
Operation Display: NA<br />
Type: Parameter<br />
Stop Protection: No<br />
Item ID: 120<br />
Maximum Setting: 999999 (Decimal point location<br />
sensitive)<br />
Minimum Setting: 1<br />
Menu Path: Setup ⇒ Speed Units/limits ⇒<br />
Scale User Units to Frequency<br />
Overview: This parameter provides the ability to<br />
scale the user defined units to the programmed<br />
drive reference frequency by setting the value of<br />
user units corresponding to frequency.<br />
For additional related information see:<br />
User SPD L_Units User Speed DP<br />
User SPD S_Units
Commands, Parameters, and Settings<br />
APPENDIX<br />
VOLTAGE BOOST<br />
Setup Display: Voltage Boost<br />
Operation Display: VBoost<br />
Type: Parameter<br />
Stop Protection: No<br />
Item ID: 298<br />
Maximum Setting: 50 volts<br />
Minimum Setting: 0 volts<br />
Menu Path: Interface ⇒ Keypad ⇒ Parameter<br />
List (or Operation Display List) ⇒<br />
Insert<br />
and<br />
Advanced ⇒ Command Batches ⇒ Batch # ⇒<br />
User Selections ⇒ Set Parameter<br />
and<br />
Setup ⇒ Motor Parameters ⇒ Voltage Boost<br />
Overview: This parameter allows setting the voltage<br />
boost which is added to the normal non boost<br />
voltage which becomes the value applied to the<br />
motor terminals. This allows the motor to develop<br />
larger starting and low speed torque by overcoming<br />
the motor’s resistive drops at low speed. Care<br />
must be exercised in setting the boost since too<br />
much may cause saturation and result in motor<br />
overheating and too little may prevent the motor<br />
from developing adequate starting torque.<br />
WINn A THRESHOLD<br />
Setup Display: WINn A Threshold (n = 1 to 4)<br />
Operation Display: NA<br />
Type: Parameter<br />
Stop Protection: No<br />
Item ID: 199, 203, 207, 211<br />
Maximum Setting: Maximum value of specified<br />
parameter plus 10 percent of its span<br />
Minimum Setting: Minimum value of specified<br />
parameter minus 10 percent of its span<br />
Menu Path: Interface ⇒ Keypad ⇒ Parameter<br />
List ⇒ Insert<br />
and<br />
Advanced ⇒ Command Batches ⇒ Batch # ⇒<br />
User Selections ⇒ Set Parameter<br />
and<br />
Advanced ⇒ Window comparators ⇒ WINn A<br />
Threshold<br />
Overview: This parameter provides the ability to<br />
set the lower/upper limit for the window comparator<br />
or level detector functions, dependant upon the<br />
function selected.<br />
For additional related information see:<br />
WINn B Threshold<br />
WINn Hysteresis<br />
WINn B THRESHOLD<br />
Setup Display: WINn B Threshold (n = 1 to 4)<br />
Operation Display: NA<br />
Type: Parameter<br />
Stop Protection: No<br />
Item ID: 200, 204, 208, 212<br />
Maximum Setting: Maximum value of specified<br />
parameter plus 10 percent of its span<br />
Minimum Setting: Minimum value of specified<br />
parameter minus 10 percent of its span<br />
Menu Path: Interface ⇒ Keypad ⇒ Parameter<br />
List ⇒ Insert<br />
and<br />
Advanced ⇒ Command Batches ⇒ Batch # ⇒<br />
User Selections ⇒ Set Parameter<br />
and<br />
Advanced ⇒ Window comparators ⇒ WINn B<br />
Threshold<br />
Overview: This parameter provides the ability to<br />
set the upper/lower limit for the window comparator<br />
function, dependant upon the function<br />
selected.<br />
For additional related information see:<br />
WINn A Threshold<br />
WINn Hysteresis<br />
AF95/IS905 Programmer’s Manual<br />
A-69
Commands, Parameters, and Settings<br />
APPENDIX<br />
WINn HYSTERESIS<br />
Setup Display: WINn Hysteresis (n = 1 to 4)<br />
Operation Display: NA<br />
Type: Parameter<br />
Stop Protection: No<br />
Item ID: 201, 205, 209, 213<br />
Maximum Setting: 10 percent of span of specified<br />
parameter<br />
Minimum Setting: 0.0<br />
Menu Path: Interface ⇒ Keypad ⇒ Parameter<br />
List ⇒ Insert<br />
and<br />
Advanced ⇒ Command Batches ⇒ Batch # ⇒<br />
User Selections ⇒ Set Parameter<br />
and<br />
Advanced ⇒ Window comparators ⇒ Hysteresis<br />
Overview: This parameter sets the hysteresis<br />
levels for the edge detection in switching the window<br />
comparator or level detector functions.<br />
For additional related information see:<br />
WINn A Threshold<br />
WINn B Threshold<br />
AF95/IS905 Programmer’s Manual<br />
A-70
Symbols<br />
# Of Motor Poles .............................................................A-10<br />
# Of Restarts ...................................................................A-10<br />
+ ILim ....................................................................... A-7, A18<br />
+/- ILim ..............................................................................A-7<br />
- ILim ....................................................................... A-7, A-19<br />
Numerics<br />
3-Wire Start .....................................................................A-63<br />
A<br />
Accel ...................................................... 3-12, A-2, A-3, A-10<br />
Accel 1, Max ............................................................. A-2, A-3<br />
Accel 2 ............................................................................A-11<br />
Accel 2 Time.................................................... A-2, A-3, A-11<br />
Accel 2, Max ............................................................. A-2, A-3<br />
Accel Rate ........................................................................A-5<br />
Accel Time .......................................................A-2, A-3, A-10<br />
Accel, In ............................................................................A-7<br />
Accel, Jog ........................................................A-2, A-3, A-32<br />
Accel, Max Jog ......................................................... A-2, A-3<br />
Accel/Decel 1 ............................................... 3-12, A-10, A-21<br />
Accel/Decel 2 ............................................... 3-12, A-11, A-21<br />
AccelJ .............................................................................A-32<br />
AccMxJ ...........................................................................A-39<br />
AccMxn (n = 1 or 2) ........................................................A-38<br />
Action, drive overtemperature .........................................A-28<br />
Action, motor overload ....................................................A-45<br />
Action, Overtemperature ................................................. 3-22<br />
Action, PID ......................................................................A-48<br />
Active Config # ................................................................A-11<br />
Actual Sw Freq ....................................................... A-4, A-12<br />
Add Device ....................................................................... 3-6<br />
Address<br />
ARCNET ............................................................... 3-6<br />
Digital ....................................................................... 3-6<br />
Index<br />
Advanced ................................................................ 3-15, A-8<br />
Ambient Temp .........................................................A-4, A-12<br />
AmbTmp ......................................................................... A-12<br />
Amps, Motor Nameplate ................................................. A-44<br />
Analog Input ....................2-6, 3-8, 3-13, 3-17, 3-18, A-2, A-8<br />
Analog n Found .............................................................. A-13<br />
Analog n Lost ................................................................. A-13<br />
Analog Output ........................................................... 3-8, A-8<br />
ARC n ............................................................................. A-14<br />
ARCNET Address ..........................................................3-6<br />
ARCNET Count #n ......................................................... A-14<br />
At Speed .................................................................... 3-8, A-7<br />
Audible Noise ........................................................ 3-23, A-65<br />
Auto Mode Select .................................................. 3-19, A-14<br />
Auto Ref .................................................................. 3-19, A-8<br />
Auto Reference ............................................... A-5, A-7, A-14<br />
Auto Restart ............................................................ 3-20, A-8<br />
Avoidance, Speed .................................................A-33, A-34<br />
B<br />
Backup ..............................................................................2-6<br />
Batch Command ......................... 3-15, A-8, A-58, A-59, A-64<br />
Batch n, Binary ................................................................. A-5<br />
Batch n, Execute .............................................................. A-5<br />
Batch Number .................................................................. A-8<br />
Batch Program ......................................................A-13, A-23<br />
Batch Strobe ..................................................................... A-5<br />
Binary Batch n .................................................................. A-5<br />
Binary Encoded Inputs ................................................... A-37<br />
Binary Preset n ................................................................. A-5<br />
Block, Terminal .............................................. 3-8, A-11, A-54<br />
Blower, External .................................................................2-5<br />
Blue Text ...........................................................................1-2<br />
Bold With No Underline Text .............................................1-2<br />
Boost, Voltage ......................................3-10, A-8, A-30, A-69<br />
Brake Speed, DC ............................................ A-2, A-3, A-20<br />
Brake Time, DC ............................................... A-2, A-3, A-20<br />
Braking Torque ................................................................3-14<br />
AF95/IS905 Programmer’s Manual<br />
I-1
INDEX<br />
Braking, DC ................................................... 3-14, A-7, A-20<br />
Braking, Dynamic ...................................................3-21, A-19<br />
Breakpoint, High Speed........................................ A-29, A-39<br />
Breakpoint, Low Speed ........................................ A-36, A-42<br />
BrkSpd ............................................................................A-20<br />
BrkTim ............................................................................A-20<br />
Buffer Parameter ............................................................ 3-27<br />
Buffers, Trend ................................................ 3-24, 3-26, A-8<br />
Bumpless ......................................3-13, A-7, A-8, A-15, A-63<br />
Bumpless Speed ............................................................A-15<br />
Bumpless Timer ..............................................................A-15<br />
Bus Current ............................................................. A-4, A-16<br />
Bus Voltage ............................................................ A-4, A-16<br />
BusI .................................................................................A-16<br />
BusV ...............................................................................A-16<br />
Button, Clear Faults ........................................................ 3-26<br />
Button, Help .................................................................... 3-27<br />
C<br />
Cable, Null Modem ........................................................... 2-3<br />
Cancel, Don't Send........................................................... 3-5<br />
Capacitor Temp ...................................................... A-4, A-16<br />
Capacitors, DC Filter .............................................3-22, A-16<br />
CapTmp ..........................................................................A-16<br />
Carrier Frequency ...............................3-22, 3-23, A-28, A-65<br />
CFG Extension ................................................................. 3-3<br />
Change, Direction.............................. 3-27, A-30, A-58, A-59<br />
Check Drive ...............................................................3-5, A-8<br />
Chng Std Config .............................................................A-17<br />
Clamped Spdset ..................................................... A-3, A-17<br />
Class 10 or 20 Overload Protection .......................3-11, A-47<br />
Clear Fault Log .............................................. 3-26, A-5, A-17<br />
Clear Faults ................................................... 3-22, 3-26, A-8<br />
Clear KW Hours ...................................................... A-5, A-18<br />
Clock ........................................................................3-21, A-8<br />
Close, Ext Cont ...............................................................A-24<br />
Closed Loop Control System .......................................... 3-18<br />
Coast ........................................................... 3-14, A-25, A-65<br />
Com port ......................................................2-2, 2-3, 3-4, 3-5<br />
Communication ........................................... 2-5, 2-7, 3-4, A-8<br />
Communications Port, Serial ............................................ 3-5<br />
Comparators, Window ..................................... 3-8, 3-16, A-8<br />
Compensation, IR .................................. 3-10, A-2, A-4, A-30<br />
Compensation, Slip ................................ 3-11, A-2, A-4, A-61<br />
Config .............................................................................A-11<br />
Configuration ............................................................. 3-3, 3-5<br />
Configurations<br />
Custom....................................................... 2-2, 2-6, 3-4<br />
Device ...............................................................3-6, A-8<br />
Print Terminal Block ................................................. 3-4<br />
Save The Present .................................................... 3-4<br />
Standard ........................................................... 2-5, 3-8<br />
Configurations, Current ..................................................... 3-5<br />
Connected, Port ................................................................ 3-5<br />
Connection, Serial Mouse ................................................. 3-5<br />
AF95/IS905 Programmer’s Manual<br />
I-2<br />
Contactor Interlock ................................. 3-23, A-6, A-8, A-24<br />
Contactor Pull In Fault .....................................................3-23<br />
Contactor, Output ...........................................3-14, A-7, A-24<br />
Control Functions ............................................. 3-6, 3-17, A-8<br />
Control Item n .................................................. A-2, A-4, A-18<br />
Copy function ....................................................................3-7<br />
Count Reset Timer ......................................................... A-60<br />
Counter, Fault ................................................................ A-60<br />
Current<br />
Bus .................................................................A-4, A-16<br />
Motor ..............................................................A-4, A-43<br />
Trip Or Fold Back .................................................. A-28<br />
Current Limit .........................3-10, A-2, A-3, A-8, A-11, A-18,<br />
A-19, A-22, A-40, A-44<br />
Curve, Motor Overload...........................................A-29, A-38<br />
Curve, Volts/hertz ..................................................A-41, A-43<br />
Cutoff Frequency ............................................................ A-49<br />
D<br />
Data, Motor Nameplate .......................... 3-9, A-8, A-44, A-45<br />
Date ....................................................................... 3-21, A-66<br />
Date - Time .................................................................... A-19<br />
Date, Present ................................................................. A-66<br />
DB Temp .................................................................A-4, A-20<br />
DBTmp ........................................................................... A-20<br />
DC Brake Speed .................................... 3-14, A-2, A-3, A-20<br />
DC Brake Time ................................................ A-2, A-3, A-20<br />
DC Braking .....................................................3-14, A-7, A-20<br />
DC Bus Current .............................................................. A-16<br />
DC Bus Voltage .....................................................A-16, A-21<br />
Decel .............................................................................. A-21<br />
Decel 2 Time .......................................... 3-12, A-2, A-3, A-21<br />
Decel Ramp Rate ........................................................... A-24<br />
Decel Time ....................................3-13, 3-14, A-2, A-3, A-21<br />
Decel, Fast ............................................. 3-14, A-2, A-3, A-24<br />
Decel, In ........................................................................... A-7<br />
Decel, Jog ....................................................... A-2, A-3, A-32<br />
Decel2 ............................................................................ A-21<br />
DecelJ ............................................................................ A-32<br />
DecFst ............................................................................ A-24<br />
Delay Time ..................................................................... A-27<br />
Derivative .............................................................. 3-18, A-49<br />
Device Configuration ................................................. 3-6, A-8<br />
Diagnose .......................................................................... A-8<br />
Diagnostics ..................................................... 3-24, 3-25, A-8<br />
Digital Address ..................................................................3-6<br />
Digital Input ...................2-6, 3-7, 3-8, 3-13, 3-15, 3-17, 3-22,<br />
A-5, A-6, A-8<br />
Digital Output ..................................3-8, 3-16, A-7, A-8, A-13<br />
Digital Pot ................................... 3-13, A-8, A-22, A-57, A-58<br />
Direction ............................3-22, 3-23, 3-27, A-8, A-30, A-31,<br />
A-34, A-58, A-59<br />
Direction, Jog ................................................................. A-60<br />
Disable DC Braking ............................................... 3-14, A-20<br />
Disable reverse ...............................................................3-23
Disk .................................................................... 2-6, 3-3, A-8<br />
Display ...................................................................... A-8, A-9<br />
Displayed, Graph .................................3-12, 3-13, 3-14, 3-26<br />
DnTime ........................................................................... A-57<br />
Dotted Underlined Text ..................................................... 1-2<br />
Down, Coast ...................................................................A-25<br />
Down, Ramp ......................3-13, 3-14, A-5, A-25, A-57, A-58<br />
Drive ................................................................................. 2-7<br />
Check ....................................................................... 3-5<br />
Communications With The ....................................... 3-4<br />
Send To .................................................... 2-7, 3-5, A-8<br />
Upload From .................................... 2-5, 3-5, 3-21, A-8<br />
Drive Faults ..................................................................... 3-24<br />
Drive Faults, Resetting ...................................................A-26<br />
Drive Horsepower ........................................................... 3-21<br />
Drive ID ........................................................................... 3-21<br />
Drive Nameplate ......................................................3-21, A-8<br />
Drive Status ....................................................................A-22<br />
Drive, Check ..............................................................3-5, A-8<br />
Drive, Minimum And Maximum Speed For The .............. 3-11<br />
Drive, Port Connected To .................................................A-8<br />
Drive, Read From .............................................................A-8<br />
Drive, Send To ................................................... 2-7, 3-5, A-8<br />
Drive, Upload From ....................................................2-5, A-8<br />
Drop, Voltage ..................................................................A-30<br />
Dry Type Contact ....................................................... 2-6, 3-8<br />
Dwell .......... 3-13, A-2, A-3, A-7, A-8, A-11, A-22, A-23, A-63<br />
Dwell Speed ........................................... A-2, A-3, A-22, A-63<br />
DwlSpd ...........................................................................A-22<br />
DwlTim ............................................................................A-23<br />
Dynamic Braking ....................................................3-21, A-19<br />
Dynamic Braking Resistors .............................................A-20<br />
E<br />
Edge Detection ...............................................................A-70<br />
Elapsed Hours ................................................................A-23<br />
Enable, Reverse ......................... 3-22, 3-23, A-8, A-31, A-60<br />
Enable, Run ....................................................................A-63<br />
Energy Consumed .......................................................... 3-21<br />
Energy, Inertial ................................................................A-60<br />
Error, PID ....................................3-18, A-4, A-49, A-50, A-67<br />
ETM ................................................................................A-23<br />
Event History ...........................................................3-27, A-8<br />
Event, Current ...................................................................A-8<br />
Execute Batch n ...................................................... A-5, A-23<br />
Exit .............................................................................3-4, A-8<br />
Ext Cont Close ................................................................A-24<br />
Ext Cont Closed ................................................................A-6<br />
Ext Cont Open ........................................................ A-6, A-24<br />
External Blower ................................................................. 2-5<br />
External Contact ................................................... A-57, A-58<br />
External Fault ........................................................ A-25, A-26<br />
External Interlock............................................................ 3-17<br />
F<br />
INDEX<br />
F1 ............................................................................ 1-1, 3-27<br />
Failures, TX .................................................................... A-14<br />
Fast Decel .................................... 3-14, A-2, A-3, A-24, A-25<br />
Fast Decel Time ........................................................A-2, A-3<br />
Fast Stop ...................................... 3-14, A-6, A-8, A-24, A-25<br />
Fast Stopping ................................................................... A-7<br />
Faster/Slower Keys ............................................... A-35, A-62<br />
Fault .....................3-8, 3-20, A-6, A-7, A-8, A-25, A-26, A-27<br />
Fault Counter ......................................................... 3-20, A-60<br />
Fault History ......................................... 3-24, 3-25, A-8, A-17<br />
Fault Log .........................................................................3-24<br />
Fault n .....................................................................A-6, A-26<br />
Fault Reset .................................................... 3-22, A-8, A-26<br />
Fault Restart ................................................................... A-26<br />
Fault Trip, STPPING TIME OUT .................................... A-65<br />
Fault, Enable Restart On .......................................A-10, A-26<br />
Fault, External .......................................................A-25, A-26<br />
Fault, Low Line ............................................................... A-60<br />
Faults, Clear ..................................................................... A-8<br />
Feed Forward ........................................................ 3-18, A-50<br />
Feedback ..................... 3-8, 3-19, A-2, A-4, A-48, A-50, A-67<br />
File .............................................................2-6, 3-2, 3-25, A-8<br />
Filter ...................................................................... 3-19, A-49<br />
FLA, High Speed ............................................................ A-28<br />
Fldbk, Heatsink ............................................................... A-28<br />
FLT Restart DLY ............................................................ A-27<br />
Foldback Carrier Frequency ............................................3-22<br />
Foldback Current Limit ....................................................3-22<br />
Foldback, Temperature .................................................. A-19<br />
Follower................................................................. 3-19, A-14<br />
Follower Mode .........................................................A-6, A-27<br />
Follower Speed ............................................... A-2, A-3, A-27<br />
FolSpd ............................................................................ A-27<br />
Format, 12 Hour .............................................................. A-66<br />
Format, 24 Hour ............................................................. A-66<br />
Forward ................................................. A-5, A-6, A-34, A-58<br />
Forward, Feed ................................................................ A-50<br />
Forward, Keypad ............................................................ A-34<br />
Forward, Running............................................................. A-7<br />
Forward/Reverse .....................................................A-6, A-28<br />
Frequency ................................................... A-15, A-44, A-46<br />
Actual Sw ................................................................. A-4<br />
Carrier ........................................ 3-22, 3-23, A-28, A-65<br />
Cutoff ..................................................................... A-49<br />
Foldback Carrier .....................................................3-22<br />
Low Breakpoint ...................................................... A-36<br />
Motor Nameplate ................................................... A-44<br />
Output........................................................... 3-11, A-10<br />
Rated ........................................................................3-9<br />
Reference .............................................................. A-68<br />
Search ....................................................................3-13<br />
Switching ............................3-22, 3-23, A-8, A-12, A-65<br />
Upper Breakpoint ................................................... A-29<br />
AF95/IS905 Programmer’s Manual<br />
I-3
INDEX<br />
Functions<br />
Control .................................................... 3-6, 3-17, A-8<br />
Machine Control .........................3-13, 3-17, A-18, A-41<br />
G<br />
Gain, Integral ..................................................................A-51<br />
Gain, PID DER ................................................................A-49<br />
Gain, PID FD FWD ......................................................... A-50<br />
Gain, PID PROP .............................................................A-52<br />
Gain, Proportional ...........................................................A-52<br />
Graph, Interpreting The .................................................. 3-27<br />
Graphically Displayed ..........................3-12, 3-13, 3-14, 3-26<br />
H<br />
Heatsink .................................................................3-22, A-28<br />
Heatsink Fldbk ...................................................... A-12, A-28<br />
Heatsink Temp ........................................................ A-4, A-28<br />
Help ................................................................. 1-1, 3-27, A-8<br />
Hi Spd FLA Freq .............................................................A-29<br />
Hi Spd FLA Frq %........................................................... A-29<br />
High Speed FLA .............................................................A-28<br />
High Speed FLA % .........................................................A-29<br />
History<br />
Event ...............................................................3-27, A-8<br />
Fault ................................... 3-24, 3-25, A-8, A-17, A-26<br />
Warning........................................................... 3-27, A-8<br />
HldSpd ............................................................................A-57<br />
Hold Reference ...............................................................A-22<br />
Hold, Ramp ..................................................................... 3-13<br />
Horsepower ...................................2-5, 3-9, 3-21, A-36, A-44<br />
Hours, Clear KW ..................................................... A-5, A-18<br />
Hours, Elapsed ...............................................................A-23<br />
Hours, Kilowatt ...................................................... A-18, A-35<br />
Hours, Megawatt ................................ 3-21, A-18, A-35, A-41<br />
Hours, Running ...............................................................A-60<br />
How To Use Help .....................................................3-27, A-8<br />
HS Temp .........................................................................A-28<br />
Hysteresis ..............................................................3-16, A-70<br />
I<br />
I/O Device Configuration ................................ 3-6, A-17, A-37<br />
I/O Device Selection .........................................................A-8<br />
ID, Drive .......................................................................... 3-21<br />
ID, Item .............................................................................A-9<br />
IGBT ...................................................................... 3-14, 3-23<br />
-ILim ................................................................................A-19<br />
ILimit, Maximum ..............................................................A-40<br />
In Accel .............................................................................A-7<br />
In Decel .............................................................................A-7<br />
In Override 1 .....................................................................A-7<br />
In Override 2 .....................................................................A-7<br />
In Restart ...........................................................................A-7<br />
In Ridethrough ...................................................................A-7<br />
Individual Address ............................................................ 3-6<br />
AF95/IS905 Programmer’s Manual<br />
I-4<br />
Inertia ................................................. 3-14, A-21, A-25, A-65<br />
Inertial Energy ................................................................ A-60<br />
Info, Summary .................................................... 2-6, 3-4, A-8<br />
Information, Diagnostic ...................................................3-24<br />
Initial Power Up .................................................................2-5<br />
Initial Start Speed ........................................................... A-15<br />
Input<br />
Analog ....................2-6, 3-8, 3-13, 3-17, 3-18, A-2, A-8<br />
Binary Encoded ..................................................... A-37<br />
Digital ...................2-6, 3-7, 3-8, 3-13, 3-15, 3-17, 3-22,<br />
A-5, A-6, A-8<br />
MC ................................................................ 3-17, A-41<br />
PID Feedback........................................................ A-14<br />
PLC ....................................................................... A-54<br />
Preset Speed ......................................................... A-38<br />
Remote ............................................... A-28, A-58, A-59<br />
Speed ...........................................................A-62, A-63<br />
Speed Follower ..................................................... A-14<br />
Start ..............................................................A-63, A-64<br />
Stop .......................................................2-6, A-63, A-64<br />
Input Kilowatt ...........................................................A-4, A-30<br />
Installing The Software...................................................... 2-1<br />
Integral Gain................................................................... A-51<br />
Integrator Level .............................................................. A-51<br />
Integrator, PID ................................................................ A-51<br />
Interconnections<br />
25 pin serial port connector ......................................2-3<br />
Cable ........................................................................2-3<br />
Interface ............................................................. 2-6, 3-6, A-8<br />
Interlock ........................................................3-17, A-24, A-26<br />
Interlock, Contactor ......................................... A-6, A-8, A-24<br />
Interpreting The Graph.................................................... 3-27<br />
Interruption Of Power...................................................... 3-20<br />
Inverse Rotation ............................................................. A-30<br />
Invert, PID ............................................................. 3-19, A-48<br />
IR Compensation ................................... 3-10, A-2, A-4, A-30<br />
IRcomp ...........................................................3-10, A-8, A-30<br />
Item ID .............................................................................. A-9<br />
J<br />
Jerk Rate ............................................................... 3-12, A-31<br />
Jitter, Speed ....................................................................3-19<br />
Jog ...................................................................3-12, A-5, A-7<br />
Jog Accel ......................................................... A-2, A-3, A-32<br />
Jog Decel ........................................................ A-2, A-3, A-32<br />
Jog Direction ......................................................... 3-13, A-60<br />
Jog Mode ....................................................................... A-33<br />
Jog Ramp ....................................................................... A-33<br />
Jog Speed .....................3-8, 3-12, A-2, A-3, A-8, A-31, A-32,<br />
A-33, A-39, A-59<br />
Jog, Jerk Rate ................................................................ A-31<br />
Jog, REM ....................................................................... A-59<br />
Jspd n ............................................................................. A-33<br />
Jump Spdn High ............................................................. A-33<br />
Jump SPDn Low ............................................................ A-34<br />
Jump Speeds ........................................................... 3-13, A-8
K<br />
Key, Select ...................................................A-62, A-63, A-64<br />
Key, Stop ........................................................................A-64<br />
Keypad ................................................................... 3-15, 3-17<br />
Configuration ..........................................................A-11<br />
F/R Button ..............................................................A-31<br />
PID Parameter ....................................................... 3-18<br />
Speed Src ..................................... A-6, A-7, A-62, A-63<br />
Start Src ........................................ A-6, A-7, A-63, A-64<br />
Type Of .................................................................... 3-6<br />
Keypad Forward .............................................................A-34<br />
Keypad Forward/Reverse Button ....................................A-34<br />
Keypad Reverse .............................................................A-34<br />
Keypad Selection .............................................................. 3-6<br />
Keypad Speed ................................................................A-35<br />
Keypad, Configure The ..................................................... 3-6<br />
Keypads, Multiple ...............................................2-3, 3-6, 3-7<br />
Keys, Faster/Slower ........................................................A-62<br />
Kilowatt Hours ....................................................... A-18, A-35<br />
Kilowatt, Input ......................................................... A-4, A-30<br />
Kilowatt-hour Reset ..........................................................A-8<br />
Kilowatt-hours ................................................................. 3-21<br />
KpdSpd ...........................................................................A-35<br />
KW ..................................................................................A-30<br />
KW Hours, Clear .............................................................A-18<br />
KW Hrs ...........................................................................A-35<br />
L<br />
L_Units, User PID ...........................................................A-67<br />
Level Detector ....................................................... A-69, A-70<br />
Level, Clamp ...................................................................A-51<br />
Level, Integrator ..............................................................A-51<br />
Level, Reference .............................................................A-53<br />
Levels, Hysteresis ...........................................................A-70<br />
Limit, Current ........................3-10, 3-22, A-2, A-3, A-8, A-11,<br />
A-18, A-19, A-22, A-40, A-44<br />
Limit, Load ......................................................................A-19<br />
Limit, Lower Window .......................................................A-69<br />
Limit, Negative Current ..........................................3-10, A-19<br />
Limit, PID INT .................................................................A-51<br />
Limit, Upper Window .......................................................A-69<br />
Limitations, Operating ....................................................... 2-7<br />
Line Voltage ................................................... 3-21, A-4, A-35<br />
Linear Ramp ................................................ 3-12, A-33, A-57<br />
LineV ...............................................................................A-35<br />
Link Communication ......................................................... 3-5<br />
Lo SPD FLA Freq ...........................................................A-36<br />
Lo SPD FLA Frq % .........................................................A-36<br />
Load ............................. 3-8, 3-9, A-4, A-21, A-25, A-30, A-36<br />
Load Config n .................................................................A-37<br />
Load Inertia ........................................ 3-14, A-21, A-25, A-65<br />
Load Limit .......................................................................A-19<br />
Load Preset n ......................................................... A-5, A-37<br />
Load, Reduce The ..........................................................A-45<br />
Log, Clear Fault ...................................................... A-5, A-17<br />
INDEX<br />
Log, Fault ........................................................................3-24<br />
Logic Software Installation ................................................ 2-6<br />
Long Label .............................................................A-67, A-68<br />
Loop, Open ......................................................................3-18<br />
Loop, PID ........................................................ 3-18, A-48–53<br />
Loss Of Ref/Filter .............3-8, A-13, A-23, A-25, A-26, A-47,<br />
A-48, A-52, A-54<br />
Loss Of Reference ..................................................A-7, A-13<br />
Loss, Power .............................................................A-8, A-65<br />
Lost, Analog n ................................................................ A-13<br />
Low Line Fault ................................................................ A-60<br />
Low Speed Breakpoint ..........................................A-36, A-42<br />
Low Speed FLA .............................................................. A-37<br />
Low Speed FLA % .......................................................... A-38<br />
Low Speed, Full Torque At ..............................................3-10<br />
Lower Breakpoint Current .............................................. A-38<br />
Lower Breakpoint, Window Comparator ................ 3-16, A-69<br />
Lowpass Filter ................................................................ A-49<br />
M<br />
Machine Control Function .................. 3-13, 3-17, A-18, A-41<br />
Maintained Contact ...........................................................3-8<br />
Maintained Run Contact ................................................. A-26<br />
Man/Auto ........................................................................ A-11<br />
Man/Auto Ramps ....... 2-4, 3-12, A-8, A-21, A-31, A-38, A-56<br />
Manual Mode ............................ 3-19, A-37, A-38, A-55, A-57<br />
Manual Reference ........................................... A-5, A-7, A-38<br />
Manual/Auto .............................................................. 3-8, A-5<br />
Max Accel 1 ...............................................................A-2, A-3<br />
Max Accel 2 ...............................................................A-2, A-3<br />
Max Accel n .................................................................... A-38<br />
Max Jog Accel ................................................. A-2, A-3, A-39<br />
Max Speed ....................................................................... A-8<br />
Max V/Hz Freq ............................................................... A-39<br />
Max V/Hz Freq% ............................................................ A-40<br />
Maximum Drive Volts/Hertz ............................................ A-41<br />
Maximum ILimit .............................................................. A-40<br />
Maximum Setting .............................................................. A-9<br />
Maximum Speed ......................A-11, A-17, A-21, A-32, A-40<br />
Maximum V/Hz ............................................................... A-40<br />
Maximum V/Hz% ............................................................ A-41<br />
Maximum, User PID ....................................................... A-67<br />
MaxSpd .......................................................................... A-40<br />
MC # n .............................................................................. A-7<br />
MC Input ........................................................ 3-17, A-5, A-41<br />
Mechanical Resonance ...................................................3-13<br />
Megawatt Hours .................................3-21, A-18, A-35, A-41<br />
Milliamps, 4 And 20 ...........................................................3-8<br />
Min Speed ........................................................................ A-8<br />
Min V/Hz Freq ................................................................ A-42<br />
Min V/Hz Freq % ............................................................ A-42<br />
Minimum And Maximum Speed For The Drive ...............3-11<br />
Minimum Drive Speed Limit ........................................... A-42<br />
Minimum Setting ............................................................... A-9<br />
Minimum Speed ............................................................. A-42<br />
Minimum V/Hz ................................................................ A-43<br />
AF95/IS905 Programmer’s Manual<br />
I-5
INDEX<br />
Minimum V/Hz % ............................................................A-43<br />
Minimum, User PID .........................................................A-67<br />
MinSpd ............................................................................A-42<br />
Miscellaneous ..........................................................3-22, A-8<br />
Contactor Interlock ................................................. 3-23<br />
Fault Reset ............................................................. 3-22<br />
Motor Direction ....................................................... 3-23<br />
Overtemperature Action......................................... 3-22<br />
Reverse Enable ..................................................... 3-23<br />
Switching Frequency.............................................. 3-23<br />
Mode<br />
Auto............................................................... 3-19, A-14<br />
Bumpless Start .......................................................A-15<br />
Coast ...................................................................... 3-14<br />
Current Limit .......................................................... 3-21<br />
Digital Pot ...............................................................A-22<br />
Fast Stop .......................................................3-14, A-25<br />
Fault Reset .............................................................A-26<br />
Follower ......................................................... A-6, A-27<br />
Follower/PID ............................................................A-6<br />
Jog ............................................................... A-33, A-59<br />
Keypad ...................................................................A-35<br />
Manual .............................3-19, A-37, A-38, A-55, A-57<br />
Parameter And Display ............................................ 3-6<br />
PID ........................................................A-6, A-27, A-52<br />
Ramp n ..................................................................A-56<br />
Remote ..................................... A-28, A-54, A-58, A-59<br />
Speed Follower ............................................ A-27, A-52<br />
Start ................3-13, A-8, A-11, A-15, A-22, A-23, A-63<br />
Start And Stop .......................................................... 3-9<br />
Stop............................................. 3-14, A-8, A-24, A-65<br />
Monitor A Drive Variable ................................................. 3-16<br />
Motor Characteristics ........................................................ 3-9<br />
Motor Coast Speed .........................................................A-15<br />
Motor Current .................................................A-4, A-43, A-44<br />
Motor Direction .....................................3-22, 3-23, A-8, A-34<br />
Motor Field Stabilization ....................................... A-22, A-23<br />
Motor Horsepower ............................................................ 3-9<br />
Motor Load ...................................................................... 3-10<br />
Motor Nameplate ................................. 3-9, A-40, A-44, A-45<br />
Motor Nameplate F .........................................................A-44<br />
Motor Nameplate I ..........................................................A-44<br />
Motor Nameplate V .........................................................A-45<br />
Motor Overheating ..........................................................A-69<br />
Motor Overload ............................ 2-5, 3-11, A-8, A-29, A-37,<br />
A-38, A-44, A-47<br />
Motor Ovld Fldbk ............................................................A-45<br />
Motor Parameters.......................... 2-5, 3-9, A-8, A-10, A-18,<br />
A-19, A-28, A-29, A-36–A-45, A-47, A-61, A-69<br />
Motor Poles...................................................... 2-5, 3-9, A-10<br />
Motor Rotation, Direction Of ........................................... 3-23<br />
Motor Shaft Speed ..........................................................A-45<br />
Motor Slip ........................................................................ 3-11<br />
Motor Speed ................................... 2-5, 3-8, A-3, A-10, A-45<br />
Motor Voltage ................................................ 3-8–3-10, A-46<br />
Motor, Spinning ............................................ 3-13, A-15, A-63<br />
Motor, Torque To Start The ............................................ 3-10<br />
AF95/IS905 Programmer’s Manual<br />
I-6<br />
Motorized Or Electronic Pot ............................................3-13<br />
MotorV ............................................................................ A-46<br />
Mtr Volts ........................................................................... A-4<br />
Multiple Keypads ................................................ 2-3, 3-6, 3-7<br />
MWH .............................................................................. A-41<br />
N<br />
NAKS ............................................................................. A-14<br />
Name, Long Label .......................................................... A-67<br />
Nameplate Data ........................................................ 3-4, A-8<br />
Nameplate Power ............................................................3-23<br />
Nameplate, Drive .................................................... 3-21, A-8<br />
Negative Current Limit .......................................... 3-10, A-19<br />
Negative Load Limit ....................................................... A-19<br />
Noise, Audible ....................................................... 3-23, A-65<br />
Normal Decel Time ........................................................ A-65<br />
Normal Set Speed .................................................A-47, A-48<br />
Normal Stop ..................................................................... A-8<br />
Null Modem Cable .............................................................2-3<br />
Number Of Motor Poles .............................................2-5, 3-9<br />
Number, Batch ................................................................. A-8<br />
O<br />
OK, Send ...........................................................................3-5<br />
On, Override n ................................................................ A-47<br />
On-line Help, Progammer Software ..................................1-1<br />
Open ......................................................................... 3-3, A-8<br />
Open Loop ......................................................................3-18<br />
Open, Ext Cont ............................................................... A-24<br />
Operating At Or Near A Limit ..........................................3-27<br />
Operating V/Hz ........................................................A-4, A-46<br />
Operation Display ......................................................A-8, A-9<br />
+ILim ...................................................................... A-18<br />
-ILim ...................................................................... A-19<br />
Accel ...................................................................... A-10<br />
Accel 2 ................................................................... A-11<br />
AccelJ .................................................................... A-32<br />
AccMxJ .................................................................. A-39<br />
AccMxn (n = 1 or 2) ............................................... A-38<br />
AmbTmp ................................................................ A-12<br />
ARC n .................................................................... A-14<br />
BrkSpd ................................................................... A-20<br />
BrkTim ................................................................... A-20<br />
BusI ....................................................................... A-16<br />
BusV...................................................................... A-16<br />
CapTmp ................................................................. A-16<br />
Config .................................................................... A-11<br />
Date ....................................................................... A-66<br />
DBTmp .................................................................. A-20<br />
Decel ..................................................................... A-21<br />
Decel2 ................................................................... A-21<br />
DecelJ ................................................................... A-32<br />
DecFst ................................................................... A-24<br />
DnTime .................................................................. A-57<br />
DwlSpd .................................................................. A-22
DwlTim ...................................................................A-23<br />
ETM .......................................................................A-23<br />
FolSpd ....................................................................A-27<br />
HldSpd ...................................................................A-57<br />
HS Temp ................................................................A-28<br />
IRcomp ...................................................................A-30<br />
Jspd n ....................................................................A-33<br />
KpdSpd ..................................................................A-35<br />
KW .........................................................................A-30<br />
KW Hrs ...................................................................A-35<br />
LineV ......................................................................A-35<br />
Load .......................................................................A-36<br />
MaxSpd ..................................................................A-40<br />
MC# n (where n=1 to 16) ........................................A-18<br />
MinSpd ...................................................................A-42<br />
MotorV ...................................................................A-46<br />
MWH ......................................................................A-41<br />
PIDacl ....................................................................A-48<br />
PIDcut ....................................................................A-49<br />
PIDdcl ....................................................................A-48<br />
PIDdg .....................................................................A-49<br />
PIDerr .....................................................................A-49<br />
PIDfdk ....................................................................A-50<br />
PIDffg .....................................................................A-50<br />
PIDig ......................................................................A-51<br />
PIDlmt ....................................................................A-51<br />
PIDpg .....................................................................A-52<br />
PIDref .....................................................................A-52<br />
PIDset .................................................................... A-53<br />
PIDSpd................................................................... A-53<br />
RunHrs ...................................................................A-60<br />
Set n .......................................................................A-55<br />
SetSrc ....................................................................A-61<br />
SLcomp ..................................................................A-61<br />
SpdOvn ..................................................................A-61<br />
SpdSet ......................................................... A-17, A-62<br />
Speed ........................................................... A-45, A-46<br />
Status .....................................................................A-22<br />
SwFreq ...................................................................A-12<br />
Time .......................................................................A-66<br />
UpTime ..................................................................A-58<br />
VBoost ...................................................................A-69<br />
Operation, Reverse .........................................................A-60<br />
Operation, Verify Proper ................................................... 2-7<br />
Operational Requirements ................................................ 2-7<br />
Opto22 ................................................................... 2-6, 3-8<br />
Out Of Range, Value Is..................................................... 2-7<br />
Outage, Power ...................................................... A-56, A-60<br />
Output Contactor ...................................................3-14, A-24<br />
Output Frequency ..................................................3-11, A-10<br />
Output Phase Rotation ......................................... A-30, A-34<br />
Output Speed ................................................ 3-18, A-3, A-46<br />
Output, Analog .................................................................. 3-8<br />
Outputs<br />
Analog ..................................................... 3-8, A-8, A-28<br />
Contactor .................................................................A-7<br />
INDEX<br />
Digital ...............................................3-8, A-7, A-8, A-13<br />
PID .................................................................. 3-19, A-8<br />
Relay ........................................................................3-8<br />
Overheating, Motor ......................................................... A-69<br />
Overload Class ............................................................... A-47<br />
Overload Condition ......................................................... A-45<br />
Overload Curve ....................................2-5, A-29, A-36–A-38<br />
Overload Protection, Class 10 or 20 ...............................3-11<br />
Overload, Motor .............................................................. A-47<br />
Override 1 ...................................................... 3-13, A-6, A-47<br />
Override 1 Off ................................................................... A-6<br />
Override 1 On ..........................................................A-6, A-48<br />
Override 1, In .................................................................... A-7<br />
Override 1, Spd .........................................................A-2, A-3<br />
Override 2 ...................................................... 3-13, A-6, A-47<br />
Override 2 Off ................................................................... A-6<br />
Override 2 On ..........................................................A-6, A-48<br />
Override 2, In .................................................................... A-7<br />
Override 2, Spd .........................................................A-2, A-3<br />
Override n ....................................................................... A-47<br />
Override n Off........................................................ A-47, A-48<br />
Override n On ................................................................. A-47<br />
Override Speed ....................................3-17, A-8, A-48, A-61<br />
Override, Regen............................................................. A-21<br />
Overtemperature Action .......................................... 3-22, A-8<br />
Overtemperature, Heatsink ............................................ A-28<br />
P<br />
PID ................................................2-4, 3-18, A-8, A-14, A-61<br />
PID Accel Time ............................................................... A-48<br />
PID Action ...................................................................... A-48<br />
PID Decel Time .............................................................. A-48<br />
PID DER Cutoff .............................................................. A-49<br />
PID DER Gain ................................................................ A-49<br />
PID Error ............................................. A-4, A-49, A-50, A-67<br />
PID FD FWD Gain .......................................................... A-50<br />
PID Feedback ................................. 3-8, A-2, A-4, A-14, A-50<br />
PID INT Gain .................................................................. A-51<br />
PID INT Limit .................................................................. A-51<br />
PID Integrator ................................................................. A-51<br />
PID Loop ..................................................... 3-18, A-48–A-53<br />
PID Mode ...................................................... A-6, A-27, A-52<br />
PID Output ..................................................... 3-19, A-8, A-52<br />
PID PROP Gain .............................................................. A-52<br />
PID Ramp ....................................................................... A-53<br />
PID Reference ................................................................ A-52<br />
PID Regulator ..................................................................3-18<br />
PID Setpoint .................................................... A-2, A-4, A-53<br />
PID Speed ...............................................................A-4, A-53<br />
PID Unit .................................................................A-66, A-67<br />
PID/follower .................................................................... A-63<br />
PIDacl ............................................................................. A-48<br />
PIDcut ............................................................................. A-49<br />
PIDdcl ............................................................................. A-48<br />
PIDdg ............................................................................. A-49<br />
AF95/IS905 Programmer’s Manual<br />
I-7
INDEX<br />
PIDerr .............................................................................A-49<br />
PIDfdk .............................................................................A-50<br />
PIDffg ..............................................................................A-50<br />
PIDig ...............................................................................A-51<br />
PIDlmt .............................................................................A-51<br />
PIDpg ..............................................................................A-52<br />
PIDref ..............................................................................A-52<br />
PIDset .............................................................................A-53<br />
PIDSpd ...........................................................................A-53<br />
PLC Run .........................................................................A-55<br />
PLC Start ........................................................................A-54<br />
PLC Start/Stop ........................................................ A-5, A-54<br />
PLC Stop ........................................................................A-54<br />
PM Setback ................................................. 3-13, 3-17, A-61<br />
Point, Decimal ....................................................... A-66, A-68<br />
Port Connected ..........................................................3-5, A-8<br />
Port, Serial .................................................. 2-3, 3-4, 3-5, A-8<br />
Pos/Neg Current Limit ......................................................A-8<br />
Position, Remote .................................................. A-63, A-64<br />
Positive Load Limit ..........................................................A-19<br />
Pot, Digital ..................................3-13, A-8, A-22, A-57, A-58<br />
Pot, Motorized Or Electronic ........................................... 3-13<br />
Potentiometer, Speed .....................................................A-37<br />
Power Loss ............................................................. A-8, A-65<br />
Power Loss Ridethrough ....................................... 3-21, A-60<br />
Power Outage....................................................... A-56, A-60<br />
Power Up...........................................................................A-8<br />
Power Up Restart ................................................. A-55, A-56<br />
Power Up, Enable Restart On ........................................A-55<br />
Power Up, Restart .......................................................... 3-20<br />
Power, Interruption Of ..................................................... 3-20<br />
Power, Nameplate .......................................................... 3-23<br />
Predefined Profile ........................................................... 3-11<br />
Present Date ...................................................................A-66<br />
Preset Fixed Speed, Run At A.......................................... 3-8<br />
Preset n ...........................................................A-2, A-3, A-55<br />
Preset Speed .....................3-12, 3-13, A-8, A-37, A-38, A-55<br />
Preset Speeds ..................................................................A-8<br />
Preset Strobe.....................................................................A-5<br />
Pressure Control ............................................................. 3-18<br />
Previous Config ..............................................................A-56<br />
Print ...........................................................................3-4, A-8<br />
Printer Setup ..............................................................3-4, A-8<br />
Process Variable ............................................................. 3-18<br />
Profile<br />
Custom ................................................................... 3-11<br />
Motor Overload ........ 3-11, A-8, A-29, A-36, A-44, A-47<br />
Volts/Hz .......................2-6, 3-11, A-8, A-40, A-42, A-43<br />
Program Configuration ............................................... 3-2, 3-3<br />
Programmer Software ..................1-1, 2-2, 2-6, 3-1, 3-5, A-9,<br />
A-55, A-56<br />
Programmer Software On-line Help .................................. 1-1<br />
Programmer Software Tree ..............................................A-8<br />
Pwr Restart Dly ......................................................3-20, A-55<br />
AF95/IS905 Programmer’s Manual<br />
I-8<br />
R<br />
Ramp ...........................................3-13, 3-19, A-5, A-15, A-25<br />
Ramp Down ...................... 3-13, 3-14, A-5, A-25, A-57, A-58<br />
Ramp Down Time ........................................... A-2, A-3, A-57<br />
Ramp Hold ......................................................................3-13<br />
Ramp Hold Speed ...................................................A-3, A-57<br />
Ramp n ........................................................................... A-56<br />
Ramp n Mode ................................................................. A-56<br />
Ramp Rate, Fast Decel .................................................. A-24<br />
Ramp Up .............................................. 3-13, A-5, A-57, A-58<br />
Ramp Up Time ................................................ A-2, A-3, A-58<br />
Ramp Up/Ramp Down Function .................................... A-63<br />
Ramp, accel/decel .......................................................... A-56<br />
Ramp, Acceleration .........................................................3-13<br />
Ramp, Deceleration ....................................................... A-65<br />
Ramp, Fast Decel .......................................................... A-25<br />
Ramp, Jog ...................................................................... A-33<br />
Ramp, PID ...................................................................... A-53<br />
Ramp, Type Of ................................................................3-12<br />
Ramp1/Ramp2 ............................................................... A-56<br />
Ramps, Man/Auto ......2-4, 3-12, A-8, A-21, A-31, A-38, A-56<br />
Rate, Accel ....................................................................... A-5<br />
Rate, Acceleration .......................................................... A-39<br />
Rate, Jerk ....................................................................... A-31<br />
Rated Current ....................................................................3-9<br />
Rated Frequency ...............................................................3-9<br />
Rated Voltage ...................................................................3-9<br />
Rating<br />
Ampere .................................................................. A-44<br />
Frequency ............................................................. A-44<br />
Horsepower ........................................................... A-44<br />
Overload ................................................................ A-44<br />
Voltage .................................................................. A-45<br />
Read From Drive .............................................................. A-8<br />
Ready ........................................................................ 3-8, A-7<br />
Reduce The Load ........................................................... A-45<br />
Reduced Cooling Effect ....................................................2-5<br />
Ref, Auto .................................................................A-8, A-27<br />
Ref/Filter, Loss Of ..................... 3-8, A-13, A-23, A-25, A-26,<br />
A-47, A-48, A-52, A-54<br />
Reference<br />
Auto ........................................................ A-5, A-7, A-14<br />
Hold ....................................................................... A-22<br />
Loss Of ...........................................................A-7, A-13<br />
Manual .................................................... A-5, A-7, A-38<br />
Speed ................. 3-8, 3-9, 3-12, 3-13, 3-17, 3-18, A-53<br />
Reference Source ........................................3-19, A-14, A-38<br />
Reference, PID ............................................................... A-52<br />
Regenerative Override...........................................A-19, A-21<br />
Regulator, PID .................................................................3-18<br />
Relay Outputs ...................................................................3-8<br />
REM Jog n ..................................................................... A-59<br />
Remote .........................................................3-17, A-54, A-63
Remote Forward .............................................................A-58<br />
Remote Jog 1 ...................................................................A-5<br />
Remote Jog 2 ...................................................................A-5<br />
Remote Mode ....................................................... A-58, A-59<br />
Remote Reverse .............................................................A-59<br />
Remote, Speed Src ................................................ A-6, A-62<br />
Remote, Start Src ................................................... A-6, A-64<br />
Requirements<br />
Operational .............................................................. 2-7<br />
Safety ....................................................................... 2-7<br />
System ..................................................................... 2-2<br />
Reset Fault .......................................... A-5, A-10, A-25, A-59<br />
Reset Timer, Count .........................................................A-60<br />
Reset, Fault ................................................... 3-22, A-8, A-26<br />
Reset, Kilowatt-hour ...................................... 3-21, A-8, A-18<br />
Resistors, Temperature Of Dynamic Braking ..................A-20<br />
Resonance, Mechanical ................................................. 3-13<br />
Restart, Auto ..................... 3-20, A-8, A-10, A-27, A-55, A-60<br />
Restart, Fault .........................................................3-20, A-26<br />
Restart, In .........................................................................A-7<br />
Restart, Power Up ................................................ A-55, A-56<br />
Retry Clear Time .............................................................A-59<br />
Rev/For .............................................................................A-7<br />
Reverse .........................................................A-5, A-34, A-59<br />
Reverse Enable .......................... 3-22, 3-23, A-8, A-31, A-60<br />
Reverse, Keypad ............................................................A-34<br />
Reverse, Remote ............................................................A-59<br />
Reverse, Running .............................................................A-7<br />
Ridethrough Time ................................................... A-8, A-60<br />
Ridethrough, In .................................................................A-7<br />
Ridethrough, Power Loss ......................................3-21, A-60<br />
Rotation, Inverse .............................................................A-30<br />
Rotation, Output Phase ........................................ A-30, A-34<br />
RPM ............. 3-11, A-10, A-15, A-28, A-42, A-46, A-61, A-62<br />
Run ............................................... 3-8, 3-17, A-7, A-54, A-64<br />
Run At A Preset Fixed Speed ........................................... 3-8<br />
Run Enable ..............................................................3-8, A-63<br />
Run Enable/Fast Stop ............................................. A-5, A-25<br />
Run Enable/Stop ..................................................... A-5, A-63<br />
Run Time, Fault Reset Continuous .................................A-60<br />
RunHrs ............................................................................A-60<br />
Running Forward ..............................................................A-7<br />
Running Hours ...................................................... A-23, A-60<br />
Running Reverse ..............................................................A-7<br />
S<br />
S Curve Ramp ..........................3-12, A-31, A-33, A-39, A-57<br />
S_Units, User PID ...........................................................A-67<br />
Safety Requirements ........................................................ 2-7<br />
Saturate, Motor Winding Will .................................3-10, A-69<br />
Save ..............................................2-3, 2-6, 3-3, 3-4, 3-5, A-8<br />
Scale ..............A-8, A-13, A-23, A-25, A-26, A-30, A-36, A-54<br />
Scale, Trend Buffer ......................................................... 3-27<br />
Scale, User Speed ..........................................................A-68<br />
Scroll Parameter ............................................A-9, A-37, A-67<br />
INDEX<br />
Select Key ................................................... A-62, A-63, A-64<br />
Select, Auto Mode ................................................. 3-19, A-14<br />
Self Cooled, Motor .............................................................2-5<br />
Send To Drive ....................................................2-7, 3-5, A-8<br />
Serial Port ....................................................2-3, 3-4, 3-5, A-8<br />
Set Fast Decel Time ....................................................... A-25<br />
Set n ............................................................................... A-55<br />
Setback, PM .................................................3-13, 3-17, A-61<br />
Setpoint Source .............................................................. A-61<br />
Setpoint, PID ..........................................3-18, A-2, A-4, A-53<br />
Setpoint, Speed ..........................3-13, 3-19, A-3, A-17, A-19,<br />
A-37, A-61, A-62<br />
SetSrc ............................................................................. A-61<br />
Setting, Maximum ............................................................. A-9<br />
Setting, Minimum .............................................................. A-9<br />
Setup Display ................................................................... A-9<br />
Setup menu .......................................................................2-5<br />
Setup, Printer ............................................................ 3-4, A-8<br />
Signal, Error ....................................................................3-18<br />
SLcomp .......................................................................... A-61<br />
Slip Comp ................................................ A-2, A-4, A-8, A-61<br />
Slip Compensation .......................................... 3-11, A-2, A-4<br />
Slip, Motor .......................................................................3-11<br />
Smoke Purge ................................................3-13, 3-17, A-61<br />
Software, Installing The .....................................................2-1<br />
Source, Setpoint ............................................................. A-61<br />
Source, Speed ......... 3-19, A-8, A-14, A-27, A-38, A-52, A-63<br />
Source, Start/Stop .......................................................... A-64<br />
Spd Override ......................................... A-2, A-3, A-47, A-48<br />
Spd Override 1 ................................................................. A-2<br />
Spd Override n ......................................................A-48, A-61<br />
Spd Unit Select ............................................................... A-62<br />
SpdOvn .......................................................................... A-61<br />
SpdSet ...................................................................A-17, A-62<br />
Spdset, Clamped .....................................................A-3, A-17<br />
Speed ....................................................................A-45, A-46<br />
Bumpless ............................................................... A-15<br />
DC Brake ...................................................... 3-14, A-20<br />
Dwell ............................................. A-2, A-3, A-22, A-63<br />
Follower .................................................. A-2, A-3, A-27<br />
Jog....................... 3-8, 3-12, A-2, A-3, A-8, A-31, A-32,<br />
A-33, A-39, A-59<br />
Keypad .................................................................. A-35<br />
Maximum .........................A-11, A-17, A-21, A-32, A-40<br />
Maximum Set ................................................A-57, A-58<br />
Minimum ................................................................ A-42<br />
Minimum Set .................................................A-57, A-58<br />
Motor ......................................2-5, 3-8, A-3, A-10, A-45<br />
Motor Shaft ............................................................ A-45<br />
Normal Set ....................................................A-47, A-48<br />
Output ................................................... 3-18, A-3, A-46<br />
PID ..................................................................A-4, A-53<br />
Preset ................................................... A-8, A-37, A-55<br />
Ramp Hold ......................................................A-3, A-57<br />
Synchronous .......................................................... A-46<br />
Speed Avoidance ..................................................A-33, A-34<br />
AF95/IS905 Programmer’s Manual<br />
I-9
INDEX<br />
Speed Control .................................... 3-19, A-58, A-62, A-63<br />
Speed Displays ...............................................................A-68<br />
Speed Follower ...............................................................A-28<br />
Speed Follower Analog Input ............................... A-27, A-28<br />
Speed Follower Input ......................................................A-14<br />
Speed Follower Mode ........................................... A-27, A-52<br />
Speed Input .......................................................... A-62, A-63<br />
Speed Jitter ..................................................................... 3-19<br />
Speed Jump ................................................ 3-13, A-33, A-34<br />
Speed Limit, Maximum Drive ..........................................A-40<br />
Speed Limit, Minimum Drive............................................A-42<br />
Speed Override .............................................. 3-13, A-8, A-47<br />
Speed Override 1 ............................................................ 3-17<br />
Speed Override 2 ............................................................ 3-17<br />
Speed Reference .........3-8, 3-9, 3-12, 3-13, 3-17, 3-18, A-53<br />
Speed Reference, Override The ..................................... 3-17<br />
Speed Setpoint 3-13, 3-19, A-3, A-17, A-19,<br />
A-37, A-61, A-62<br />
Speed Source ..........3-19, A-8, A-14, A-27, A-38, A-52, A-63<br />
Speed Src Keypad ................................. A-6, A-7, A-62, A-63<br />
Speed Src Remote ................................................. A-6, A-62<br />
Speed Unit Displays .......................................................A-68<br />
Speed Units ............................... A-8, A-45, A-46, A-62, A-68<br />
Speed Units, User Defined ............................................. 3-11<br />
Speed Units/Limits ............................... 3-11, A-8, A-40, A-42<br />
Speed, Max .......................................................................A-8<br />
Speed, Min ........................................................................A-8<br />
Speed, Output ..................................................................A-3<br />
Speed, PID Loop ............................................................A-48<br />
Speeds ............................. 3-12, A-8, A-10, A-11, A-21, A-31<br />
Jump ...............................................................3-13, A-8<br />
Override .................................................................A-61<br />
Preset ..............................................................3-12, A-8<br />
Spinning Motor ............................................. 3-13, A-15, A-63<br />
Stabilization, Motor Field ...................................... A-22, A-23<br />
Start ................................................................. 2-6, A-5, A-63<br />
Start And Stop Modes ...................................................... 3-9<br />
Start Command .............................................. 2-6, 3-27, A-64<br />
Start Input ............................................................. A-63, A-64<br />
Start Into A Spinning Motor ............................................. 3-13<br />
Start Mode ...............3-13, A-8, A-11, A-15, A-22, A-23, A-63<br />
Start Src Keypad .................................... A-6, A-7, A-63, A-64<br />
Start Src Remote .................................................... A-6, A-64<br />
Start, 3-Wire ....................................................................A-63<br />
Start, Bumpless ........................................... 3-13, A-15, A-63<br />
Start, Dwell ............................................................3-13, A-63<br />
Start, PLC ....................................................................... A-54<br />
Start/Stop ...................................... 3-8, 3-19, A-5, A-55, A-64<br />
Start/Stop Source ...........................................................A-64<br />
Status Bar .................................................................. 3-3, 3-5<br />
Status, Drive ...................................................................A-22<br />
Stop ..................................................... 2-6, A-25, A-54, A-64<br />
Stop Command .............................................3-14, 3-22, 3-27<br />
Stop Input ...................................................... 2-6, A-63, A-64<br />
Stop Mode ........................................... 3-14, A-8, A-24, A-65<br />
Stop Protection .................................................................A-9<br />
Stop, Fast .....................................3-14, A-6, A-8, A-24, A-25<br />
AF95/IS905 Programmer’s Manual<br />
I-10<br />
Stop, Fast Decel ............................................................. A-24<br />
Stop, Jog .......................................................................... A-6<br />
Stop, Normal .................................................................... A-8<br />
Stop, PLC ....................................................................... A-54<br />
Stopped ...................................................................A-7, A-22<br />
Stopping ..................................................................A-7, A-22<br />
Stopping Timeout .................................................. 3-14, A-65<br />
Stopping, Fast .................................................................. A-7<br />
STPPING TIME OUT Fault Trip ..................................... A-65<br />
Strobe, Batch ................................................................... A-5<br />
Strobe, Preset .................................................................. A-5<br />
Summary Info ..................................................... 2-6, 3-4, A-8<br />
SwFreq............................................................................ A-12<br />
Switch, Inverting ..............................................................3-19<br />
Switching Freq ......................................................A-12, A-65<br />
Switching Frequency ...................3-22, 3-23, A-8, A-12, A-65<br />
Synchronous Speed ....................................................... A-46<br />
System Requirements .......................................................2-2<br />
T<br />
Temp, Ambient ........................................................A-4, A-12<br />
Temp, Capacitor ......................................................A-4, A-16<br />
Temp, DB.................................................................A-4, A-20<br />
Temp, Heatsink....................................................... A-4, A-28<br />
Temperature Foldback ................................................... A-19<br />
Temperature, Heatsink ................................................... A-28<br />
Term, PID Error............................................................... A-50<br />
Three Wire Start/Stop Control ...............................A-63, A-64<br />
Time ............. 3-14, 3-21, A-15, A-19, A-20, A-21, A-23, A-66<br />
Time 24 Hour ................................................................. A-66<br />
Time AM/PM .................................................................. A-66<br />
Time Delay ..................................................................... A-63<br />
Time Delay Before PU Restart ....................................... A-55<br />
Time Delay Parameter ....................................................3-20<br />
Timestamped .........................................................3-21, 3-24<br />
Time, Accel ..................................................... A-2, A-3, A-10<br />
Time, Accel 2 .................................................. A-2, A-3, A-11<br />
Time, Acceleration ................................................A-11, A-32<br />
Time, Acceleration Ramp ............................................... A-48<br />
Time, Coast/Use Normal Decel ...................................... A-65<br />
Time, Decel ...................................3-13, 3-14, A-2, A-3, A-21<br />
Time, Decel 2 ............................................................A-2, A-3<br />
Time, Deceleration ................................................A-21, A-32<br />
Time, Delay .................................................................... A-27<br />
Time, Dwell ............... 3-13, A-2, A-3, A-11, A-22, A-23, A-63<br />
Time, Eastern ..................................................................3-21<br />
Time, Fast Decel .......................................................A-2, A-3<br />
Time, PID Accel ............................................................. A-48<br />
Time, PID Decel ............................................................. A-48<br />
Time, Ramp Down .......................................... A-2, A-3, A-57<br />
Time, Ramp Up............................................... A-2, A-3, A-58<br />
Time, Ridethrough ...................................................A-8, A-60<br />
Time, Use Fast Decel ..................................................... A-24<br />
Timeout, Stopping ................................................. 3-14, A-65<br />
Timer, Bumpless ................................................... 3-13, A-15<br />
To Use Diagnostics .........................................................3-25
Today’s Date ...................................................................A-66<br />
Torque To Start The Motor ............................................. 3-10<br />
Torque, Braking .....................................................3-14, A-25<br />
Torque, Low Speed ........................................................A-69<br />
Trend Buffers ................................................. 3-24, 3-26, A-8<br />
Trip ..................................................... A-25, A-26, A-45, A-65<br />
Trip or Fold Back Current ...............................................A-28<br />
Trip, Overtemperature Action ......................................... 3-22<br />
TX Failures .....................................................................A-14<br />
U<br />
Unit, PID ............................................................... A-66, A-67<br />
Units, Speed .............................. A-8, A-45, A-46, A-62, A-68<br />
Units, User ... 3-12, 3-19, A-15, A-28, A-42, A-61, A-62, A-68<br />
Units/Limits, Speed .............................. 3-11, A-8, A-40, A-42<br />
Up, Ramp ............................................. 3-13, A-5, A-57, A-58<br />
Upload From Drive .................................... 2-5, 3-5, 3-21, A-8<br />
Upper Breakpoint ...................................................3-16, A-29<br />
Upper Breakpoint Current ...............................................A-29<br />
Upper Breakpoint Frequency ..........................................A-29<br />
UpTime ...........................................................................A-58<br />
User Defined PID Units ...................................................A-67<br />
User Defined Speed Units .............................................. 3-11<br />
User Defined Units ................................................ A-27, A-62<br />
User PID DP ...................................................................A-66<br />
User PID L_Units ............................................................A-67<br />
User PID Maximum .........................................................A-67<br />
User PID Minimum ..........................................................A-67<br />
User PID S_Units ............................................................A-67<br />
User Selected Unit ................................................ A-40, A-42<br />
User Selections .................................................................A-8<br />
User SPD L_Units ...........................................................A-68<br />
User SPD S_Units ..........................................................A-68<br />
User Speed DP............................................................... A-68<br />
User Speed Scale ...........................................................A-68<br />
User Units .............................................................. 3-12, 3-19<br />
V<br />
V/Hz, Operating ...................................................... A-4, A-46<br />
Value, Hysteresis ............................................................ 3-16<br />
Value, Maximum PID ......................................................A-67<br />
Values, Nameplate ........................................................... 3-9<br />
INDEX<br />
Values, Parameter .............................................................2-6<br />
Variable, Monitor A Drive ................................................3-16<br />
Variable, Process ............................................................3-18<br />
VBoost ............................................................................ A-69<br />
Voltage<br />
Bus ....................................................... A-4, A-16, A-21<br />
Line ....................................................... 3-21, A-4, A-35<br />
Motor .....................................................3-8–3-10, A-46<br />
Voltage Boost .......................................3-10, A-8, A-30, A-69<br />
Voltage Drop .................................................................. A-30<br />
Voltage Rating, Nameplate ............................................ A-45<br />
Voltage, Motor Nameplate .............................................. A-45<br />
Volts Per Hertz .................................. A-39, A-40, A-42, A-46<br />
Volts, Mtr .......................................................................... A-4<br />
Volts/hertz ............................................................... 3-10, A-8<br />
Volts/Hz ................................................ 2-6, 3-11, A-39, A-42<br />
Volts/Hz Profile.................... 2-6, 3-11, A-8, A-40, A-42, A-43<br />
W<br />
Warning History ....................................................... 3-27, A-8<br />
Warnings ............................................................... 3-24, 3-27<br />
Wet Well Level Control ....................................................3-18<br />
Window Comparator ........... 3-8, 3-16, A-8, A-16, A-17, A-19,<br />
A-20, A-30, A-33, A-45, A-62<br />
Window Compare n .......................................................... A-7<br />
WINn A Threshold .......................................................... A-69<br />
WINn B Threshold .......................................................... A-69<br />
WINn Hysteresis ............................................................. A-70<br />
X<br />
X-axis ..............................................................................3-27<br />
Y<br />
Y-axis ..............................................................................3-27<br />
Year/Month/Day ............................................................. A-66<br />
Z<br />
Zero Speed ...............................A-11, A-15, A-21, A-32, A-60<br />
Zero, DC Brake Speed ....................................................3-14<br />
AF95/IS905 Programmer’s Manual<br />
I-11
INDEX<br />
AF95/IS905 Programmer’s Manual<br />
I-12
<strong>Cutler</strong>-<strong>Hammer</strong> Solid State Motor Control<br />
Aftermarket Services<br />
• Technical/telephone support.<br />
• Resident service engineers in major trading centers.<br />
• Factory repair services.<br />
• Warranty administration.<br />
• Equipment modification and upgrading services.<br />
• Training seminars.<br />
• Renewal parts.<br />
For service or more information call<br />
1-800-322-4986<br />
A response network that gives new meaning to customer service<br />
• Personalized<br />
• Comprehensive<br />
• Professional<br />
<strong>Cutler</strong>-<strong>Hammer</strong><br />
110 Douglas Road E<br />
Oldsmar, FL 34677<br />
0IM-530028-4000/2<br />
APR 97<br />
Printed in U.S.A.


