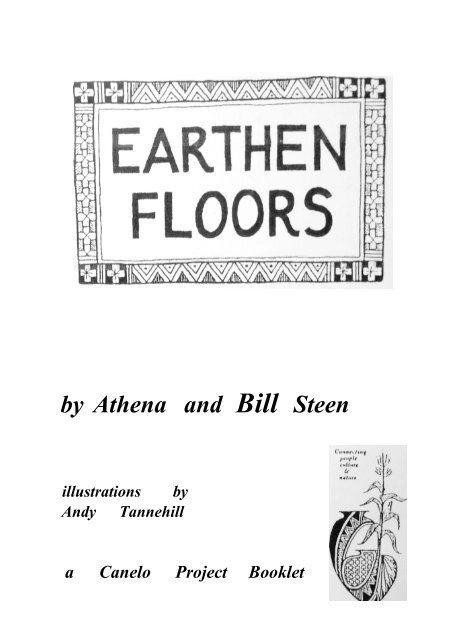
by Athena and Bill Steen - Cohabitat
by Athena and Bill Steen - Cohabitat
by Athena and Bill Steen - Cohabitat

You also want an ePaper? Increase the reach of your titles
YUMPU automatically turns print PDFs into web optimized ePapers that Google loves.
y <strong>Athena</strong> <strong>and</strong> <strong>Bill</strong> <strong>Steen</strong><br />
illustrations <strong>by</strong><br />
Andy Tannehill<br />
a Canelo Project Booklet
CONTENTS<br />
Introduction<br />
Preparing the Base<br />
Waterproofing <strong>and</strong> Drainage<br />
Insulation<br />
The Sub Floor<br />
Finding a Soil Mix for the Finished Floor<br />
Installing the Finished Floor<br />
Method 1<br />
Method!<br />
Method 3<br />
Dividing with a Wooden Grid<br />
Stabilizing Earthen Floor Mixes<br />
Surface Hardeners <strong>and</strong> Sealents<br />
Floor Sealing Sequence<br />
Maintenance <strong>and</strong> Repairs<br />
Earthen Floors for Upper Stories<br />
Taylor Publishing tms@northcoast.com<br />
www.dirtcheapbuilder.com 707-441-1632<br />
PO Box 375 Cutten CA 95534 USA
Earthen Floors<br />
an introduction<br />
Earthen floors are one of the oldest flooring method used<br />
throughout the world in many climates <strong>and</strong> conditions. They<br />
have ranged from basic dirt, hardened <strong>and</strong> "sealed" from years<br />
of use, to elaborate clay mixtures poured in place, leveled,<br />
<strong>and</strong> highly polished. Because of their natural warmth, softness,<br />
<strong>and</strong> brcatliability, earthen floors make very comfortable living<br />
surfaces.<br />
Since local clay/soils can often be used <strong>and</strong> specialized<br />
labor is not required, earthen floors can be inexpensive More<br />
forgiving than brick, tile or concrete, they are easier to install,<br />
or repair. Well built floors can be quite durable even under<br />
high traffic. Once sealed, they can be swept, mopped or waxed<br />
the same as other floors.<br />
Earthen floors can be finished to look as one likes;<br />
smooth <strong>and</strong> shiny or more "earthy" - slightly matted <strong>and</strong><br />
textured with flecks of straw. Wood can be placed into the<br />
floor to create a grid-like pattern, or the surface can be scored<br />
to look like tile. Different colored clays can be added to vary<br />
the color. Earthen floors can also be used as sub-flooring for<br />
coverings such as tile or carpet, <strong>and</strong> can be installed directly<br />
over existing concrete slabs.<br />
One of the most beautiful things about earthen floors, is<br />
that there is no one way of constructing one. Formulas for<br />
constructing earthen floors vary according to available<br />
materials, cultural traditions, climatic conditions <strong>and</strong><br />
individual preferences. This booklet covens a few formulas<br />
that we have worked with succesfully. With some<br />
experimentation, testing <strong>and</strong> a basic underst<strong>and</strong>ing of the<br />
general principles, it will be possible to create your own<br />
earthen floor, that will be long-lasting, natural <strong>and</strong> beautiful.
Depending on site conditions, a well constructed<br />
earthen floor may consist of several layers.<br />
Preparing the Base<br />
To help prevent the floor from cracking or settling, the ground<br />
should be well compacted an free of all movement All organic <strong>and</strong><br />
plant matter should be removed. If very expansive clay is present, it<br />
should be removed <strong>and</strong> replaced with another non-expansive soil or<br />
other substitute. The ground should also be dry before beginning<br />
construction of the floor<br />
Waterproofing <strong>and</strong> drainage<br />
If the capillary rise of moisture is a problem, steps need to be<br />
taken to improve drainage <strong>and</strong> stop the upward movement of moisture.<br />
For many situations, a layer of 6 to 12 inches (15 to 25 cm), of either<br />
dry stone topped with gravel, gravel, or coarse s<strong>and</strong> may be adequate<br />
to improve drainage <strong>and</strong> stop moisture migration. Certain volcanic<br />
stones like pumice could also provide the additional benefit of<br />
insulation as well as protection from moisture. The uppermost portion<br />
can be comprised of finer gravel or coarse s<strong>and</strong> to prevent the upper<br />
layers of the floor from falling through.<br />
If more drastic measures are required, plastic or petroleum based<br />
membranes can be laid down, to prevent capillary rise, but at the cost<br />
of losing the b readability ofthe floor <strong>and</strong> contact with the earth itself<br />
Preferably, this membrane should be laid with care on top of a layer<br />
of s<strong>and</strong> to avoid any tears or punctures.<br />
If a non-synthetic, water-tight barrier is desired, a thin layer<br />
( 1/4" to 3") of soil with a high clay content or bentonite can be used.<br />
It can be applied in a moist state in several layers, filling all cracks as<br />
each layer dries. Troweling each layer will help compact the clay<br />
mix <strong>and</strong> reduce the pore space. This will further aid in creating a<br />
water-tight seal. The top layer in particular needs to be wellcompacted.<br />
Bentonite sheets (1/4 H<br />
thick, backed with cardboard), can<br />
also be purchased, although more costly. (See resources.)<br />
It might be possible that the application of a lime plaster which has<br />
been stabilized with a water-resistant material, like prickly pear cactus<br />
gel, could be effective as an anti-capillary barrier Whatever approach<br />
is used, it should be tested first to determine if it performs well.
Insulation<br />
For insulation, 4 to 6 inches (10 to 15 cm) of straw/light-clay<br />
(see formula below), perlite/clay, pumice fines, or exp<strong>and</strong>ed day (clay<br />
that has been heated, exp<strong>and</strong>ed <strong>and</strong> filled with small air spaces) are<br />
some of the natural options that can be laid on top of the gravel or<br />
drainage layer. If desired, one can always resort to rigid foam<br />
insulation.<br />
Clay Slip<br />
A clay slip acts as the "glue" that binds together the straw or the<br />
perlite in straw/light-clay or perlite/clay mixes. A soil with very high<br />
clay content can be passed through a 1/8" screen to remove small<br />
stones <strong>and</strong> other debris. It is then mixed with enough water until it<br />
has a consistency of a latex paint. When a finger is dipped into the<br />
mixture, a coating should remain that obscures one's finger prints.<br />
Straw/light-clay<br />
Gay slip is slowly poured onto a small quantity of loose straw<br />
(2-3 flakes) at a time, then mixed either <strong>by</strong> h<strong>and</strong> or with pitchforks,<br />
until each straw is coated with clay slip, similar to tossing a giant<br />
salad, when the straw sticks together in a bundle when tightly<br />
squeezed, the mix is ready. To keep the mixture from drying out while<br />
more is being made, it can be stored under a tarp. If allowed to sit for<br />
a couple of days, the mixture matures <strong>and</strong> improves.<br />
The straw/light-clay needs to be tamped such that poorly<br />
integrated layers are not created. The butt end of a 2x4 works to tamp<br />
<strong>and</strong> work the mix together. Upon completion, the straw/light-clay<br />
needs to be solid <strong>and</strong> not spongy. J<br />
*A solid <strong>and</strong> compact layer of straw/light clay requires practice <strong>and</strong><br />
can be somewhat labor intensive.<br />
Mixing Straw/Light Clay
Perlite (or vermiculite)/light clay<br />
Perlite is mixed with a clay slip, either <strong>by</strong> h<strong>and</strong> or with a concrete<br />
or mortar mixer. Enough slip needs to be added so that the perlite<br />
binds together <strong>and</strong> that the mix has sufficient density. Like most facets<br />
of the earthen floor making process, experimentation will be needed<br />
to yield the proper proportions.<br />
Pumice fines (or other lightweight volcanic stone) can most<br />
likely be laid dry <strong>and</strong> tamped for good compaction.<br />
The Sub-Floor<br />
The finished earthen floor, needs to rest on a compact, level<br />
surface. If an insulating <strong>and</strong>/or drainage layer has not been used, the<br />
sub-floor can be nothing more than the well-compacted ground.<br />
Otherwise, 2 to 3 inches of compacted silty/s<strong>and</strong>y soil (not pure s<strong>and</strong>)<br />
can be applied over the insulating or drainage layer to insure a solid<br />
base. This soil needs to have enough day that it holds together when<br />
dry. Slightly moistening the soil will help the initial compaction. The<br />
sub-floor can serve as a good working surface during the final<br />
construction stages of the building. Foot traffic will help compact<br />
the bottom layers.<br />
Radiant floor tubing can be installed into this sub-floor layer.<br />
Finding a Soil Mix for the Finished Floor Layer<br />
Determining a good soil mixture, a combination of clay, s<strong>and</strong><br />
<strong>and</strong> fiber (chopped straw), is the most critical step of the finished<br />
floor layer. The mixture needs to have sufficient clay to bind all the<br />
ingredients together with good strength. Conducting a series of tests<br />
using varying proportions of these ingredients, is a crucial step. The<br />
strongest earthen floor is one that doesn't crack. Cracks, even when<br />
filled or grouted remain the weakest <strong>and</strong> most vulnerable part of the<br />
floor to damage. Creating test samples to see how they dry is crucial.<br />
Analyzing soil for clay content<br />
To determine whether or not soils contain enough clay to be<br />
used for a floor, several simple tests can be done. One is to form the<br />
moistened soil into a round egg-sized ball using just enough water to<br />
bind it together without it sticking to the h<strong>and</strong>s. Let it drop. If it breaks<br />
easily there is most likely not enough clay content. If it resists breaking<br />
<strong>and</strong> has a sticky adhesive quality, the clay content is probably<br />
sufficient. The same ball can also be cut in half with a knife. A shiny<br />
surface on the soil reveals clay while a dull surface indicates silt<br />
Another indicator is that clayey soils resist penetration of a knife<br />
while silty/s<strong>and</strong>y soils show little resistance. H<strong>and</strong>ling <strong>and</strong> feeling<br />
different soils <strong>and</strong> noting the differences between them will begin to<br />
reveal a lot about them. With a little experience you will have a<br />
natural sense about what generally needs to be added to correctly<br />
adjust the soil.
Mixing Test Samples for Finished Floor<br />
To find a mix for the finished floor, the soil being used needs to be<br />
tested first alone <strong>and</strong> then sit h varying quantities of s<strong>and</strong> <strong>and</strong>/or straw.<br />
Both the soil as well as the s<strong>and</strong> should be sifted through 3/8 inch<br />
hardware doth to remove any larger particles, debris <strong>and</strong> stones. Mix<br />
enough material to create test samples that are approximately 1/2 to<br />
1" thick <strong>and</strong> 12* square<br />
Clay soil <strong>by</strong> itself<br />
Mix with water without s<strong>and</strong> or straw<br />
Clay soil <strong>and</strong> s<strong>and</strong><br />
Dry mix different proportions of soil <strong>and</strong> s<strong>and</strong><br />
Add increments of s<strong>and</strong>:<br />
1/2 part s<strong>and</strong> to 1 part clay/soil<br />
1 part s<strong>and</strong> to 1 part day/soil, etc.<br />
Continue up to 3 parts for starters.<br />
Add enough water to thoroughly blend alt the ingredients. The<br />
mix should be kept as dry as possible <strong>and</strong> yet remain workable.<br />
These samples should dry in the same place where the finished<br />
floor will be installed. Make sure the samples are marked with<br />
their appropriate percentage of clay <strong>and</strong> s<strong>and</strong>. When dry,<br />
choose the sample that has no cracking <strong>and</strong> has sufficient<br />
strength. Too much s<strong>and</strong> will produce a weak floor. If <strong>by</strong><br />
chance, none of the samples are free of cracks, the soil being<br />
used may be unsatisfactory because of the expansive nature of<br />
the clay.<br />
If the crack-free sample lacks adequate strength, it is then<br />
necessary to work backwards. Select several of the samples<br />
that seem to have good strength <strong>and</strong> start over <strong>by</strong> remixing<br />
them but this time with straw. Begin <strong>by</strong> adding 5% <strong>and</strong> continue<br />
in increments of 5% up to 25%. When dry, observe to see if<br />
there are any samples that are crack-free <strong>and</strong> that have good<br />
strength <strong>and</strong> density. Too much strew may yield samples that<br />
lack sufficient density for a good floor The straw used should<br />
be finely chopped (straw passed through a 1/4" or 1/8* screen).<br />
Clay soil with straw<br />
Another option is to mix the clay soil with only straw <strong>and</strong><br />
no s<strong>and</strong>. In this case the concentration of straw will need to be<br />
higher than if s<strong>and</strong> were added. As above, add straw in<br />
increasing increments, 5% at a time This approach has value<br />
when s<strong>and</strong> is difficult to come <strong>by</strong> or is an added expense when<br />
money is scarce. With such a high quantity of straw added,<br />
there may be more difficulty achieving enough compaction <strong>and</strong><br />
strength.<br />
Sanely soils<br />
There are some soils that are too s<strong>and</strong>y or silty <strong>by</strong> nature <strong>and</strong><br />
lack sufficient clay to produce a good floor mix. There are basically<br />
two major options in this case. Either additional clay can be added<br />
to bring it up to a suitable level or a small amount of portl<strong>and</strong><br />
cement (6 to 10%) can be added. Cement is probably the most<br />
commonly available stabilizer for s<strong>and</strong>y soils.<br />
Straw can also be added for effect, if wanted, to any test sample<br />
that produced good results without it.<br />
Once a mix has been selected, a larger test sample (a square meter)<br />
can be completed for final confirmation.
We have included three different methods for installing earthenfloors,<br />
lire steps which have been covered prior to this point are the same<br />
for each method unless stated otherwise.<br />
Method 1 is a troweledfloor that is both durable <strong>and</strong> beautiful, but<br />
is the most labor intensive of the three methods. It is our choice for<br />
areas that receive the most traffic <strong>and</strong> where an attractive floor is<br />
desired<br />
Method 2 is a tamped floor that is of lower quality than method 1,<br />
but isfaster to install. It would be a good choicefor areas with less<br />
traffic or where the finished look is not as important It wotild also<br />
be a good choice when using an earthen floor as a base for tile,<br />
carpeting, etc.<br />
Method 3 is the easiest <strong>and</strong>fastest of the three methods, but the most<br />
experimental <strong>and</strong> the one for which we have the least amount of data.<br />
It is simply installed dry <strong>and</strong> moistened in place using psyllium seed<br />
as a stabilizer. We have created some incredible samples using this<br />
method, but consistent results will require more work <strong>and</strong><br />
experimentation.<br />
Method 1<br />
This version produces the most finely finished <strong>and</strong> durable earthen<br />
floor that we have seen.<br />
If the base for the floor has been properly prepared, the thickness<br />
of the finished floor can be thin, anywhere from 1 to 2 inches.<br />
Historically, earthen floors have often been treated like concrete pours<br />
<strong>and</strong> have been installed at a thickness of 4 inches or more, but this<br />
excessive thickness can make the floor much more susceptible to<br />
cracking <strong>and</strong> substantially increase the drying time.<br />
Typically, we have had good results with a 1" finished floor<br />
layer, applied in two seperate 1/2" thick applications. It is conceivable<br />
that it could also be done in one layer, although there would be more<br />
shrinkage <strong>and</strong> cracking problems. Three layers might be necessary, if<br />
problems have developed as the floor is being installed.<br />
Getting ready to begin.<br />
Before beginning, the height of the various floor layers need to<br />
be marked on the walls of the room. For example, if two 1/2" layers<br />
are being used, a mark 1/2" above the top of the sub-floor, along with<br />
another at 1", need to be made. These marks can then be connected<br />
<strong>by</strong> drawing level lines between them, or snapping a chalk line. A<br />
water-tube level in combination with a St<strong>and</strong>ard carpenter's level are<br />
usually adequate for most rooms, however a transit could be helpful<br />
for larger rooms.<br />
Prepare your tested floor mixture, measuring the ingredients<br />
carefully, so that each batch is consistent. Thoroughly dry mix. It is a<br />
good idea to save <strong>and</strong> store some of this dry-mix for future repairs.<br />
Just enough water should be added to make the mix workable. The<br />
drier the mix, the less the floor will shrink <strong>and</strong> crack. Straw added to<br />
the first layer will help control shrinkage. The base needs to be<br />
thoroughly clean (a vacuum works well for this), <strong>and</strong> dampened before<br />
applying the floor mixture.
Applying the floor mixture is most easily done with a trowel<br />
Swimming pool trowels have rounded corners <strong>and</strong> are easier to use<br />
with earthen materials. St<strong>and</strong>ard square cornered trowels have a<br />
tendency to leave marks <strong>and</strong> are harder to control A 3" to 4" putty<br />
knife can help when it is necessary to work corners. Longer, concrete<br />
floor trowels, also work well <strong>and</strong> help to level larger areas of the<br />
floor.<br />
It is usually easier to apply the floor mixture in 2 foot wide strips<br />
across the room. When finishing each strip, it is extremely important<br />
that the edges of each of these sections be tapered or beveled <strong>and</strong><br />
then scored or scratched. In this way the following section will overlap<br />
<strong>and</strong> integrate well with the previous one. Failure to taper each section<br />
at the edge will typically produce cracks wherever sections meet.<br />
The base needs to be kept damp, especially the area where the<br />
mix is being applied. This keeps the base from wicking water too<br />
quickly out of the floor mixture, <strong>and</strong> thus producing cracks.<br />
It is best to do an entire room at one time. However, if it is a<br />
large room, or time does not permit it is possible to stop <strong>and</strong> resume<br />
later, as long as the tapered edge of the last section is well moistened<br />
before continuing<br />
Where the earthen floor meets a wall, a door sill, or any different<br />
type of material, such as brick, concrete or wood, a 1/2" strip of drier<br />
mix, should be used to minimize shrinkage. Some dry mix can simply<br />
be added to what has been already mixed for the rest of the floor<br />
Keeping the floor level as you go.<br />
There are a variety of techniques that can be used to keep the<br />
floor level while each application is being made.<br />
To check the level <strong>and</strong> to remove any excess material or<br />
unevenness a 3 foot level is h<strong>and</strong>y. It can be attached or taped to a<br />
length of milled lumber of the same or slightly longer length, to drag<br />
across sections that have been installed.
As guides or reference points while troweling the earthen<br />
mixture! sections of re-bar or pieces of wood (the same dimension as<br />
the depth of the application) laid at periodic intervals across the base<br />
layer. For example, if each layer is one half inch thick, a piece of #4<br />
re-bar can be used as a guide to regulate depth. As each section of<br />
floor is completed, the re-bar or wooden guides can be removed <strong>and</strong><br />
repositioned for the next section. Make sure to carefully fill the gaps<br />
left after removing the guides.<br />
When a room is large, it can be difficult to maintain a level surface<br />
when installing the floor. One remedy is to use pre-laid, 3 4" strips<br />
of floor mix at approximately 6 1<br />
intervals, to create reference points<br />
for the correct height of the floor. Once in place they can also be used<br />
to lay a board or level across <strong>and</strong> adjust the height of the floor.<br />
The first layer of earthen mix can be left slightly rough so that<br />
the second layer will better adhere to it. There is a point when the<br />
floor will be dry enough to walk across -yet still damp enough to be<br />
workable. At this time, any cracks or shrinkage lines that have<br />
occurred, can be worked with a trowel. This first layer can be left<br />
fairly rough for the next layer to adhere to. To help spread the<br />
concentrated loads of feet <strong>and</strong> knees, so that no marks or depressions<br />
will be left on the floor surface, two pieces of plywood or some other<br />
flat, rigid material can be alternately leap-froged across to create a<br />
path of movement.
The second layer<br />
Optimally; the second earthen floor layer should be applied<br />
while the first layer is still damp, yet leather-hard. If the first layer<br />
dries out before applying the second layer, be sure to dampen it well<br />
before starting, <strong>and</strong> while working. If for any reason, the first layer<br />
showed any cracking, adjust the soil mixture <strong>and</strong> retest before applying<br />
the second layer<br />
The second layer of the earthen floor is applied in exactly the<br />
same manner as the first. Once the floor has hardened, but is still<br />
damp, it can be troweled, using a little water, to give a smooth, fine<br />
polish. A spray bottle works well to apply the water. Wiping the floor<br />
lightly with a wet sponge <strong>and</strong> troweling it will bring out the flecks of<br />
straw.<br />
Depending on the weather, the entire floor could dry in as short<br />
of time as a few days in drier climates or as much as several weeks in<br />
damper conditions. A fan could help speed up the drying process.<br />
AD traffic should be kept off the floor during this time.<br />
Method2<br />
This method produces a floor that is not as durable as<br />
Method /, but is easier to install.<br />
The technique<br />
It is possible to construct an earthen floor <strong>by</strong> tamping<br />
or ramming. It can also be done in multiple layers, but at greater<br />
thickness because it is done with a dry or slightly moistened<br />
mixture rather than one which is wet enough to trowel. The<br />
Initial layers of this floor need not be as finely screened as for<br />
Method 1. Soil passed through a 1/2 inch screen is more than<br />
satisfactory. Select a clay/s<strong>and</strong> mix as described earlier in the<br />
text. Prepared road base has also been used with good results.<br />
Each layer can be somewhere between 1.5 to 2 inches<br />
in depth with the total depth of the floor at 4 to 6 inches or<br />
more if conditions require it.<br />
Adding water<br />
The first layer can be applied dry <strong>and</strong> then moistened<br />
slightly with a mister on a hose or a watering can. The soil<br />
mixture should be wet enough that the clay can bind the<br />
ingredients together, but not so wet that it can't be walked<br />
upon without disturbing it. The mixture can also be lightly<br />
moistened before applying. Doing so helps ensure that the<br />
moisture is evenly distributed throughout the mix, but it is<br />
more laborious.<br />
Another option, which will help further stabilize the<br />
soil, is to add boiled linseed oil to the water at a rate of 4<br />
liters of boiled linseed oil, diluted with 2 liters of water for every<br />
100 liters of soil (<strong>by</strong> volume).<br />
Tamping<br />
The mixture can then be roughly<br />
leveled <strong>and</strong> then compacted with a plate<br />
compactor. H<strong>and</strong> tamping is clearly the<br />
least expensive, but more laborious.<br />
Simple tampers can be made from<br />
plywood with a h<strong>and</strong>le or metal plates<br />
welded to a piece of pipe. Mechanical<br />
plate compactors are commonly<br />
available through tool rental outlets.<br />
When using one, it is necessary to h<strong>and</strong>tamp<br />
the edges of the room where the<br />
floor meets the walls.
Additional layers<br />
When this first layer is completed, it can be followed with other<br />
layer or layers. If the finished look of the floor is not so critical, this<br />
can be the final layer. More care can be taken to level the surface.<br />
Dragging a board across the surface to screed it as done with concrete<br />
is a good method<br />
Tamping will produce edges, but these can be smoothed or<br />
softened with a trowel <strong>and</strong> retamped to create a reasonably level<br />
surface If this is the final layer, it should be applied slightly higher<br />
than the intended height of the floor as tamping will compact the<br />
floor mixture approximately 20 to 30%.<br />
Final layer<br />
If the surface of the final layer is not smooth enough, it can be<br />
topped with a very thin troweled-on application of the same soil<br />
mixture, screened with 1/8* hardware cloth. It is applied in the same<br />
way that one would apply a finish plaster to a wall. Care should be<br />
taken to make sure that the previous layer is well moistened to ensure<br />
a good bond between the two.<br />
A hybrid version of Method 1 <strong>and</strong> 2 can also be used for the<br />
final layer. A1/2 inch layer of a clay/soil mix, as in Method 1, can be<br />
troweled on top of the tamped layers.<br />
Method 3<br />
This is the fastest method of the three, but less finished with more<br />
texture than methods 1 <strong>and</strong> 2. It is also suitable for outdoor surfaces<br />
in dry climates.<br />
Soil Mixture<br />
This method uses psyllium seed as a stabilizer in combination<br />
with a s<strong>and</strong>y soil mix or another material that has a fair amount of<br />
aggregate. Psyllium acts like clay or cement, it coats small pieces of<br />
aggregate <strong>and</strong> triads them together, ft is often used with crushed granite<br />
for outdoor walkways.<br />
Ground psyllium seed (see resource section) is dry mixed at<br />
the rate of 1 lb. per 10 square feet to create a 2 inch thick floor. For a<br />
3 inch thick floor, 1 lb. per 7 square feet is needed. A mortar mixer or<br />
concrete mixer is good for larger quantities.<br />
Application<br />
This mix is spread dry over the base layer that has been soaked<br />
with water. It is then leveled <strong>and</strong> compacted with a roller, as is typically<br />
used for l<strong>and</strong>scaping.<br />
The soil <strong>and</strong> psyllium mix is then saturated with water <strong>by</strong> using<br />
a spray nozzle that has a mist option. Applying the water in a mist<br />
does not disturb the prepared surface of the floor. It is essential to<br />
moisten the soil mixture so that the full depth of the material receives<br />
water. After the surface water disappears, the surface can be further<br />
compacted with a roller.<br />
The top layer can be troweled lightly to help seal the surface of<br />
the floor <strong>and</strong> to produce a smooth surface. Too much pressure will<br />
tend to float the psyllium to the top <strong>and</strong> weaken the bottom layers.<br />
The surface can be misted or moistened slightly to facilitate the<br />
process.<br />
It is possible to apply the psyllium in a wet mix with a trowel,<br />
like in method 1, but it can be difficult to control the consistency of<br />
the soil psyllium mix. Which has a tendency to continue absorbing<br />
moisture <strong>and</strong> consequently continues becoming drier <strong>and</strong> changing<br />
in consistency. However, some experimentation may yield good<br />
results. Small samples that we have created using this method have<br />
yielded good results.<br />
Volume of soil needed for the finished floor layer<br />
At adepth of 1 inch, approximately 1 ton of soil mixture will be<br />
needed for every 200 square feet; for 2 inches, 1 ton per 200 square<br />
feet is needed; for 3 inches, 1 ton per 65 square feet.
Earthen floors can be divided with grids of wood, brick, concrete<br />
QT other materials If wishing to do this, it is important to remember<br />
that earthen doors are strongest to a monolithic form without any<br />
divisions Their weakest point is at the edges <strong>and</strong> when divided <strong>by</strong><br />
other materials, the number of edges increases considerably. Dividing<br />
the floor into sections does make it easier to level Smaller tile-sized<br />
sections can also be made <strong>and</strong> then grouted with a different colored<br />
clay<br />
Stabilizing Earthen Floor Mixes<br />
Most soil mixes will make a good floor without additional<br />
stabilization. They can be added if additional hardness is required or<br />
if the soil mix doesn't produce enough binding <strong>and</strong> strength. Choice<br />
of stabilizers can vary depending upon available resources.<br />
An easy <strong>and</strong> inexpensive stabilizer that was sometimes used<br />
throughout the southwestern United States was wheat flour paste<br />
Wheat flour paste can be made from commonly available white flour<br />
mixed in the following manner<br />
Mix 1 cup of white wheat flour with I pint of water <strong>and</strong> add<br />
it to 2 cups of boiling water. Then cook at low heat until it becomes<br />
slightly translucent taking care that the mixture does not stick <strong>and</strong><br />
burn Dilute this with 2 quarts of cold water <strong>and</strong> use it as the water to<br />
mix the soil ingredients.<br />
Another option is using casein powder which produces a natural<br />
glue. It is prepared <strong>by</strong> soaking 25 grams of casein powder <strong>and</strong> 8 grams<br />
of borax in enough water to form a putty. The putty can then be diluted<br />
with water to a consistency suitable for mixing the soil ingredients<br />
Auro (see resources) makes a powdered casein glue that could also<br />
be used Synthetic polymer based glues like Elmers or Concrete<br />
Bonder can be used at a ratio of 16 ounces to 22 shovels of mix.<br />
Surface Hardeners <strong>and</strong> Sealents<br />
To be effective, a good sealant needs to penetrate deeply into the<br />
earthen floor rather than form a skin or shell on the surface of the<br />
floor, as do acrylic sealants. The problem with skins, is that they<br />
create a thin, hard cap on top of a relatively soft material (the earthen<br />
floor). This cap or skin is then susceptible to damage <strong>and</strong> when it is<br />
broken, produces "pot holes" in the floor.<br />
Traditionally, the most successful sealents have included oils,<br />
animal urine <strong>and</strong> bloods. Penetrating oils, which oxidize <strong>and</strong> become<br />
fixed, are often the best choice for earthen floors, as they not only<br />
seal, but harden the floor as well. Unseed oil is probably the most<br />
cost effective <strong>and</strong> widely available of these oils. However, other<br />
options include hemp oil, castor oil <strong>and</strong> possibly, cottonseed, coconut,<br />
<strong>and</strong> fish oils. Boiled oils are preferred, because they require much<br />
less time to dry. Another option which we have not tried, but that<br />
could be superior to any of the above is st<strong>and</strong> oil. St<strong>and</strong> oil is usually<br />
linseed or tung oil which has been exposed to oxygen in order to<br />
oxidize it In former times, oils were left to st<strong>and</strong> exposed to the<br />
oxygen in the air tQ produce the same effect <strong>and</strong> dais the name, st<strong>and</strong><br />
oil, however st<strong>and</strong> oils can now be produced <strong>by</strong> injecting oxygen<br />
into the oil
There are a number of varnish combinations which are<br />
manufactured in Europe that are composed of varying combinations<br />
of linseed oil, tung oils, solvents, dryers <strong>and</strong> other substances that<br />
could also be effective, particularly for the final coat. A source for<br />
these products is Sinan (see resources) which is a representative for a<br />
European company named Auro which manufactures a complete line<br />
of natural paints, oils, solvents <strong>and</strong> related products. Their linseed oil<br />
is organically grown <strong>and</strong> not diluted with any type of petroleum<br />
solvent<br />
A solvent for thinning the oil will also be necessary. There a<br />
number of options which include everything from common mineral<br />
spirits <strong>and</strong> turpentine to more expensive environmentally friendly<br />
thinners diluted with citrus oils, ordorless turpentine <strong>and</strong> pure citrus<br />
oils. Unfortunately almost all of the natural oils <strong>and</strong> solvents are<br />
considerably more expensive.<br />
Oils penetrate deeper <strong>and</strong> more effectively when they are heated,<br />
<strong>and</strong> will also be more readily absorbed, if the surface of the floor <strong>and</strong><br />
the room are warm.<br />
// is extremely important to remember that both oils <strong>and</strong> solvents<br />
are very volatile <strong>and</strong> flammable <strong>and</strong> need to be treated with great<br />
caution when heating. Any brushes <strong>and</strong> equipment used during the<br />
application are also subject to spontaneous combustion after they<br />
have been used <strong>and</strong> should be carefully stored in closed containers<br />
Generally, it is better to apply the oil in a stronger concentration<br />
in the initial coats, gradually reducing the percentage of oil to solvent<br />
in the following coats. The earthen floor is less porous with each<br />
subsequent coat of sealant, <strong>and</strong> will accept full strength oil more<br />
readily at the beginning. Our best results have come from applying<br />
full strength oil for the first coat, gradually diluting it in several<br />
subsequent coats.<br />
Floor Sealing Sequence<br />
The floor should be completely dry before sealing. The oil/<br />
solvents to be most effective should be heated, but only with the<br />
utmost caution. They should be warmed, but not taken to the point<br />
where they began to smoke.<br />
Each coat should be applied only to the point that the floor can<br />
accept the quantity being applied <strong>and</strong> no more. If it starts to puddle,<br />
the oil/solvent combination may form a cap on the surface of the<br />
floor. A large brush can be used to apply the oil. Remove excess oil.<br />
Coat 1 - Apply full strength oil<br />
Coat 2- Dilute the oil with 25% solvent<br />
Coat 3- Dilute with 50% solvent<br />
Coat 4- Dilute with 75% solvent<br />
Subsequent coats should be applied as soon as the previous one<br />
is fully absorbed <strong>and</strong> no longer tacky to the touch. With 4 coats, the<br />
floor should be sufficiently sealed, yet if more sheen is wanted,<br />
additional applications of "Coat 4" can be added.<br />
Some of the above mentioned varnish preparations might be<br />
effective as a final coat. Since no specific testing has been conducted<br />
on earthen floors, small samples should be experimented with before<br />
attempting an entire floor. Watch that an impermeable cap or skin on<br />
the floor is not created. Besides st<strong>and</strong> oils <strong>and</strong> linseed oil varnish,<br />
Auro manufactures a product called Natural Resin Floor Sealer that<br />
is a combination of different st<strong>and</strong> oils, solvents, <strong>and</strong> dryers that could<br />
be very effective. They also have another product called Clear Amber<br />
Varnish which is also a combination of st<strong>and</strong> oils <strong>and</strong> solvents, but<br />
also includes colophon amber which gives a harder finish.
Periodic Applications of Coat 4" can be used at maitenance<br />
coats The frequency of this application will depend upon the amount<br />
of wear the floor receives For an average floor, somewhere between<br />
6 months to a year is sufficient. Although, if a high sheen is not<br />
important, the Boor can go years without the addition of any further<br />
coats or maintenance The application of a hard wax can also be used<br />
Recipe for hard wax: 250 kg's of camuba wax, 250 kg's of beeswax<br />
<strong>and</strong> 5 kg's of turpentine or other solvent, all dissolved together in a<br />
double boiler<br />
Auro produces two different floor wax products that could be<br />
used for floor maintenance Beeswax floor care is designed for regular<br />
floor care <strong>and</strong> produces a water-repellent coating while Floor <strong>and</strong><br />
Furniture Plant Wax contains carnauba wax <strong>and</strong> gives a harder finish.<br />
Repairs<br />
If the floor needs repair, open up the crack or hole, splaying<br />
the edges, so that the hole or crack is smaller at the top than at the<br />
bottom. If the crack or hole is small, it can help to pass the mix through<br />
window screen to remove any large particles <strong>and</strong> debris. Thoroughly<br />
moisten the floor when applying the new mix. Seal when dry.<br />
There is a variety of reinforced <strong>and</strong>/or stabilized load-bearing<br />
earth <strong>and</strong> earth/straw in-fills that can be used between floor joists to<br />
provide a satisfactory base for an upper-level earthen floor.<br />
It is important to establish a solid enough base that doesn't move<br />
(so uncharactenstiocharacteristic of many wooden floors). Another<br />
consideration is that an upper-story earthen floor will most likely be<br />
quite heavy <strong>and</strong> the calculated loads must be within the limits of the<br />
structure Reducing the span between floor joists can help distribute<br />
loads along the walls, but also improve the performance of the in-fill<br />
material<br />
Light clay/straw is possibly the best in-fill, in that it is lighter<br />
than solid earth, a good insulator <strong>and</strong> has good tensile, shear <strong>and</strong><br />
bending strength.<br />
The light day/straw mix can either be packed directly between<br />
the floor joists or beams, or can be made into prefabricated panels or<br />
blocks, <strong>and</strong> positioned once dry. Some type of horizontal reinforcing<br />
element, such as; lx2's, 1/2" re-bar, 1" bamboo, willow branches, or<br />
some other type of branch, spaced every few inches, needs to be<br />
integrated into the light clay/straw in order to make it load-bearing in<br />
a flat position. These reinforcing elements need to be strong enough<br />
to carry the loads imposed on them from above as well as the weight<br />
of the infill material itself.<br />
Once the infill portion has been completed <strong>and</strong> is thoroughly<br />
dry, a 1 inch thick (two 1/2 inch layers) section of earthen floor can<br />
be installed, as described earlier in the text If the floor joists are to<br />
be exposed, the infill material should stop 1 inch below their top, <strong>and</strong><br />
if they are to be covered, the infill material should cover them with at<br />
least 2 inches of material. Burlap, coated with a clay slip can be placed<br />
on top of the straw/light day if further protection from cracking is<br />
desired. Any of the light day/straw infills can then be plastered<br />
underneath, on the ceiling side.
Obviously the construction of an upper-story floor in terms of the<br />
actual construction <strong>and</strong> the calculation of loads, etc. is more complicated<br />
them can be dealt with in a small booklet like this, but we have included<br />
short descriptions of the basic techniques to give the reader some idea of<br />
how these infill sections are constructed. The relationship between the load<br />
of the light clay/straw to the joists <strong>and</strong> walls as well as the technique for<br />
constructing the in fill, needs to be thoroughly understood before attempting<br />
this type of construction.<br />
Light clay/straw infill<br />
A mixture of light clay/straw can be tamped directly into place,<br />
using a slip-form attached to the bottom of the joists or rafters thus<br />
producing a flat surface when the form work is removed The<br />
reinforcement rods, placed every 2-4 inches, rest on the ledgers which<br />
are attached to the lower sides of the joists.<br />
These infill sections can also be curved <strong>by</strong> using a form work<br />
of flexible branches such as willow which are bent to the desired arc<br />
<strong>and</strong> placed 1 or 2 inches apart The light clay/straw is then packed on<br />
top of them.<br />
Prefabricated blocks of straw/light-clay<br />
T-shaped straw/light-clay blocks can be prefabricated to rest<br />
between the rafters or floor joists. Two reinforcing rods are worked<br />
into the middle of the block when packing the wet mix into the form.<br />
The blocks can be removed immediately from the form <strong>and</strong> set aside<br />
to dry. A little clay slip can be used between the blocks as mortar,<br />
when the dried blocks are laid in place. The blocks can be shaped to<br />
produce either a flat or vaulted ceiling.<br />
Light clay/straw ceiling rolls<br />
Another version of creating a flat infill section, is to use reels<br />
made up of a fibrous material, like straw or grass, coated with clay<br />
slip <strong>and</strong> then wrapped around reinforcing rods. These reels are slid<br />
between the joists, compactly against each other while still wet. As<br />
with the other infill methods, the bottom of the rolls can then be<br />
plastered.
Yavapai Sports Surfaces<br />
P.O. BOx 17150 r<br />
Ft. McDowell, AZ 8S264<br />
(602)837-8038 $<br />
1-80O-9-2724<br />
Psyllium seed<br />
Sinan Company<br />
P.O. Box 857<br />
Davis, CA 95617-3104<br />
(916)75-3104<br />
Auro products-natural paints, oils solvents,<br />
waxes, etc<br />
The Pilot Chemical Co.<br />
1030 Jackson Ave.<br />
Long Isl<strong>and</strong>, NY 11101<br />
(718)729-8282<br />
Casein powder<br />
Frank Andreson<br />
Duseldorf, Germany<br />
summer address:<br />
P.O. Box 249<br />
Brownfield ME 04010<br />
We have worked with Frank Andreson of<br />
Germany who Is skilled with many years*<br />
experience In building with light<br />
Wc ait a small non-profit organization dedicated to connecting people,<br />
different cultures <strong>and</strong> nature. Our work explores living, building <strong>and</strong> food<br />
production practices that can be simultaneously beautiful <strong>and</strong> sustainable<br />
The Canelo Project is defined <strong>by</strong> the place we call home - a 41 acre<br />
secluded homestead tucked into the higher elevation oak woodl<strong>and</strong>s of<br />
southeastern Arizona. Shaped <strong>and</strong> nurtured over the last eight years, the<br />
site provides a comfortable <strong>and</strong> peaceful context for learning, applied<br />
research, <strong>and</strong> cultural exchanges.<br />
Our current projects include:<br />
• Workshops <strong>and</strong> Tours<br />
Ongoing programs focusing on natural building, straw bale<br />
construction <strong>and</strong> the living arts.<br />
• Straw-Earthen Housing in Mexico<br />
Innovative low-cost housing using local <strong>and</strong> natural resources.<br />
• Enjarradora Program<br />
Training women <strong>and</strong> children In the traditional livelihood<br />
of working <strong>and</strong> building with earth.<br />
• International Exchange<br />
Bringing together people from around the world, to share<br />
their specialized skills <strong>and</strong> cultural knowledge.<br />
We invite you to join us <strong>and</strong> participate in any of our ongoing activities.<br />
We welcome your interest <strong>and</strong> support. If you would like more information<br />
about the Canelo Project, workshops, <strong>and</strong> other mail order products, or for<br />
more copies of "Earthen Floors*' ($8.50 + $1.50 shipping)<br />
Call or write to:<br />
THE CANELO PROJECT<br />
<strong>Athena</strong> <strong>and</strong> BIO <strong>Steen</strong><br />
HC1 Box 324<br />
Elgin, AZ 85611<br />
(520) 455-5548<br />
fex(520) 455-9360<br />
absteen@dakotacom.net<br />
all donations are tax-exempt
When I was a boy, my father was the main one to look after the<br />
church. Once when we had been up to southern Colorado to visit part<br />
of our familyfor a couple of weeks, it had been raining here almost<br />
every day we were gone, heavy rains. The day after we got back, my<br />
father took me with him to go see how Aings were with the church.<br />
We could see as soon as we walked up to the church how heavy the<br />
rains had been. The adobe plaster was washed away here <strong>and</strong> there,<br />
<strong>and</strong> the winds had blown a cottonwood limb onto the roof When we<br />
went to open the doors, the wood was so swollen <strong>by</strong> the water that we<br />
could barely open them.<br />
When we got them open <strong>and</strong> saw inside, we just stood there awhile not<br />
saying anything* There, growing out of the adobe floor, was a young<br />
st<strong>and</strong> of wheat<br />
I remember trying to convince my father to leave the wheat alone-it<br />
seemed right to me that it should be there-but he Just smiled <strong>and</strong> said,<br />
"Ml hijo, you know we can H worship the wheat n<br />
lna couple of days,<br />
everything was back to the way it was, but I never forgot that day.<br />
Elder from northern New Mexico village.<br />
Persistence of Memory \ New Mexico's Churches<br />
Museum of New Mexico Press