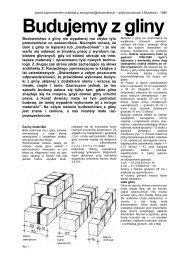
by Athena and Bill Steen - Cohabitat
by Athena and Bill Steen - Cohabitat
by Athena and Bill Steen - Cohabitat

Create successful ePaper yourself
Turn your PDF publications into a flip-book with our unique Google optimized e-Paper software.
We have included three different methods for installing earthenfloors,<br />
lire steps which have been covered prior to this point are the same<br />
for each method unless stated otherwise.<br />
Method 1 is a troweledfloor that is both durable <strong>and</strong> beautiful, but<br />
is the most labor intensive of the three methods. It is our choice for<br />
areas that receive the most traffic <strong>and</strong> where an attractive floor is<br />
desired<br />
Method 2 is a tamped floor that is of lower quality than method 1,<br />
but isfaster to install. It would be a good choicefor areas with less<br />
traffic or where the finished look is not as important It wotild also<br />
be a good choice when using an earthen floor as a base for tile,<br />
carpeting, etc.<br />
Method 3 is the easiest <strong>and</strong>fastest of the three methods, but the most<br />
experimental <strong>and</strong> the one for which we have the least amount of data.<br />
It is simply installed dry <strong>and</strong> moistened in place using psyllium seed<br />
as a stabilizer. We have created some incredible samples using this<br />
method, but consistent results will require more work <strong>and</strong><br />
experimentation.<br />
Method 1<br />
This version produces the most finely finished <strong>and</strong> durable earthen<br />
floor that we have seen.<br />
If the base for the floor has been properly prepared, the thickness<br />
of the finished floor can be thin, anywhere from 1 to 2 inches.<br />
Historically, earthen floors have often been treated like concrete pours<br />
<strong>and</strong> have been installed at a thickness of 4 inches or more, but this<br />
excessive thickness can make the floor much more susceptible to<br />
cracking <strong>and</strong> substantially increase the drying time.<br />
Typically, we have had good results with a 1" finished floor<br />
layer, applied in two seperate 1/2" thick applications. It is conceivable<br />
that it could also be done in one layer, although there would be more<br />
shrinkage <strong>and</strong> cracking problems. Three layers might be necessary, if<br />
problems have developed as the floor is being installed.<br />
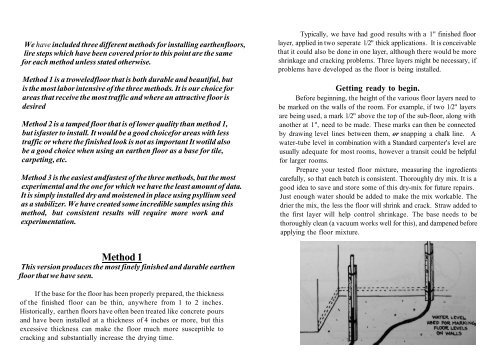
Getting ready to begin.<br />
Before beginning, the height of the various floor layers need to<br />
be marked on the walls of the room. For example, if two 1/2" layers<br />
are being used, a mark 1/2" above the top of the sub-floor, along with<br />
another at 1", need to be made. These marks can then be connected<br />
<strong>by</strong> drawing level lines between them, or snapping a chalk line. A<br />
water-tube level in combination with a St<strong>and</strong>ard carpenter's level are<br />
usually adequate for most rooms, however a transit could be helpful<br />
for larger rooms.<br />
Prepare your tested floor mixture, measuring the ingredients<br />
carefully, so that each batch is consistent. Thoroughly dry mix. It is a<br />
good idea to save <strong>and</strong> store some of this dry-mix for future repairs.<br />
Just enough water should be added to make the mix workable. The<br />
drier the mix, the less the floor will shrink <strong>and</strong> crack. Straw added to<br />
the first layer will help control shrinkage. The base needs to be<br />
thoroughly clean (a vacuum works well for this), <strong>and</strong> dampened before<br />
applying the floor mixture.