

Download Manual - Security Camera Systems
Download Manual - Security Camera Systems
Download Manual - Security Camera Systems

You also want an ePaper? Increase the reach of your titles
YUMPU automatically turns print PDFs into web optimized ePapers that Google loves.
User <strong>Manual</strong><br />
Click [Main menuNetworkMobile] to enter into the<br />
[Mobile] interface shown as Picture 5-41.<br />
User Name: indicate user name of DVR, and support<br />
numbers and characters and 1~15 bits length<br />
User password: indicate user password of DVR, and<br />
also support numbers and characters and 1~15 bits<br />
length<br />
Server port: Mobile monitoring port. Setting range is<br />
between 1024 and 65535.<br />
Picture 5-38<br />
Please note that the server port could not duplicate the port you have set to network set.<br />
5.3.4.6 DDNS Set<br />
DDNS (Dynamic DNS) is a service that register a domain name and the floating IP<br />
address with the DDNS server so that the domain name can be routed to the IP address<br />
even if the IP address is changed in a dynamic IP system.<br />
User can visit a remote DVR by using DDNS on above three types (Static, DHCP and PPPoE)<br />
You can apply for a DDNS account for free at the<br />
web www.3322.org or www.dyndns.org.<br />
You can register on DVR2009.3322.org or<br />
dyndns.org website and get a domain name, user<br />
name, and password.<br />
Server: select DDNS provider<br />
Host name: input the host domain name you<br />
have registered at dynamic domain name system,<br />
Picture 5-39<br />
such as: DVR2009.3322.org;<br />
User Name: Input a user name registered before applying for a domain name;<br />
Password: Input a password you set when registering a user name.<br />
Click [Apply] button and restart the DVR; and then enter the domain name (such as:<br />
http://superdvr.3322.org:8080) to visit your remote DVR.<br />
5.3.5 Alarm<br />
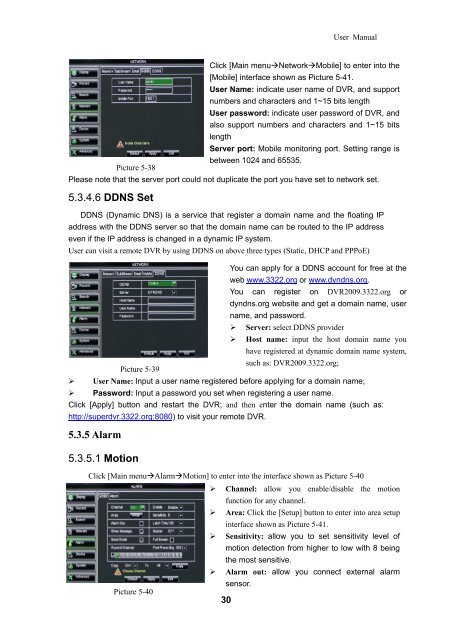
5.3.5.1 Motion<br />
Click [Main menuAlarmMotion] to enter into the interface shown as Picture 5-40<br />
Channel: allow you enable/disable the motion<br />
function for any channel.<br />
Area: Click the [Setup] button to enter into area setup<br />
interface shown as Picture 5-41.<br />
Sensitivity: allow you to set sensitivity level of<br />
motion detection from higher to low with 8 being<br />
the most sensitive.<br />
Alarm out: allow you connect external alarm<br />
sensor.<br />
Picture 5-40<br />
30