PHANTOM™ Premium 3.0L 6DOF 3D Touch - Curtin University
PHANTOM™ Premium 3.0L 6DOF 3D Touch - Curtin University
PHANTOM™ Premium 3.0L 6DOF 3D Touch - Curtin University

Create successful ePaper yourself
Turn your PDF publications into a flip-book with our unique Google optimized e-Paper software.
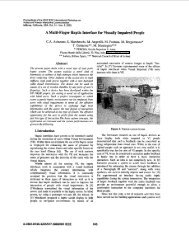
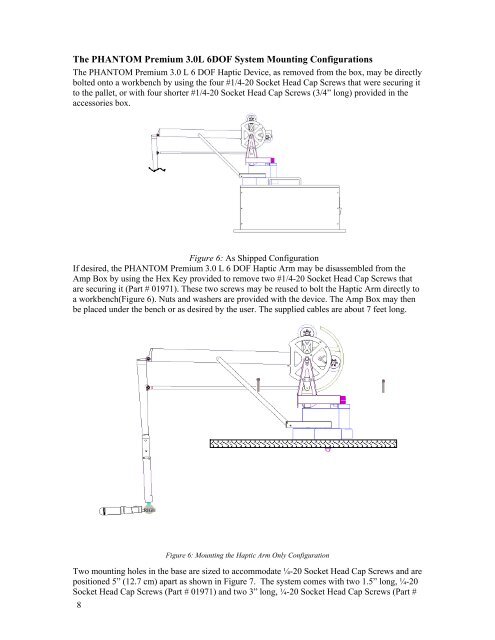
The PHANTOM <strong>Premium</strong> <strong>3.0L</strong> <strong>6DOF</strong> System Mounting Configurations<br />
The PHANTOM <strong>Premium</strong> 3.0 L 6 DOF Haptic Device, as removed from the box, may be directly<br />
bolted onto a workbench by using the four #1/4-20 Socket Head Cap Screws that were securing it<br />
to the pallet, or with four shorter #1/4-20 Socket Head Cap Screws (3/4” long) provided in the<br />
accessories box.<br />
Figure 6: As Shipped Configuration<br />
If desired, the PHANTOM <strong>Premium</strong> 3.0 L 6 DOF Haptic Arm may be disassembled from the<br />
Amp Box by using the Hex Key provided to remove two #1/4-20 Socket Head Cap Screws that<br />
are securing it (Part # 01971). These two screws may be reused to bolt the Haptic Arm directly to<br />
a workbench(Figure 6). Nuts and washers are provided with the device. The Amp Box may then<br />
be placed under the bench or as desired by the user. The supplied cables are about 7 feet long.<br />
RIGH<br />
Figure 6: Mounting the Haptic Arm Only Configuration<br />
Two mounting holes in the base are sized to accommodate ¼-20 Socket Head Cap Screws and are<br />
positioned 5” (12.7 cm) apart as shown in Figure 7. The system comes with two 1.5” long, ¼-20<br />
Socket Head Cap Screws (Part # 01971) and two 3” long, ¼-20 Socket Head Cap Screws (Part #<br />
8