

DM1000 Digital Mailing System - Pitney Bowes Canada
DM1000 Digital Mailing System - Pitney Bowes Canada
DM1000 Digital Mailing System - Pitney Bowes Canada

You also want an ePaper? Increase the reach of your titles
YUMPU automatically turns print PDFs into web optimized ePapers that Google loves.
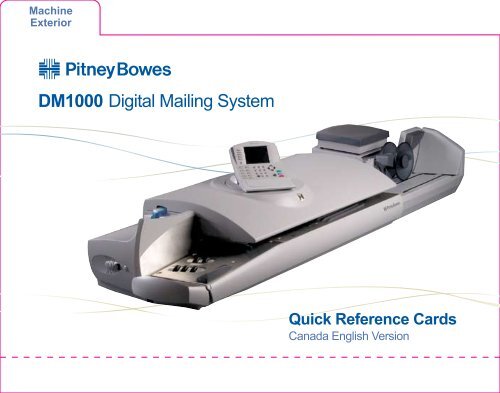
Machine<br />
Exterior<br />
<strong>DM1000</strong> <strong>Digital</strong> <strong>Mailing</strong> <strong>System</strong><br />
Quick Reference Cards<br />
<strong>Canada</strong> English Version
Feeder Wall<br />
Back Stop<br />
Machine<br />
Exterior<br />
Large Envelope<br />
Prop<br />
IntelliLink<br />
Control Centre<br />
Feed Deck<br />
Main Cover<br />
E-Z Seal ® Bottle<br />
for Envelopes<br />
Quick Reference<br />
Cards<br />
E-Z Seal ®<br />
Wet/Dry<br />
Tape Lever<br />
Bottle for Tapes<br />
Tape Exit
Thickness Adjustment<br />
Knob/Material<br />
Type Selection<br />
Knob<br />
Feed<br />
Release Levers<br />
Light Mail/Postcard<br />
Selection Knob<br />
Feed<br />
Lever<br />
Machine<br />
Interior<br />
Roll Tape<br />
Transport<br />
Release Lever<br />
Ink Cartridge<br />
Printhead<br />
Assembly<br />
Wiper Blade<br />
Assembly<br />
E-Z Seal ®<br />
Bottle<br />
Tape Moistening<br />
Brush Removal<br />
Lever<br />
Tape<br />
Exit
5 Screen Keys<br />
The five keys directly to the left<br />
of the display screen allow you to<br />
select options on the screen.<br />
Lock Button<br />
Locks the IntelliLink Control Centre<br />
when pressed.<br />
Normal Preset Key<br />
Returns you to the factory default<br />
setting and quickly clears your current<br />
mail job allowing you to reset your<br />
processing modes, class selection,<br />
etc.<br />
Mode Key<br />
Allows you to choose a specific mail<br />
processing mode such as: Attached<br />
Scale mode, Weigh on the Weigh,<br />
Manual Weight Entry mode, etc.<br />
Class Key<br />
Allows you to select the correct class<br />
for your mailing (e.g., Lettermail,<br />
Domestic Parcel, Xpresspost), and<br />
select special services. A class<br />
selection is a required action to<br />
process all mail jobs.<br />
Seal Key<br />
Turns sealing on/off. Includes<br />
seal only which will seal envelope<br />
but indicia will not print.<br />
IntelliLink<br />
Control Center<br />
Seal Key (continued)<br />
Configures sealing for open/nested<br />
flaps or both open and closed flaps.<br />
No previously sealed envelopes<br />
can be processed in the closed flap<br />
mode.<br />
Accounts Key<br />
Allows you to select, setup, and<br />
edit accounts.<br />
Custom Preset Key<br />
Allows you to choose frequently<br />
used system setting for running<br />
up to 10 different jobs.<br />
Menu Key<br />
Offers many settings and options:<br />
• Meter Stamp Options<br />
• Set Up<br />
• Zero Scale<br />
• Rate Details<br />
• Multiple Tapes<br />
• Adjust Contrast<br />
• Maintenance<br />
• Turn Features On<br />
• Volume Control<br />
• Currency Add<br />
• Rate Details<br />
• Display Alternate Weight
Funds Keys<br />
Allows you to view or perform a<br />
variety of functions:<br />
• View funds available<br />
• View funds used<br />
• View total pieces processed<br />
with postage<br />
• Perform a quick refill<br />
• Perform a new refill<br />
• View Postage By Phone ®<br />
balance<br />
Reports Key<br />
Offers a selection of different type<br />
of reports to run.<br />
Start Key<br />
Begins processing the envelopes<br />
with the option you have selected.<br />
Tape Key<br />
Allows you to make postage tapes<br />
for mailpieces that are too large or<br />
too thin for processing in the<br />
envelope mode.<br />
Stop Key<br />
Ends a mail or tape processing job<br />
in progress. It also shuts off rollers<br />
when nothing is in transport.<br />
Help Key<br />
Gives you detailed information<br />
about a screen you are viewing.<br />
IntelliLink<br />
Control Center<br />
Clear Key<br />
Clears an entry or if no data has<br />
been entered, it will take you to<br />
previous screen. The Clear Key also<br />
provides an access point for entering<br />
a numeric value for multiple postage<br />
tapes.<br />
Numeric Key Pad<br />
Used to enter manual postage values<br />
for Corrections and Statement of<br />
<strong>Mailing</strong>s / Manifests, entering manual<br />
weights, creating accounts, and making<br />
selections from numbered menus.<br />
Enter Key<br />
Enters the information you have<br />
selected and moves you to the<br />
next screen.<br />
Arrow Keys<br />
Used to move to new screens and<br />
navigate menus. In some cases it<br />
moves you back to main (Home)<br />
screen.<br />
Alpha Keyboard<br />
Used to enter accounts and other<br />
set up information. Use shift key<br />
for capital letters and the space<br />
key for inserting space when<br />
needed. The symbol key activates<br />
the symbols above the letters. The<br />
keyboard can be used to look up<br />
country codes.
Note:<br />
Processing mail requires a combination of a weight entry for the mail<br />
piece (Attached Scale, Manual Weight Entry, Weigh-on-the-Way) and<br />
a class selection to calculate the accurate postage. You cannot manually<br />
key in a postage value using the numeric keys unless you are processing<br />
a correction or payment for a Statement of <strong>Mailing</strong> / Manifest.<br />
Mail<br />
Modes<br />
W-O-W (Weigh-on-the-Way)<br />
Use this mode if:<br />
• the mailpieces are of different<br />
weights.<br />
• you do not know the weight of<br />
the mailpiece.<br />
Press the Mode key.<br />
Select W-O-W TM .<br />
Press the Class key to select a class<br />
(required action for all mail jobs). Select<br />
a special service, if desired, and then<br />
press Enter.<br />
• To add an advertisement and<br />
inscription, press Menu key,<br />
select Meter Stamp Options,<br />
and select your choice.<br />
• Press the left arrow key to<br />
return to main screen.<br />
Press Start.<br />
Place envelopes on the feeder<br />
deck to be processed.<br />
Note: For more information<br />
see Chapter 4: Running Mail<br />
in the Operator Guide.
1. Adjust Mail Feeding<br />
Adjust Mail Thickness/<br />
Material Type Knob.<br />
• Lift the top cover to access knob.<br />
• Adjust knob to position 2 for<br />
most mail envelopes.<br />
• Very thin mail may feed better<br />
with the knob set to 1.<br />
• Thick mail 1/2"-3/4" may feed<br />
better with the knob set to 2.<br />
All Other Mail<br />
Adjust Light Mail/<br />
Postcard Knob Postcard<br />
• Turn to the Left for<br />
postcard or thin mail.<br />
• Turn to the Right for all other mail.<br />
Adjust Mail Thickness/<br />
Material Type Knob<br />
Adjust Light<br />
Mail/Postcard Knob<br />
2. Selecting Sealing Options<br />
• Press the Seal key.<br />
• Select the sealing option appropriate<br />
for the mailing. If sealing is not<br />
necessary, select Print Only.<br />
• Select the appropriate setting<br />
reguarding the flap position of<br />
the envelope. Flaps folded over<br />
against the envelope.<br />
or<br />
Flaps nested and placed in the<br />
slot at the back wall.<br />
Processing<br />
Mail<br />
3. Press Start<br />
4. Begin Processing Mail<br />
• For letter mail raise Backstop.<br />
• For flats lower Backstop.<br />
Backstop<br />
Start/En Marche<br />
• Place envelopes on the feeder<br />
in small handfulls according to<br />
the sealing setting selected.<br />
Note: Do Not process sealed<br />
envelopes if the sealer is set to<br />
“Flaps are both open and closed.”<br />
This will cause the system to misfeed.
Feeder Misfeed<br />
Lift top cover<br />
Lift and hold small release levers.<br />
Press the tab on upper feed<br />
roller unit and lift up. Remove<br />
material.<br />
Transport Misfeed<br />
Lift the top cover and follow the<br />
directions on the label for removing<br />
a piece or pieces.<br />
Lift transport<br />
release lever.<br />
Remove<br />
material.<br />
Push Main<br />
lever back to<br />
operating<br />
position.<br />
Troubleshooting<br />
Low Ink<br />
Lift the top cover.<br />
Follow the instructions on<br />
the label to replace the<br />
ink cartridge.<br />
E-Z Seal Low<br />
Lift the top cover.<br />
Follow the instruction on<br />
the label under the cover<br />
for refilling the bottles.<br />
Out of Tape<br />
Lift the top cover.<br />
Follow the instruction on<br />
the label to replace the<br />
tape supply roll.
To order supplies for your mailing machine<br />
Call Toll Free PB Supply Line TM 1 800 672-6937<br />
or order online: www.pitneybowes.ca<br />
Red Fluorescent Ink Cartridge (1) Pack 767-8<br />
E-Z Seal ® Sealing Solution<br />
16 Ounce Bottle (4) Pack 601-0<br />
Gummed Postage Meter Tape (6 Rolls) 672-2<br />
Pressure Sensitive<br />
Postage Tape (3 Pack) 627-8<br />
©2006 <strong>Pitney</strong> <strong>Bowes</strong> Inc. SV60954 Rev D 03/06 All Right Reserved. Printed in U.S.A.<br />
Supplies


